
October 1, 2026
|
5 min read


Published: July 6, 2026

Blazingly fast way to build, track and deploy your models!
このガイドでは、 CrewAI エージェントをTrueFoundry上にデプロイする方法をご紹介します。TrueFoundryは、DevOpsやMLOpsの専門知識を最小限に抑えながらAIデプロイメントを簡素化するために設計されたプラットフォームです。TrueFoundryはインフラ管理、スケーリング、監視を自動化し、デプロイの複雑さに煩わされることなく、インサイトの導出に集中できるようにします。数回クリックするだけで、自然言語のリクエストをSQLクエリや動的なチャートに変換でき、データ探索をシームレスかつインテリジェントにします。手動でのクエリは不要です!
直接お試しになりたい場合は、TrueFoundryプラットフォームにアクセスし、「Live Demos」と「CrewAI-Streamlit」に移動してください。エージェントワークフローのライブデモをご覧いただけます。
このプロジェクトは、連携して動作するいくつかの主要コンポーネントで構成されています。
クエリ・エージェント
可視化エージェント:2番目のAIエージェントで、
FastAPIバックエンド:RESTful APIで、
Streamlit フロントエンド: ユーザーインターフェースで、
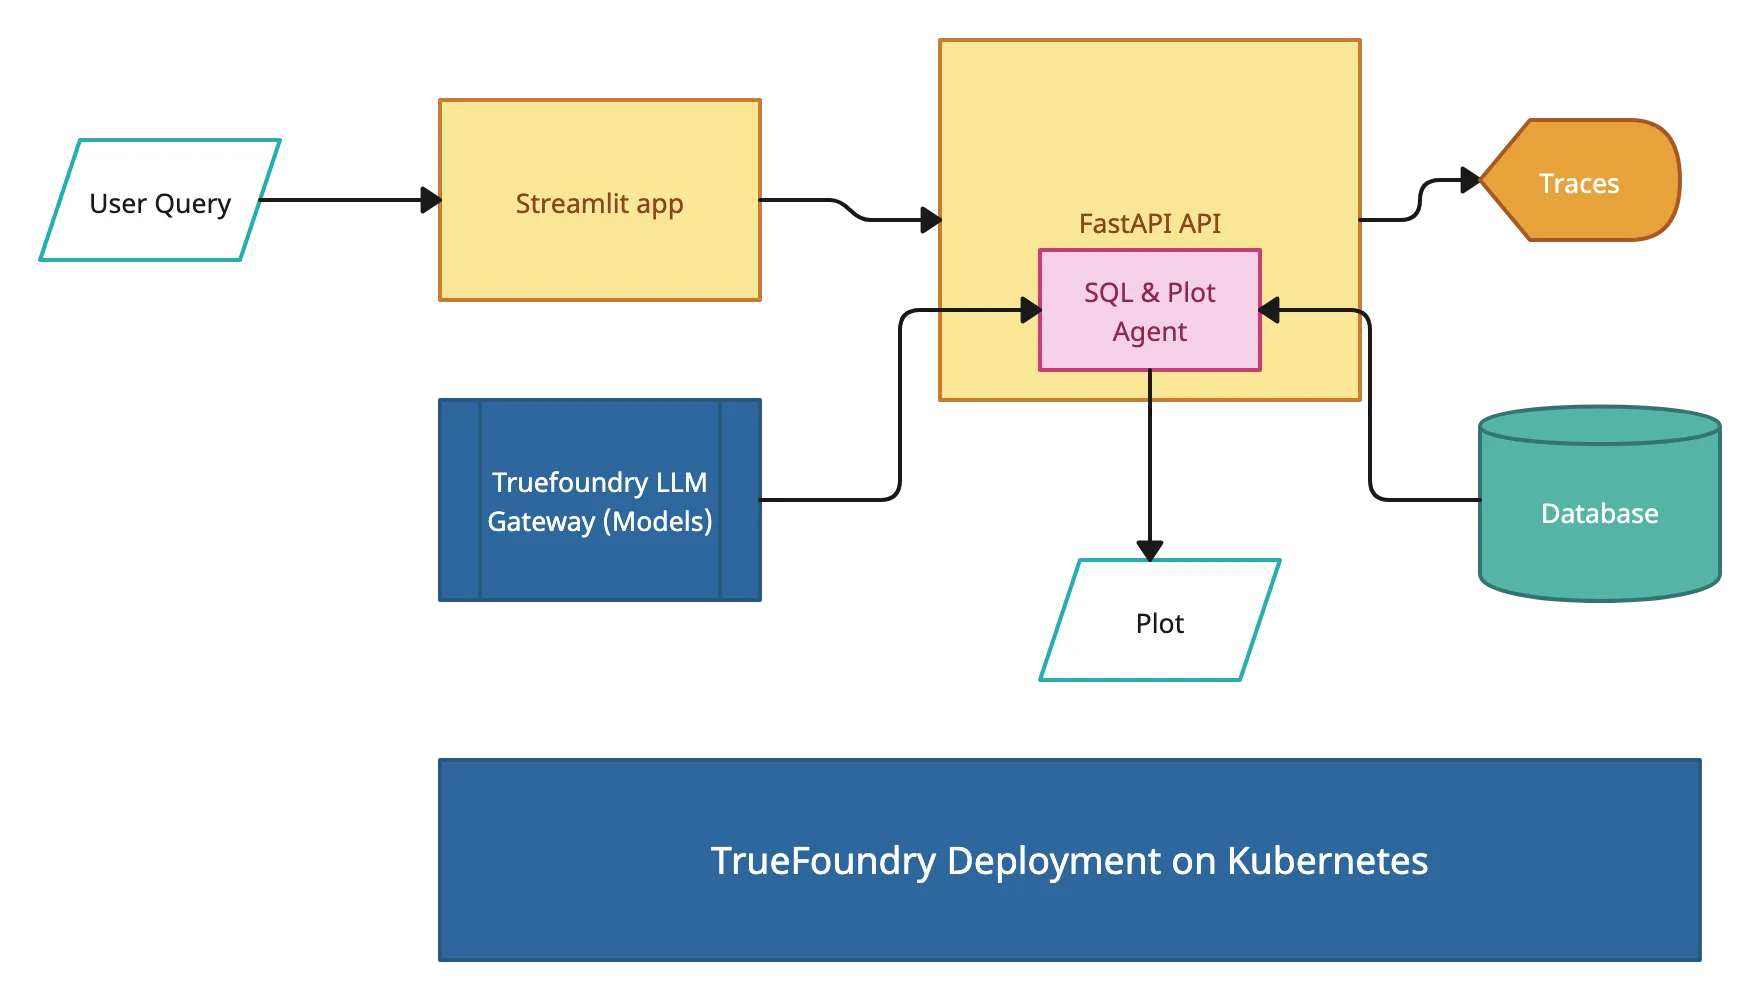
ユーザーはStreamlitを通じて自然言語クエリを送信します。
リポジトリをクローンします
まず、 TrueFoundry Getting Started Examples リポジトリに移動し、クローンします。
git clone <https://github.com/truefoundry/getting-started-examples.git>CrewAI Plot Agent ディレクトリに移動します。
cd getting-started-examples/plot_agent/crewai_plot_agent環境設定
仮想環境を作成し、アクティベートします。
python -m venv venv
source venv/bin/activate  # On Windows: venv\Scripts\activate
依存関係をインストールします。
pip install uv
uv pip install -r requirements.txt
環境変数の設定
「 .env 」ファイルを作成します。
# Truefoundry LLMGateway Configuration if using Truefoundry LLM Gateway for calling models
LLM_GATEWAY_BASE_URL=your_llm_gateway_base_url_here
LLM_GATEWAY_API_KEY=your_llm_gateway_api_key_here

# OPENAI API Configuration if not using Truefoundry LLM Gateway
OPENAI_API_KEY=<your_openai_api_key_here>
CLICKHOUSE_HOST=your_clickhouse_host
CLICKHOUSE_PORT=443
CLICKHOUSE_USER=your_user
CLICKHOUSE_PASSWORD=your_password
CLICKHOUSE_DATABASE=default
CREWAI_VERBOSE=true
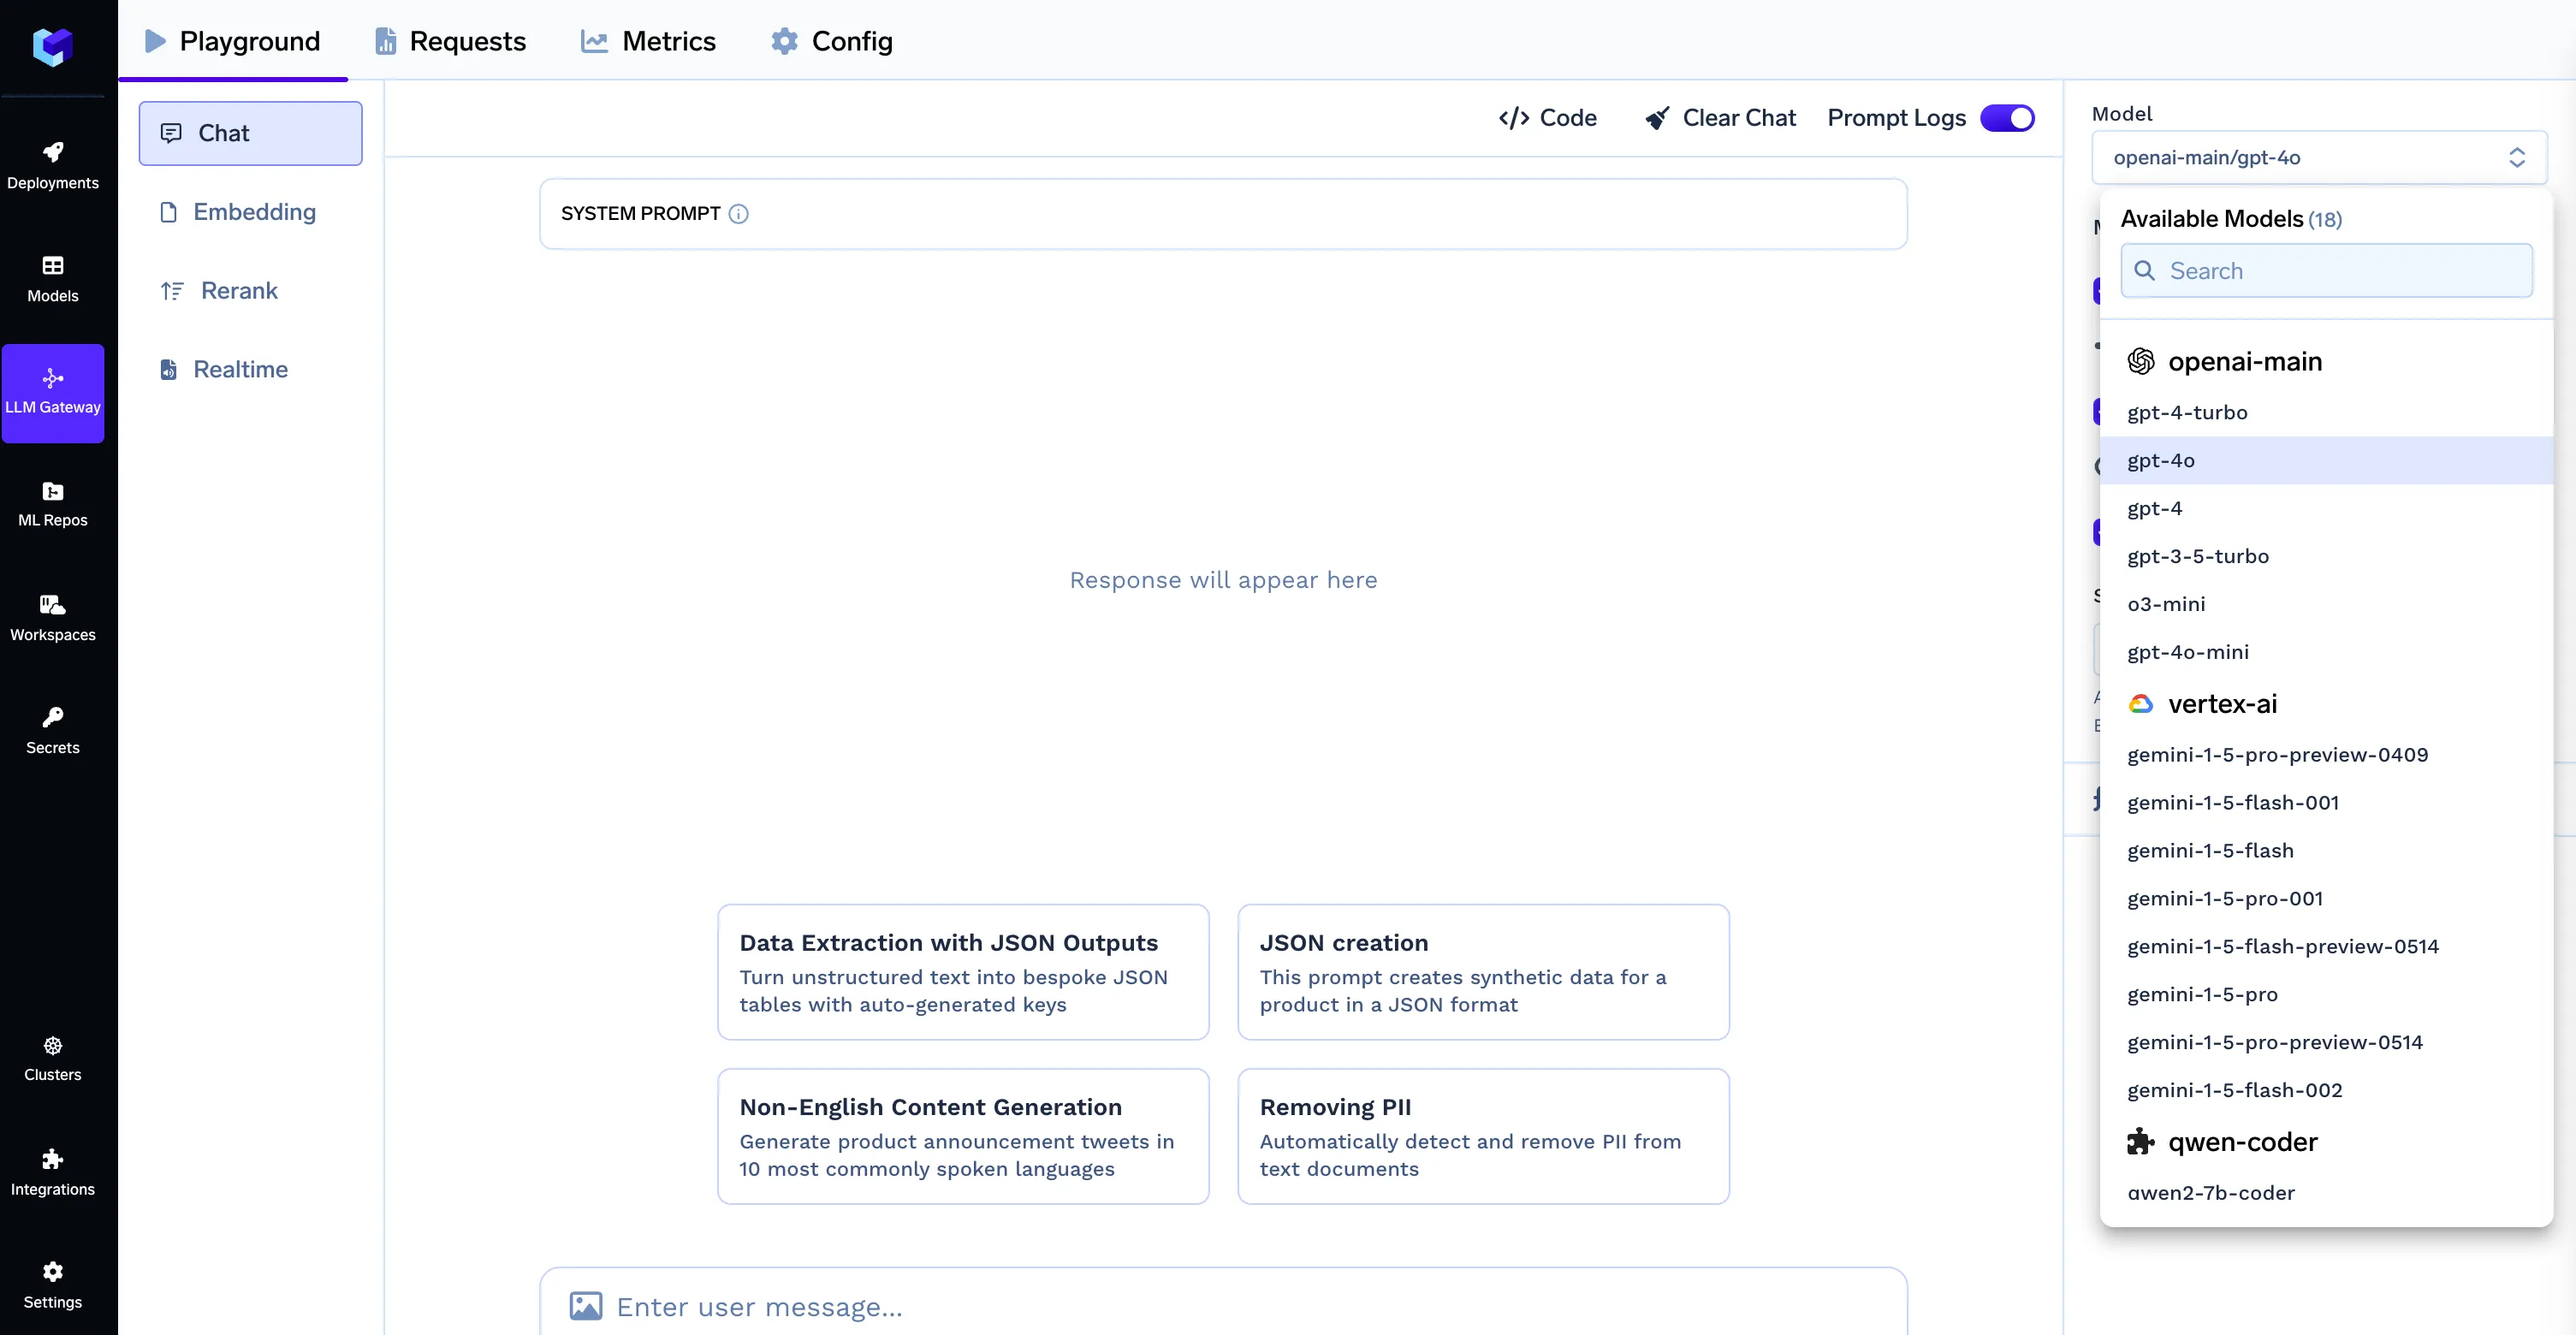
注: TrueFoundry LLM Gatewayを使用する場合、モデルIDの形式は provider-name/model-name (例: openai-main/gpt-4o) となります。お使いの .env ファイルに、環境設定セクションに示されているように正しいLLM Gatewayの認証情報が含まれていることを確認してください。
ClickHouseの認証情報を取得するには、 clickhouseにサインインしてサービスを作成します。サービスをクリックすると、左サイドバーの中央に接続ボタンが表示され、それをクリックすると以下に示すように認証情報が表示されます。ファイルをアップロードしてデータベースを作成するか、事前に定義されたものを使用できます。

@CrewBase
class CrewaiPlotAgent():
	"""CrewaiPlotAgent crew"""

	# Learn more about YAML configuration files here:
	# Agents: https://docs.crewai.com/concepts/agents#yaml-configuration-recommended
	# Tasks: https://docs.crewai.com/concepts/tasks#yaml-configuration-recommended
	agents_config = 'config/agents.yaml'
	tasks_config = 'config/tasks.yaml'

	# def process_output(self, output):
	# 	# Modify output after the crew finishes
	# 	output.raw += "\nProcessed after kickoff."
	# 	print("Output", output ,"sdfsdfsdfsd")
	# 	return output

	# If you would like to add tools to your agents, you can learn more about it here:
	# https://docs.crewai.com/concepts/agents#agent-tools
	@agent
	def sql_writer(self) -> Agent:
		return Agent(
			config=self.agents_config['sql_writer'],
			verbose=True,
			tools=[ClickHouseTool()]
		)

	@agent
	def plot_writer(self) -> Agent:
		return Agent(
			config=self.agents_config['plot_writer'],
			verbose=True,
			tools=[PlotTools()],
			pydantic_output=PlotResult,
		)

	# To learn more about structured task outputs,
	# task dependencies, and task callbacks, check out the documentation:
	# https://docs.crewai.com/concepts/tasks#overview-of-a-task
	@task
	def sql_task(self) -> Task:
		return Task(
			config=self.tasks_config['sql_task'],
		)

	@task
	def plot_task(self) -> Task:
		return Task(
			config=self.tasks_config['plot_task'],
			# callback=self.process_output,
			allow_code_execution=True,
			output_pydantic=PlotResult,
			# output_file='plot.png'
		)

	@crew
	def crew(self) -> Crew:
		"""Creates the CrewaiPlotAgent crew"""
		# To learn how to add knowledge sources to your crew, check out the documentation:
		# https://docs.crewai.com/concepts/knowledge#what-is-knowledge

		return Crew(
			agents=self.agents, # Automatically created by the @agent decorator
			tasks=self.tasks, # Automatically created by the @task decorator
			process=Process.sequential,
			verbose=True,
			# output_pydantic=True,
			# process=Process.hierarchical, # In case you wanna use that instead https://docs.crewai.com/how-to/Hierarchical/
		)
デコレータの@Crewbase、@agent、@taskなどは、TrueFoundryでのトレースを有効にするためのもので、詳細については後述します。
CrewAIワークフローを起動
crewai run
FastAPIバックエンドを起動:
python api.pyStreamlit UIを起動(新しいターミナル):
streamlit run app.py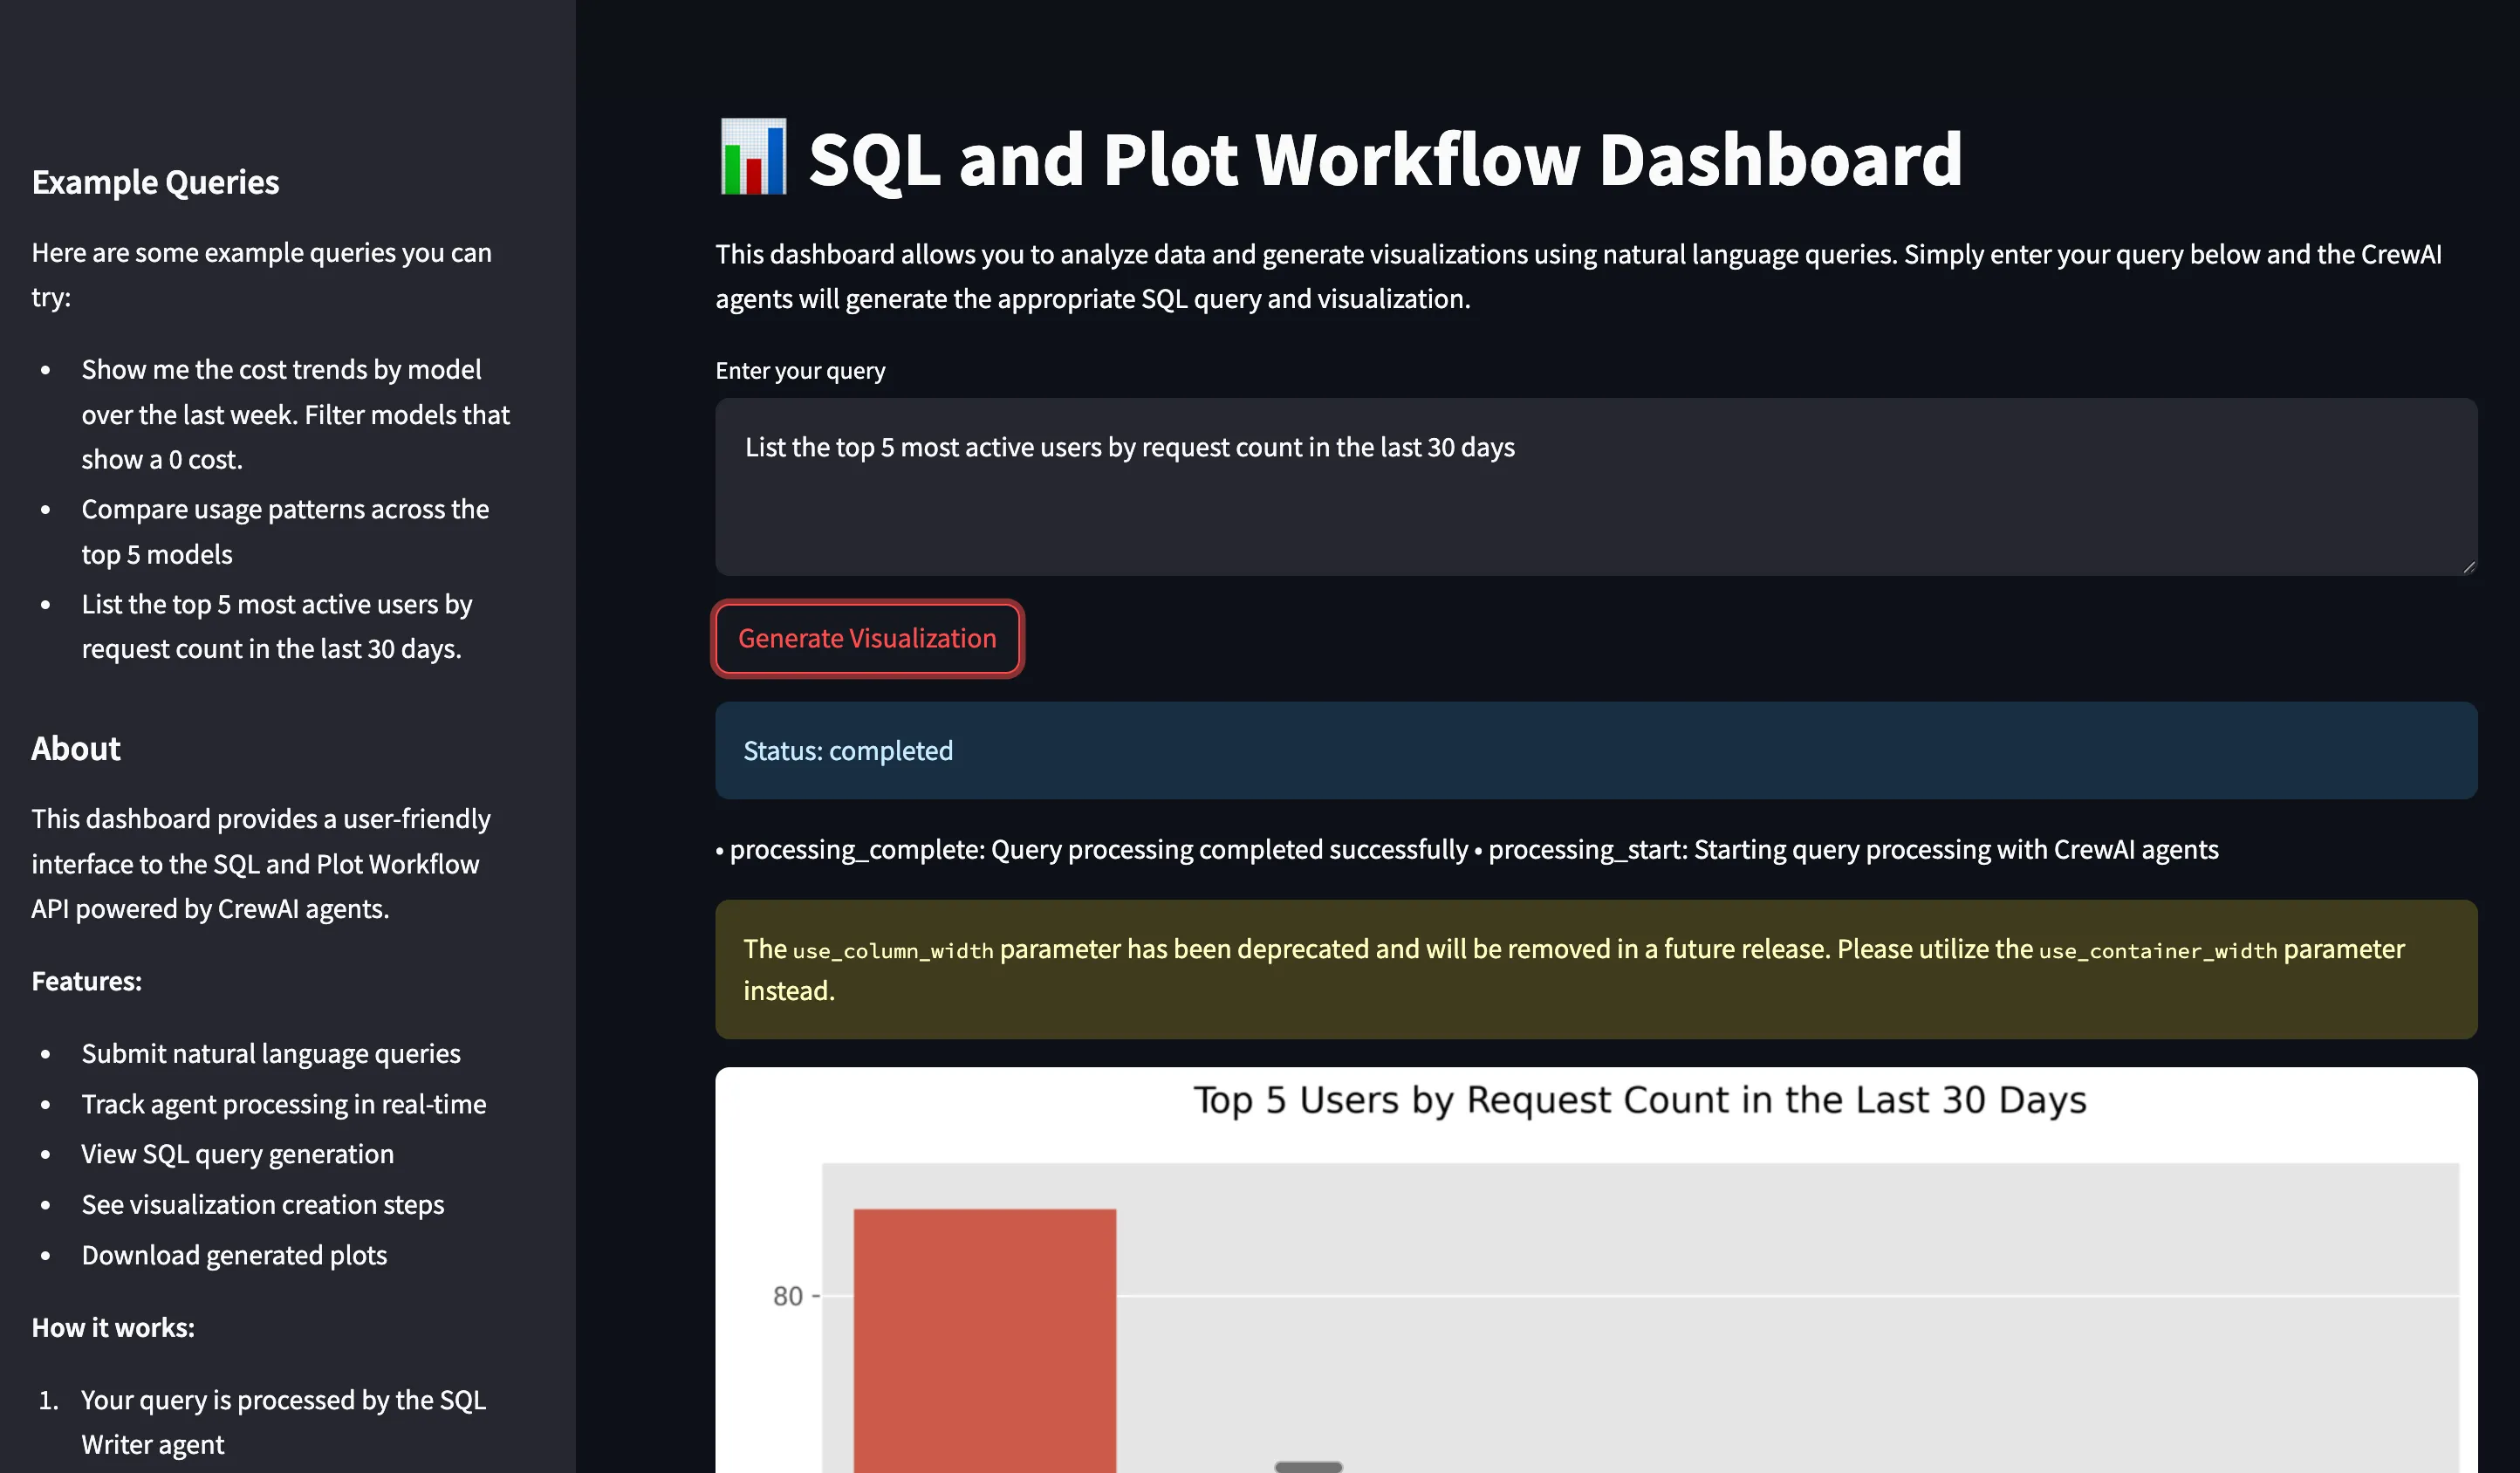
前提条件
TrueFoundry CLIのインストール:
pip install -U "truefoundry"TrueFoundryへのログイン:
tfy login --host "<https://app.truefoundry.com>"
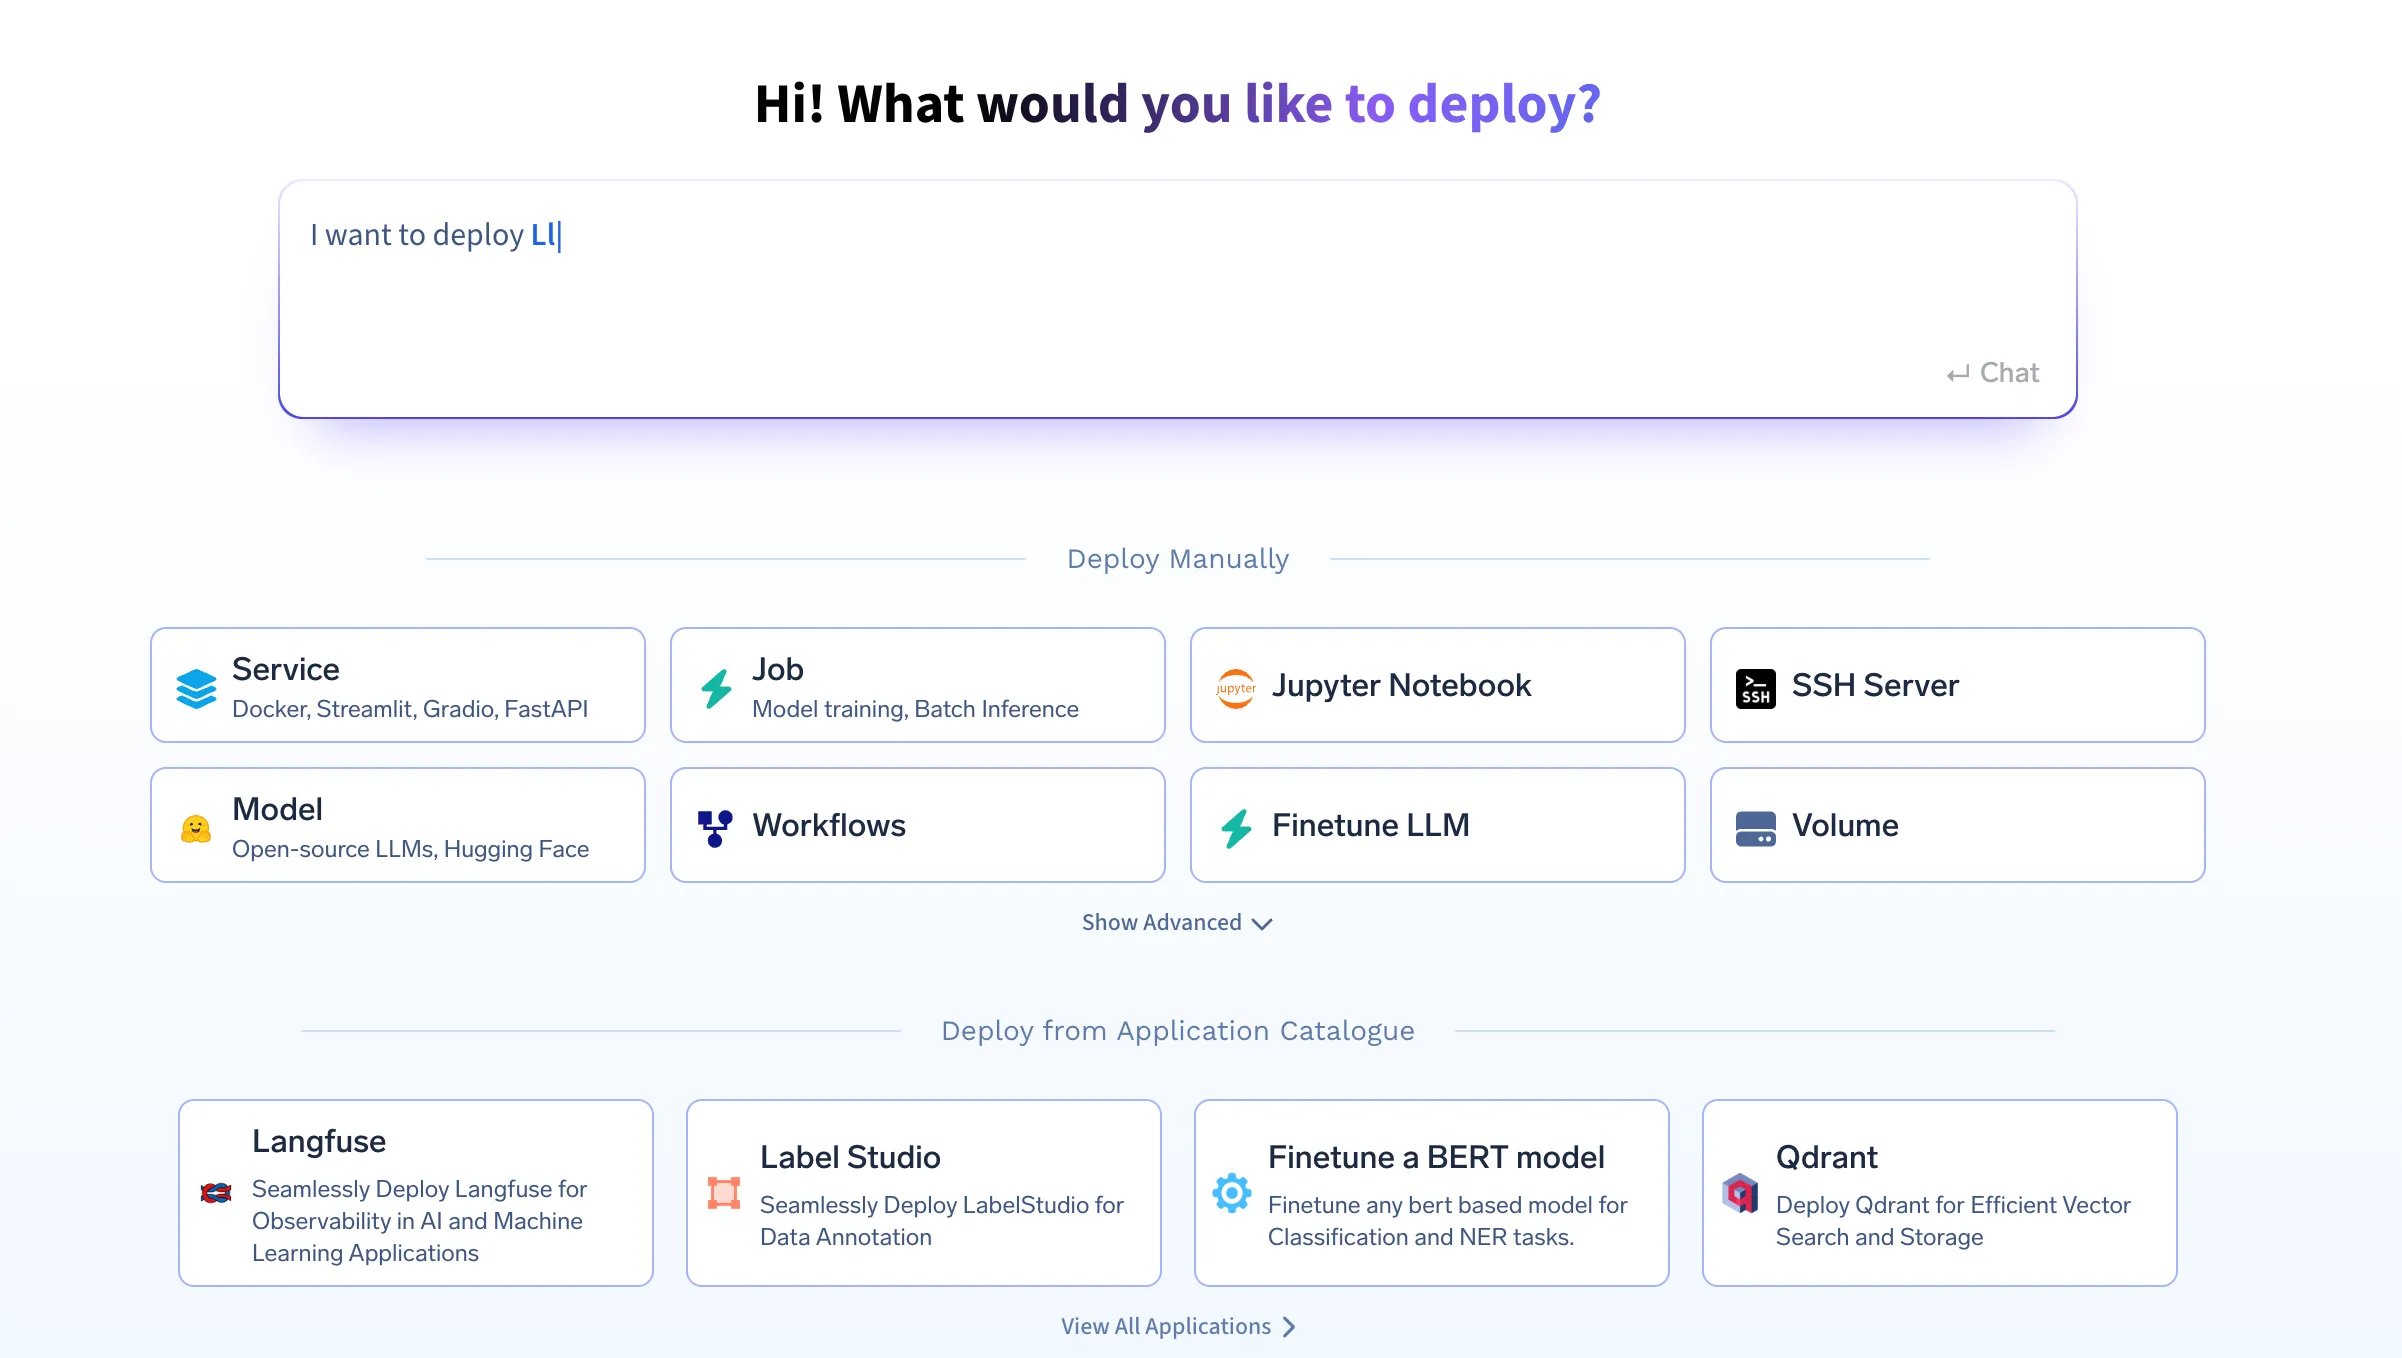
deploy.py を使用して、 env セクションを編集します:env={
"OPENAI_API_KEY": "your_openai_api_key",
"CLICKHOUSE_HOST": "your_clickhouse_host",
"CLICKHOUSE_PORT": "443",
"CLICKHOUSE_USER": "your_user",
"CLICKHOUSE_PASSWORD": "your_password",
"CLICKHOUSE_DATABASE": "default",
"CREWAI_VERBOSE": "true"
},プレースホルダーをご自身の認証情報と環境設定に置き換えてください。
テストクエリを送信:
curl -X POST \
  -H "Content-Type: application/json" \
  -d '{"query": "Show me the cost trends by model over the last week"}' \
  <https://crewai-plot-agent-demo-8000.aws.demo.truefoundry.cloud/query>
応答成功例:
{
  "job_id": "1234-abcd-5678-efgh"
}
APIエンドポイント
curl -X POST <http://localhost:8000/query> -H "Content-Type: application/json" -d '{"query": "Your query here."}'curl -X GET <http://localhost:8000/status/{job_id}>curl -X GET <http://localhost:8000/plot/{job_id}> > plot.pngフロントエンドとCORS
FastAPIでCORSを設定:
from fastapi.middleware.cors import CORSMiddleware

app.add_middleware(
    CORSMiddleware,
    allow_origins=["*"],
    allow_credentials=True,
    allow_methods=["*"],
    allow_headers=["*"],
)
Streamlitで環境変数を定義:
import os

FASTAPI_ENDPOINT = os.getenv("FASTAPI_ENDPOINT", "<http://localhost:8000>")
デプロイ後の注意事項
.env ファイルをFastAPIエンドポイントで更新する。TrueFoundryを通じてデプロイメントを監視および管理するには:
/health)、APIドキュメント(/docs)、およびメトリクスを /metrics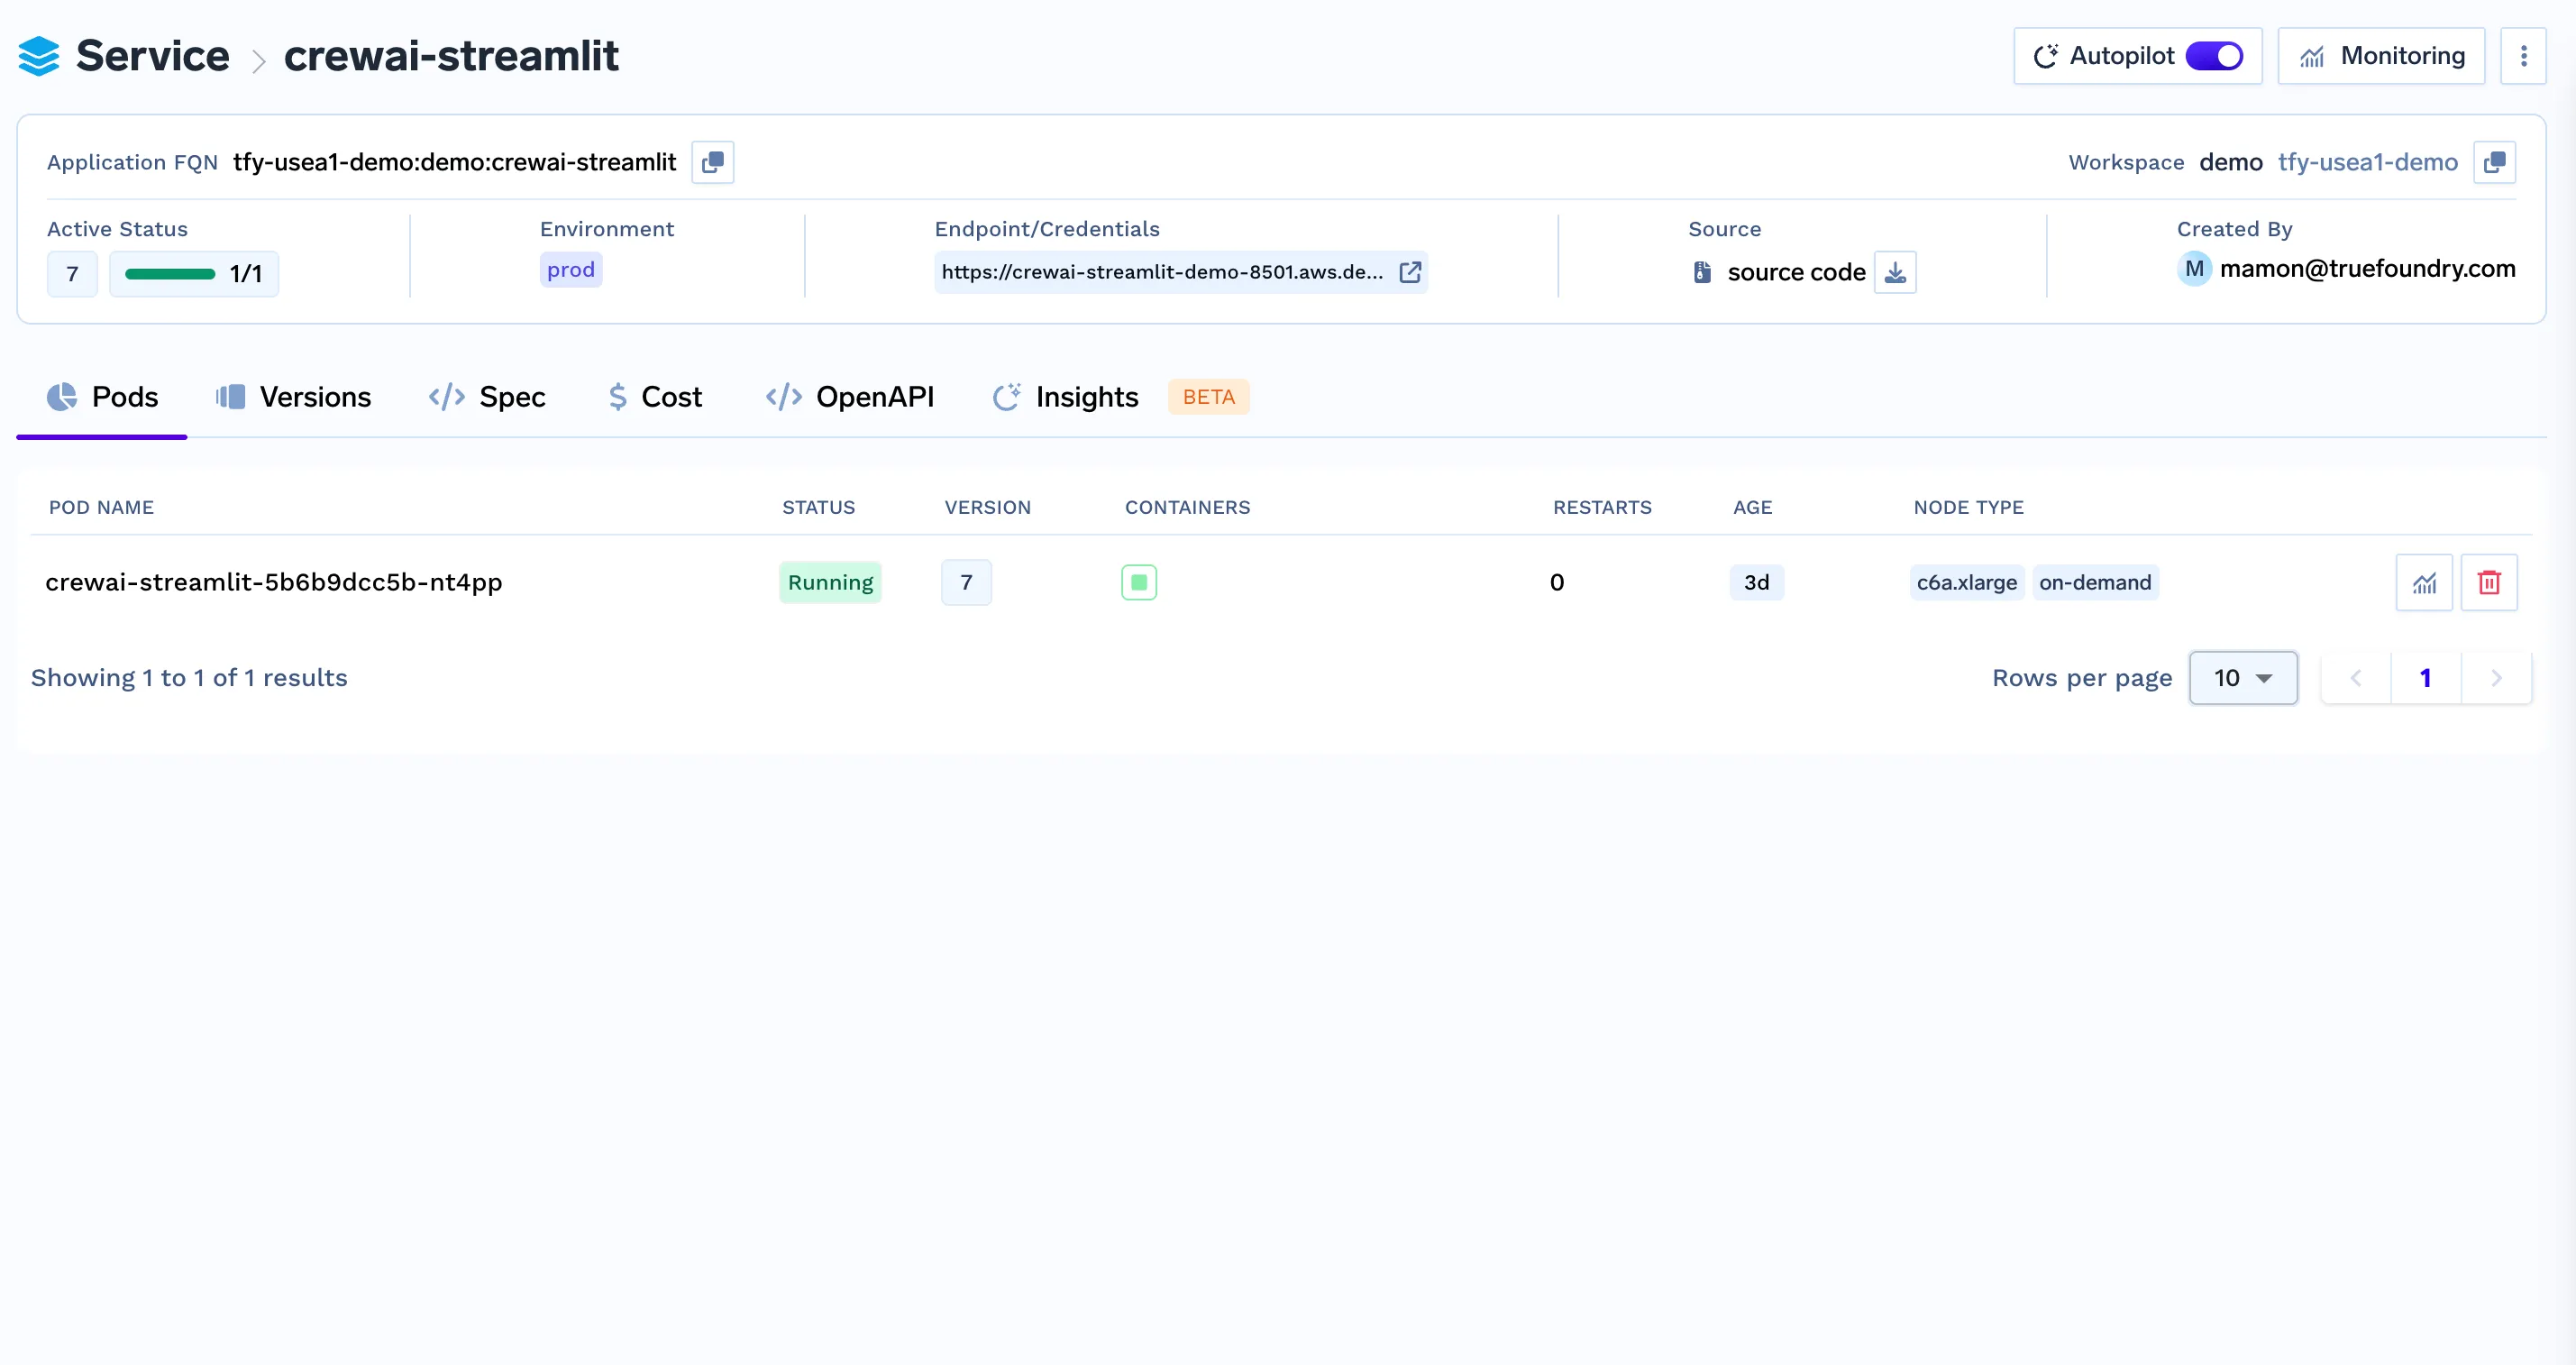
トレース機能を使用すると、エージェントが実行された際に内部で何が起こっているかを把握できます。Truefoundryのトレース機能を利用し、わずかなコードを追加するだけで、エージェント実行時のパス、ツール呼び出し、使用されたコンテキスト、かかったレイテンシーを理解できるようになります。
以下をインストールする必要があります
pip install traceloop-sdkそして、トレースを有効にするために必要な環境変数を追加します
"TRACELOOP_BASE_URL": "<your_host_name>/api/otel" # "https://internal.devtest.truefoundry.tech/api/otel"
"TRACELOOP_HEADERS"="Authorization=Bearer%20<your_tfy_api_key>"
エージェントを定義しているコードベースに、トレースを有効にするための以下の行を追加するだけです
from traceloop.sdk import Traceloop
from traceloop.sdk.decorators import workflow, agent, task
Traceloop.init(app_name="crew-ai")
次に、以下のようにエージェントとワークフローにデコレーターを追加します
@agent(name="sql_and_plot_workflow")
@workflow(name="plotting workflow")
@task(name="execute sql query")
これらの手順で、CrewAIエージェントワークフローがTrueFoundryに正常にデプロイされました!
TrueFoundry AI Gateway delivers ~3–4 ms latency, handles 350+ RPS on 1 vCPU, scales horizontally with ease, and is production-ready, while LiteLLM suffers from high latency, struggles beyond moderate RPS, lacks built-in scaling, and is best for light or prototype workloads.

.png)

.png)
.png)
.png)
.png)
.png)
.png)
.png)
.png)
.png)
.png)