Assume there is a team A assigned to develop RAG application for use-case-1, then there is team B that is developing RAG application for use-case-2, and then there is team C, that is just planning out for their upcoming RAG application use case. Have you wished that building RAG pipelines across multiple teams should have been easy? Each team need not start from scratch but a modular way where each team can use the same base functionality and effectively develop their own apps on top of it without any interference?
Worry not!! This is why we created Cognita. While RAG is undeniably impressive, the process of creating a functional application with it can be daunting. There's a significant amount to grasp regarding implementation and development practices, ranging from selecting the appropriate AI models for the specific use case to organizing data effectively to obtain the desired insights. While tools like LangChain and LlamaIndex exist to simplify the prototype design process, there has yet to be an accessible, ready-to-use open-source RAG template that incorporates best practices and offers modular support, allowing anyone to quickly and easily utilize it.
Advantages of Cognita:
A central reusable repository of parsers, loaders, embedders and retrievers.
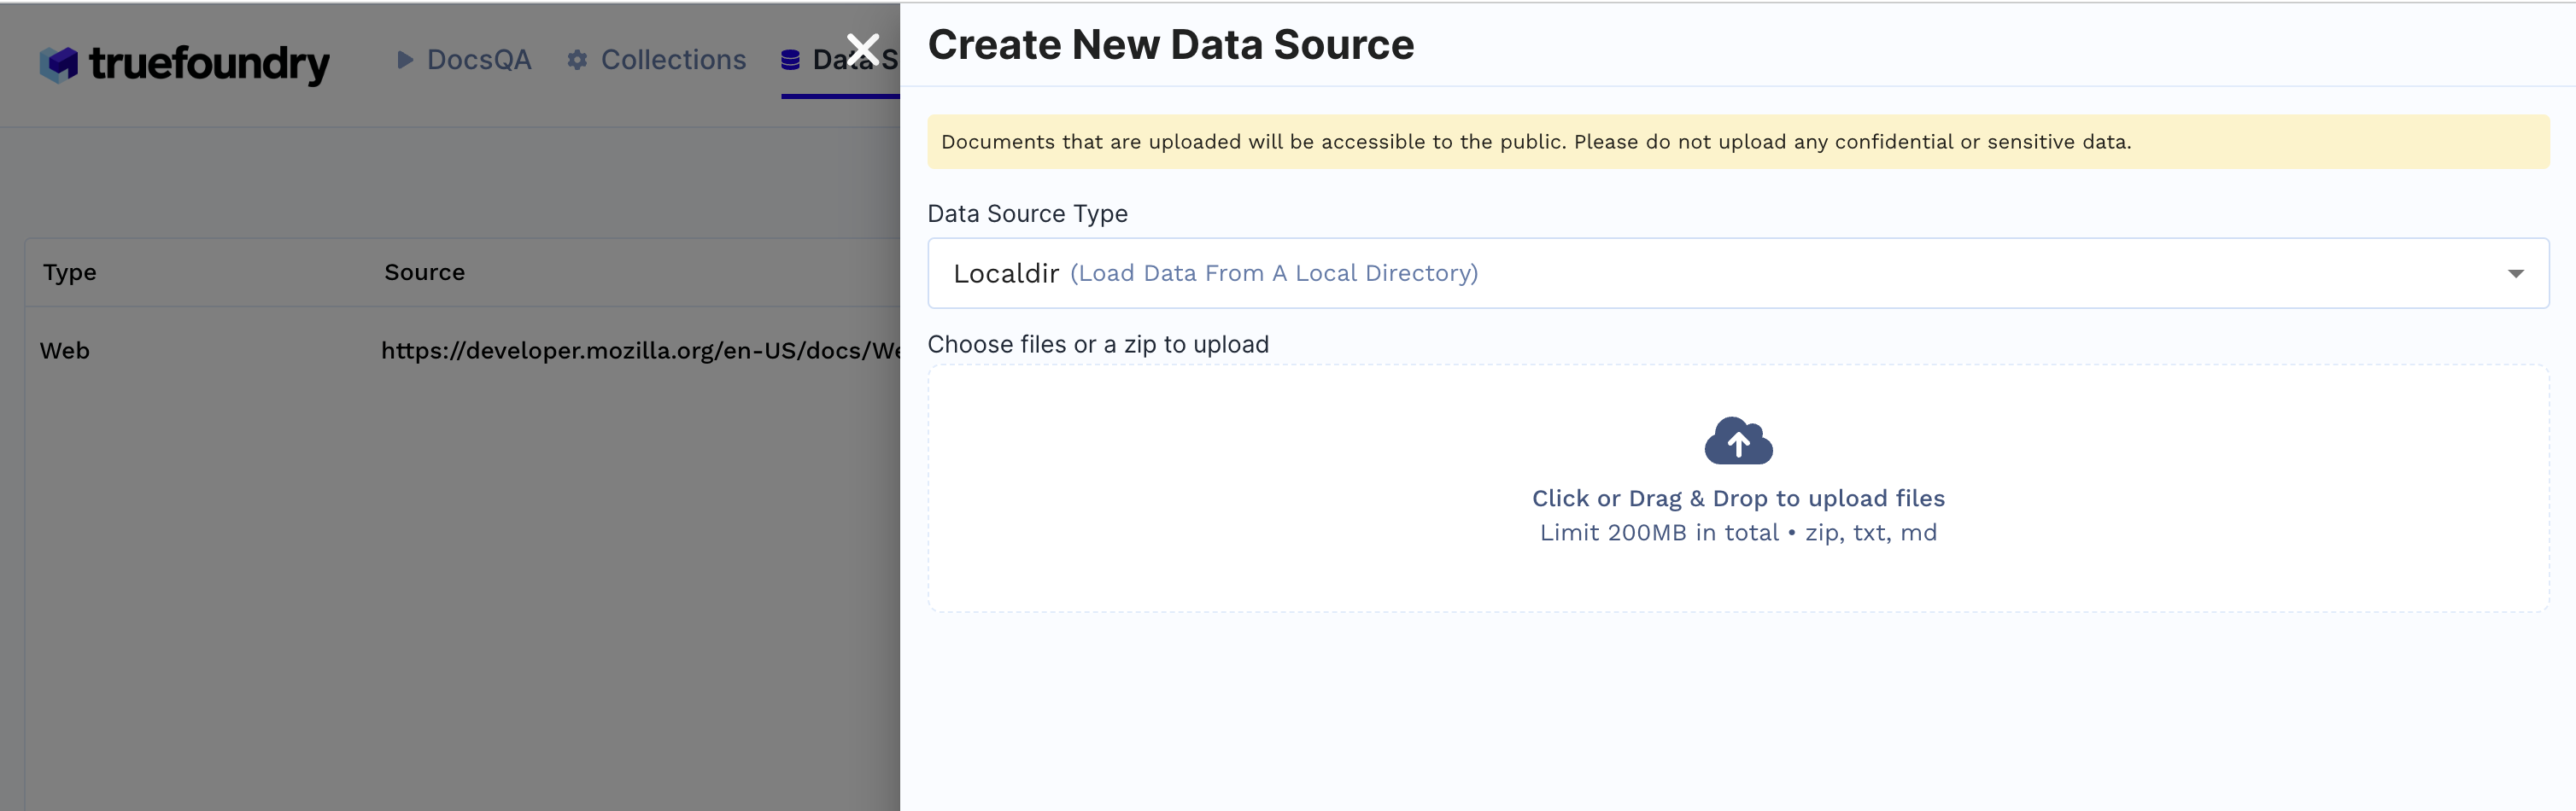
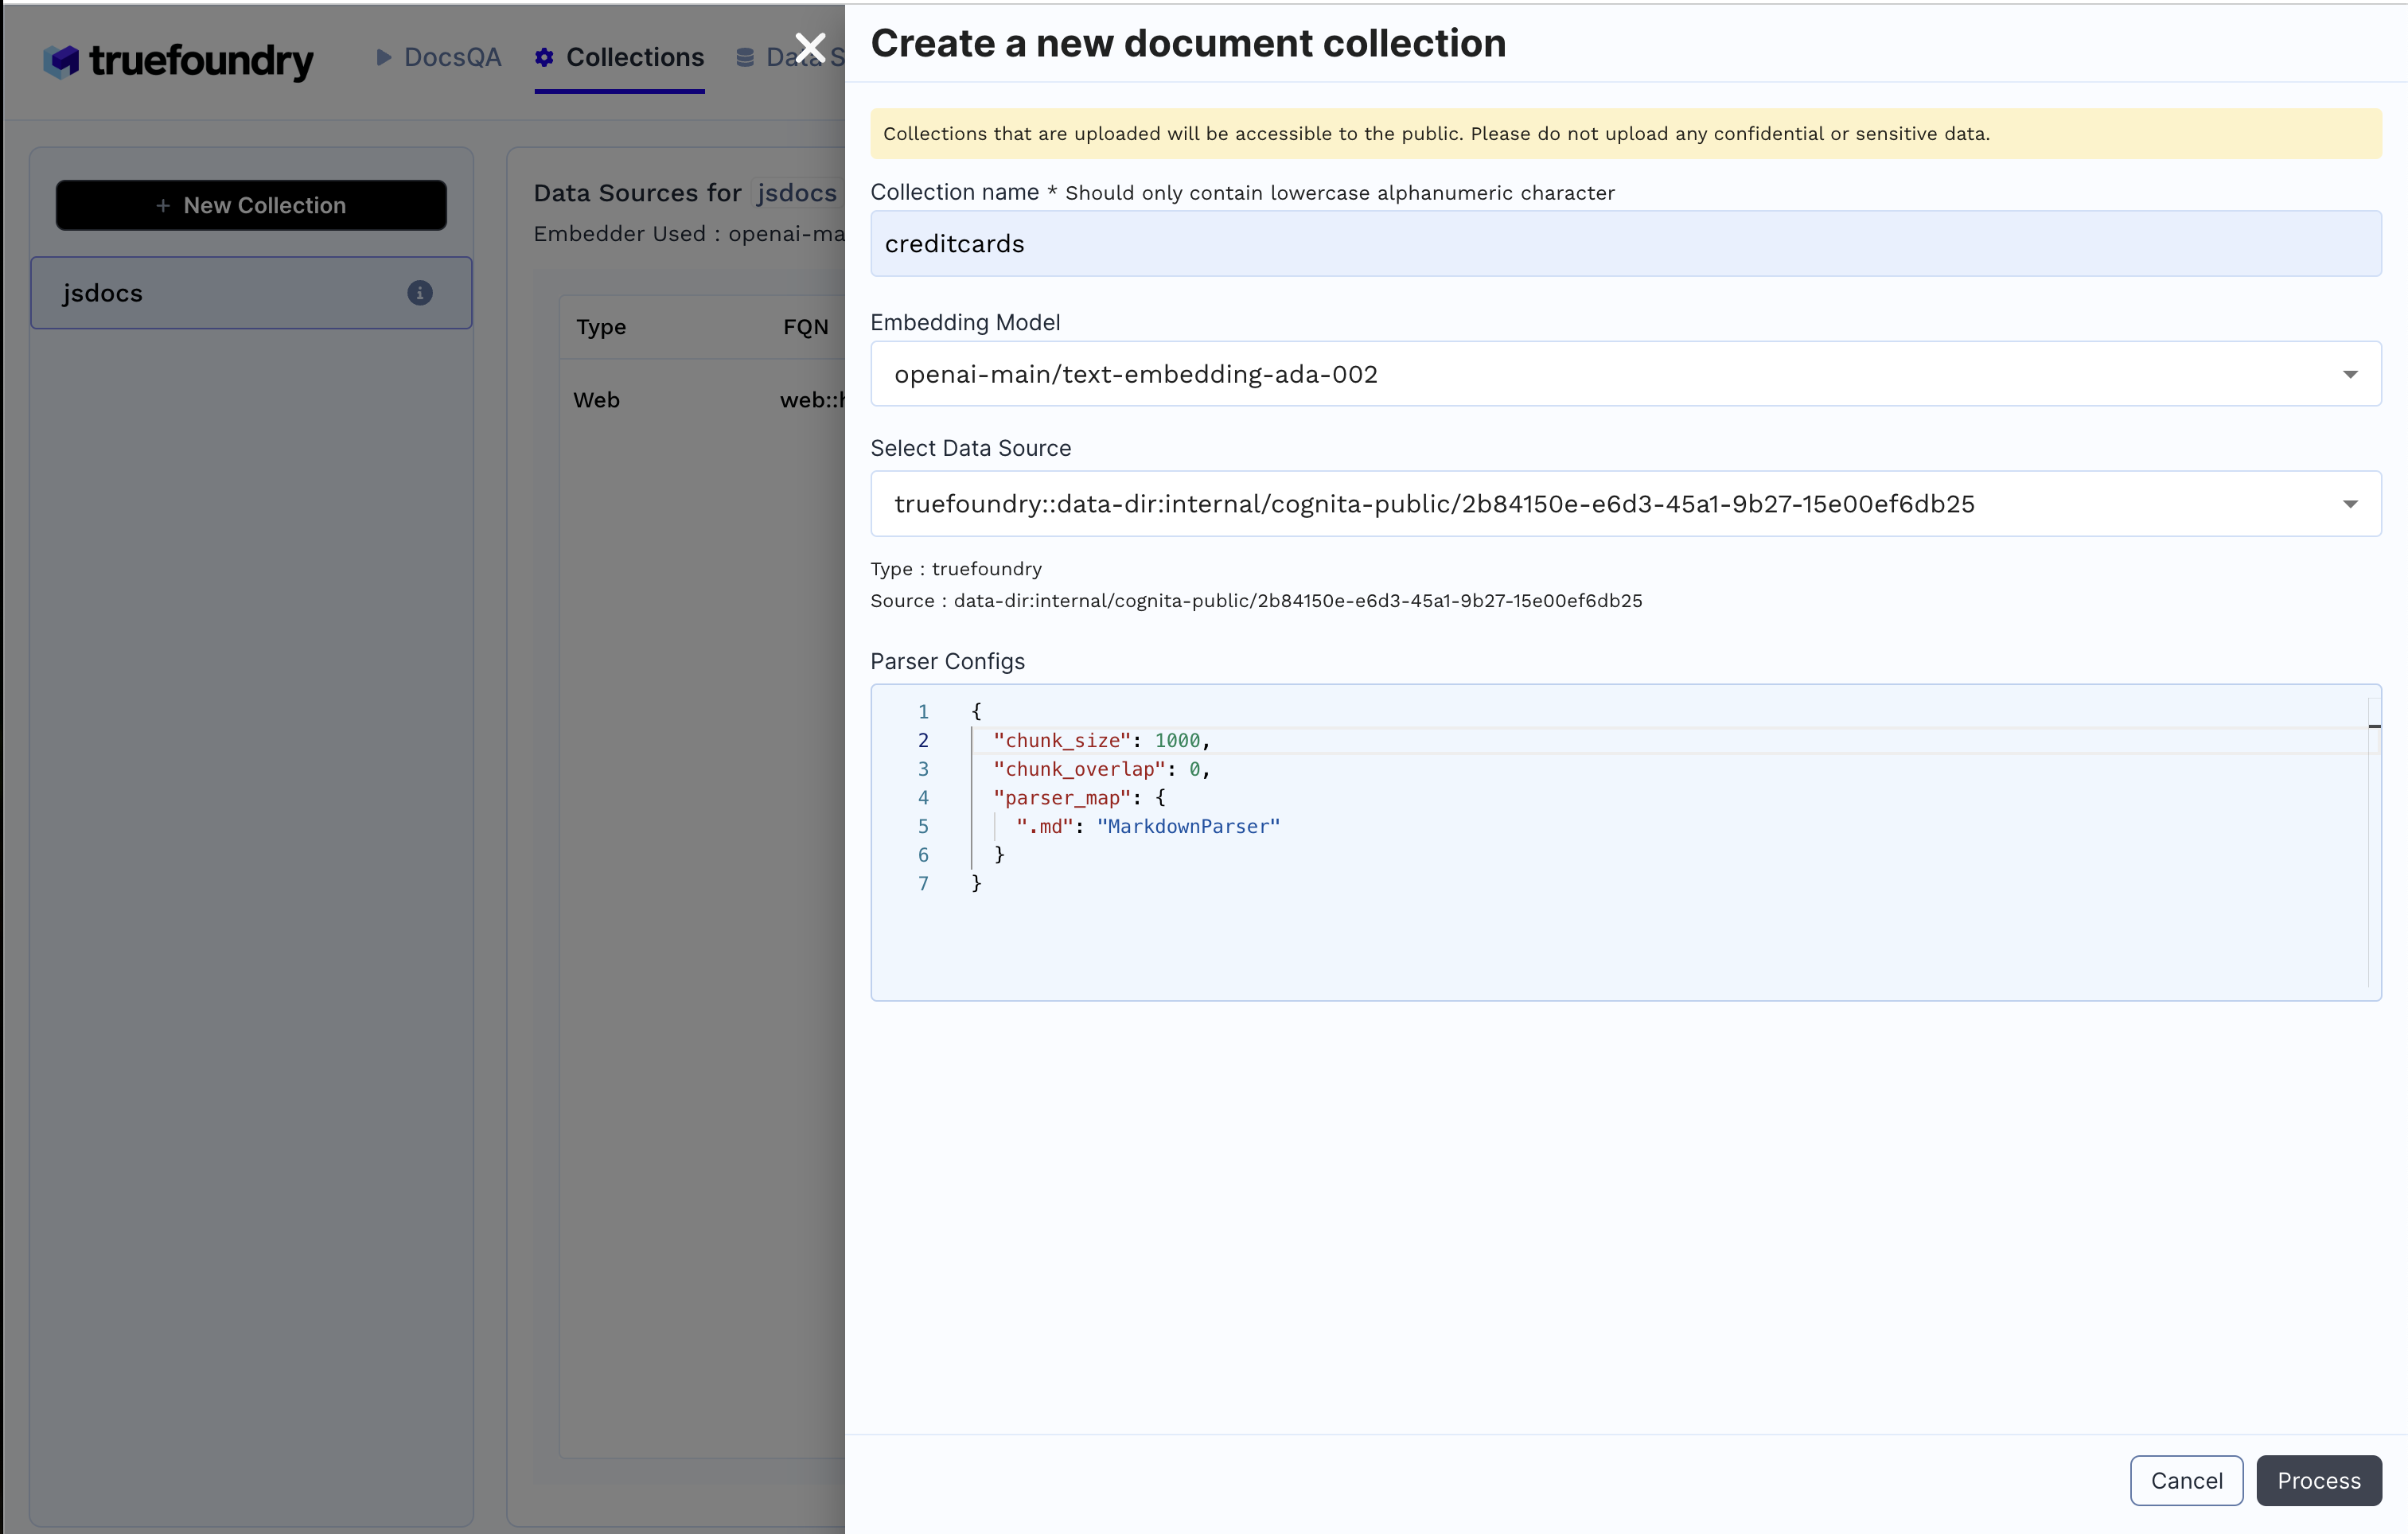
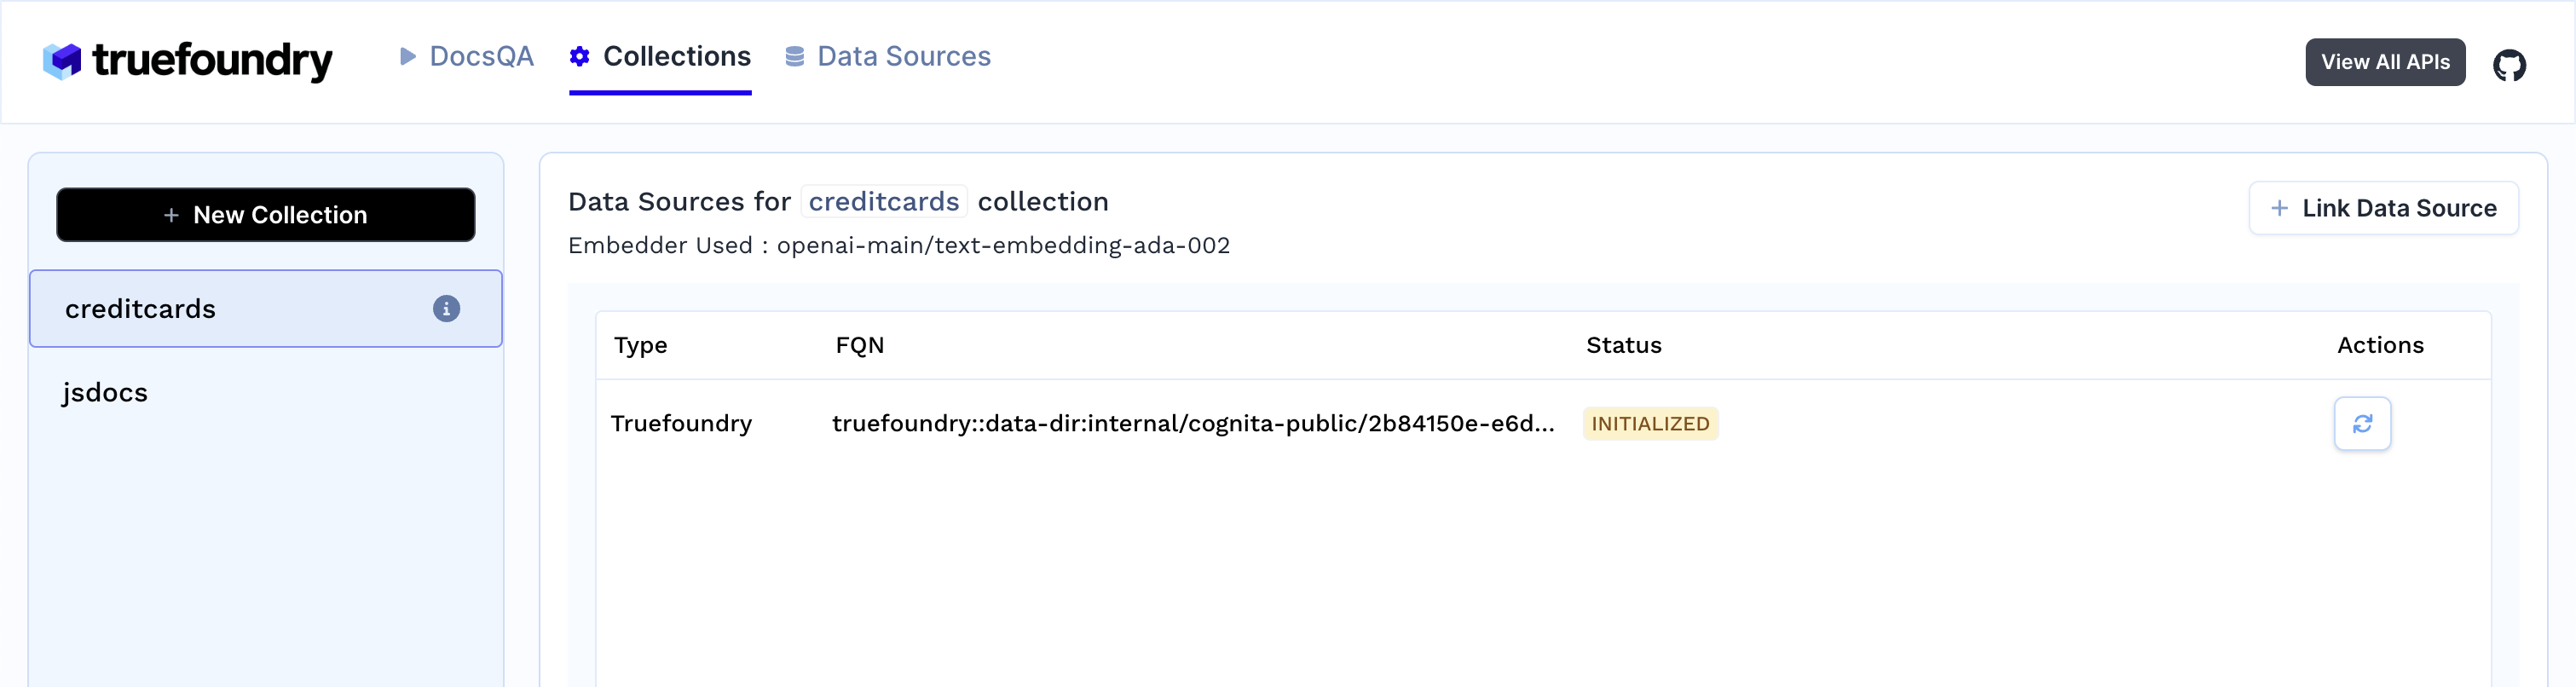
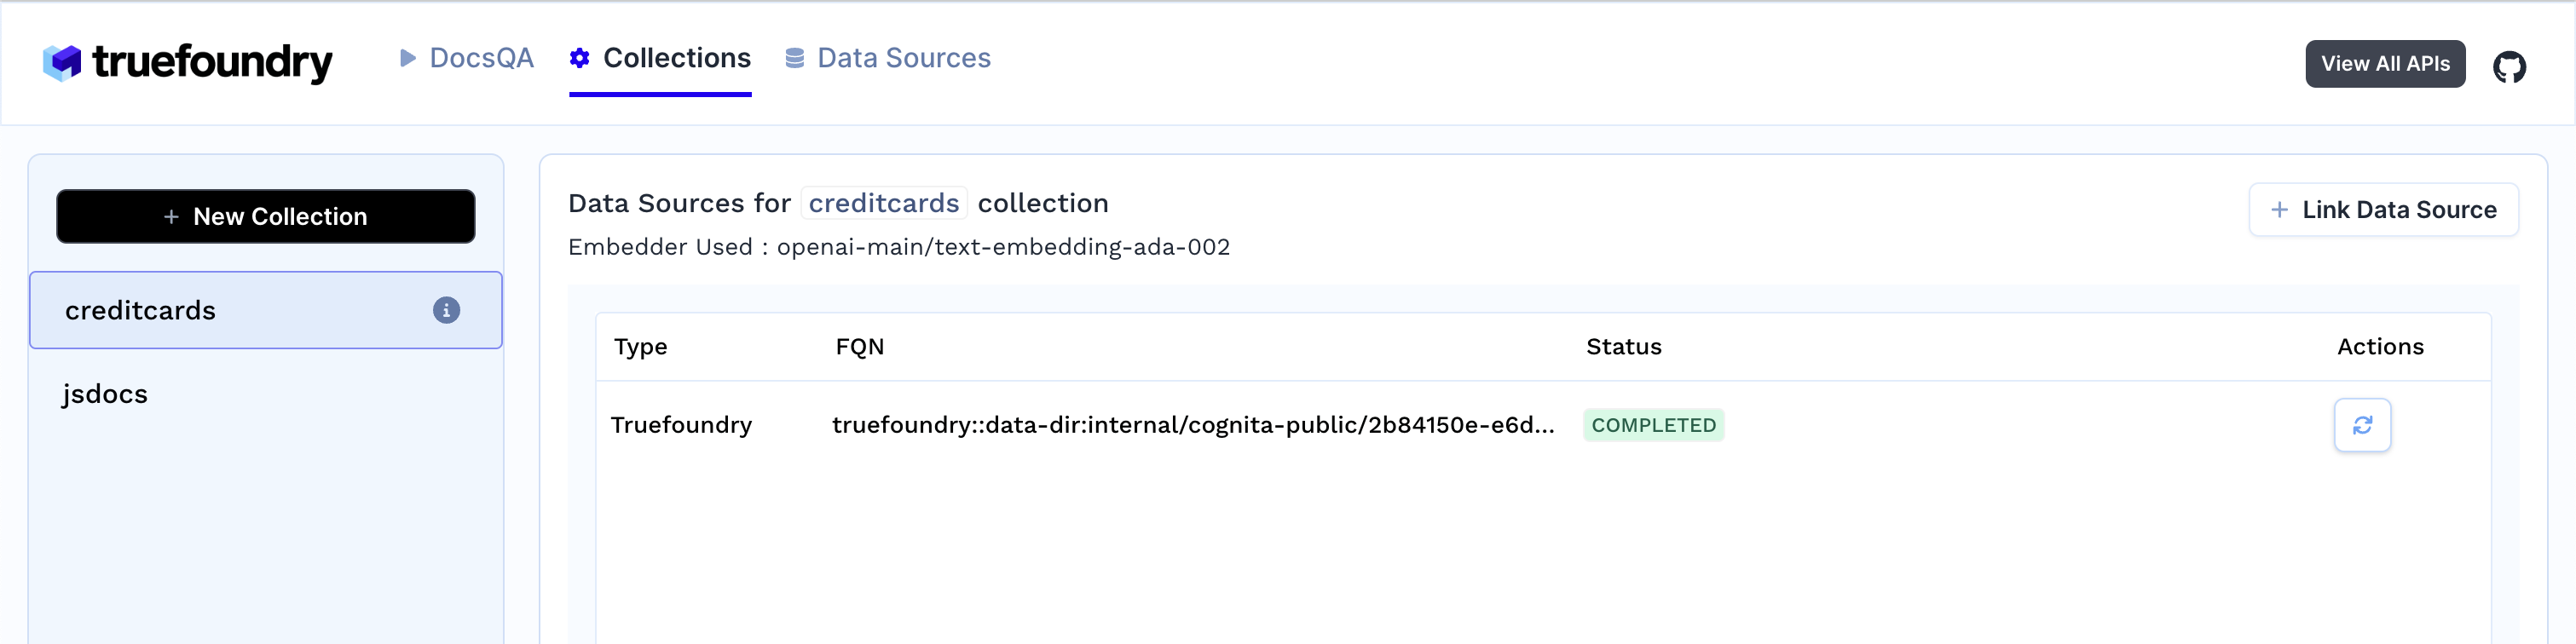
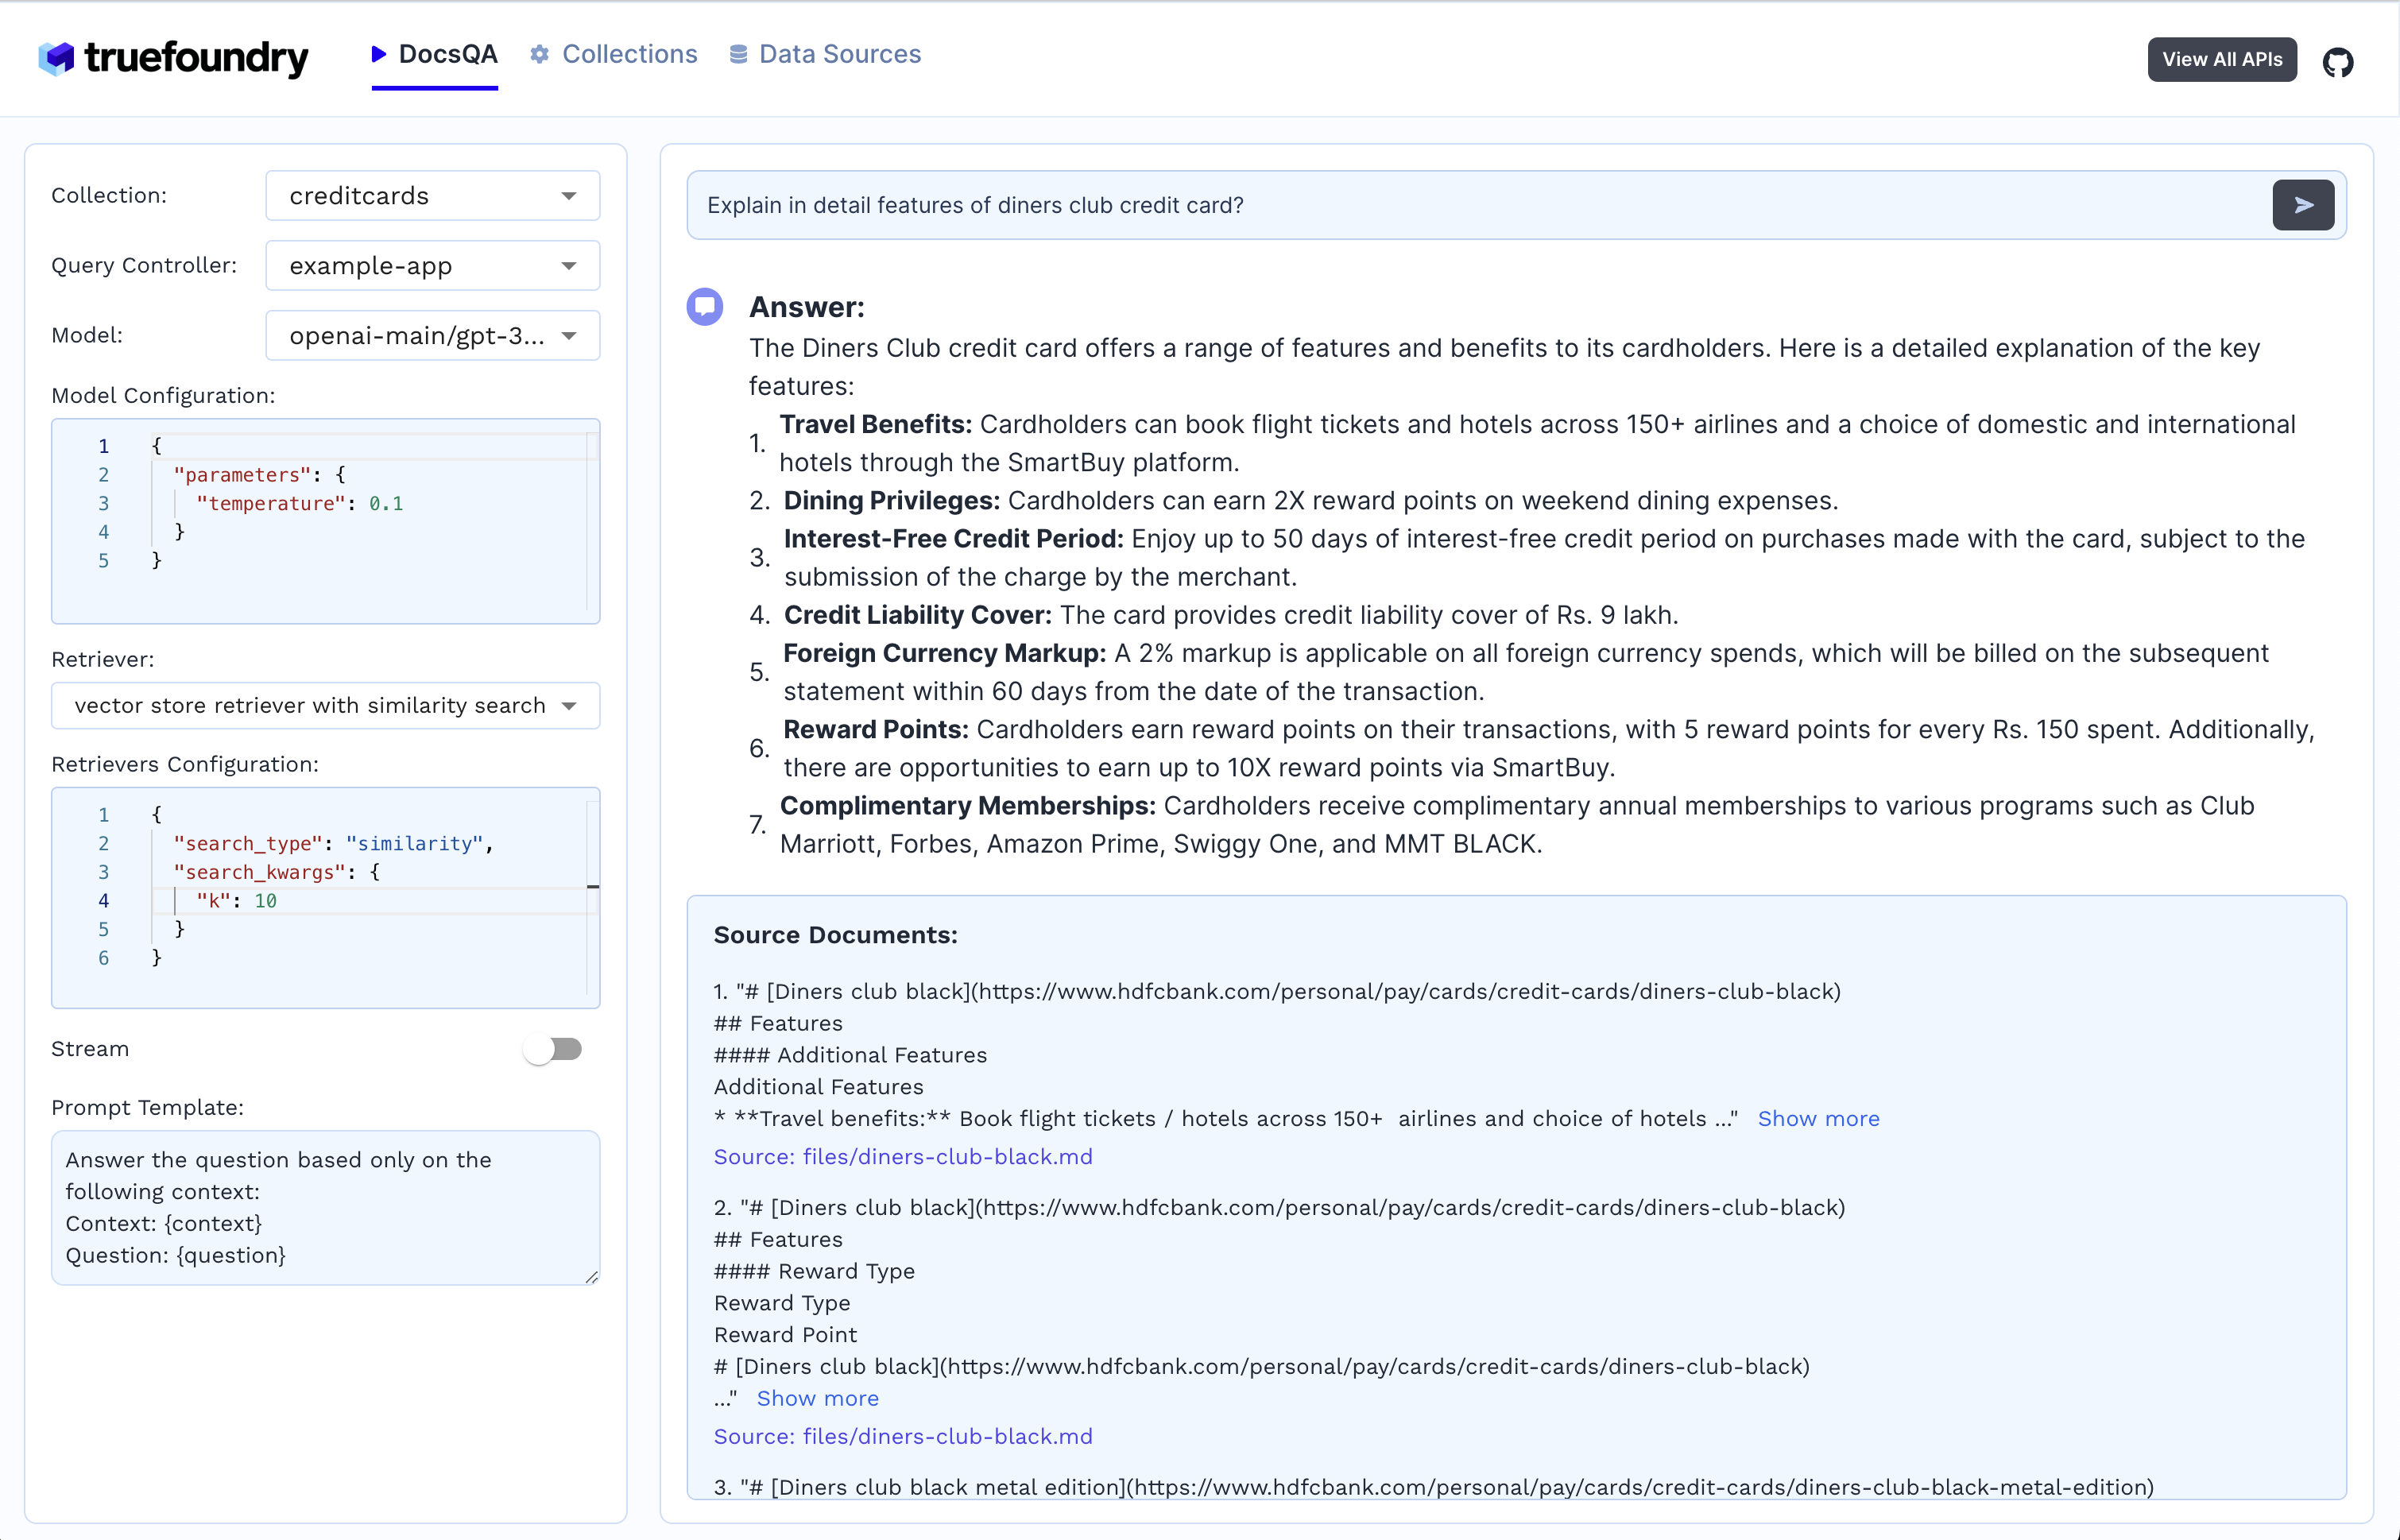
Ability for non-technical users to play with UI - Upload documents and perform QnA using modules built by the development team.
Fully API driven - which allows integration with other systems.
Overview
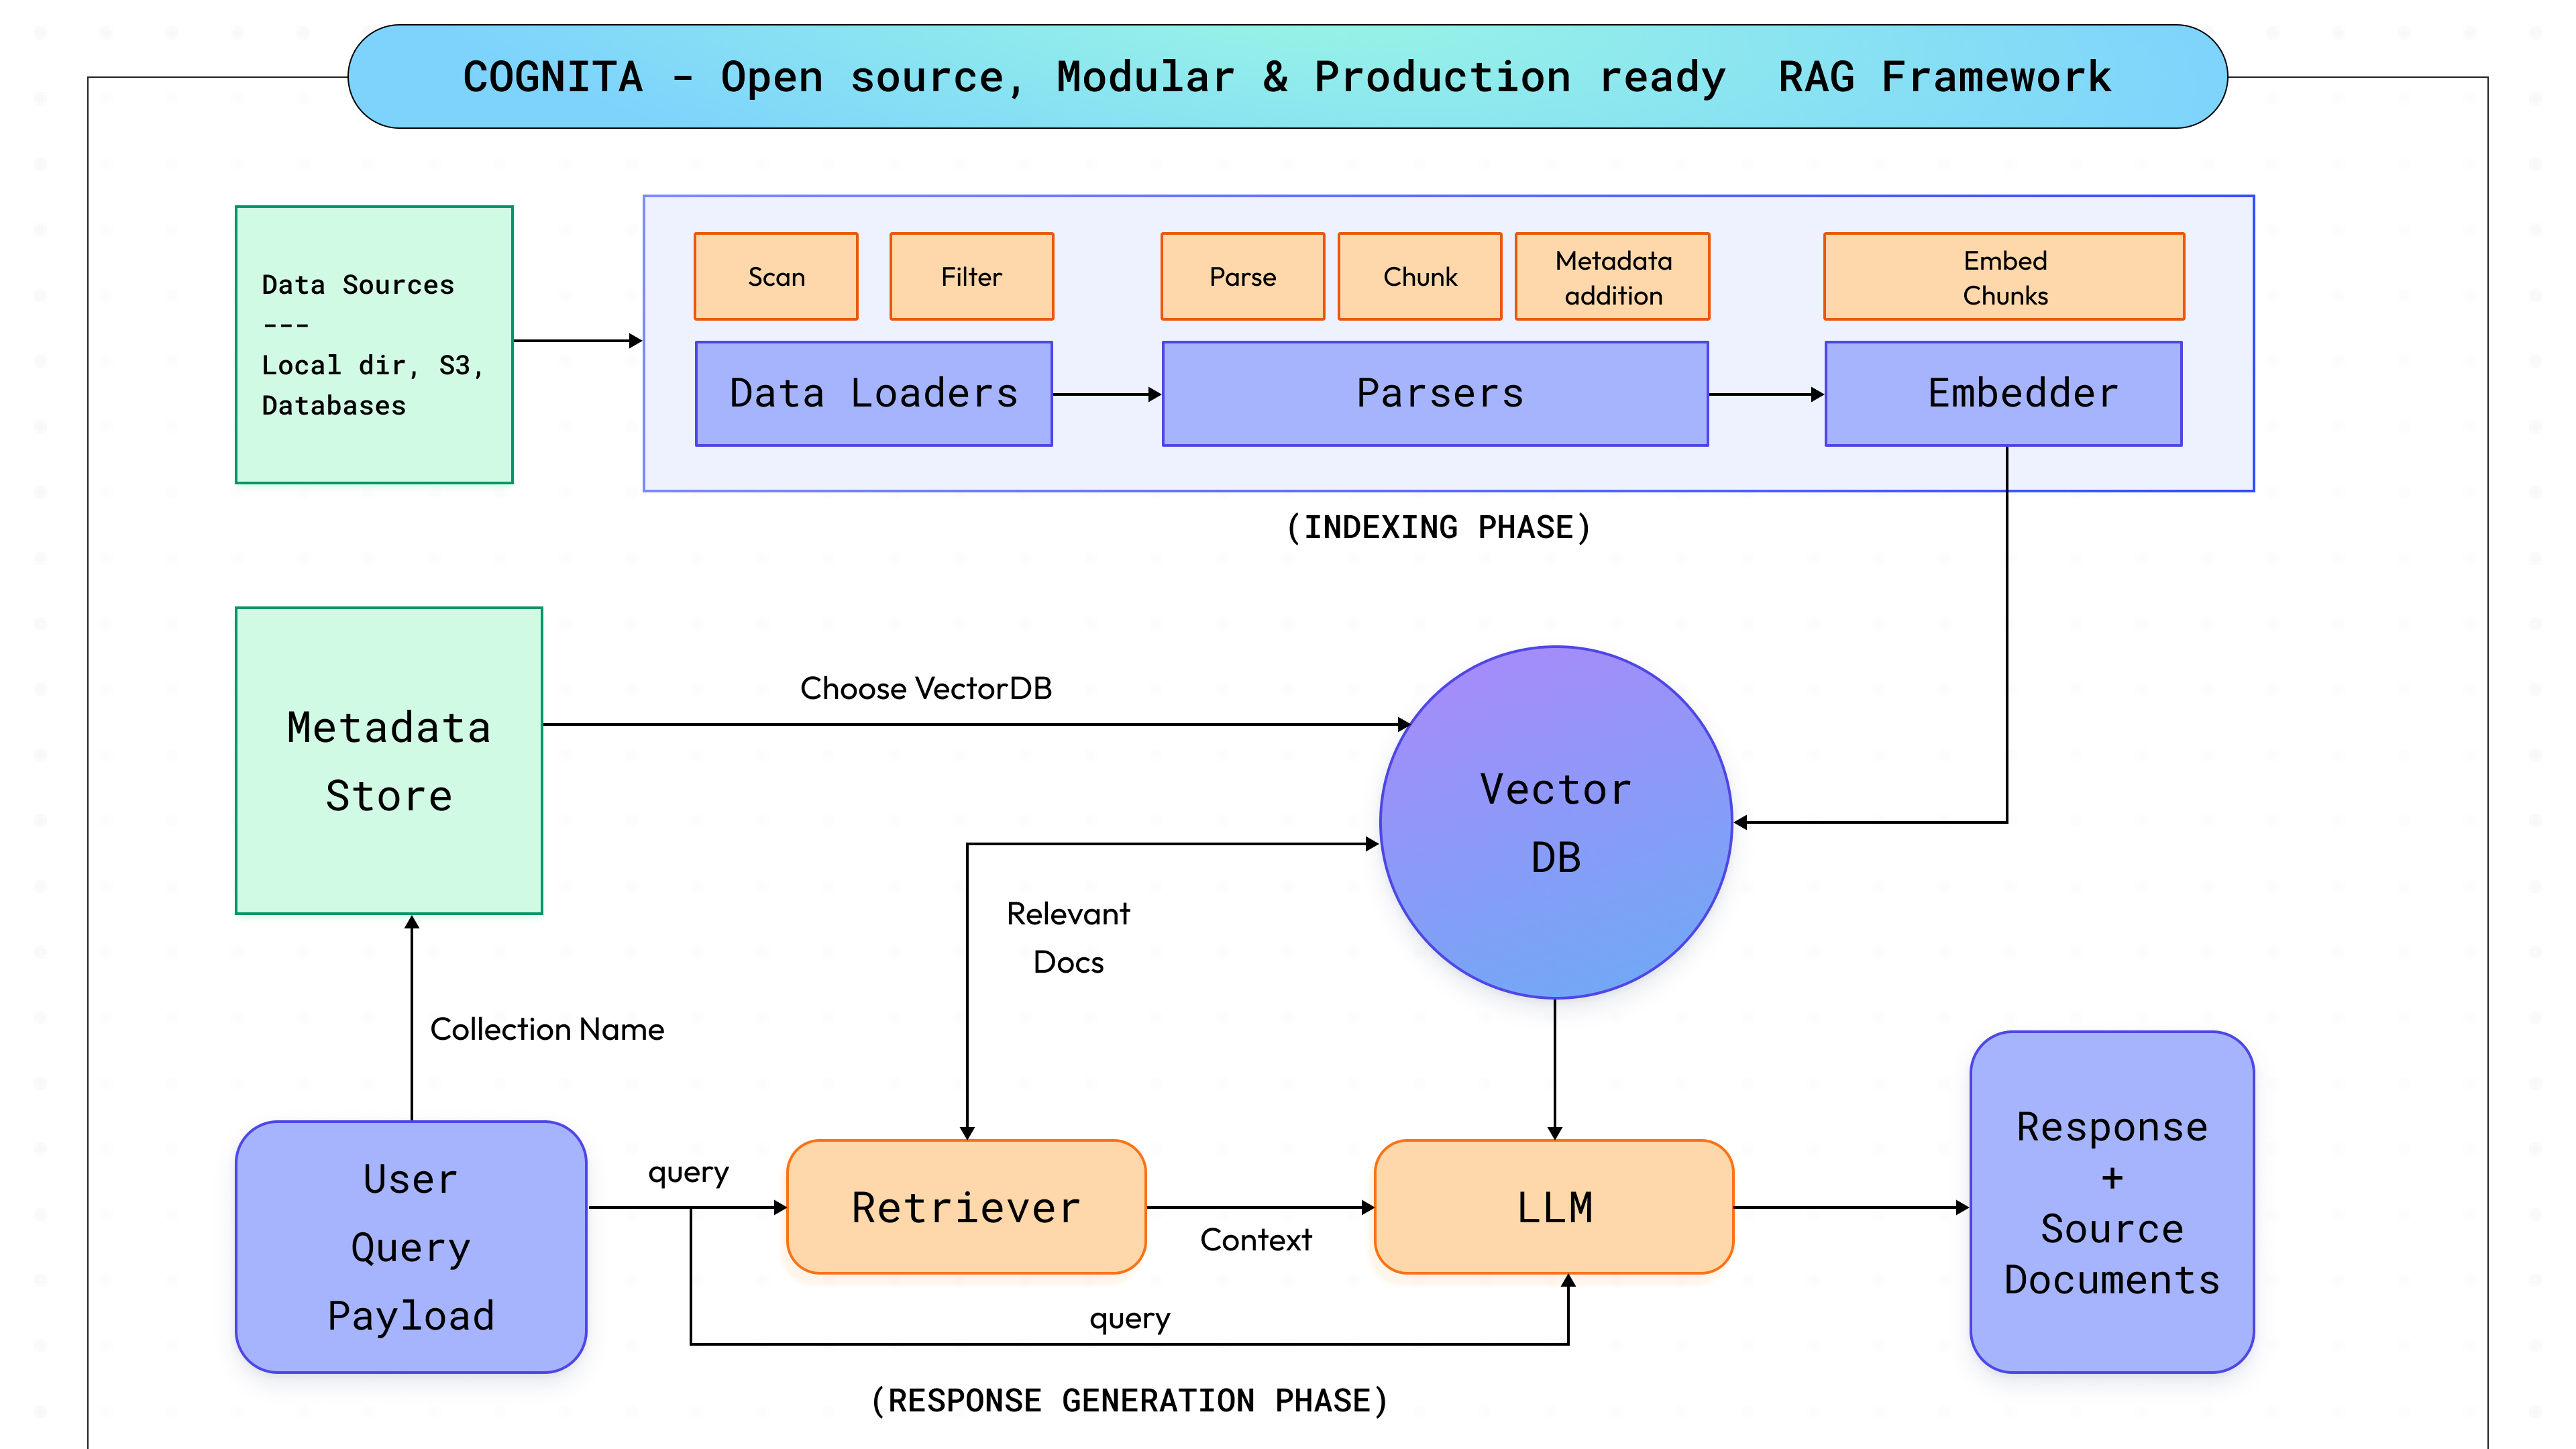
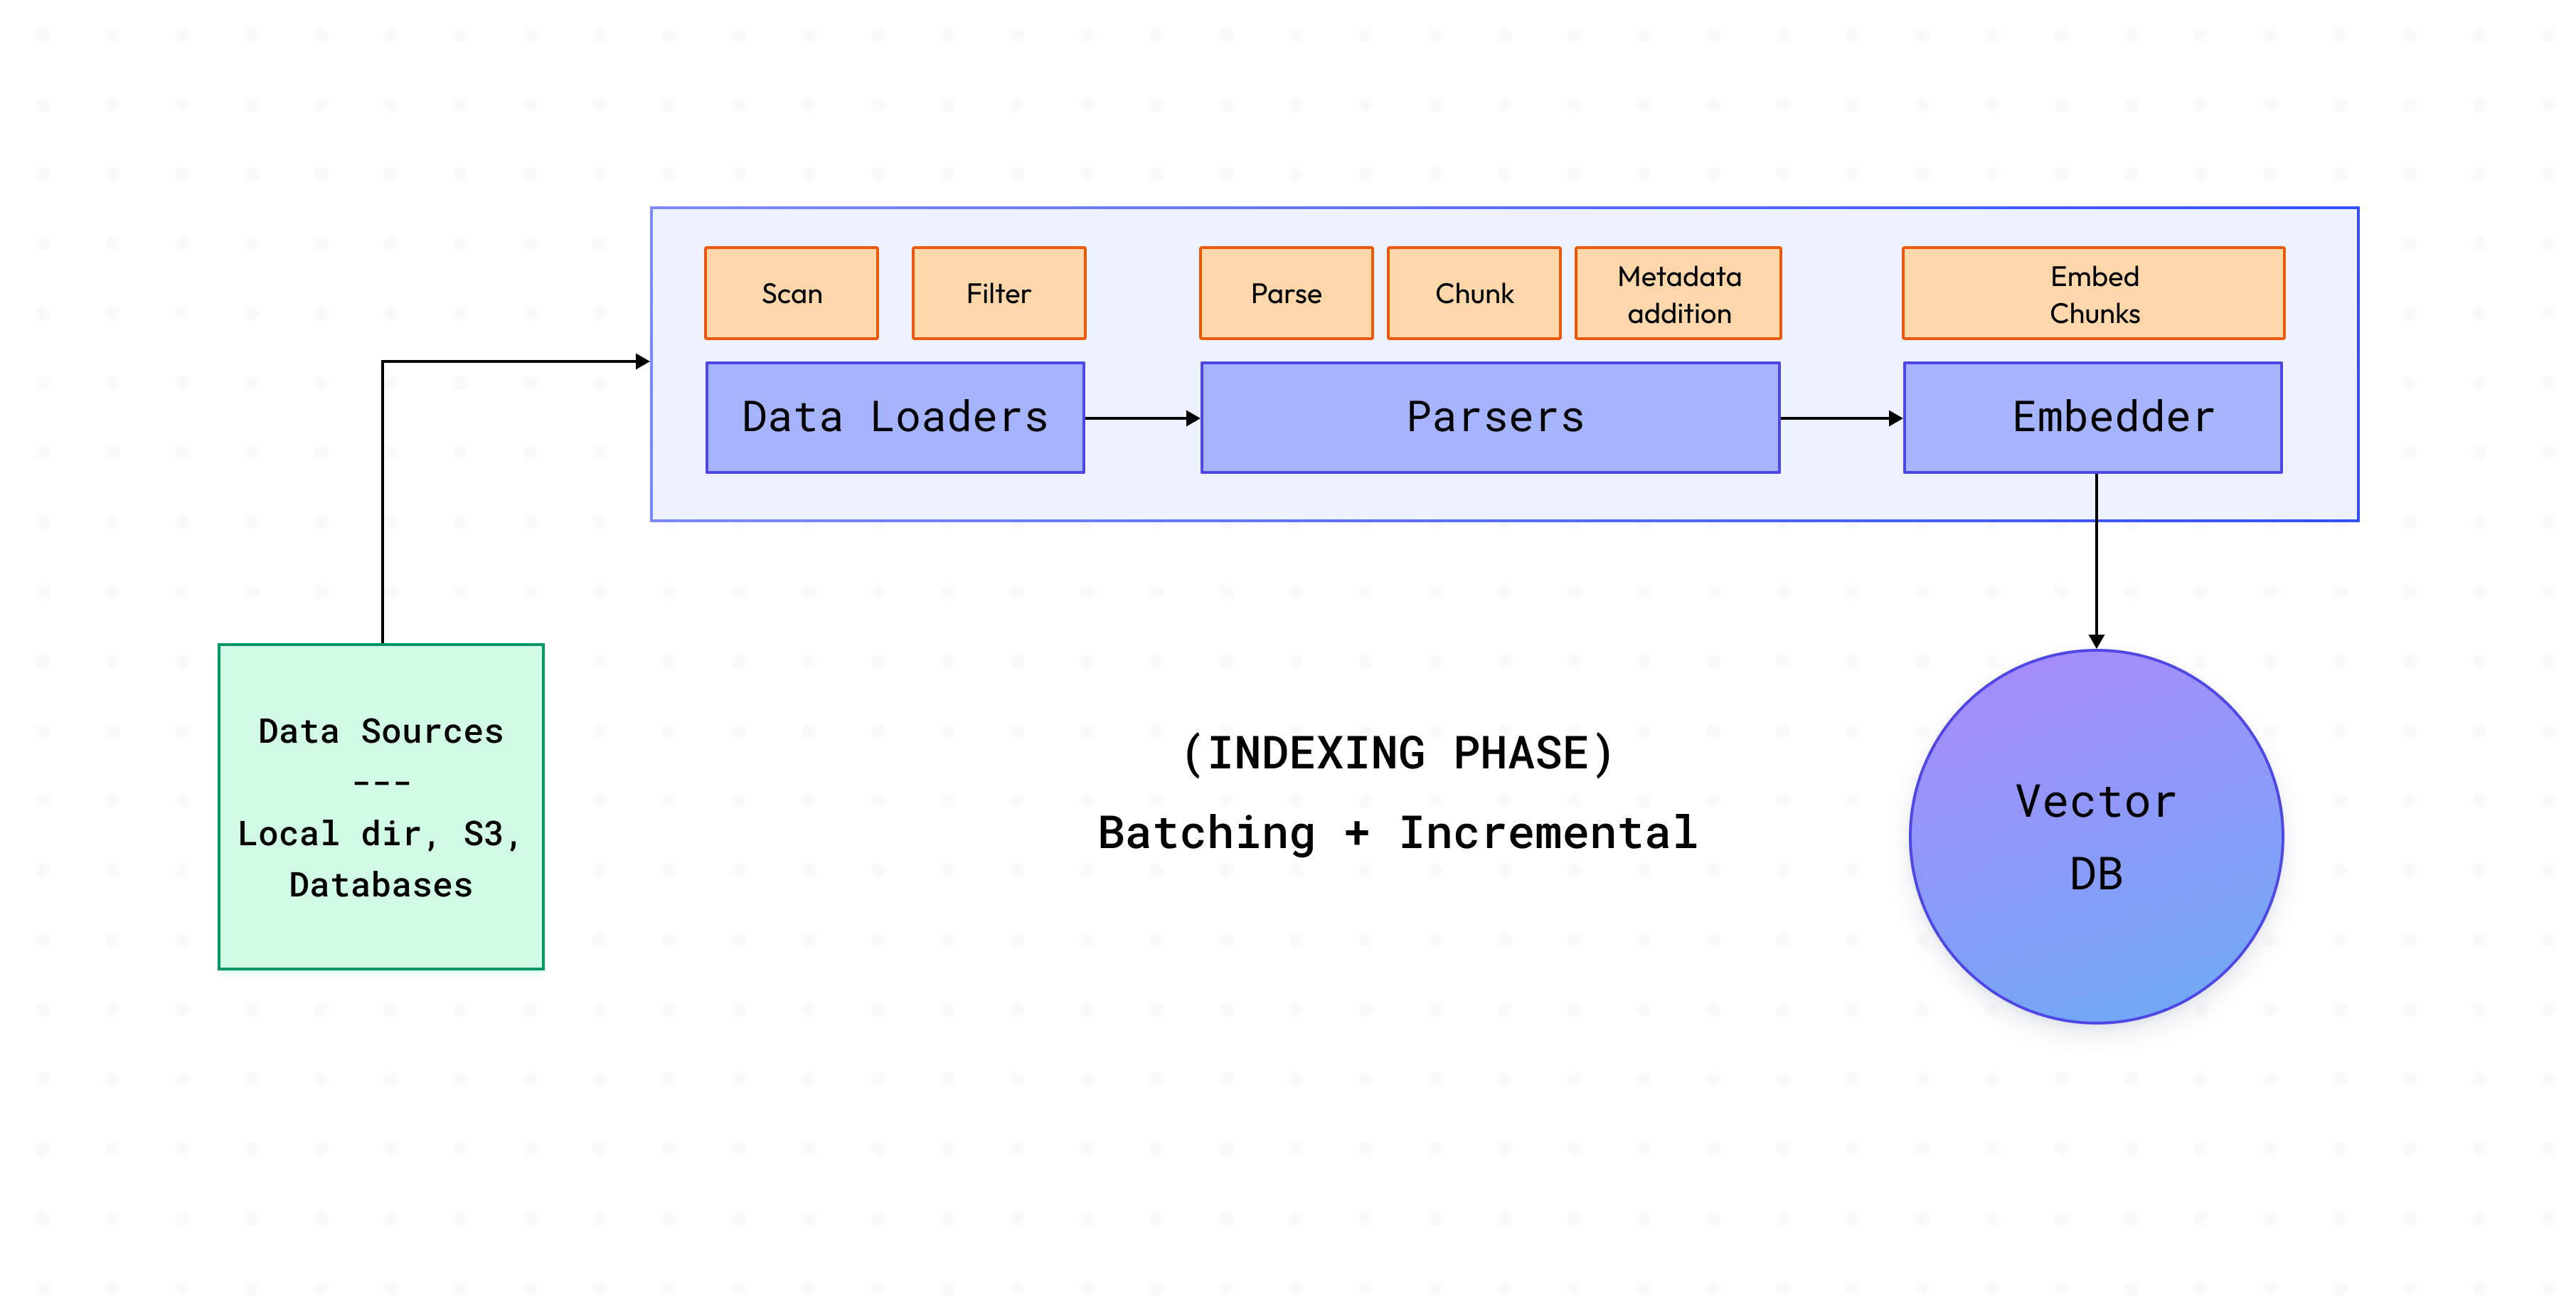
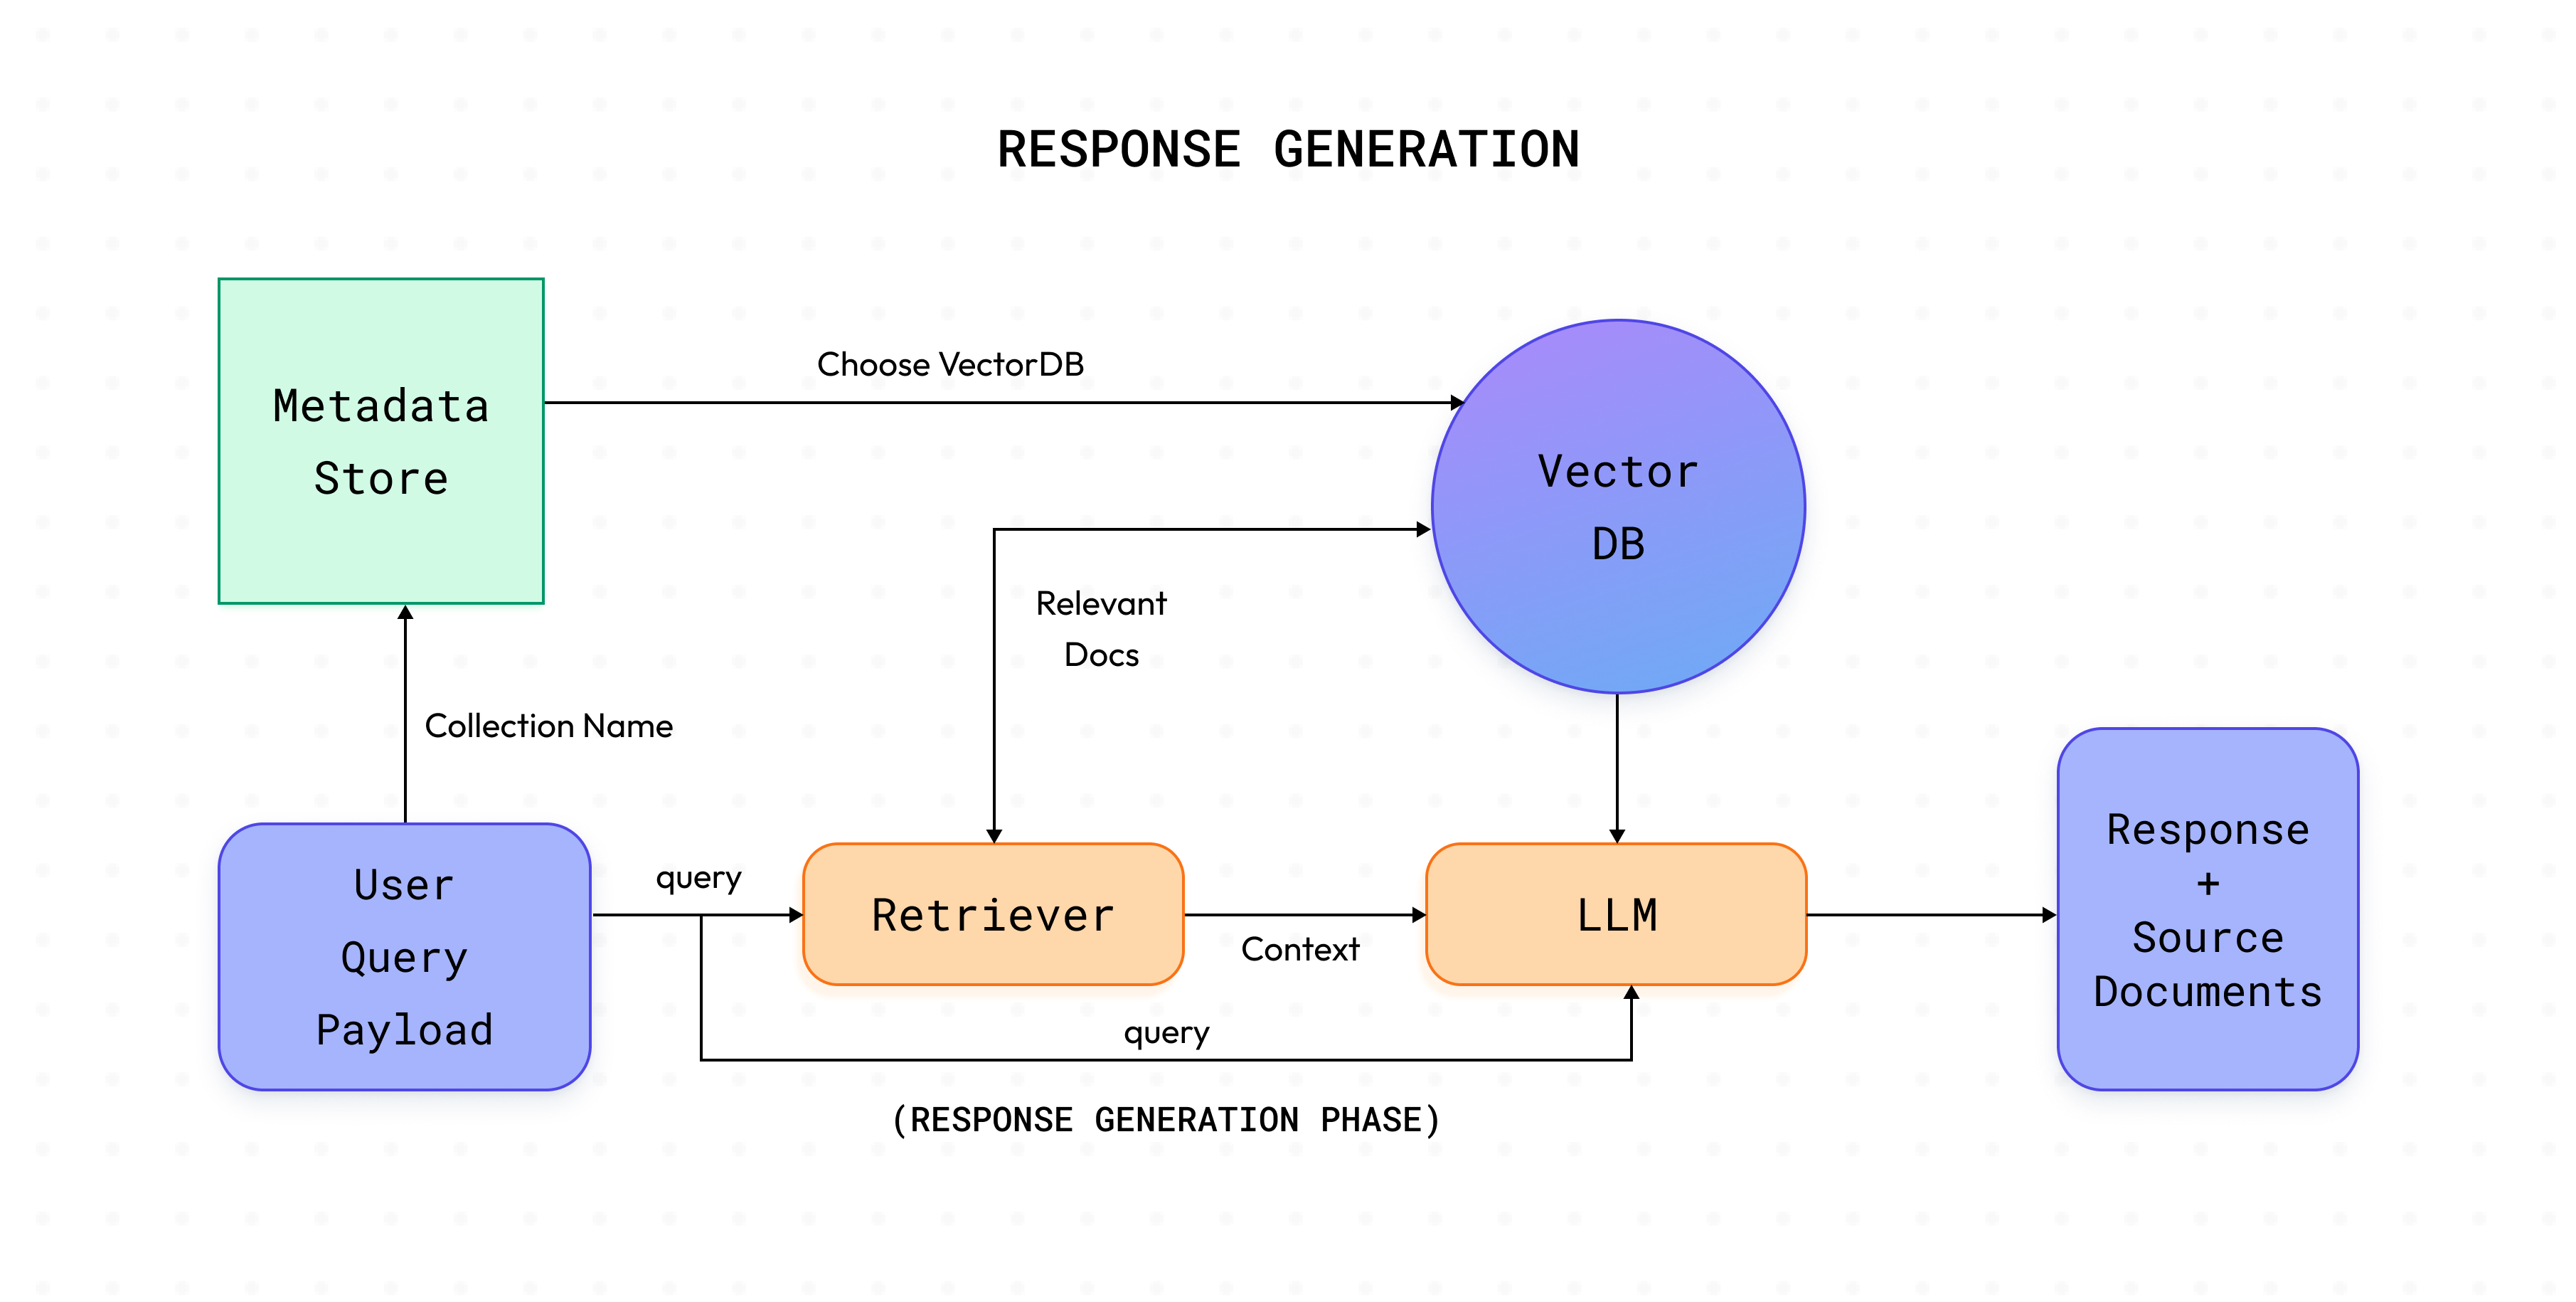
Delving into the inner workings of Cognita, our goal was to strike a balance between full customisation and adaptability while ensuring user-friendliness right out of the box. Given the rapid pace of advancements in RAG and AI, it was imperative for us to engineer Cognita with scalability in mind, enabling seamless integration of new breakthroughs and diverse use cases. This led us to break down the RAG process into distinct modular steps (as shown in the above diagram, to be discussed in subsequent sections), facilitating easier system maintenance, the addition of new functionalities such as interoperability with other AI libraries, and enabling users to tailor the platform to their specific requirements. Our focus remains on providing users with a robust tool that not only meets their current needs but also evolves alongside technology, including broader architectural shifts such as MCP vs RAG, ensuring long-term value.
Components
Cognita is designed around seven different modules, each customisable and controllable to suit different needs:
Data Loaders
Parsers
Embedders
Rerankers
Vector DBs
Metadata Store
Query Controllers
Data Loaders
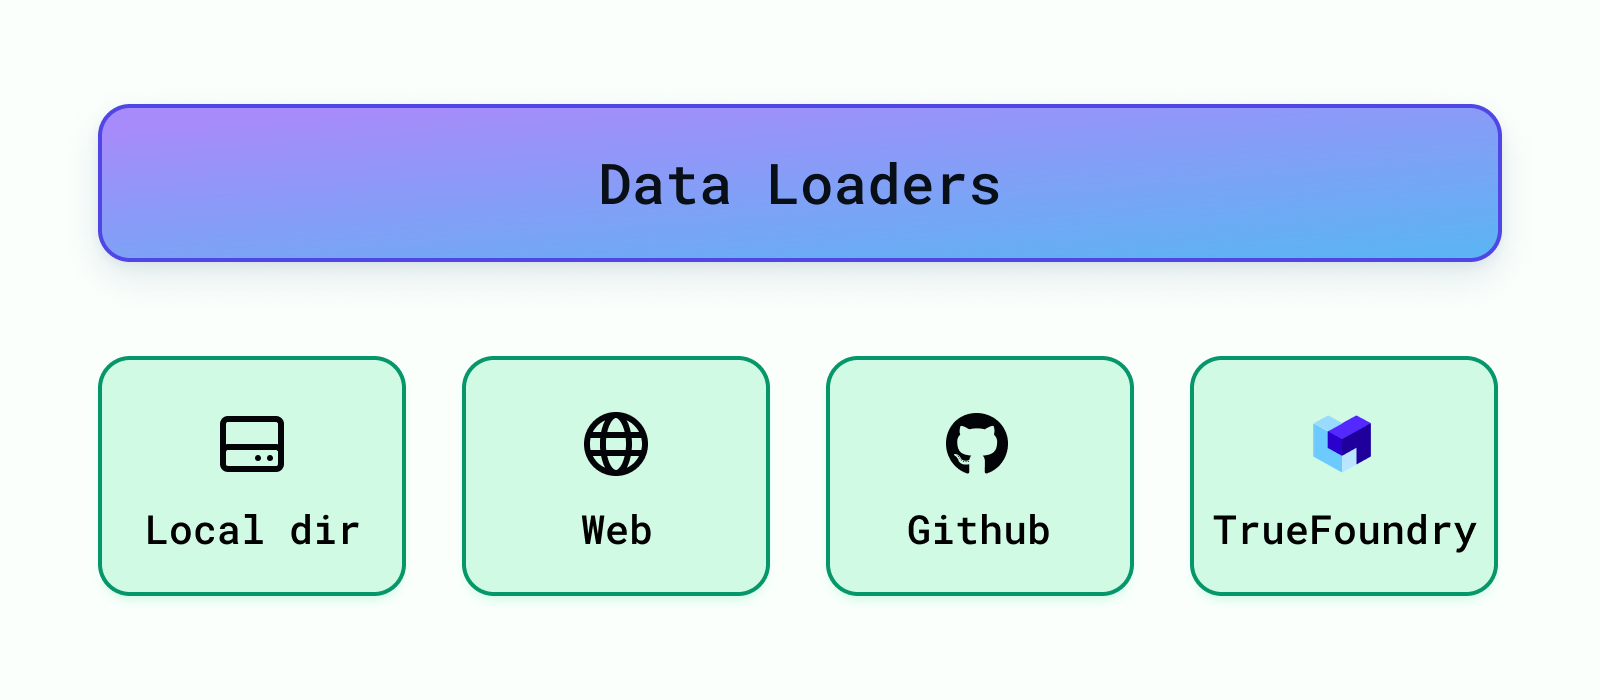
These load the data from different sources like local directories, S3 buckets, databases, Truefoundry artifacts, etc. Cognita currently supports data loading from local directory, web url, Github repository and Truefoundry artifacts. More data loaders can be easily added under backend/modules/dataloaders/ . Once a dataloader is added you need to register it so that it can be used by the RAG application under backend/modules/dataloaders/__init__.py To register a dataloader add the following:
In this step, we deal with different kinds of data, like regular text files, PDFs, and even Markdown files. The aim is to turn all these different types into one common format so we can work with them more easily later on. This part, called parsing, usually takes the longest and is difficult to implement when we're setting up a system like this. But using Cognita can help because it already handles the hard work of managing data pipelines for us.
Post this, we split the parsed data into uniform chunks. But why do we need this? The text we get from the files can be different lengths. If we use these long texts directly, we'll end up adding a bunch of unnecessary information. Plus, since all LLMs can only handle a certain amount of text at once, we won't be able to include all the important context needed for the question. So instead, we're going to break down the text into smaller parts for each section. Intuitively, smaller chunks will contain relevant concepts and will be less noisy compared to larger chunks.
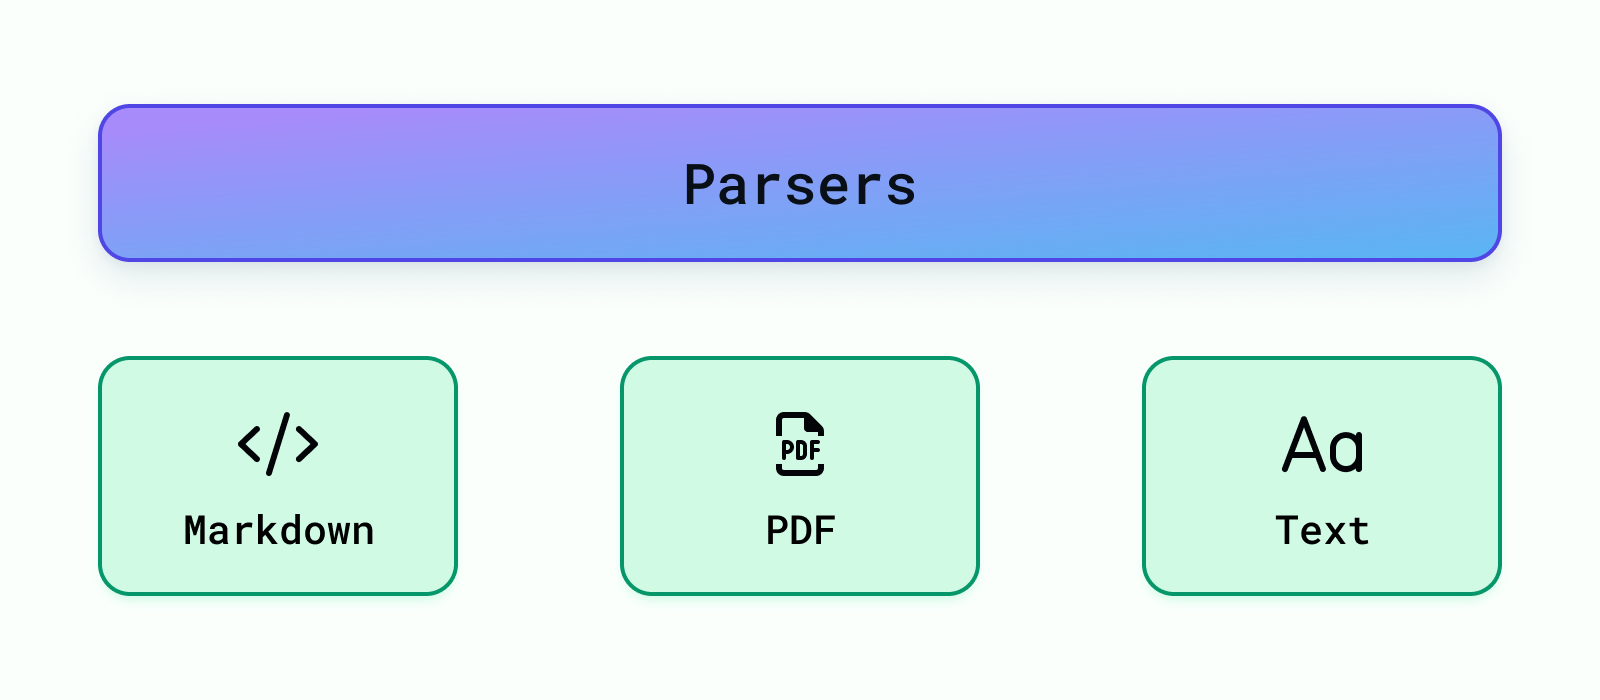
Currently we support, parsing for Markdown, PDF and Text files. More data parsers can be easily added under backend/modules/parsers/ . Once a parser is added you need to register it so that it can be used by the RAG application under backend/modules/parsers/__init__.py To register a parser add the following:
register_parser("MyParser", MyParserClass)
Embedders
Once we've split the data into smaller pieces, we want to find the most important chunks for a specific question. One fast and effective way to do this is by using a pre-trained model (embedding model) to convert our data and the question into special codes called embeddings. Then, we compare the embeddings of each chunk of data to the one for the question. By measuring the cosine similarity between these embeddings, we can figure out which chunks are most closely related to the question, helping us find the best ones to use.
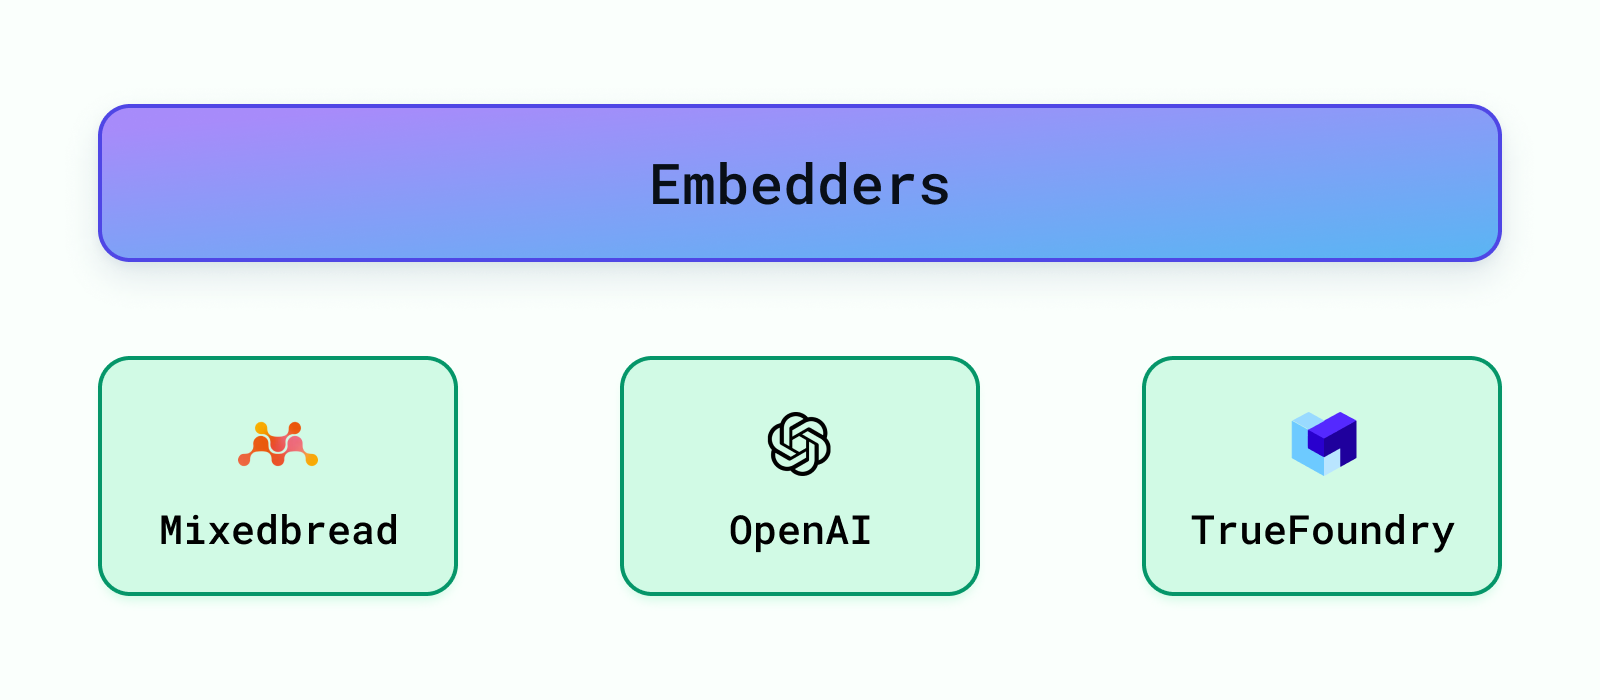
There are many pre-trained models available to embed the data such as models from OpenAI, Cohere, etc. The popular popular ones can be discovered through HuggingFace's Massive Text Embedding Benchmark (MTEB) leaderboard. We provide support for OpenAI Embeddings, TrueFoundry Embeddings and also current SOTA embeddings (as of April, 2024) from mixedbread-ai.
More embedders can be easily added under backend/modules/embedder/ . Once a embedder is added you need to register it so that it can be used by the RAG application under backend/modules/embedders/__init__.py To register a parser add the following:
register_embedder("MyEmbedder", MyEmbedderClass)
Note: Remember, embeddings aren't the only method for finding important chunks. We could also use an LLM for this task! However, LLMs are much bigger than embedding models and have a limit on the amount of text they can handle at once. That's why it's smarter to use embeddings to pick the top k chunks first. Then, we can use LLMs on these fewer chunks to figure out the best ones to use as the context to answer our question.
Rerankers
Once embedding step finds some potential matches, which can be a lot, a reranking step is applied. Reranking to makes sure the best results are at the top. As a result, we can choose the top x documents making our context more concise and prompt query shorter. We provide the support for SOTA reranker (as of April, 2024) from mixedbread-ai which is implemented under backend/modules/reranker/
VectorDB
Once we create vectors for texts, we store them in something called a vector database. This database keeps track of these vectors so we can quickly find them later using different methods. Regular databases organize data in tables, like rows and columns, but vector databases are special because they store and find data based on these vectors. This is super useful for things like recognizing images, understanding language, or recommending stuff. For example, in a recommendation system, each item you might want to recommend (like a movie or a product) is turned into a vector, with different parts of the vector representing different features of the item, like its genre or price. Similarly, in language stuff, each word or document is turned into a vector, with parts of the vector representing features of the word or document, like how often the word is used or what it means. These vector databases are designed to handle these efficiently. Using different ways to measure how close vectors are to each other, like how similar they are or how far apart they are, we find vectors that are closest to the given user query. The most common ways to measure this are Euclidean Distance, Cosine Similarity, and Dot Product.
There are various available vector databases in the market, like Qdrant, SingleStore, Weaviate, etc. We currently support Qdrant and SingleStore. Qdrant vector db class is defined under /backend/modules/vector_db/qdrant.py, while SingleStore vector db class is defined under /backend/modules/vector_db/singlestore.py
Other vector dbs can be added too in the vector_db folder and can be registered under /backend/modules/vector_db/__init__.py
To add any vector DB support in Cognita, user needs to do the following:
Create the class that inherits from BaseVectorDB (from backend.modules.vector_db.base import BaseVectorDB) and initialize it with VectorDBConfig (from backend.types import VectorDBConfig)
Implement the following methods:
create_collection: To intialize the collection/project/table in vector db.
upsert_documents: To insert the documents in the db.
get_collections: Get all the collections present in the db.
delete_collection: To delete the collection from the db.
get_vector_store: To get the vector store for the given collection.
get_vector_client: To get the vector client for the given collection if any.
list_data_point_vectors: To list already present vectors in the db that are similar to the documents being inserted.
delete_data_point_vectors: To delete the vectors from the db, used to remove old vectors of the updated document.
We now show how we can add a new vector db to the RAG system. We take example of both Qdrant and SingleStore vector dbs.
Qdrant Integration
Qdrant is an Open-Source Vector Database and Vector Search Engine written in Rust. It provides fast and scalable vector similarity search service with convenient API. To add Qdrant vector db to the RAG system, follow the below steps:
VECTOR_DB_CONFIG='{"provider":"qdrant","local":"true"}'# For local file based Qdrant instance without docker
Create a new class QdrantVectorDB in backend/modules/vector_db/qdrant.py that inherits from BaseVectorDB and initialize it with VectorDBConfig
from langchain_community.vectorstores.qdrant import Qdrant
from qdrant_client.http.models import VectorParams, Distance
from qdrant_client import QdrantClient, models

class QdrantVectorDB(BaseVectorDB):
    def __init__(self, config: VectorDBConfig):
        ...
        # Initialize the qdrant client
        self.qdrant_client = QdrantClient(
            url=self.url,
            port=self.port,
            prefer_grpc=self.prefer_grpc,
            prefix=self.prefix,
        )
Override the create_collectionmethod to create a collection in Qdrant
 def create_collection(self, collection_name: str, embeddings: Embeddings):
    # Calculate embedding size
    partial_embeddings = embeddings.embed_documents(["Initial document"])
    vector_size = len(partial_embeddings[0])

    # Create collection given the embeding dimension and simalrity metric
    self.qdrant_client.create_collection(
        collection_name=collection_name,
        vectors_config=VectorParams(
            size=vector_size,  # embedding dimension
            distance=Distance.COSINE,
        ),
        replication_factor=3,
    )

    # Create metadata index for the collection
    self.qdrant_client.create_payload_index(
        collection_name=collection_name,
        field_name=f"metadata.{DATA_POINT_FQN_METADATA_KEY}",
        field_schema=models.PayloadSchemaType.KEYWORD,
    )
Override the upsert_documents method to insert the documents in the db
def upsert_documents(
    self,
    collection_name: str,
    documents,
    embeddings: Embeddings,
    incremental: bool = True,
):
    # Get the data point fqns from the documents
    # fqns uniquely identify the documents
    # This is used to delete the outdated documents from the db
    data_point_fqns = []
    for document in documents:
        if document.metadata.get(DATA_POINT_FQN_METADATA_KEY):
            data_point_fqns.append(
                document.metadata.get(DATA_POINT_FQN_METADATA_KEY)
            )

    # Add Documents
    Qdrant(
        client=self.qdrant_client,
        collection_name=collection_name,
        embeddings=embeddings,
    ).add_documents(documents=documents)

    # Get the record ids that are already present in the db (Existing documents that are modified)
    # These docs should be removed from the db
    # Used when incremental indexing is enabled
    record_ids_to_be_upserted: List[str] = self._get_records_to_be_upserted(
        collection_name=collection_name,
        data_point_fqns=data_point_fqns,
        incremental=incremental,
    )

    # Delete Documents
    if len(record_ids_to_be_upserted):
        for i in range(0, len(record_ids_to_be_upserted), BATCH_SIZE):
            record_ids_to_be_processed = record_ids_to_be_upserted[
                i : i + BATCH_SIZE
            ]
            self.qdrant_client.delete(
                collection_name=collection_name,
                points_selector=models.PointIdsList(
                    points=record_ids_to_be_processed,
                ),
            )

# This method is used to get the records that are already present in the db
def _get_records_to_be_upserted(
    self, collection_name: str,
    data_point_fqns: List[str],
    incremental: bool
):
    if not incremental:
        return []
    # For incremental deletion, we delete the documents with the same document_id
    stop = False
    offset = None
    record_ids_to_be_upserted = []

    # we fetch the records in batches based on the data_point_fqns
    while stop is not True:
        records, next_offset = self.qdrant_client.scroll(
            collection_name=collection_name,
            scroll_filter=models.Filter(
                should=[
                    models.FieldCondition(
                        key=f"metadata.{DATA_POINT_FQN_METADATA_KEY}",
                        match=models.MatchAny(
                            any=data_point_fqns,
                        ),
                    ),
                ]
            ),
            limit=BATCH_SIZE,
            offset=offset,
            with_payload=False,
            with_vectors=False,
        )
        for record in records:
            record_ids_to_be_upserted.append(record.id)
            if len(record_ids_to_be_upserted) > MAX_SCROLL_LIMIT:
                stop = True
                break
        if next_offset is None:
            stop = True
        else:
            offset = next_offset
    return record_ids_to_be_upserted
Override the get_collections method to get all the collections present in the db
def get_collections(self):
    collections = self.qdrant_client.list_collections()
    return [collection.name for collection in collections]
Override the delete_collection method to delete the collection from the db
Override the list_data_point_vectors method to list already present vectors in the db that are similar to the documents being inserted
def list_data_point_vectors(
    self, collection_name: str,
    data_source_fqn: str,
    batch_size: int
) -> List[DataPointVector]:

    stop = False
    offset = None
    data_point_vectors: List[DataPointVector] = []

    # Get the vectors that match with the doc unique identifier
    # Data point is an object that has vector_id, fqn and hash
    # hash is calculated during parsing and chunking phase
    while stop is not True:
        records, next_offset = self.qdrant_client.scroll(
            collection_name=collection_name,
            limit=batch_size,
            with_payload=[
                f"metadata.{DATA_POINT_FQN_METADATA_KEY}",
                f"metadata.{DATA_POINT_HASH_METADATA_KEY}",
            ],
            # filter the records based on the data_point_fqn
            scroll_filter=models.Filter(
                should=[
                    models.FieldCondition(
                        key=f"metadata.{DATA_POINT_FQN_METADATA_KEY}",
                        match=models.MatchText(
                            text=data_source_fqn,
                        ),
                    ),
                ]
            ),
            with_vectors=False,
            offset=offset,
        )
        for record in records:
            metadata: dict = record.payload.get("metadata")
            if (
                metadata
                and metadata.get(DATA_POINT_FQN_METADATA_KEY)
                and metadata.get(DATA_POINT_HASH_METADATA_KEY)
            ):
                # Create a DataPointVector object
                data_point_vectors.append(
                    DataPointVector(
                        data_point_vector_id=record.id,
                        data_point_fqn=metadata.get(DATA_POINT_FQN_METADATA_KEY),
                        data_point_hash=metadata.get(DATA_POINT_HASH_METADATA_KEY),
                    )
                )
            if len(data_point_vectors) > MAX_SCROLL_LIMIT:
                stop = True
                break
        if next_offset is None:
            stop = True
        else:
            offset = next_offset
    return data_point_vectors
Override the delete_data_point_vectors method to delete the vectors from the db, used to remove old vectors of the updated document
def delete_data_point_vectors(
    self,
    collection_name: str,
    data_point_vectors: List[DataPointVector],
    batch_size: int = BATCH_SIZE,
):

    vectors_to_be_deleted_count = len(data_point_vectors)
    deleted_vectors_count = 0

    # delete the vectors in batches
    for i in range(0, vectors_to_be_deleted_count, batch_size):
        data_point_vectors_to_be_processed = data_point_vectors[i : i + batch_size]
        # Delete the vectors from the db
        self.qdrant_client.delete(
            collection_name=collection_name,
            points_selector=models.PointIdsList(
                points=[
                    document_vector_point.data_point_vector_id
                    for document_vector_point in data_point_vectors_to_be_processed
                ],
            ),
        )
        # Increment the deleted vectors count
        deleted_vectors_count = deleted_vectors_count + len(data_point_vectors_to_be_processed)
SingleStore Integration
SingleStore offers powerful vector database functionality perfectly suited for AI-based applications, chatbots, image recognition and more, eliminating the need for you to run a speciality vector database solely for your vector workloads. Unlike traditional vector databases, SingleStore stores vector data in relational tables alongside other types of data. Co-locating vector data with related data allows you to easily query extended metadata and other attributes of your vector data with the full power of SQL.
SingleStore provides a free tier for developers to get started with their vector database. You can sign up for a free account here. Upon signup, go to Cloud -> workspace -> Create User. Use the credentials to connect to the SingleStore instance.
To add SingleStore vector db to the RAG system, follow the below steps:
We want to add extra columns to table to store vector id hence, we override SingleStoreDB.
from langchain_community.vectorstores.singlestoredb import SingleStoreDB
import singlestoredb as s2

class SSDB(SingleStoreDB):
    def _create_table(self: SingleStoreDB) -> None:
        """Create table if it doesn't exist."""
        conn = self.connection_pool.connect()
        try:
            cur = conn.cursor()
            # Overriding the default table creation behaviour this adds id as autoinc primary key
            try:
                if self.use_vector_index:
                    index_options = ""
                    if self.vector_index_options and len(self.vector_index_options) > 0:
                        index_options = "INDEX_OPTIONS '{}'".format(
                            json.dumps(self.vector_index_options)
                        )
                    cur.execute(
                        """CREATE TABLE IF NOT EXISTS {}
                        (id BIGINT AUTO_INCREMENT PRIMARY KEY, {} TEXT CHARACTER SET utf8mb4 COLLATE utf8mb4_general_ci,
                        {} VECTOR({}, F32) NOT NULL, {} JSON,
                        VECTOR INDEX {} ({}) {});""".format(
                            self.table_name,
                            self.content_field,
                            self.vector_field,
                            self.vector_size,
                            self.metadata_field,
                            self.vector_index_name,
                            self.vector_field,
                            index_options,
                        ),
                    )
                else:
                    cur.execute(
                        """CREATE TABLE IF NOT EXISTS {}
                        (id BIGINT AUTO_INCREMENT PRIMARY KEY, {} TEXT CHARACTER SET utf8mb4 COLLATE utf8mb4_general_ci,
                        {} BLOB, {} JSON);""".format(
                            self.table_name,
                            self.content_field,
                            self.vector_field,
                            self.metadata_field,
                        ),
                    )
            finally:
                cur.close()
        finally:
            conn.close()


    def add_texts(
        self,
        texts: Iterable[str],
        metadatas: Optional[List[dict]] = None,
        embeddings: Optional[List[List[float]]] = None,
        **kwargs: Any,
    ) -> List[str]:
        """Add more texts to the vectorstore.

        Args:
            texts (Iterable[str]): Iterable of strings/text to add to the vectorstore.
            metadatas (Optional[List[dict]], optional): Optional list of metadatas.
                Defaults to None.
            embeddings (Optional[List[List[float]]], optional): Optional pre-generated
                embeddings. Defaults to None.

        Returns:
            List[str]: empty list
        """
        conn = self.connection_pool.connect()
        try:
            cur = conn.cursor()
            try:
                # Write data to singlestore db
                for i, text in enumerate(texts):
                    # Use provided values by default or fallback
                    metadata = metadatas[i] if metadatas else {}
                    embedding = (
                        embeddings[i]
                        if embeddings
                        else self.embedding.embed_documents([text])[0]
                    )
                    # Overriding insert statement to handle autoincrement id
                    cur.execute(
                        "INSERT INTO {} (content, vector, metadata) VALUES (%s, JSON_ARRAY_PACK(%s), %s)".format(
                            self.table_name
                        ),
                        (
                            text,
                            "[{}]".format(",".join(map(str, embedding))),
                            json.dumps(metadata),
                        ),
                    )
                if self.use_vector_index:
                    cur.execute("OPTIMIZE TABLE {} FLUSH;".format(self.table_name))
            finally:
                cur.close()
        finally:
            conn.close()
        return []
def upsert_documents(
    self,
    collection_name: str,
    documents: List[Document],
    embeddings: Embeddings,
    incremental: bool = True,
):
    # Get the data point fqns from the documents
    data_point_fqns = []
    for document in documents:
        if document.metadata.get(DATA_POINT_FQN_METADATA_KEY):
            data_point_fqns.append(
                document.metadata.get(DATA_POINT_FQN_METADATA_KEY)
            )

    try:
        # Add documents to the table
        SSDB.from_documents(
            embedding=embeddings,
            documents=documents,
            table_name=collection_name,
            host=self.host,
        )
        logger.debug(
            f"[SingleStore] Added {len(documents)} documents to collection {collection_name}"
        )
    except Exception as e:
        logger.error(
            f"[SingleStore] Failed to add documents to collection {collection_name}: {e}"
        )
def get_collections(self) -> List[str]:
    # Create connection to SingleStore
    conn = s2.connect(self.host)
    try:
        cur = conn.cursor()
        try:
            # Get all the tables in the db
            cur.execute("SHOW TABLES")
            return [row[0] for row in cur.fetchall()]
        except Exception as e:
            logger.error(
                f"[SingleStore] Failed to get collections: {e}"
            )
        finally:
            cur.close()
    except Exception as e:
        logger.error(
            f"[SingleStore] Failed to get collections: {e}"
        )
    finally:
        conn.close()
def list_data_point_vectors(
    self,
    collection_name: str,
    data_source_fqn: str,
) -> List[DataPointVector]:
    data_point_vectors: List[DataPointVector] = []
    logger.debug(f"data_source_fqn: {data_source_fqn}")

    # Get all data point vectors from table upto MAX_SCROLL_LIMIT
    conn = s2.connect(self.host)
    try:
        curr = conn.cursor()

        # Remove all data point vectors with the same data_source_fqn
        curr.execute(f"SELECT * FROM {collection_name} WHERE JSON_EXTRACT_JSON(metadata, '{DATA_POINT_FQN_METADATA_KEY}') LIKE '%{data_source_fqn}%' LIMIT {MAX_SCROLL_LIMIT}")

        for record in curr:
            # id, content, vector, metadata
            id, _, _, metadata = record
            if (
                metadata
                and metadata.get(DATA_POINT_FQN_METADATA_KEY)
                and metadata.get(DATA_POINT_HASH_METADATA_KEY)
            ):
                # Create a DataPointVector object
                data_point_vectors.append(
                    DataPointVector(
                        data_point_vector_id=id,
                        data_point_fqn=metadata.get(DATA_POINT_FQN_METADATA_KEY),
                        data_point_hash=metadata.get(DATA_POINT_HASH_METADATA_KEY),
                    )
                )
    except Exception as e:
        logger.error(
            f"[SingleStore] Failed to list data point vectors: {e}"
        )
    finally:
        conn.close()

    logger.debug(
        f"[SingleStore] Listing {len(data_point_vectors)} data point vectors for collection {collection_name}"
    )
    return data_point_vectors
def delete_data_point_vectors(
    self,
    collection_name: str,
    data_point_vectors: List[DataPointVector],
    batch_size: int =BATCH_SIZE,
):
    if len(data_point_vectors) > 0:
        # Create connection to SingleStore
        conn = s2.connect(self.host)

        try:
            vectors_to_be_deleted_count = len(data_point_vectors)
            curr = conn.cursor()

            # Delete the vectors as per the data_point_vector_id
            curr.execute(
                f"DELETE FROM {collection_name} WHERE id in ({', '.join(data_point_vector.data_point_vector_id for data_point_vector in data_point_vectors)})"
            )
            logger.debug(
                f"[SingleStore] Deleted {vectors_to_be_deleted_count} data point vectors"
            )
        except Exception as e:
            logger.error(
                f"[SingleStore] Failed to delete data point vectors: {e}"
            )
        finally:
            conn.close()
from backend.server.decorator import post
@query_controller("/app-2")
class MyCustomController():
    ...
    @post("/answer")
    def answer(query: str):
        # Write code to express your logic for answer
        # This API will be exposed as POST /my-controller/answer
        ...
TrueFoundry AI Gateway delivers ~3–4 ms latency, handles 350+ RPS on 1 vCPU, scales horizontally with ease, and is production-ready, while LiteLLM suffers from high latency, struggles beyond moderate RPS, lacks built-in scaling, and is best for light or prototype workloads.












.png)





.png)
.png)
.png)
.png)
.png)
.png)
.png)
.png)
.png)
.png)