

Run setup
With Claude Desktop installed, install the setup tool, then run:Choose models
In the wizard, map the Opus, Sonnet, and Haiku tiers to the gateway model IDs recommended by your administrator:- Opus: for complex tasks.
- Sonnet: for everyday coding and chat.
- Haiku: for fast background work and Cowork sub-agents. Include a Haiku model so those tasks can resolve correctly.
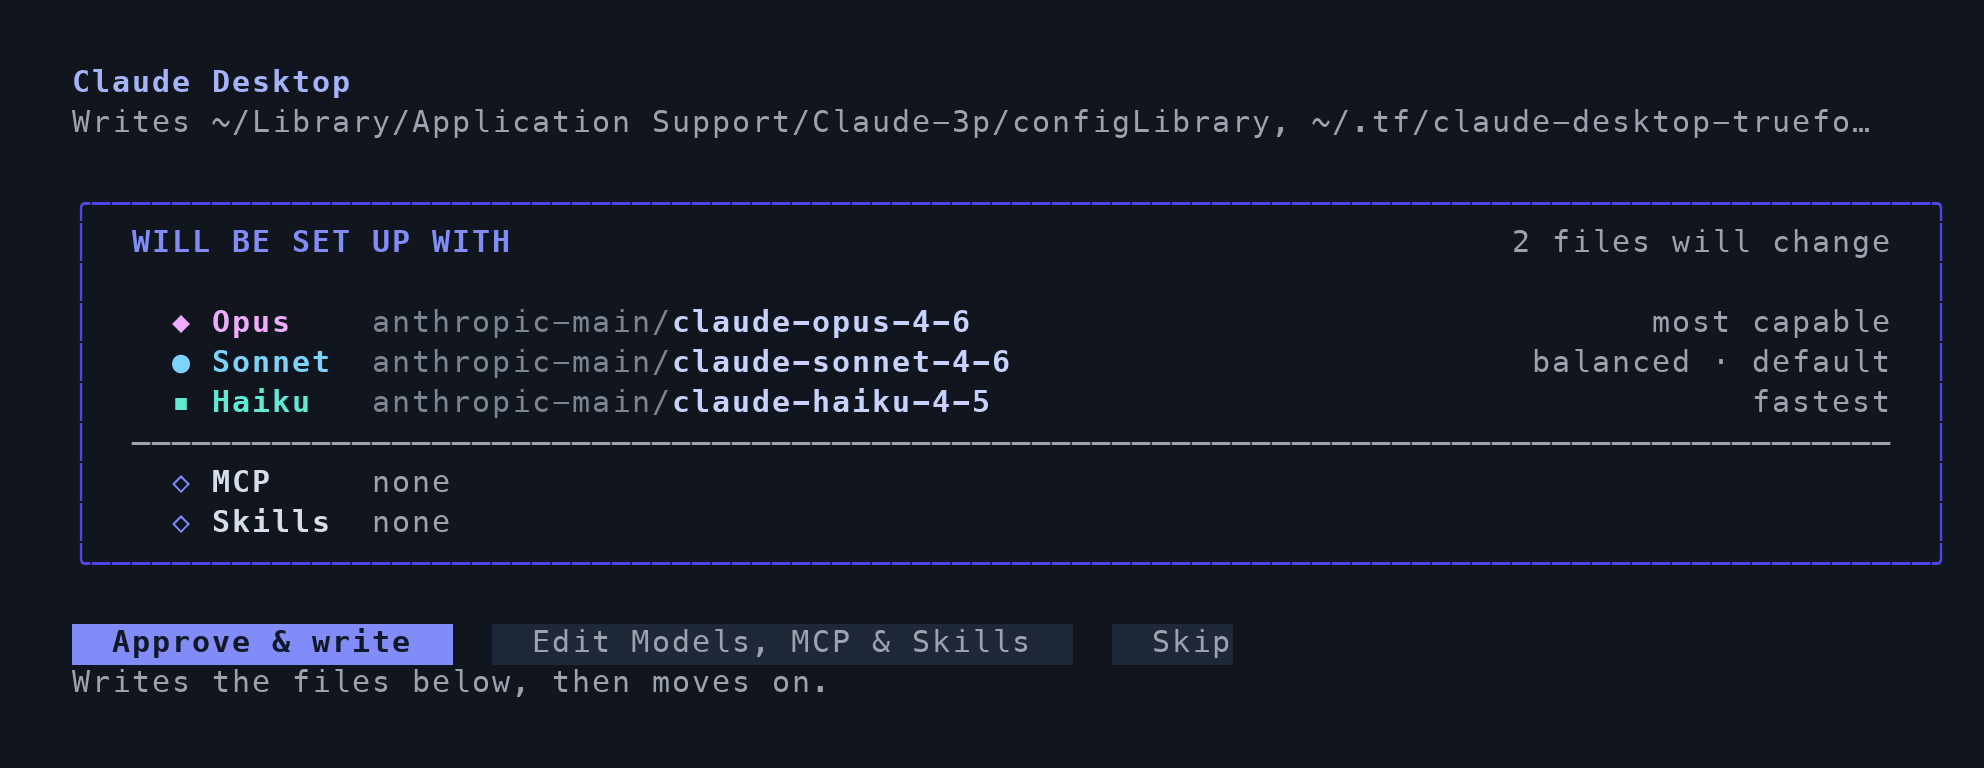
Review the Opus, Sonnet, and Haiku model mappings before approving.
Finish in Claude Desktop
- Follow any quit/reopen prompt so setup can apply the TrueFoundry configuration.
- If setup provides a configuration import file instead, import that file in Claude Desktop using the completion summary’s instructions.
- If you selected Skills, upload the generated ZIP files in Customize → Skills. The completion summary lists the files to use.
- Open a new conversation. Authorize any selected MCP servers that require sign-in.
Verify the connection
Select your configured model in a new conversation and ask:Reply exactly TFY-CHAT-OK. Do not use tools. Confirm that a response arrives without an authentication or model error. Then verify the request in the gateway.
For manual configuration and advanced options, see the Claude Desktop integration guide.