Step 1: Setup SSO
Enabling Single Sign-On (SSO) lets your users log in with your Identity Provider (IdP) instead of separate credentials. Once SSO is configured, the gateway login page shows a Login with SSO button so users can authenticate through your IdP (e.g., Google, Okta, Azure AD, Keycloak).Enable SSO and choose your provider
Toggle Enabled on, then select your SSO Provider (Okta, Google, Azure AD, or Custom). Under Authentication Configuration, choose OIDC or SAML v2 depending on what your IdP supports.
Complete the SSO configuration
Fill in the required fields (e.g., client ID, client secret, issuer URL for OIDC, or SAML metadata for SAML). Set the redirect/callback URL to
https://login.truefoundry.com/oauth2/callback when configuring your IdP.For detailed SSO flow and provider-specific setup (Azure AD, Okta, Keycloak, SAML), see the SSO Overview and the linked OIDC/SAML guides (e.g., OIDC with Azure AD, OIDC with Okta, OIDC with Keycloak).
Step 2: Create and Manage Teams
Teams group users and simplify access control: you grant models and MCP servers to teams instead of individual users. You can set up teams in two ways:- Option A: Create teams and assign managers
- Option B: Setup teams using SCIM
Create teams manually and assign managers so they can add and remove members without admin involvement.
See Manage Teams for the full flow and Create a team manually.
Step 3: Virtual Account Creation
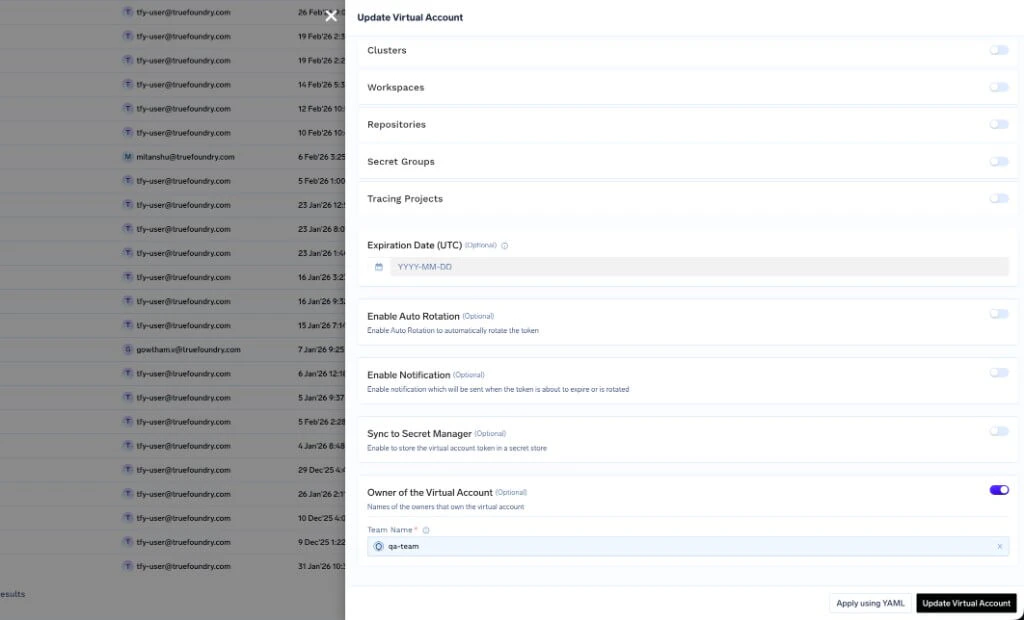
Virtual accounts are used by applications and services to call the AI Gateway (and other TrueFoundry APIs) without using a user’s token. You need to decide who can create and manage them.Mark teams as owners (recommended)
When creating or updating a virtual account, we recommend enabling Owner of the Virtual Account and adding one or more teams as owners. Team members can then see that virtual account’s data in observability—request logs, metrics, and traces—according to your Data Access rules. For example, the defaultdefault-everyone-team-data rule lets team members see data for virtual accounts owned by their team.
Who can create a virtual account?
- Central (admin-only)
- Delegated to team managers
- GitOps (PR-based)
Keep virtual account creation central: only tenant admins (or a central platform team) create and manage virtual accounts. This gives maximum control and consistency.
- Create virtual accounts under Access → Virtual Account Tokens (or Manage Virtual Accounts).
- Assign each virtual account to the right team and grant access to the models/MCP servers that application needs.
- Use this when you want a single team to own all service identities and tokens.
Saving the virtual account token in a secret manager
After creating a virtual account, you can sync its token to your secret store so applications read it from there instead of the UI.- Auto-rotation: You can enable auto-rotation and notifications on rotation.
- Secret store sync: Configure secret store sync so the token is written to a path in your chosen secret manager (e.g. AWS Secrets Manager, HashiCorp Vault, Google Secret Manager, Azure Vault). The token is kept in sync when it rotates. First integrate a secret store with TrueFoundry, then set the sync path for the virtual account.
Step 4: Add Models and MCP Servers and Control Team Access
Add the models and MCP servers your organization needs to the gateway, then decide which teams (or users) can use which.-
Add provider accounts and models
Add provider accounts (e.g. OpenAI, Anthropic, AWS Bedrock) and their models via the UI or the Apply API. Models are grouped under provider accounts. -
Add MCP servers
Register MCP servers in the gateway so teams can use tools and data sources through a single gateway endpoint. -
Assign access per team
For each provider account (and thus its models), grant:- Provider Account Manager: can change provider settings, add/remove models, and manage who has access.
- Provider Account User: can use all models in that account but cannot change settings or permissions.
Step 5: Get Tokens (Per User and Per Virtual Account)
Users and applications need a token to call the AI Gateway.| Who / What | Token type | How to get it |
|---|---|---|
| Individual users (developers, testing) | Personal Access Token (PAT) | Access → Personal Access Tokens in the platform. A PAT has the same access as the user. See Personal Access Tokens. |
| Applications / services | Virtual Account Token (VAT) | Create a virtual account, then use Get Token for that account. Optionally sync the token to a secret manager. |
Authorization: Bearer <token> header (or as OPENAI_API_KEY when using the OpenAI-compatible base URL). See Authentication for AI Gateway.
Step 6: Govern Who Can See Observability Data (Data Access)
Request logs and metrics in the AI Gateway are sensitive. Use Data Access rules to control who can see what. Go to AI Gateway → Controls → Data Access. You can manage rules in the UI or via YAML config.Three default rules (cover most use cases)
TrueFoundry ships with three default rules that fit most organizations:-
default-everyone-team-data— Team members can see their team’s data (including virtual accounts owned by the team).- Subjects:
team:everyone· Scope:team_data
- Subjects:
-
default-everyone-own-data— Users can see only their own request logs and metrics.- Subjects:
team:everyone· Scope:own_data
- Subjects:
-
default-tenant-admin-all-data— Tenant admins can see all data.- Subjects:
role:tenant-admin· Scope:all_data
- Subjects:
When you need custom rules
Add more rules if you need:- A specific team to see only a subset of all data (e.g. by metadata or
created_by). - Multiple teams or users with different scopes.
- Stricter or looser access than the defaults.
gateway-data-access-config). Full reference and examples: Data Access Rules for Request Logs and Metrics.