Why use the TrueFoundry AI Gateway
Routing IDE connections through the AI Gateway gives you:- Observability — every tool call is logged and traceable to the developer who made it.
- Governance — access is controlled by TrueFoundry identity and server-level permissions; admins decide who can reach which servers.
- Security — no API keys or provider tokens are stored in IDE config files, shell history, or anywhere on the developer machine. The developer signs in with TrueFoundry (using SSO if configured) and the AI Gateway handles the rest.
How the connection flow works
When a developer connects from the IDE, the AI Gateway uses Sign in with TrueFoundry (OAuth). The IDE receives a temporary TrueFoundry token to talk to the AI Gateway. If the MCP server requires a per-user provider token (for example, a GitHub or Slack OAuth token), the AI Gateway stores that token at the AI Gateway layer — it never reaches the developer’s machine. Key points:- The developer only interacts with TrueFoundry sign-in (steps 2–3). No keys to copy or paste.
- Provider tokens are stored at the AI Gateway layer (step 7), not on the developer machine.
- Every subsequent tool call (step 8) goes through the AI Gateway, where it is logged, authorized, and rate-limited.
Prerequisites
- An MCP server registered in TrueFoundry that you have access to. If you don’t have one yet, see Getting Started.
- A Gateway URL for the MCP server. Copy it from the server’s How To Use tab in TrueFoundry.
- For outbound auth — only if the server uses “your own API key” (per-user): your own upstream API key for that provider. You will be prompted to enter it during the connection flow from your IDE. Other outbound methods (shared key, OAuth, token passthrough, no auth) need no key from you.
https://<gateway>/<tenant>/mcp/<server>/server. Always copy the exact URL shown on the How To Use tab for your server — that is the source of truth.Connect the server
Adding the server differs per IDE, but every step after that is the same. Follow the steps below in order.Add the server in your IDE
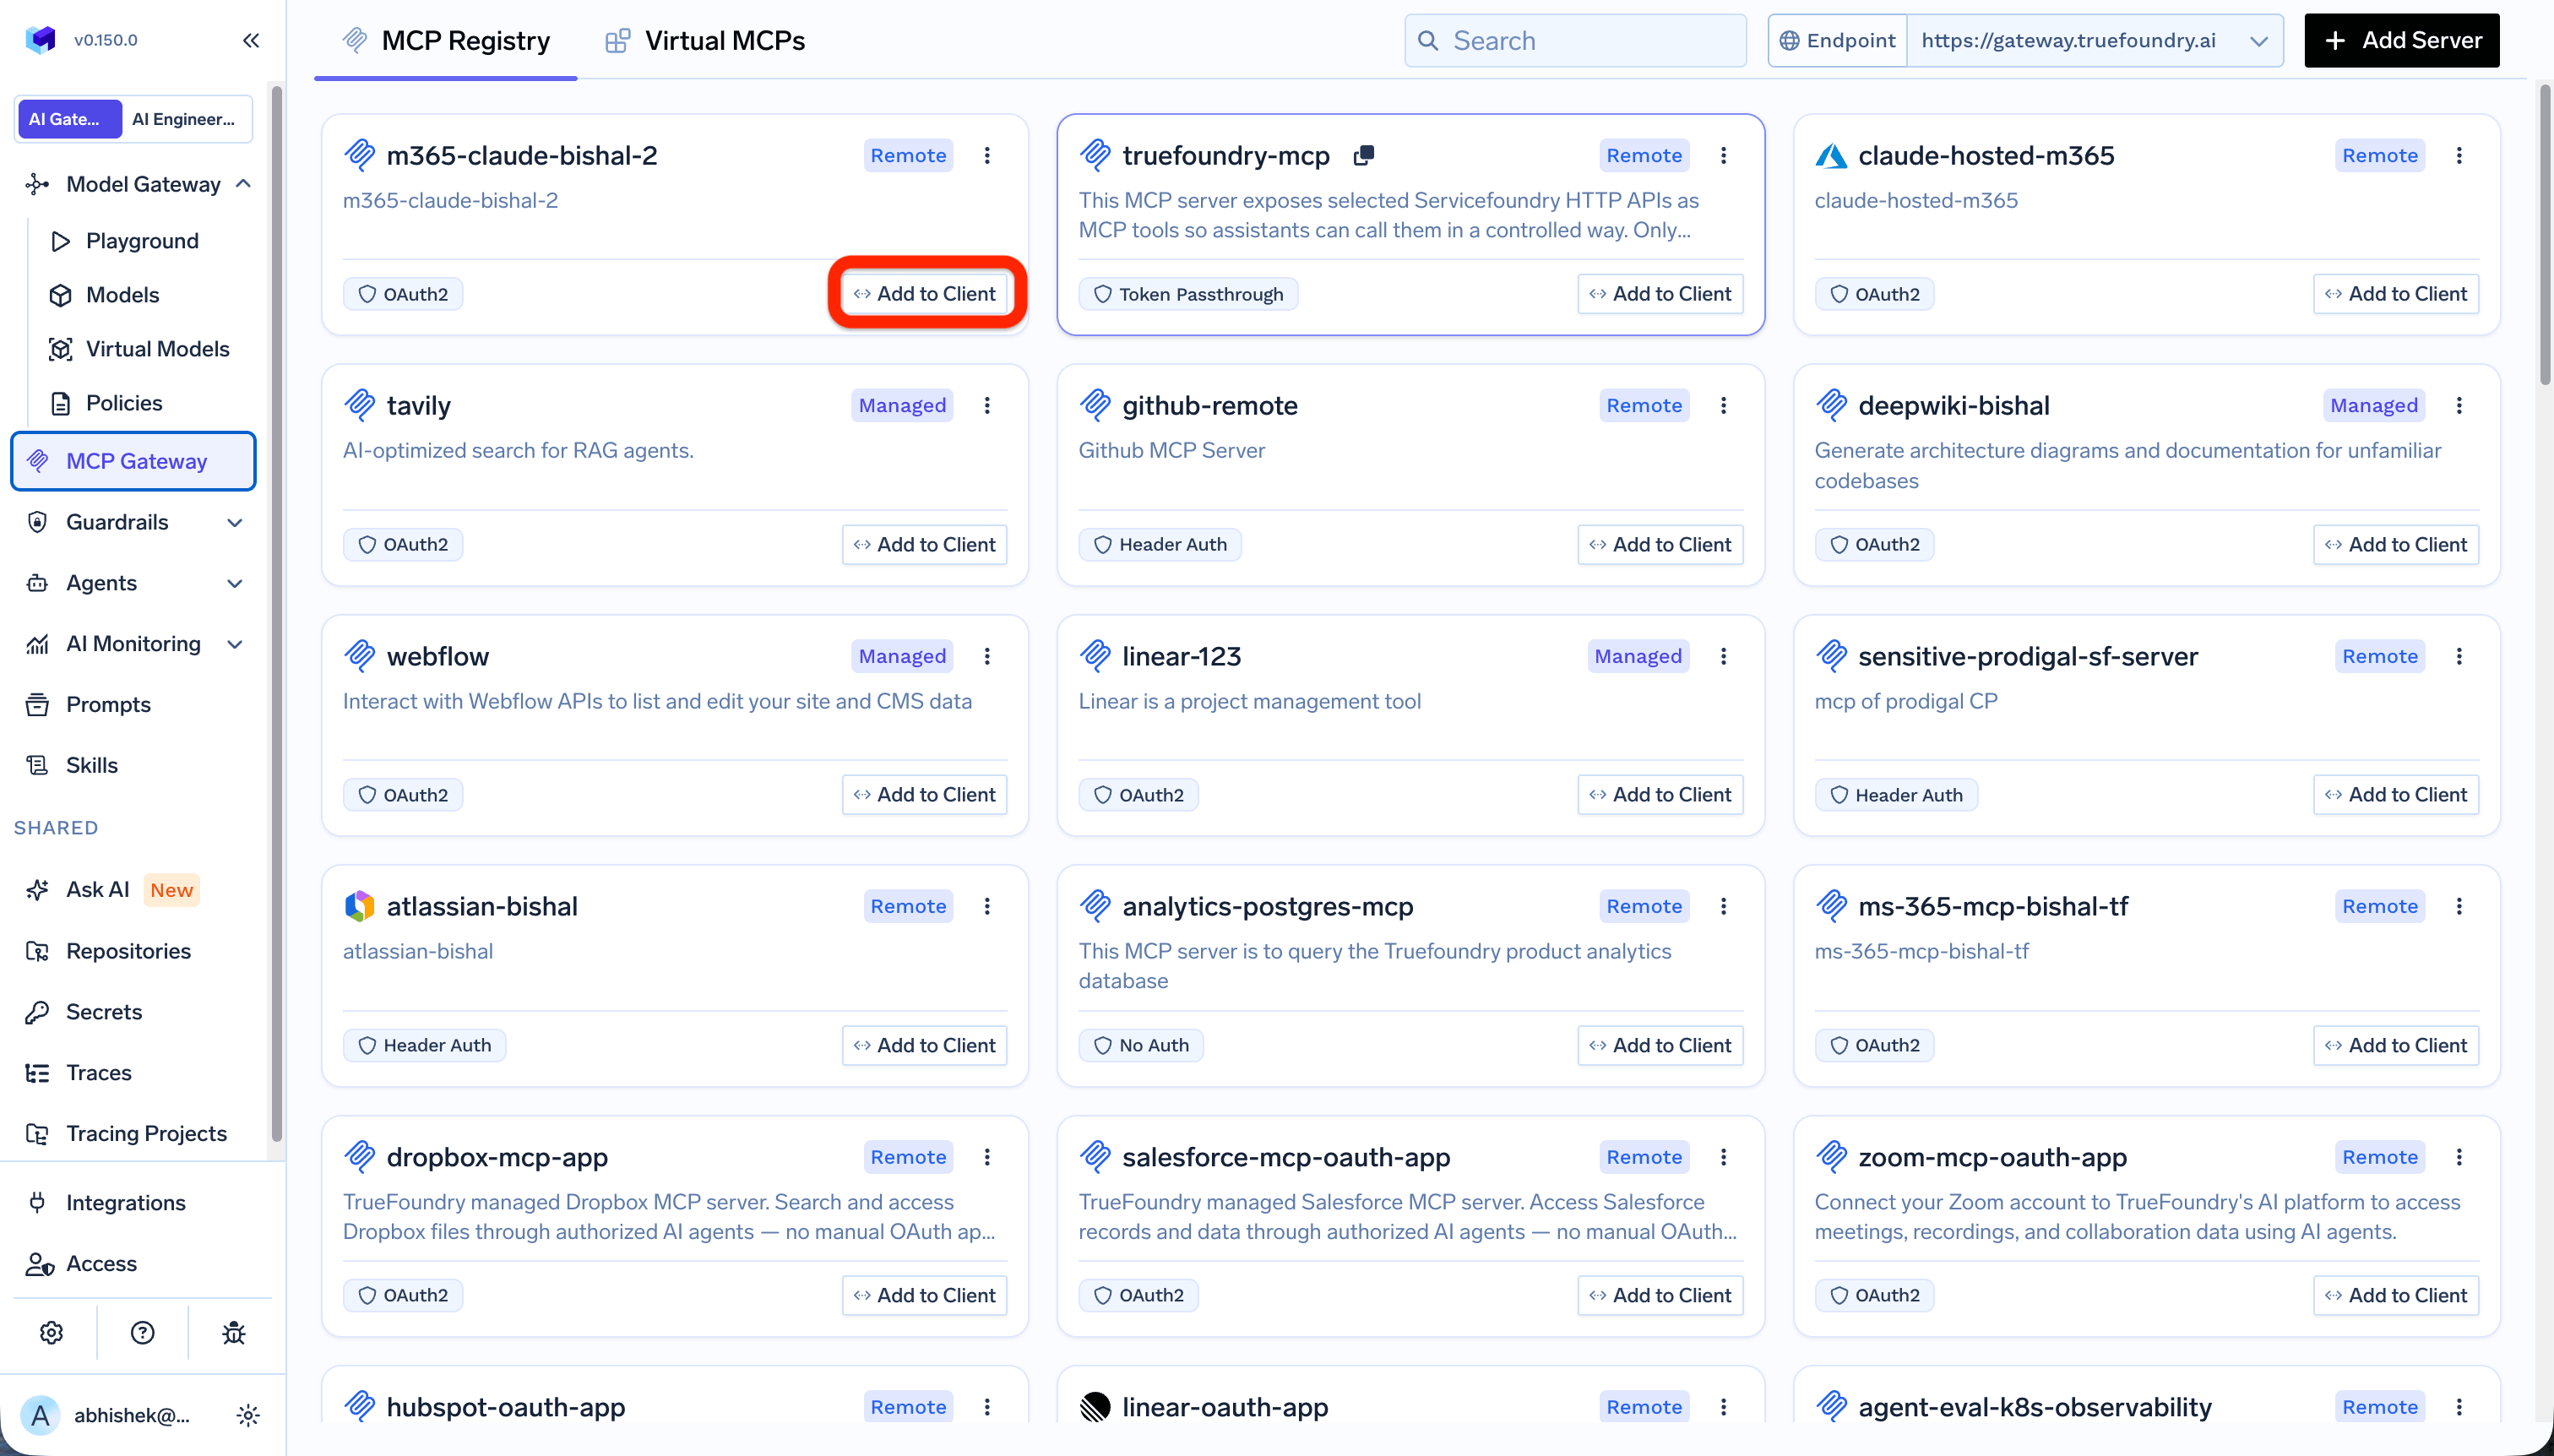
The Add to Client button on an MCP server page in TrueFoundry
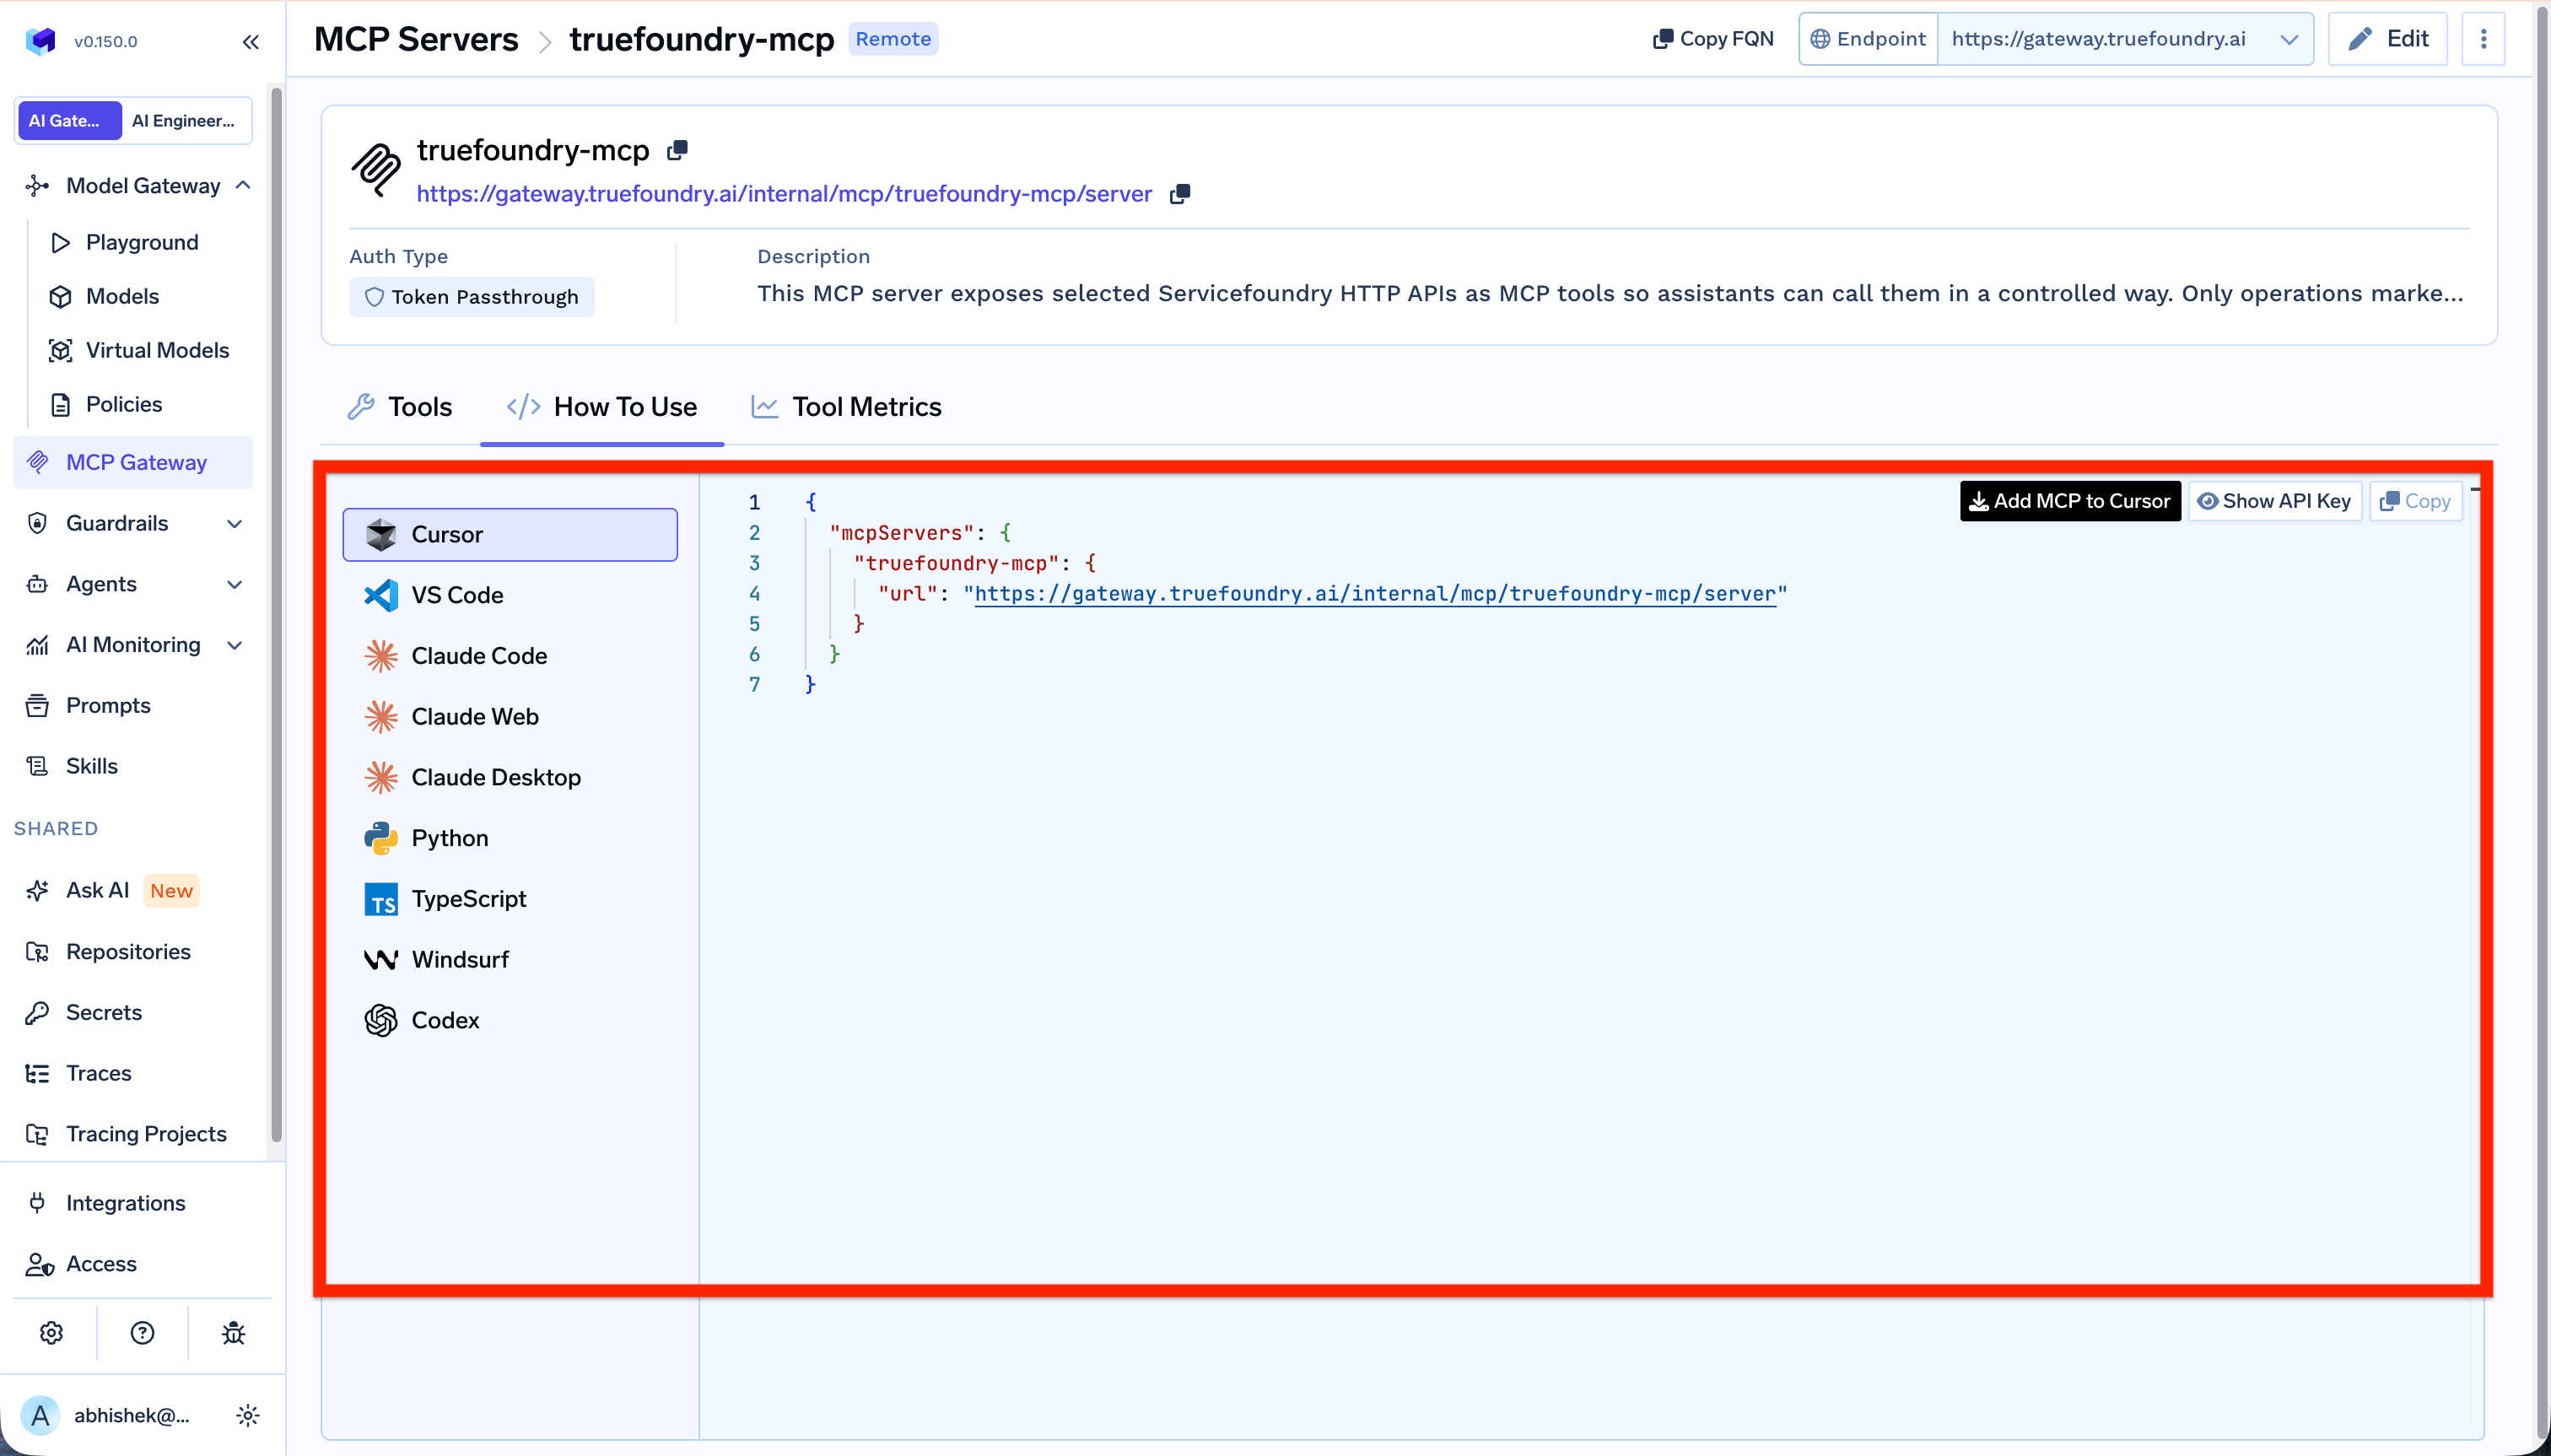
The How To Use tab showing the AI Gateway URL and per-IDE instructions
- Cursor
- Claude Code
- VS Code
mcp.json: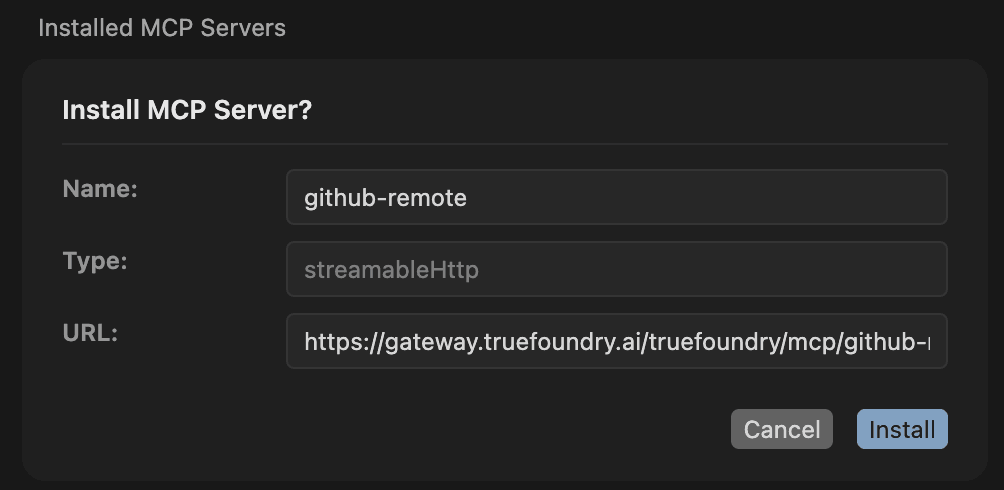
Cursor's Install MCP Server dialog after adding the server

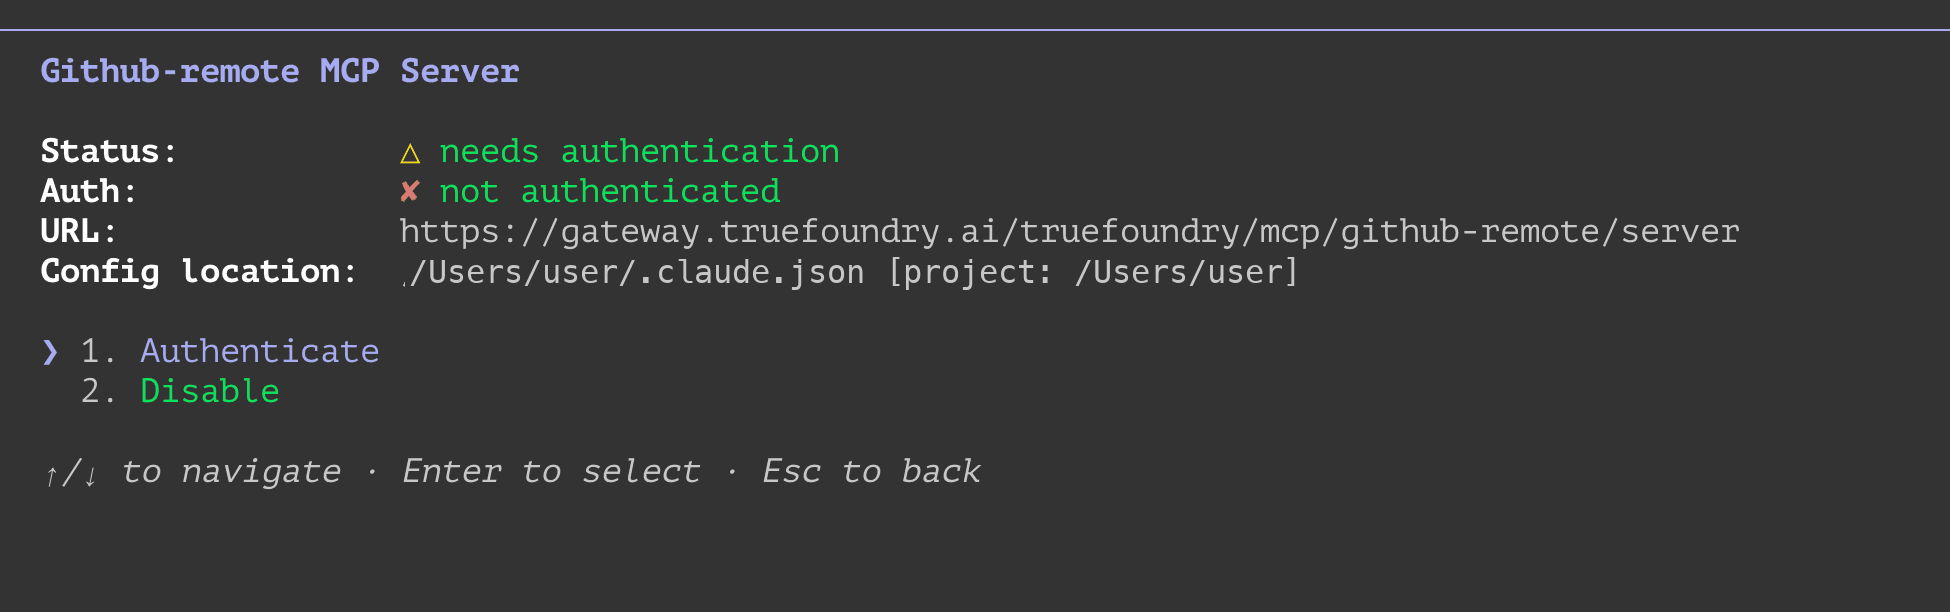
An added MCP server showing a 'Needs authentication' state with a Connect action

Sign in and approve the access request
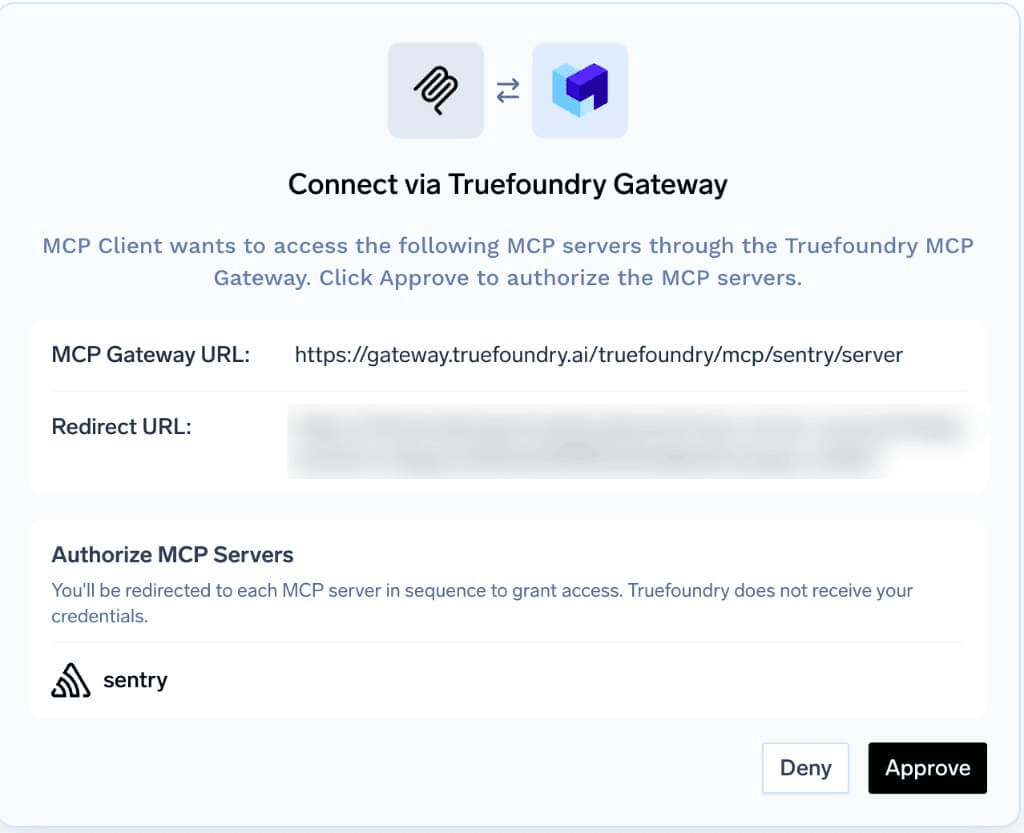
The TrueFoundry consent screen showing the IDE and the AI Gateway URL
Authorize access to the upstream provider (if needed)
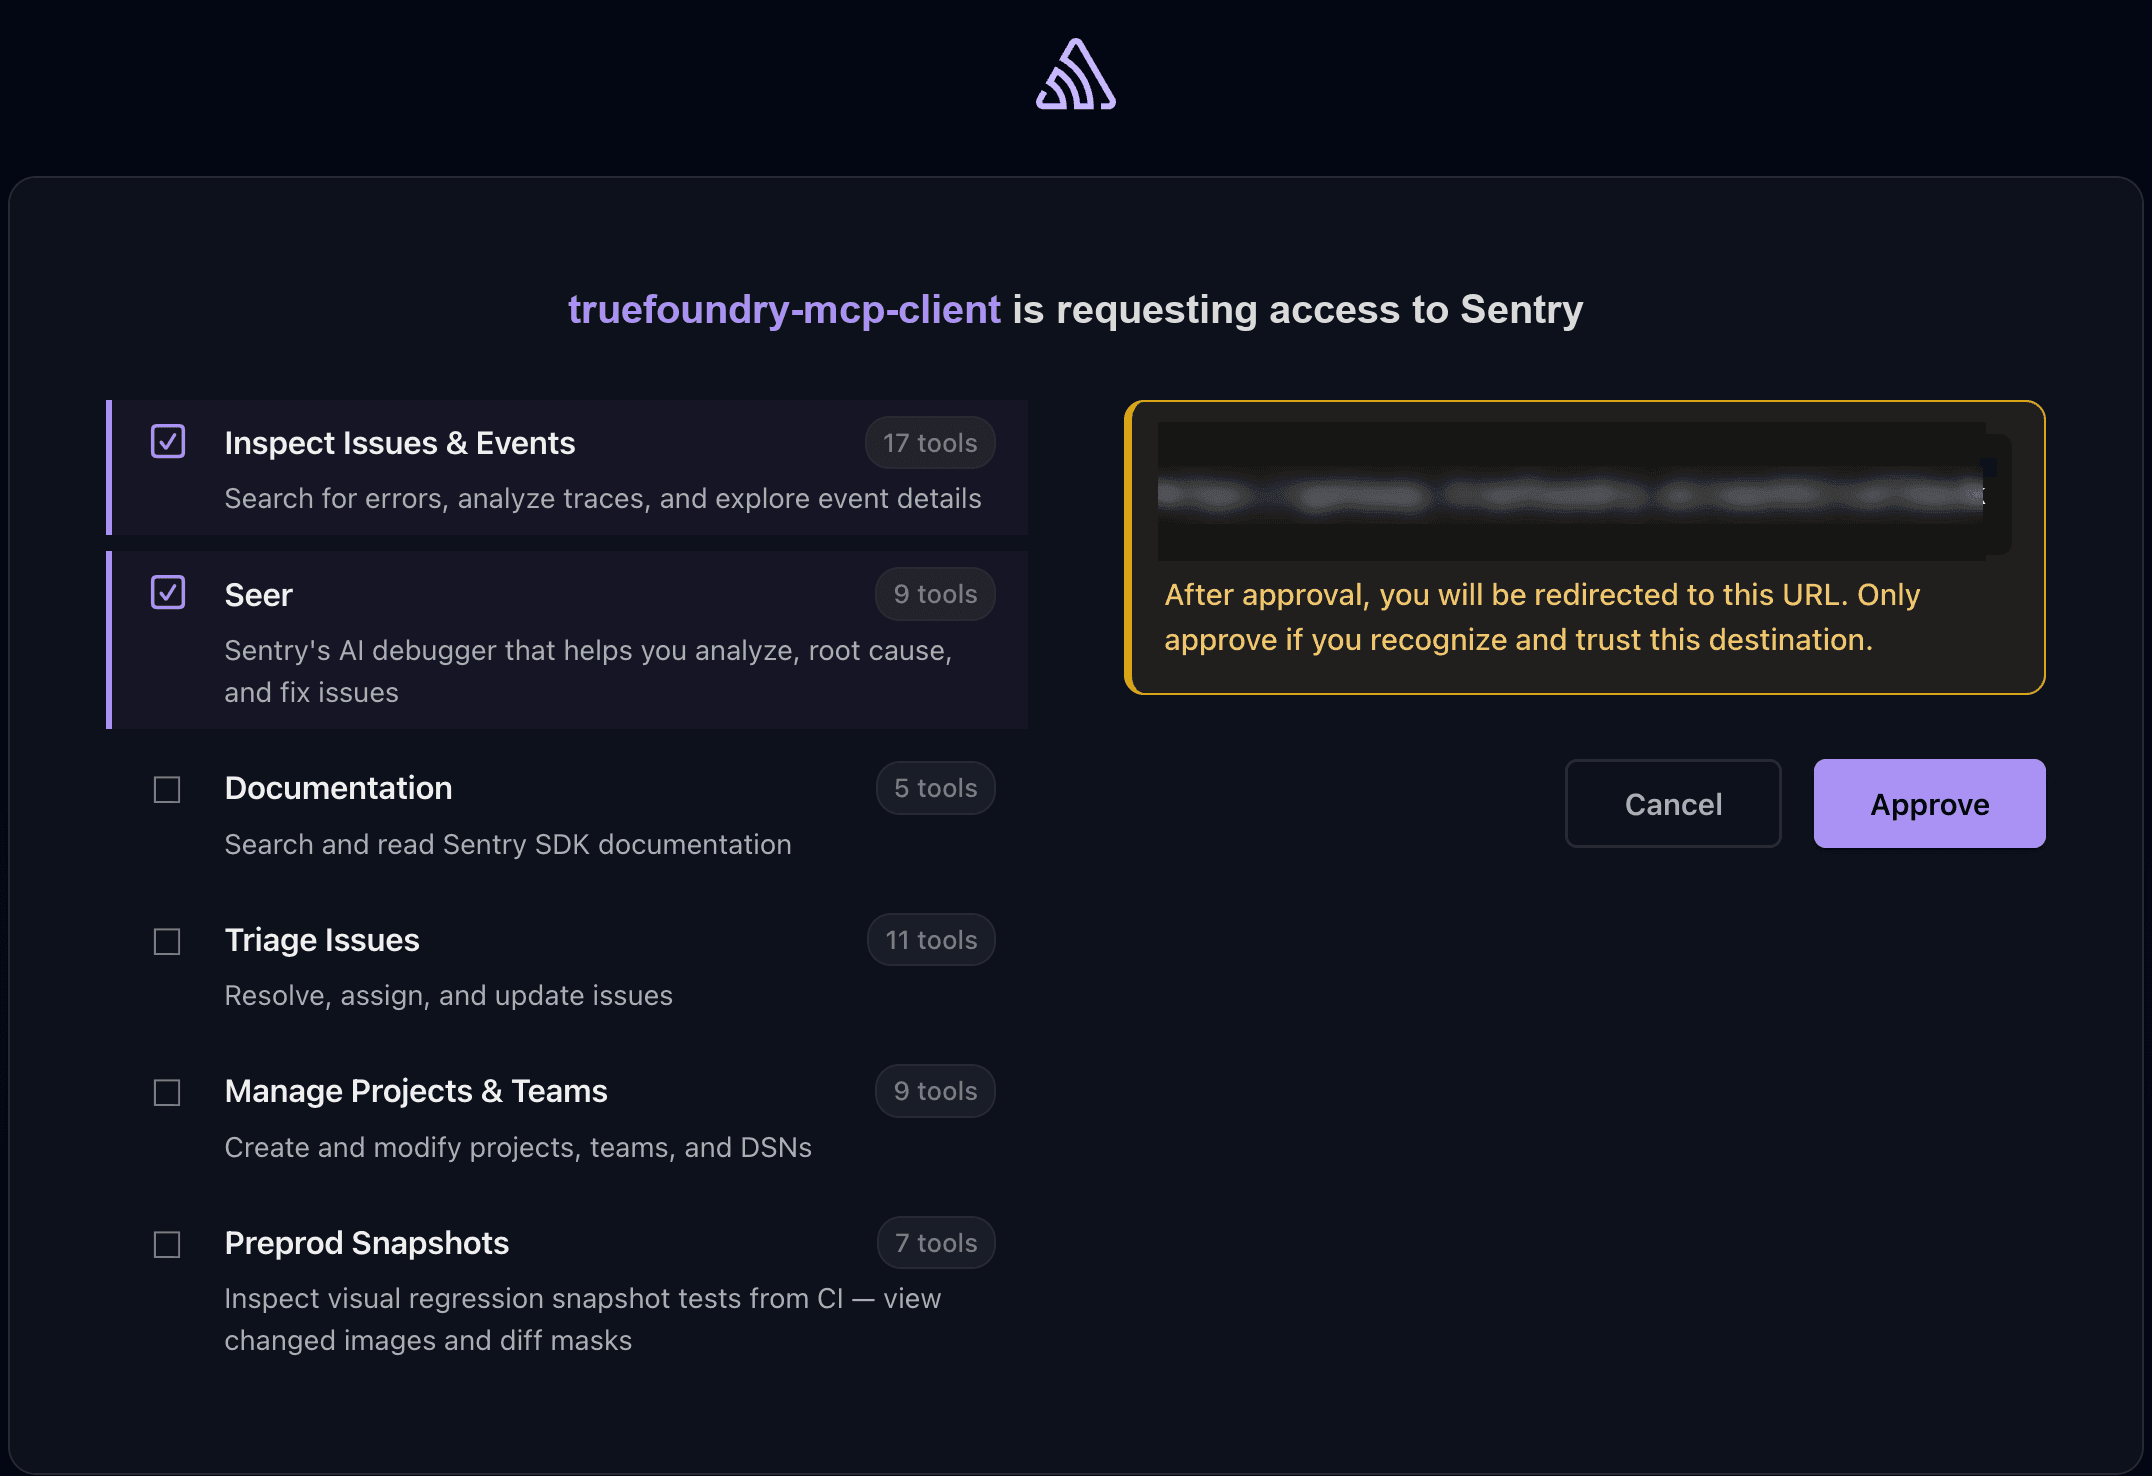
The upstream provider's authorization screen — here, Sentry requesting access with selectable tool scopes
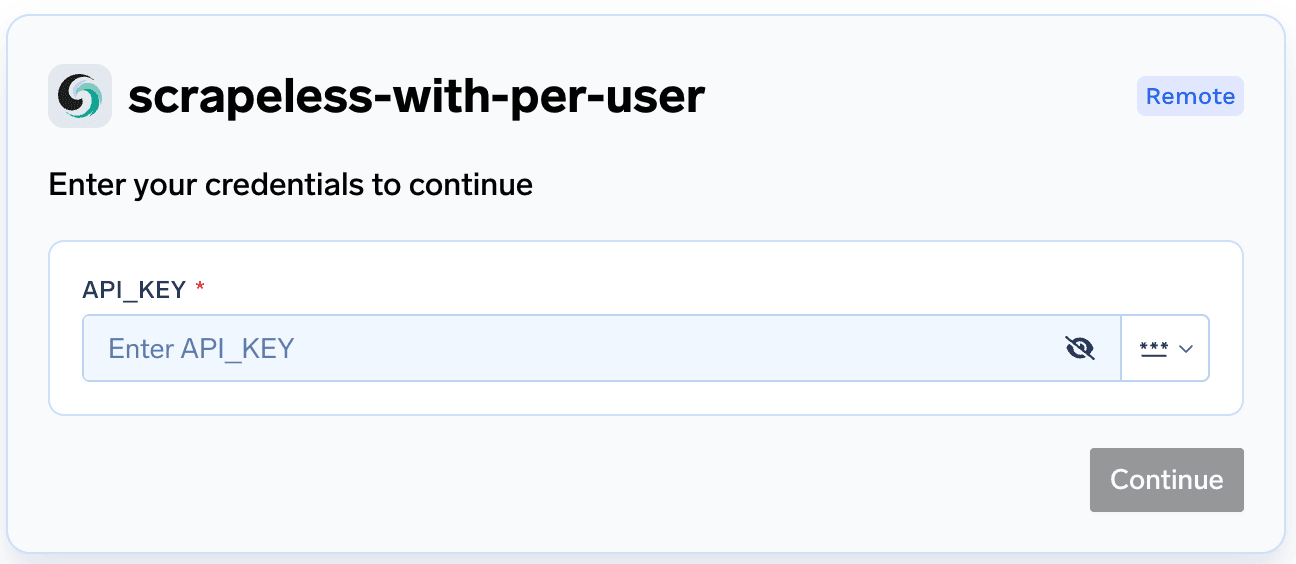
The prompt to enter your own upstream API key for the provider
Return to your IDE
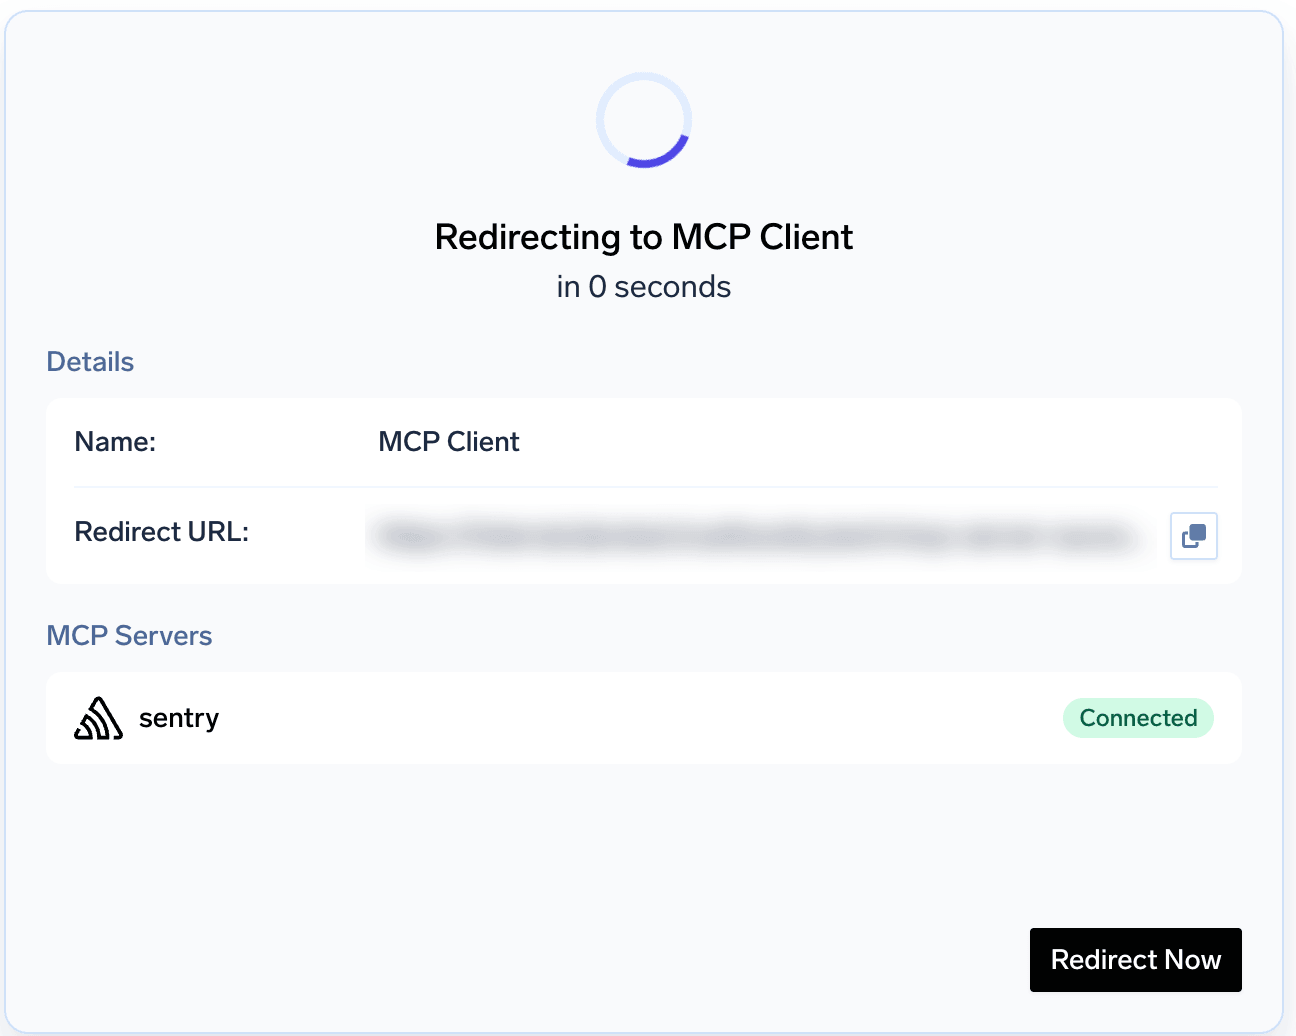
The browser redirect page that sends you back to your IDE after approval
Use the connected tools
FAQ and troubleshooting
Does every user need a TrueFoundry account to connect?
Does every user need a TrueFoundry account to connect?
- Configure SSO in TrueFoundry with your identity provider (Okta, Azure AD, or your own IDP) — see Identity Providers.
- Grant access to the group of developers or users who should be able to reach MCP servers.
- The IDE opens the browser to the TrueFoundry sign-in page.
- The user signs in through SSO (Okta, Azure AD, etc.).
- The user gives consent on the TrueFoundry approval screen.
- TrueFoundry creates their account automatically on first sign-in.
- The flow continues to the MCP provider’s OAuth screen (if needed) and then redirects back to the IDE.
Can I use a TrueFoundry API key instead of the browser sign-in?
Can I use a TrueFoundry API key instead of the browser sign-in?
- Your IDE or platform version does not support the browser-based OAuth flow.
- You are running a headless or CI environment where a browser sign-in is not possible.
Authorization header with the key to your IDE config. Pick your IDE below for the exact format.- Cursor
- Claude Code
- VS Code
Can I supply my upstream API key ahead of time instead of during the connection flow?
Can I supply my upstream API key ahead of time instead of during the connection flow?
How do I pass custom headers to the MCP server from my IDE?
How do I pass custom headers to the MCP server from my IDE?
x-tfy-mcp-headers header in your IDE configuration.Set x-tfy-mcp-headers to a JSON string where the key is the MCP server name and the value is an object of headers to forward:- Cursor
- Claude Code
- VS Code
The connection stopped working or I'm asked to sign in again
The connection stopped working or I'm asked to sign in again