

Create an Okta Authorization Server
- Navigate to Security > API in the Okta dashboard
- Click Add Authorization Server
- Configure with the following:
- Name:
CalculatorMCPAuthServer(or your preferred name) - Audience:
https://calculator-mcp-server.example.com(this will be your MCP server’s identifier) - Description: Authorization server for Calculator MCP servers
- Name:
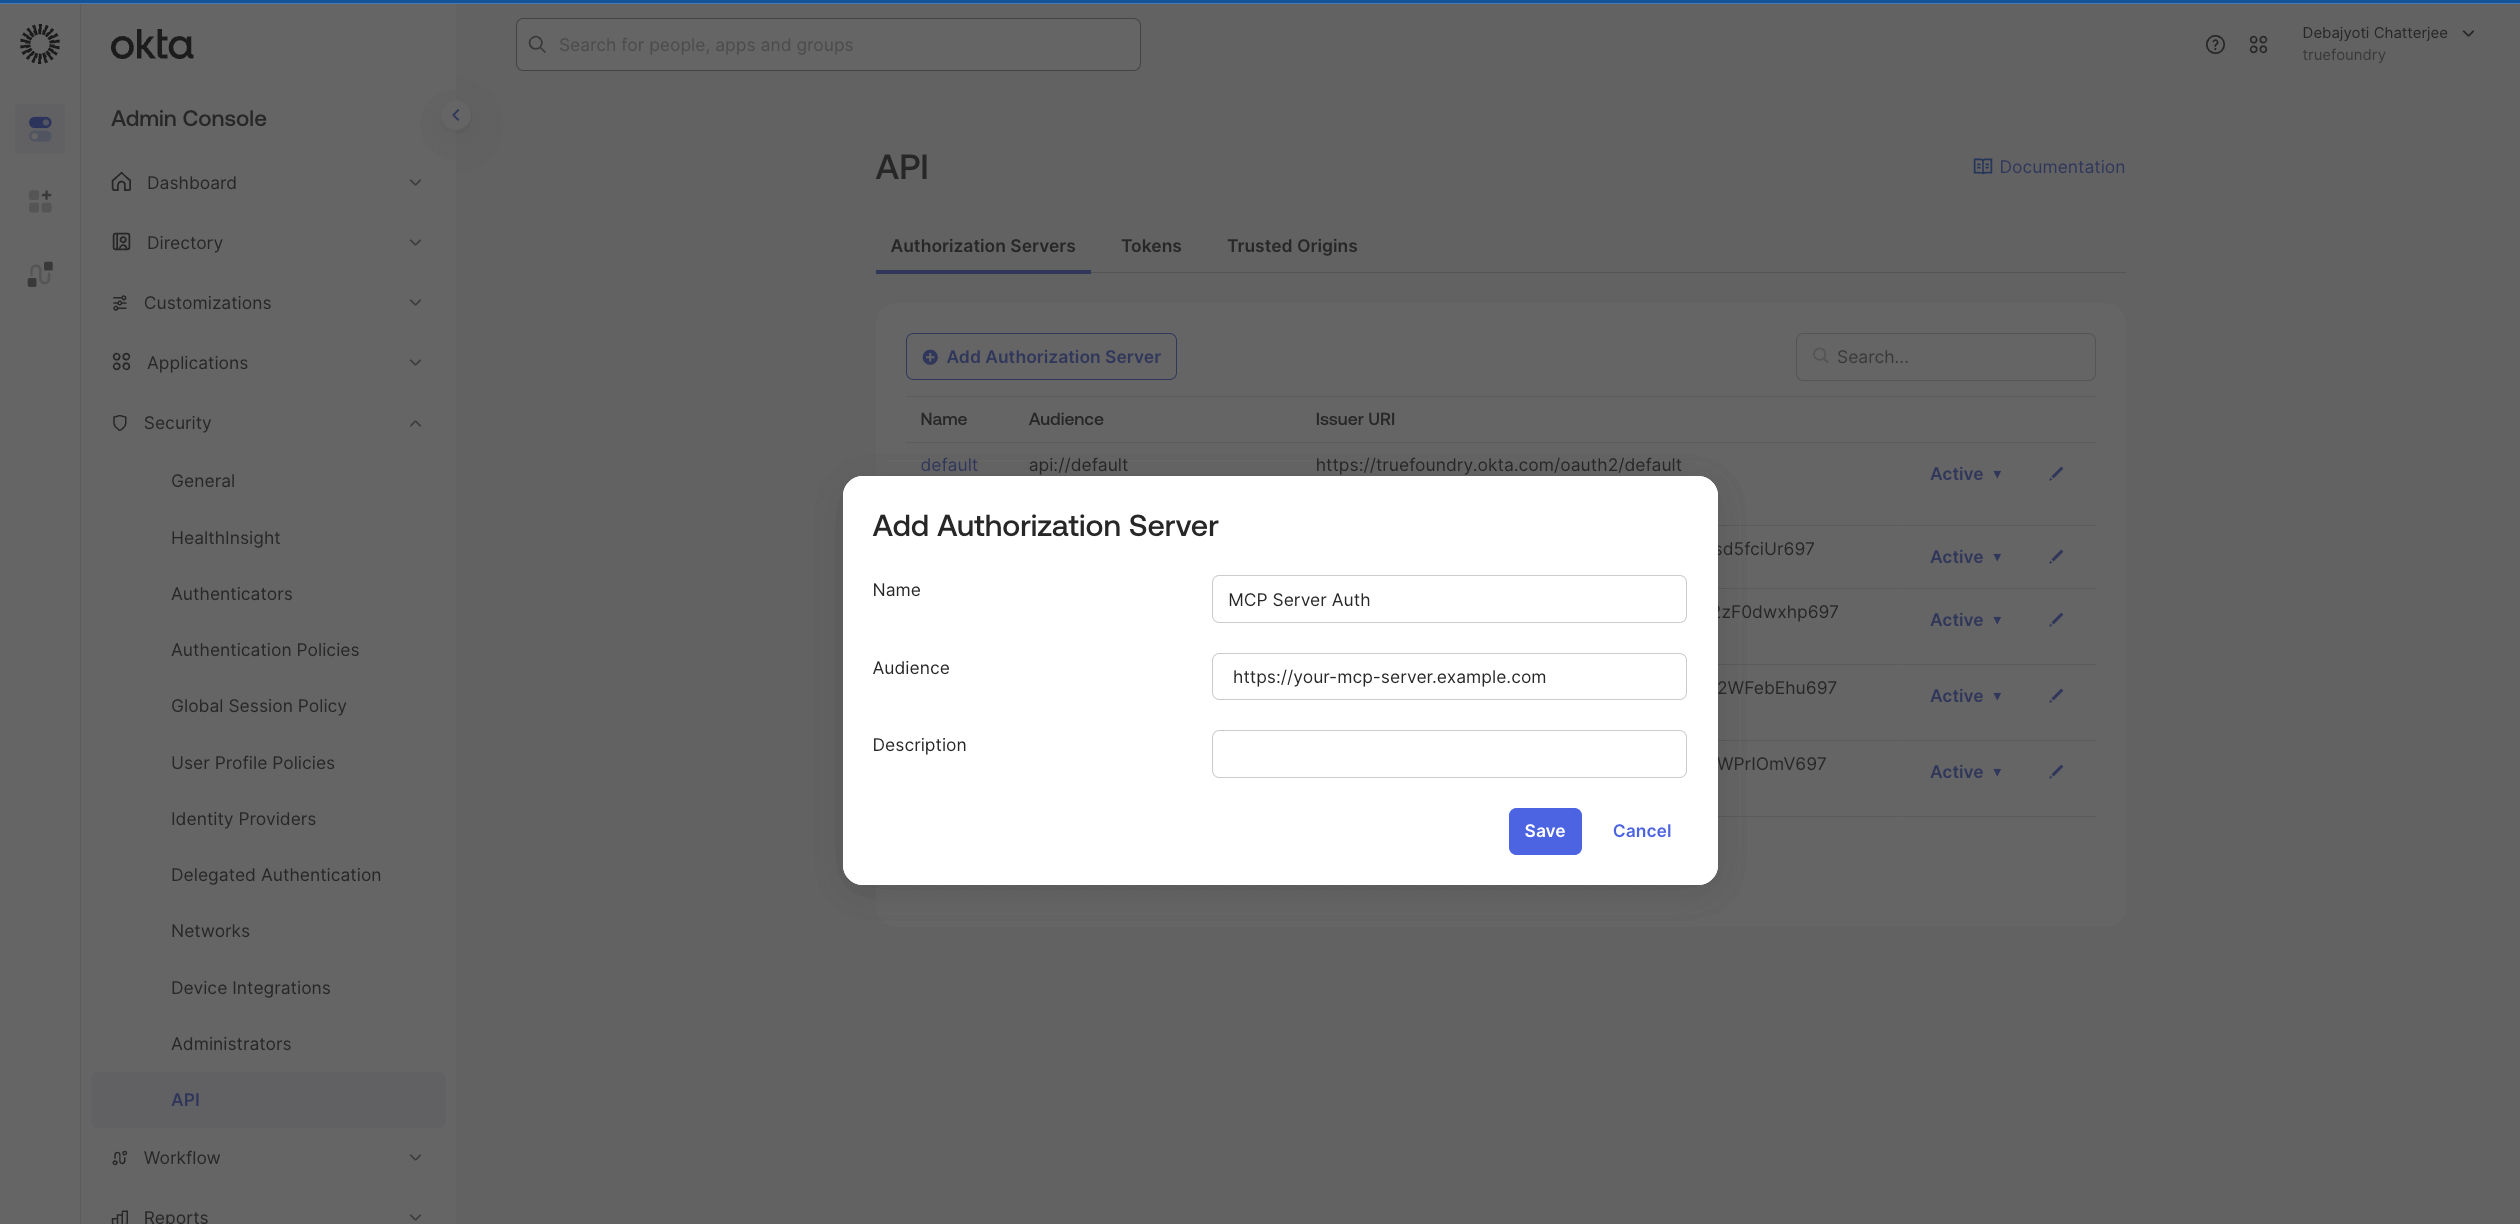
- Click Save
- Note the Issuer URI from the Settings tab (e.g.,
https://dev-12345678.okta.com/oauth2/aus123abc)
- Configure Scopes: Define what permissions your application can request.
- In your Authorization Server, go to the Scopes tab
- Add custom scopes if needed (e.g., read:data, write:data)
- For the calculator MCP server, we will add two scopes -
calculator.addandcalculator.subtract
default for now.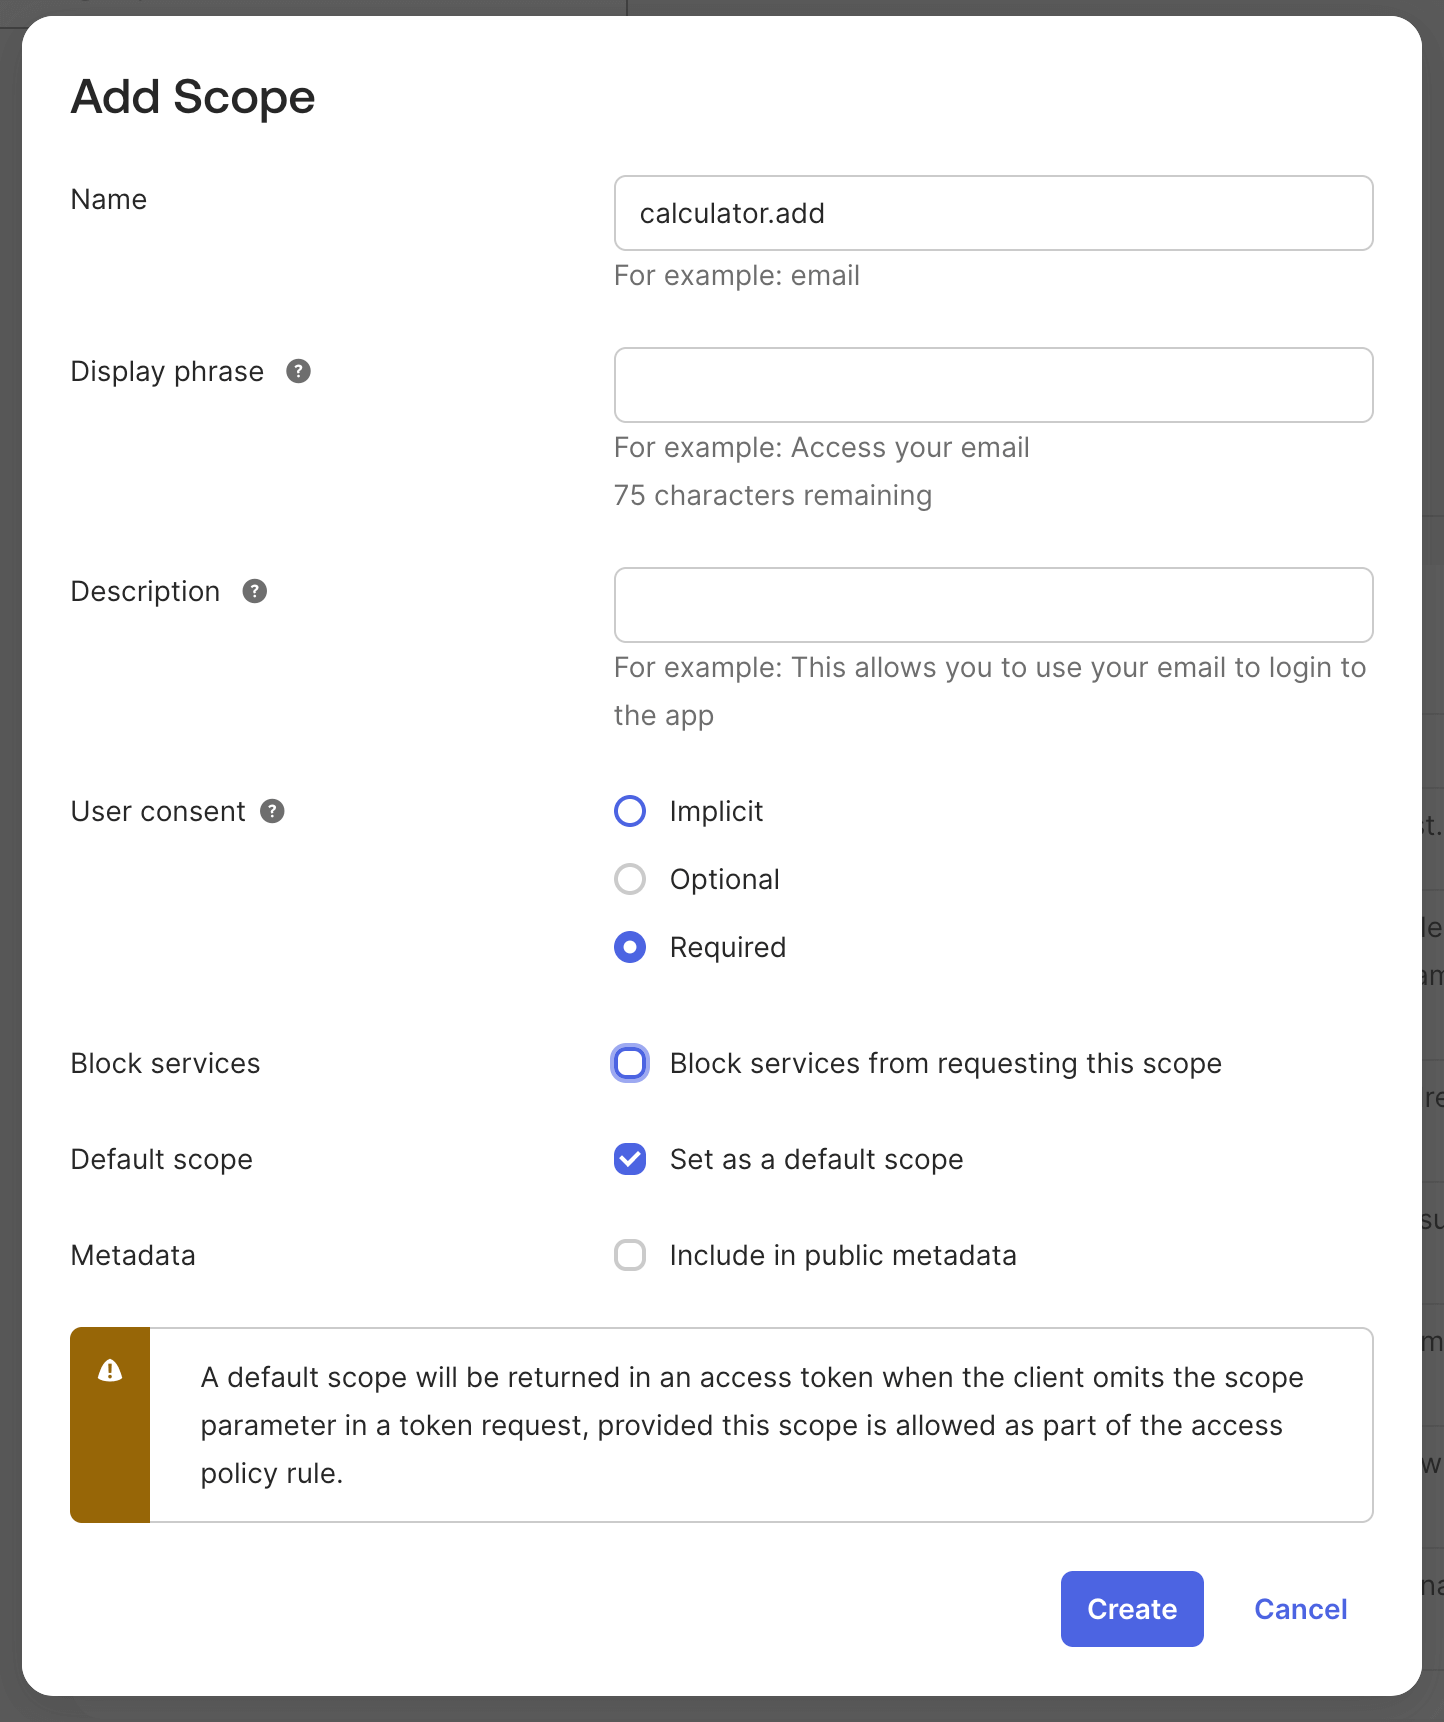
Create an Okta App
Instructions to create the Okta app
Instructions to create the Okta app
- Navigate to Applications > Applications in the Okta dashboard
- Click Create App Integration
- Select OIDC - OpenID Connect
- Select Web Application as the application type
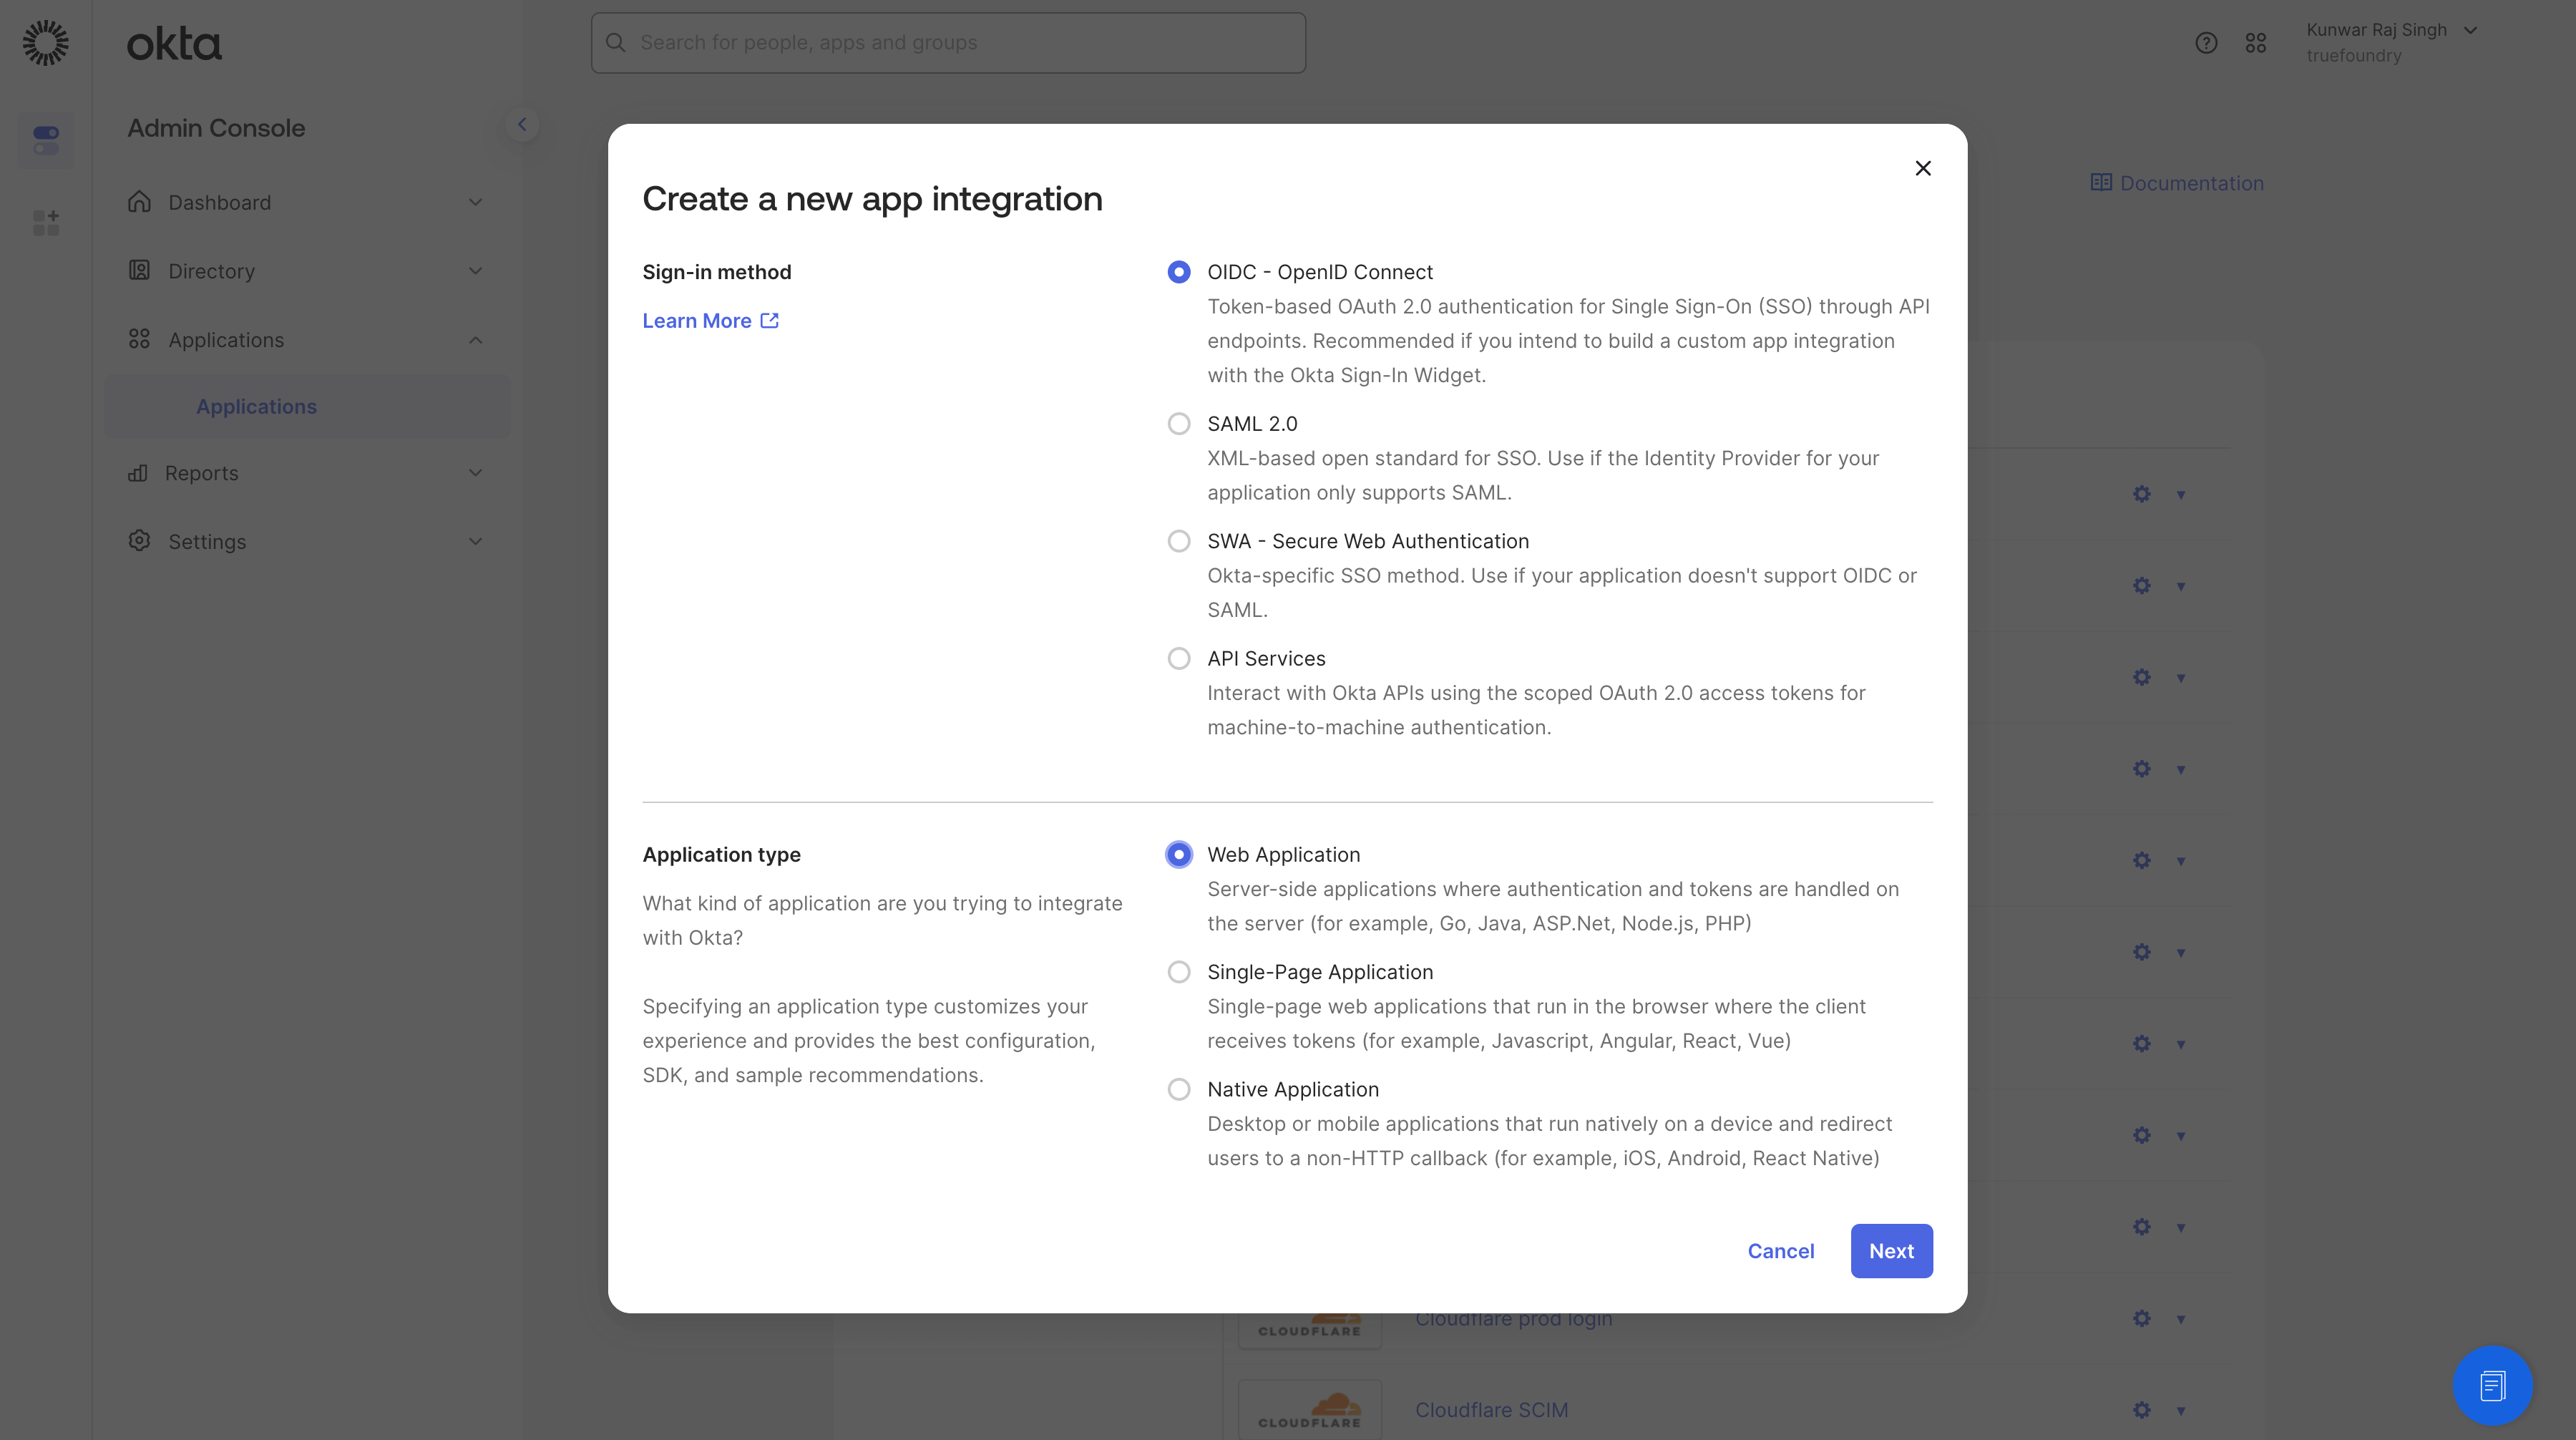
- Configure the application:
- App integration name:
CalculatorMCPClient - Grant type: Check:
- Client Credentials (required for machine-to-machine authentication)
- Authorization Code (required for user authentication via Gateway)
- Refresh Token (required to enable automatic token refresh)
- Sign-in redirect URIs: Add
https://<your-tfy-control-plane-url>/api/svc/v1/llm-gateway/mcp-servers/oauth2/callback
- App integration name:
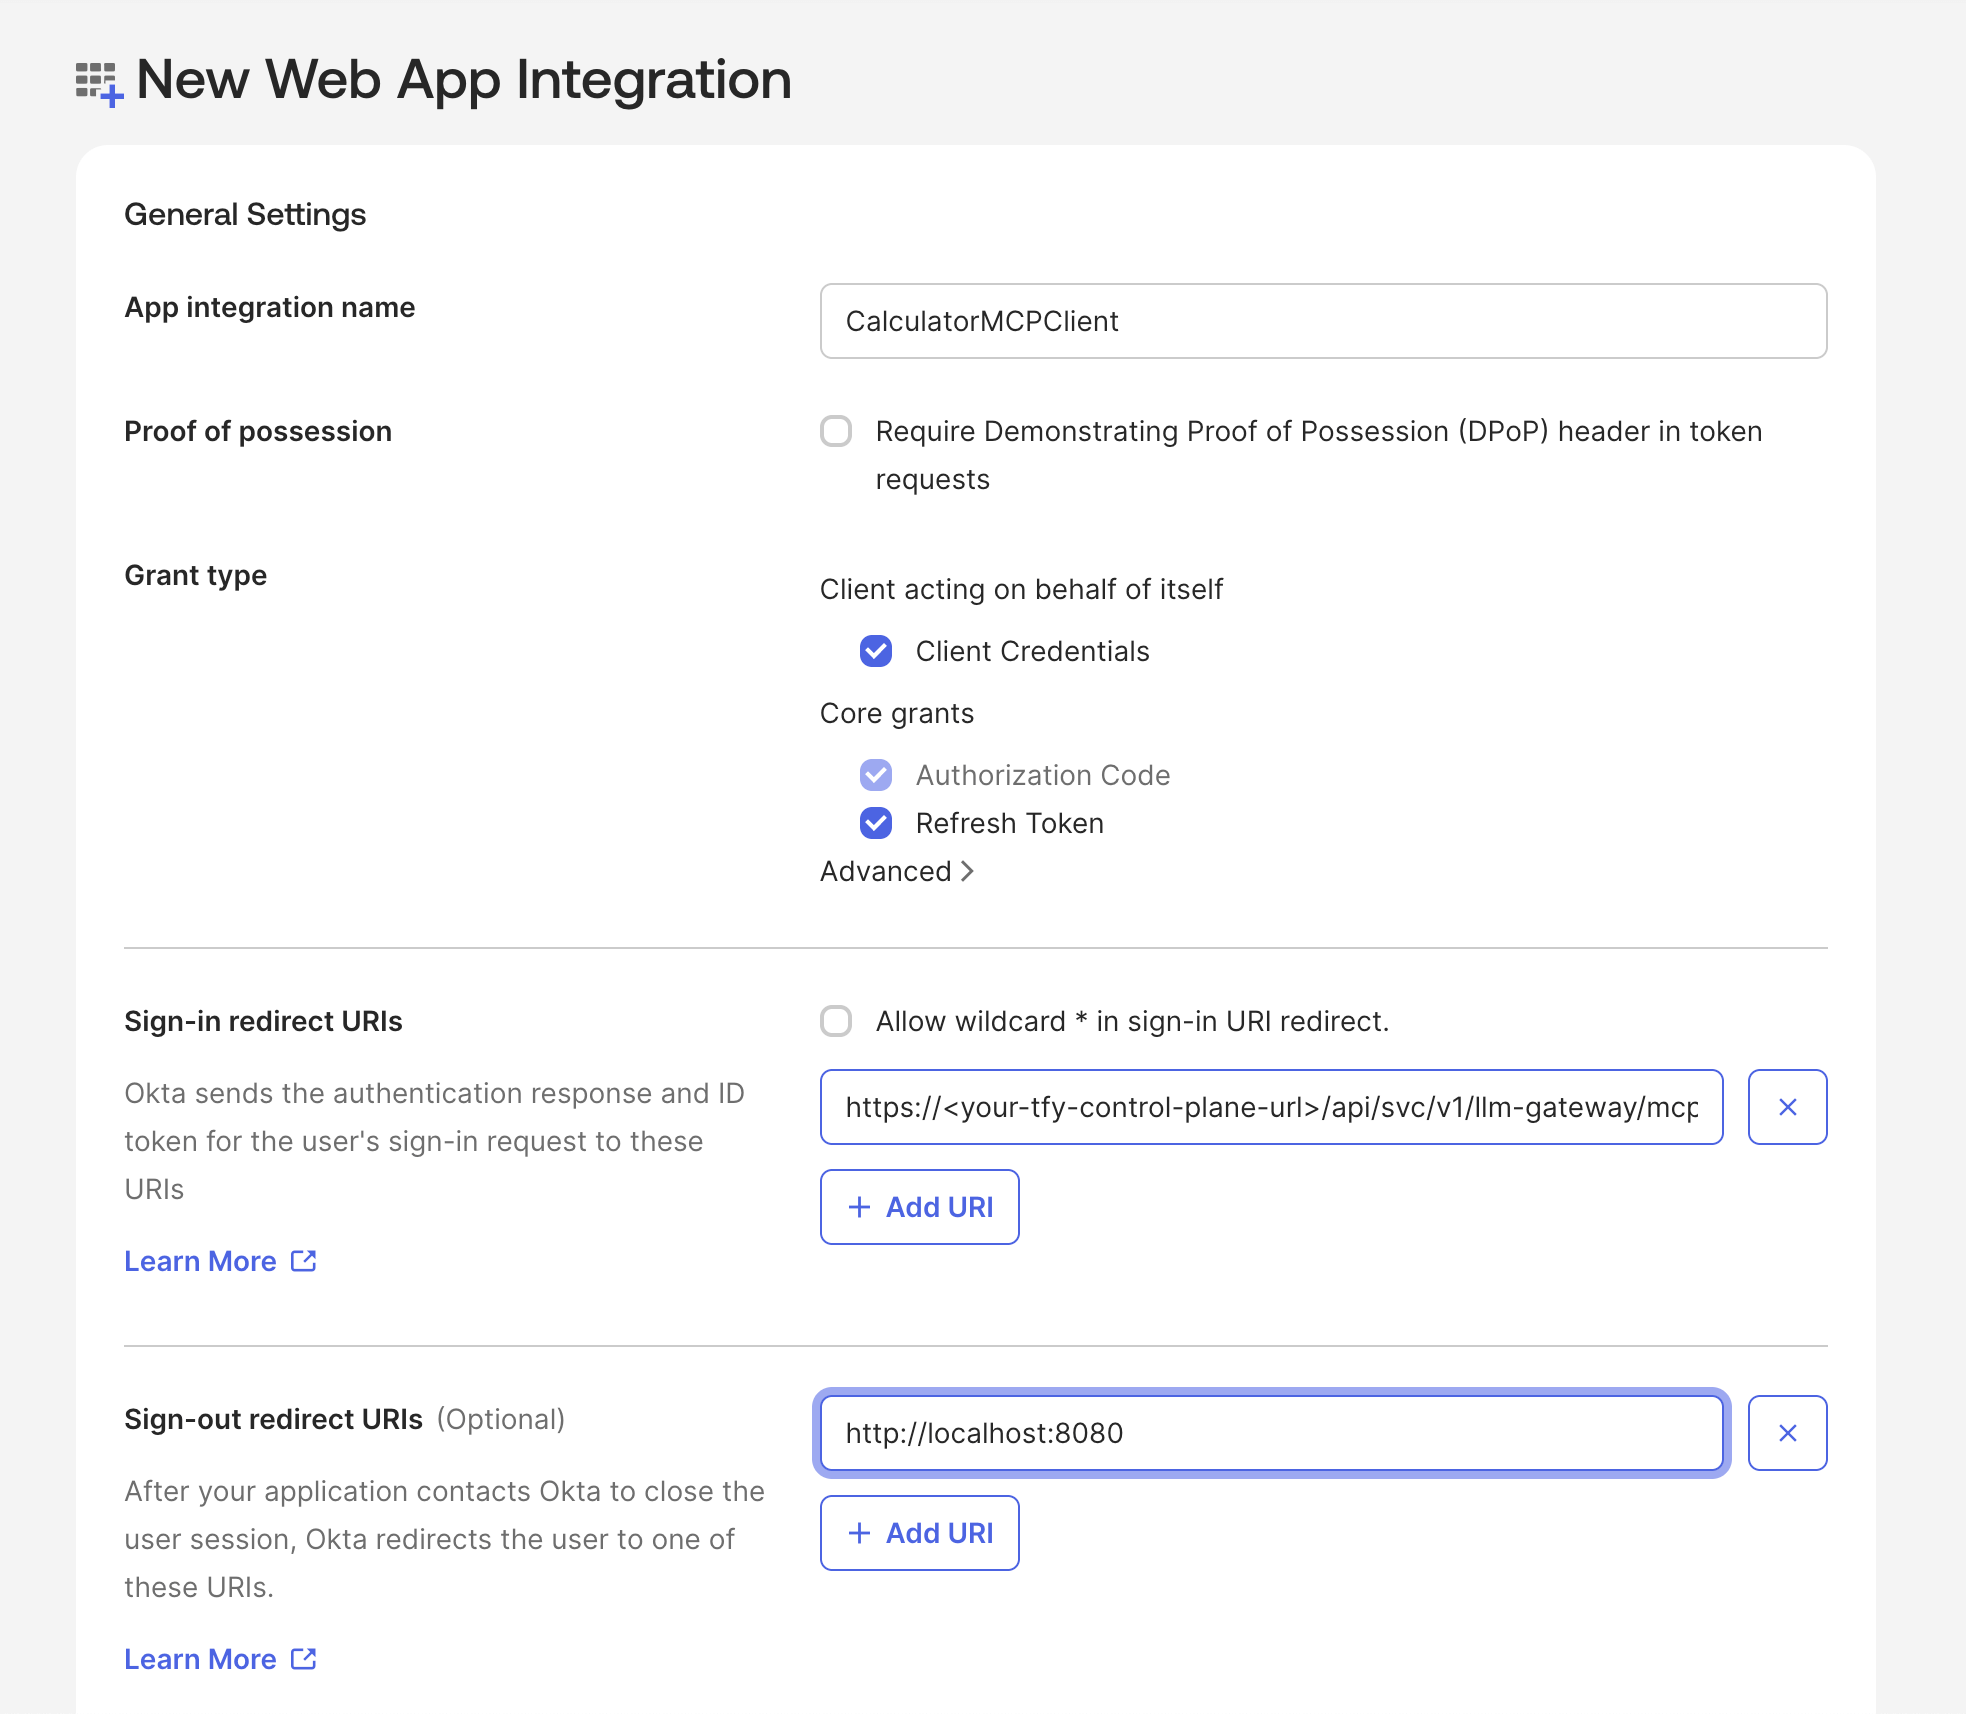
- Click Save
- Note the Client ID and Client Secret from the application page
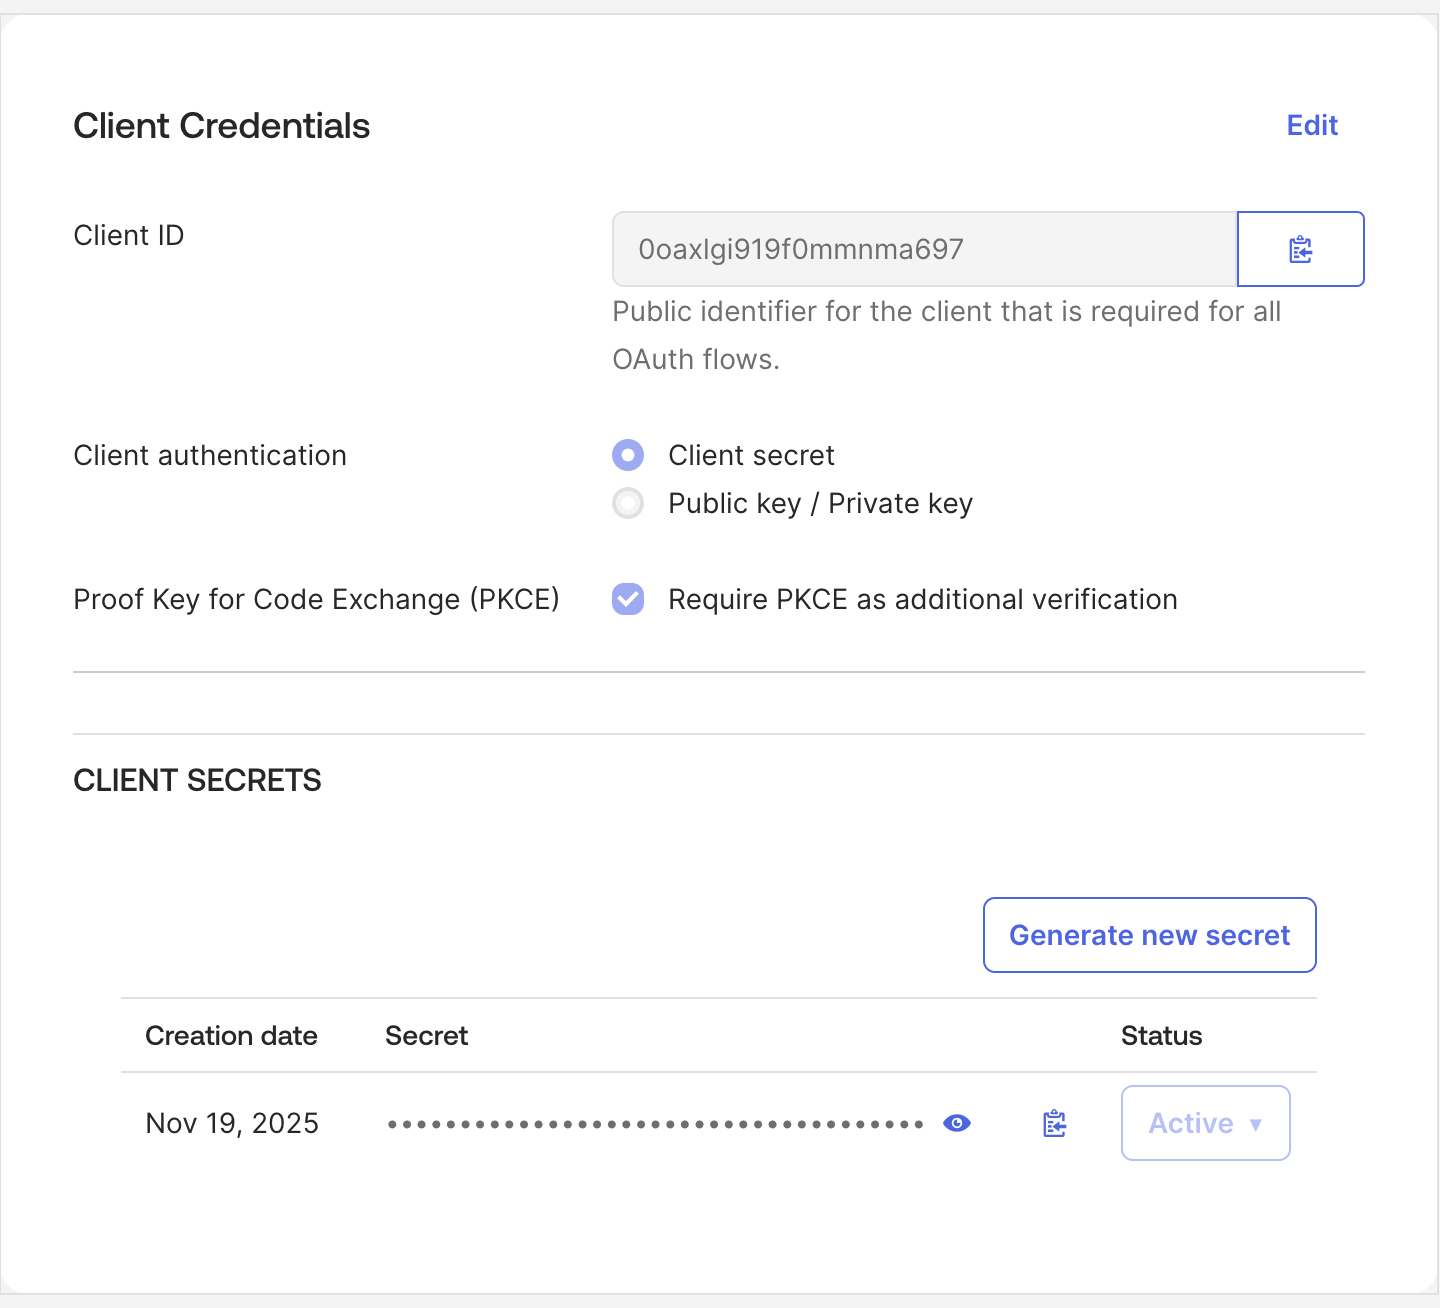
Assign the Okta App to the Authorization Server
Instructions to create the access policy and rule
Instructions to create the access policy and rule
- In your Authorization Server, go to the Access Policies tab.
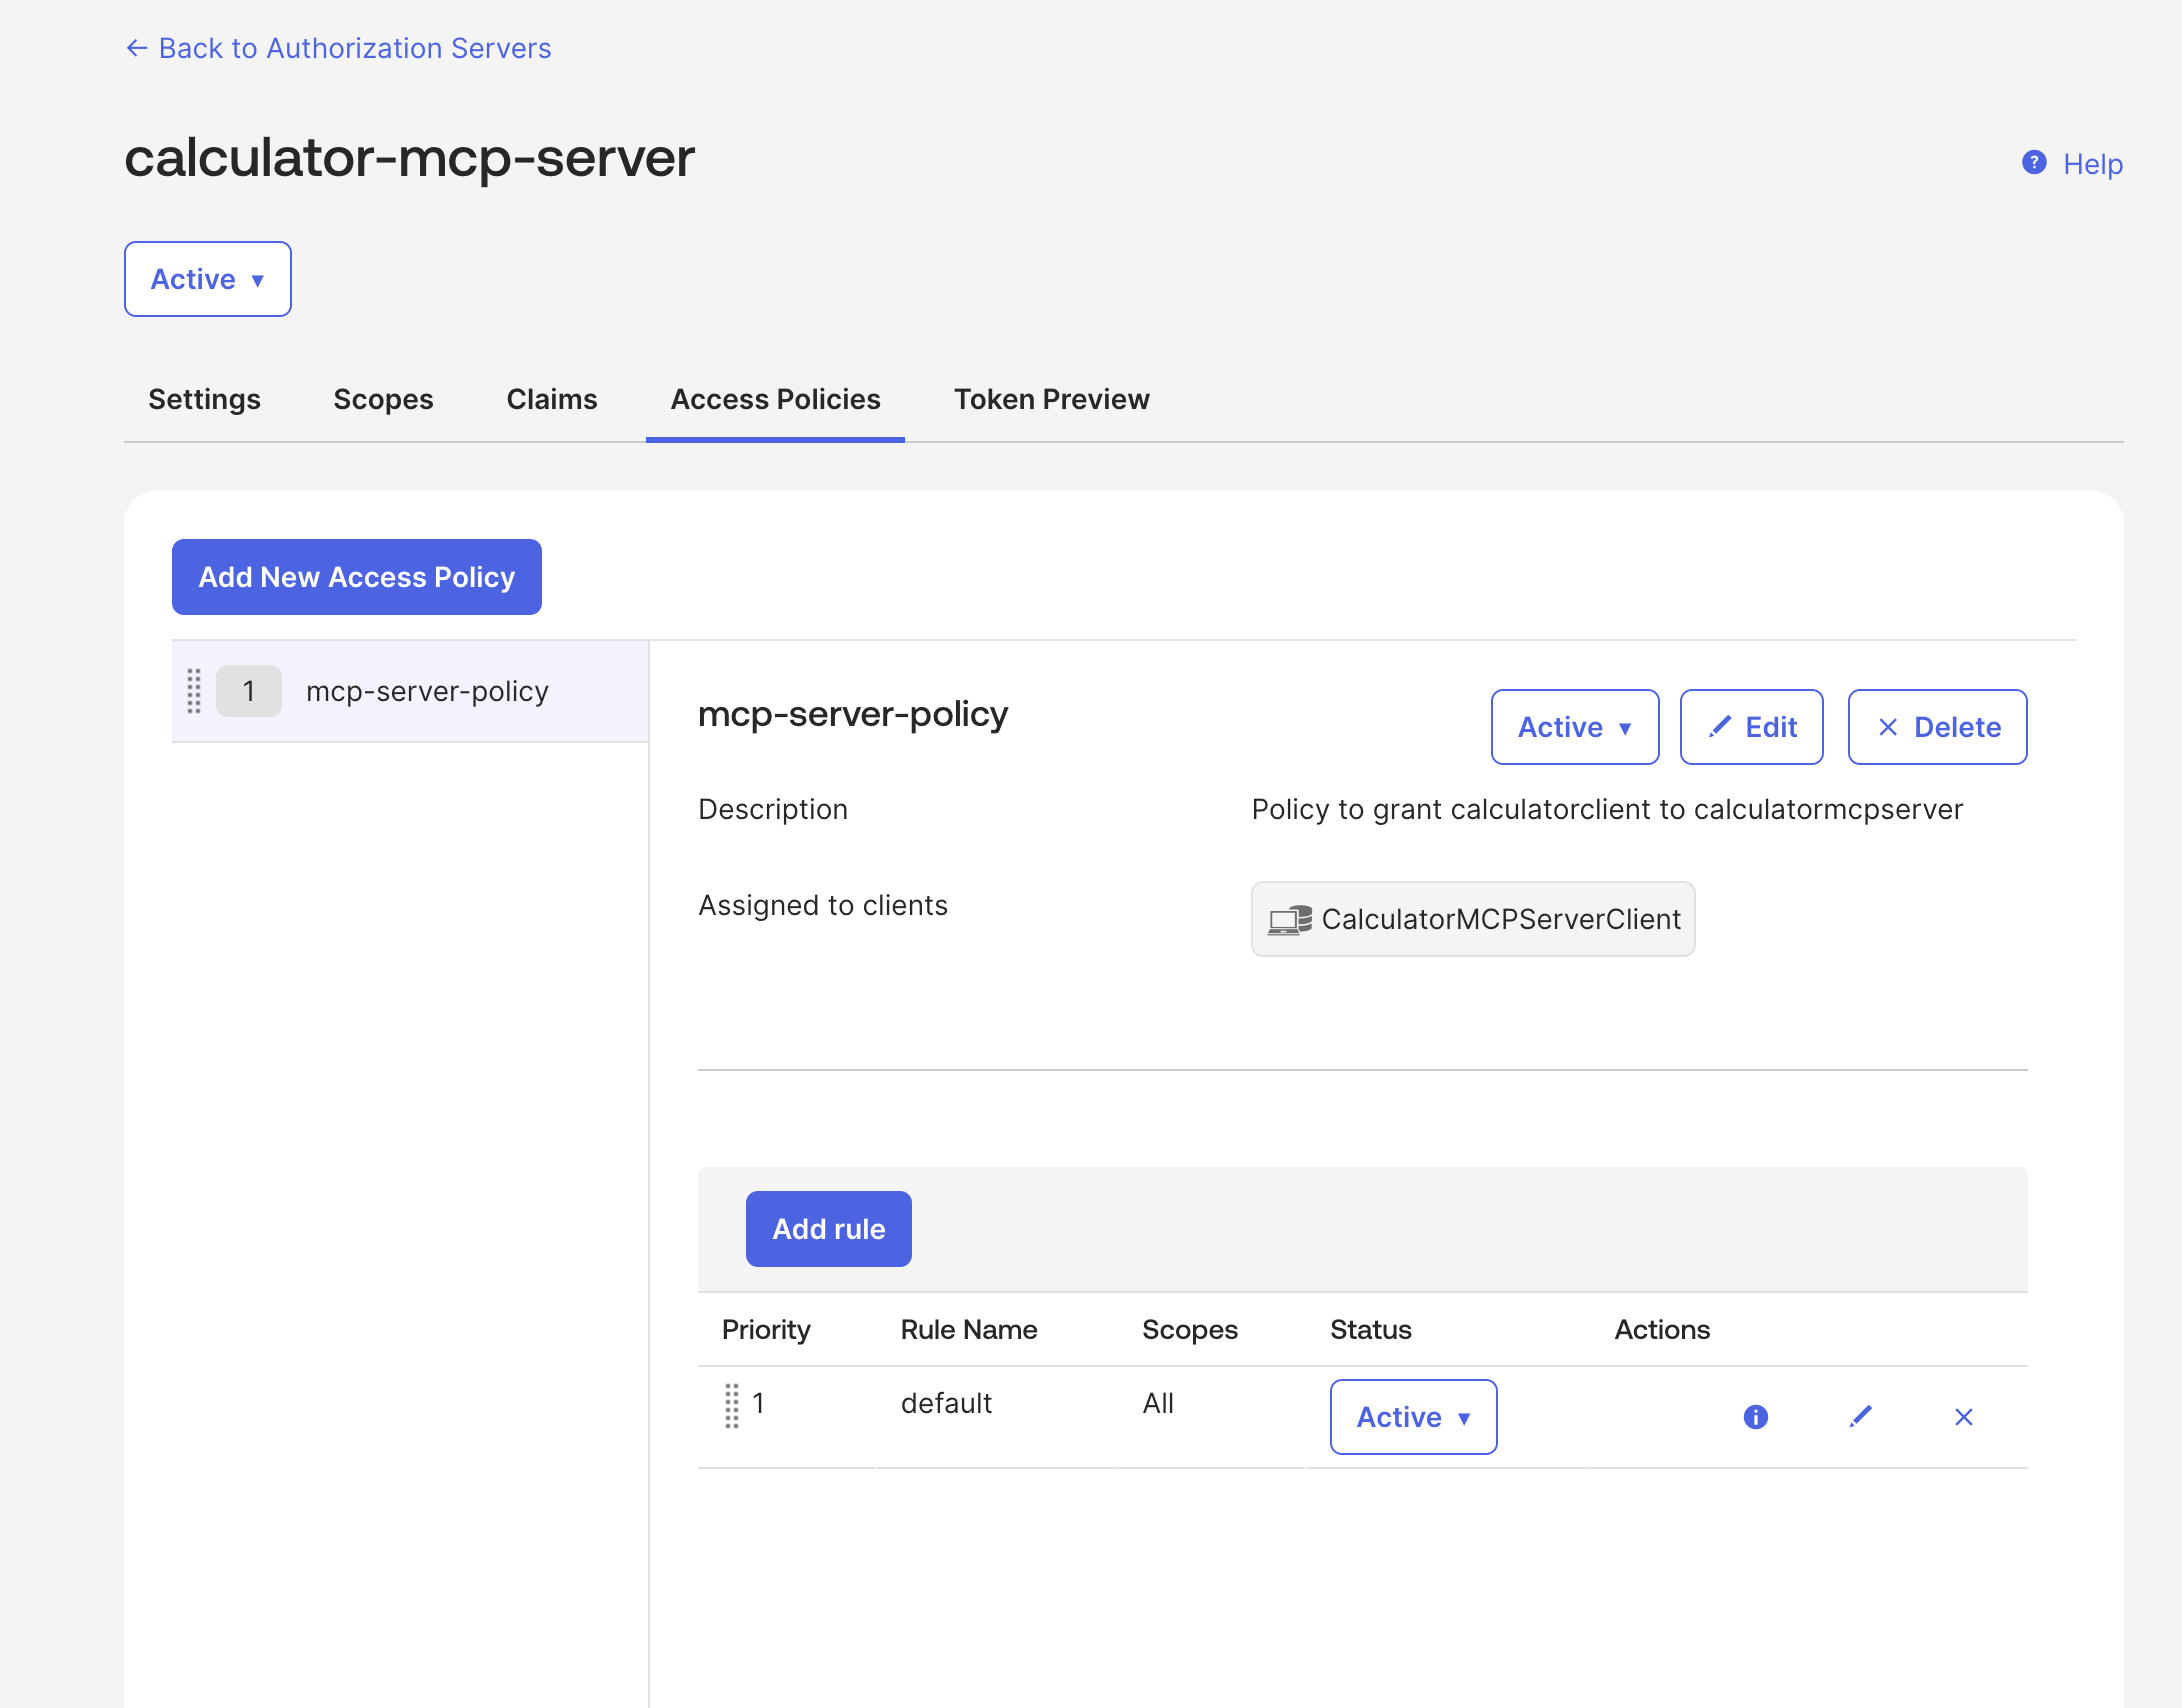
- Click Add New Access Policy
- Configure:
- Name:
CalculatorMCPAccessPolicy - Description: Policy for MCP server access
- Assign to: Select your OAuth application
- Name:
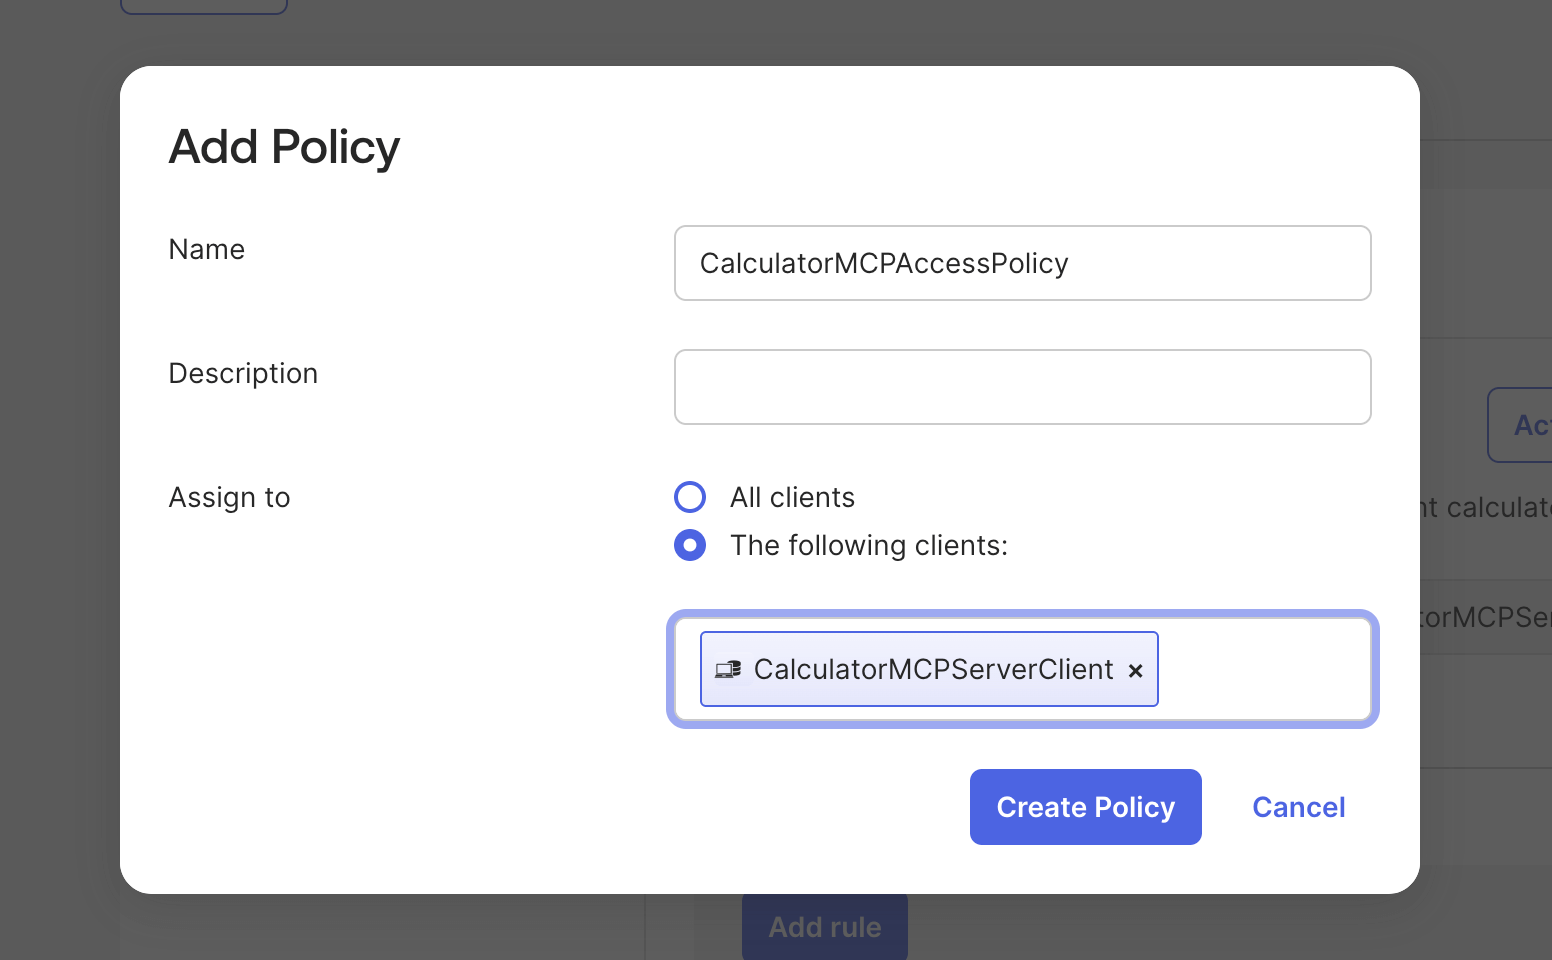
- Click Create Policy
- Click Add Rule to create a default rule:
- Rule Name:
Default Rule - Grant type is: Check Authorization Code and Device Authorization and Client Credentials
- User is: Any user assigned the app
- Scopes requested: Any scopes
- Access token lifetime: 1 hour (or as per your requirements)
- Rule Name:
- Click Create Rule
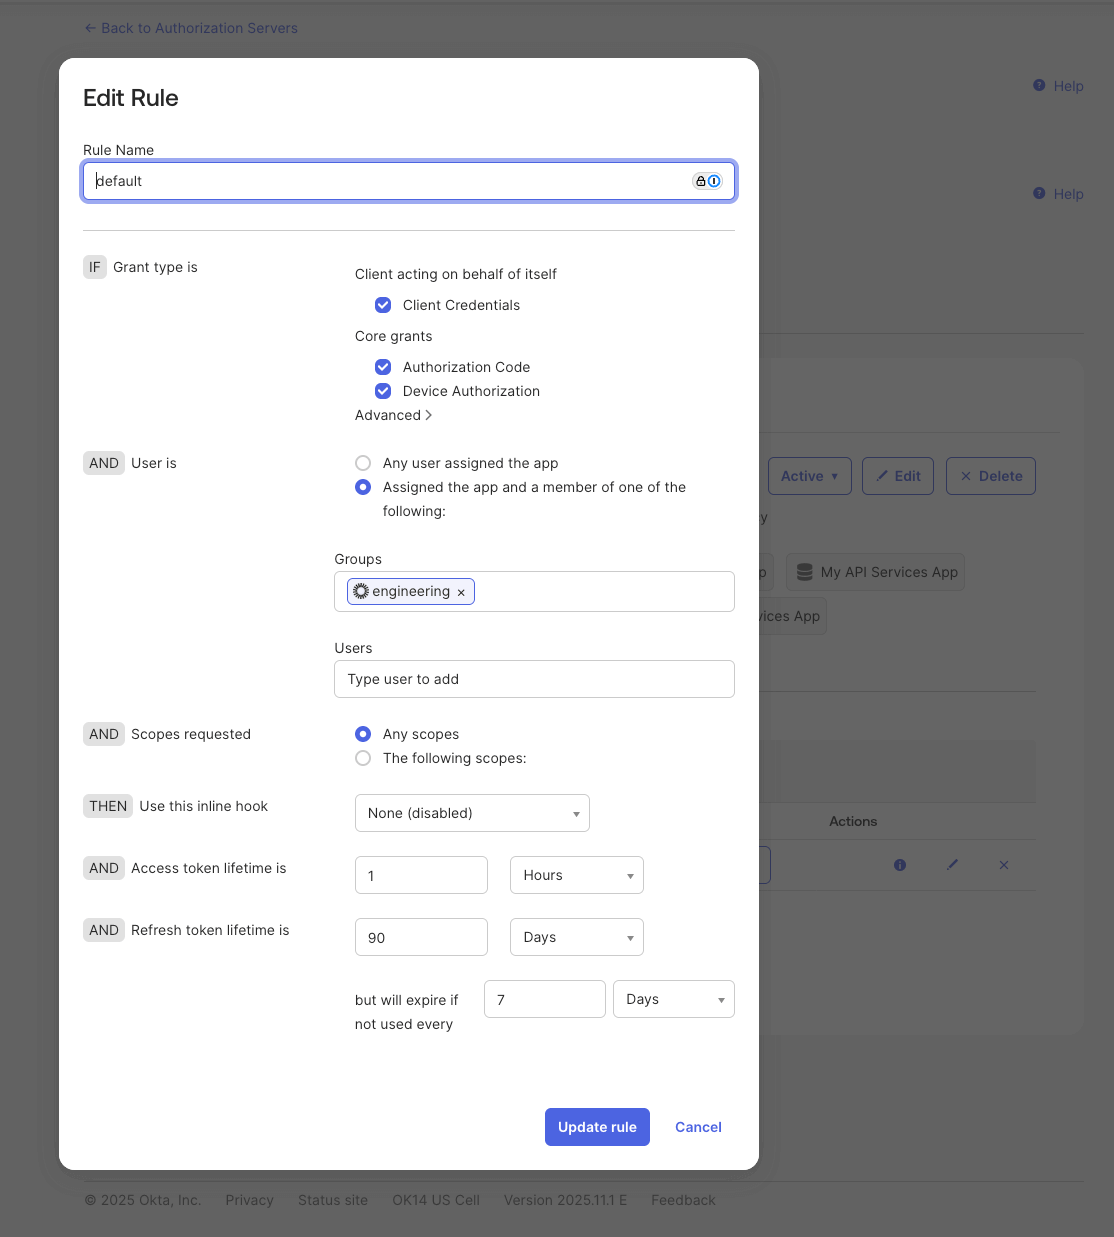
Collect Necessary Information
https://dev-12345678.okta.com/oauth2/aus123abc), you can access the well-known URL:OAUTH_WELL_KNOWN_URL: {OAUTH_ISSUER}/.well-known/oauth-authorization-server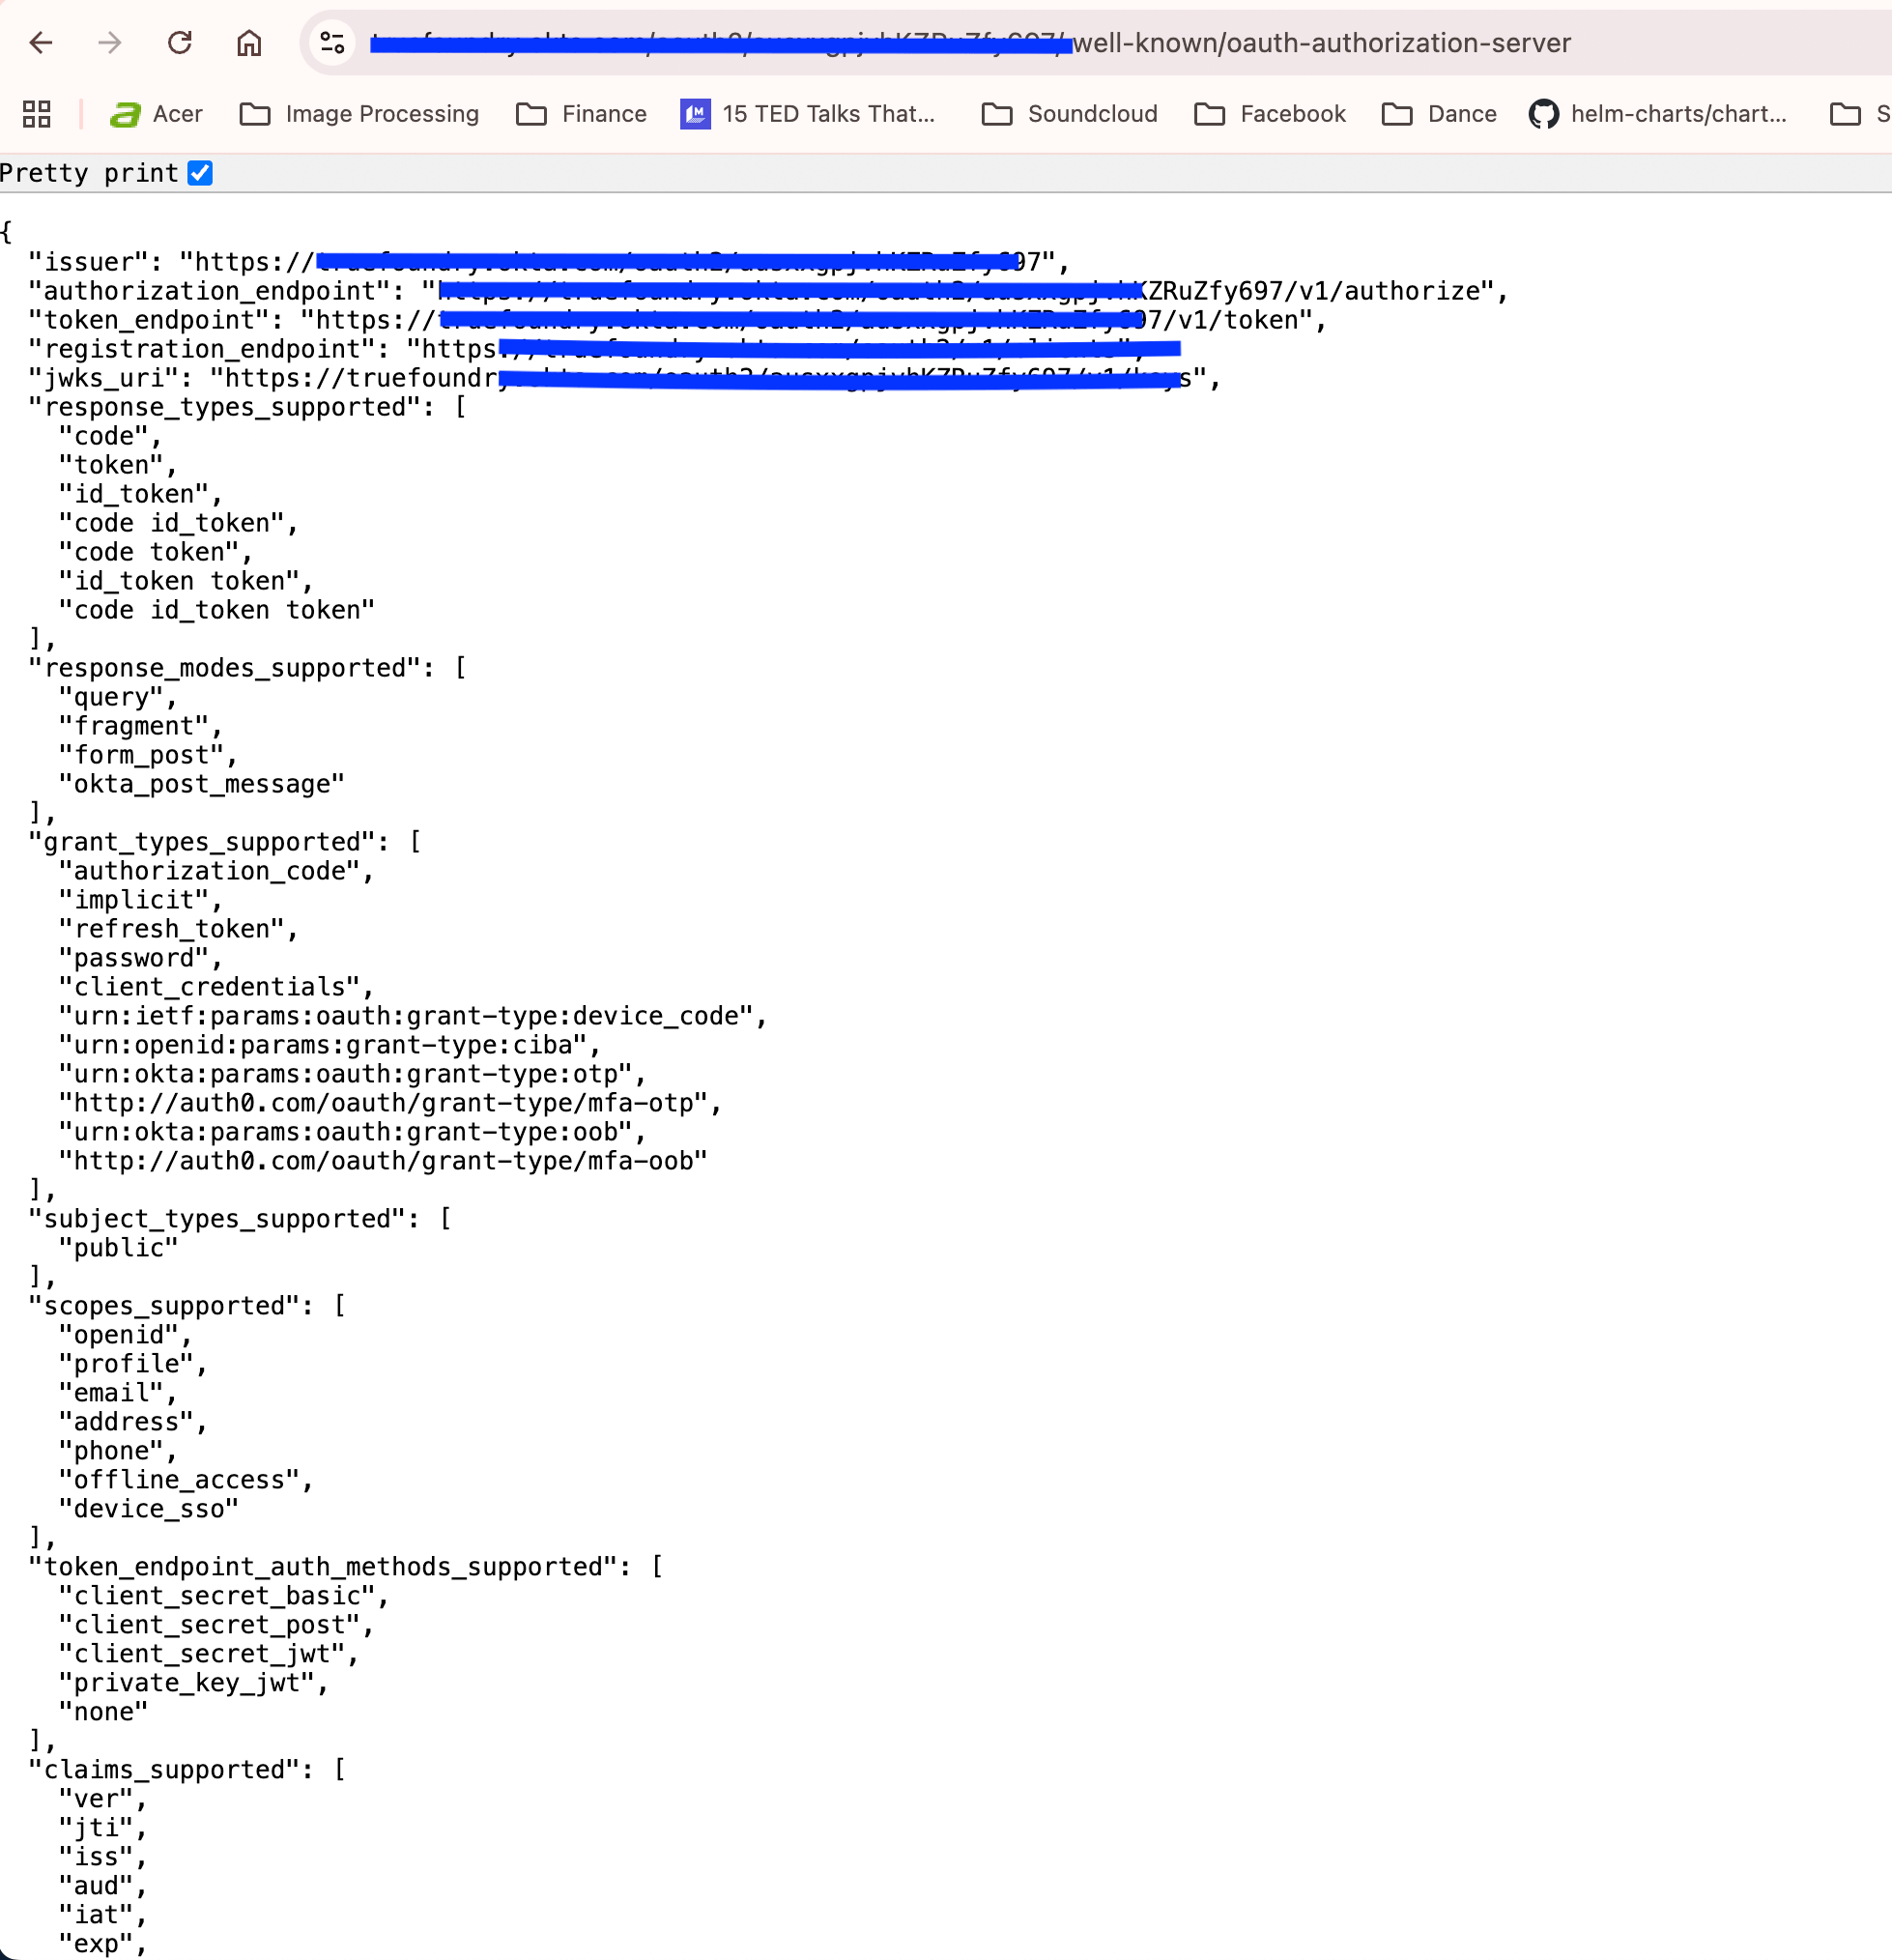
- OAUTH_AUDIENCE: The audience value you configured in the authorization server (e.g.,
calculator-mcp-server.example.com) - CLIENT_ID and CLIENT_SECRET: From your user-facing OAuth application (for TrueFoundry MCPGateway integration)
Okta setup for On-Behalf-Of (OBO) token exchange
This runbook covers the Okta admin console setup for the OAuth2 Token Exchange (OBO) outbound grant type, where the AI Gateway exchanges each caller’s Okta SSO access token for a fresh On-Behalf-Of token before calling the MCP server. For the gateway-side configuration (manifests, caller contract, troubleshooting), see the Okta OBO Token Exchange scenario in Authentication and Security. Okta’s own guide: Set up token exchange. You need two custom authorization servers, a native app for user sign-in, and an API Services app that performs the exchange.Create two authorization servers
- A user authorization server — issues the SSO access tokens your users sign in with. Set its Audience (e.g.
user). - A service authorization server — performs the token exchange and issues the OBO tokens. Set its Audience (e.g.
service). This audience becomes theaudclaim of the exchanged token and theaudiencevalue in the MCP server manifest.
subject_token.Create a native app for user sign-in
- Select OIDC - OpenID Connect, then Native Application.
- Name the app and select Allow everyone in your organization to access.
- Save, and note the Client ID — this is the value you will map on the TrueFoundry Virtual Account, because it appears as the
cidclaim in every user access token.
Create an API Services app for the exchange
- Select API Services.
- Name the app (e.g.
mcp-obo-service), then save. - In General Settings, click Edit and uncheck “Require Demonstrating Proof of Possession (DPoP) header in token requests” — the AI Gateway authenticates with a client secret, not DPoP.
- In the Grant type section, expand Advanced and enable Token Exchange. Save.
- Note the Client ID and Client Secret — these go into the MCP server manifest’s
auth_data.
Add custom scopes
api:access:read, api:access:write). These are the scopes the gateway requests in the exchange and are minted into the OBO token’s scp claim.Create access policies and rules
- Go to Access Policies and add a policy assigned to the native app (Assign to > The following clients).
- Add a rule allowing the scopes users sign in with (e.g.
openid) under Scopes requested > The following scopes.
- Add a policy assigned to the API Services app.
- Add a rule that allows the API scopes (
api:access:read,api:access:write) and, under Grant type is > Advanced, enables Token Exchange.
Verify the exchange manually
This is the RFC 8693 request the AI Gateway performs against the service authorization server on your behalf — useful for validating the Okta setup and debugging a failing exchange:client_secret_post, shown above) or as an Authorization: Basic base64(client_id:client_secret) header (client_secret_basic). Both work — but use one method or the other, never both in the same request.FAQ
What is Machine to Machine Authentication?
What is Machine to Machine Authentication?
Which Okta app to create if I only want Machine to Machine authentication?
Which Okta app to create if I only want Machine to Machine authentication?
openid, profile, and email won’t work for API Service Integrations. For detailed instructions on implementing M2M authentication using the Client Credentials grant type, see the Okta documentation.How can different services access the MCP server with different scopes?
How can different services access the MCP server with different scopes?
- One App Per Service: Each service accessing the MCP server has its own API Service Integration app, providing isolation and granular access control
- Shared MCP Server: Multiple services can access the same MCP server, but each uses different Okta apps with different scopes
- Custom Authorization Server: All apps use the same custom authorization server (not the Org Authorization Server, which is only for Okta APIs)
How to get an access token from Okta for Machine-to-Machine authentication?
How to get an access token from Okta for Machine-to-Machine authentication?
{OAUTH_ISSUER}/.well-known/oauth-authorization-server. The response includes the token_endpoint:token_endpoint value from this response in your token requests.How to access the the token details and user identity in the tool in MCP server?
How to access the the token details and user identity in the tool in MCP server?
How to refresh tokens in client for Machine to Machine authentication?
How to refresh tokens in client for Machine to Machine authentication?
TokenManager class that handles automatic token renewal (adapt the token endpoint URL and parameters to match your OAuth provider):