

1
Create an App Registration for the MCP Server (Resource/API)
This app registration represents your MCP server as a protected resource. It will define what permissions (scopes) are available for your API.
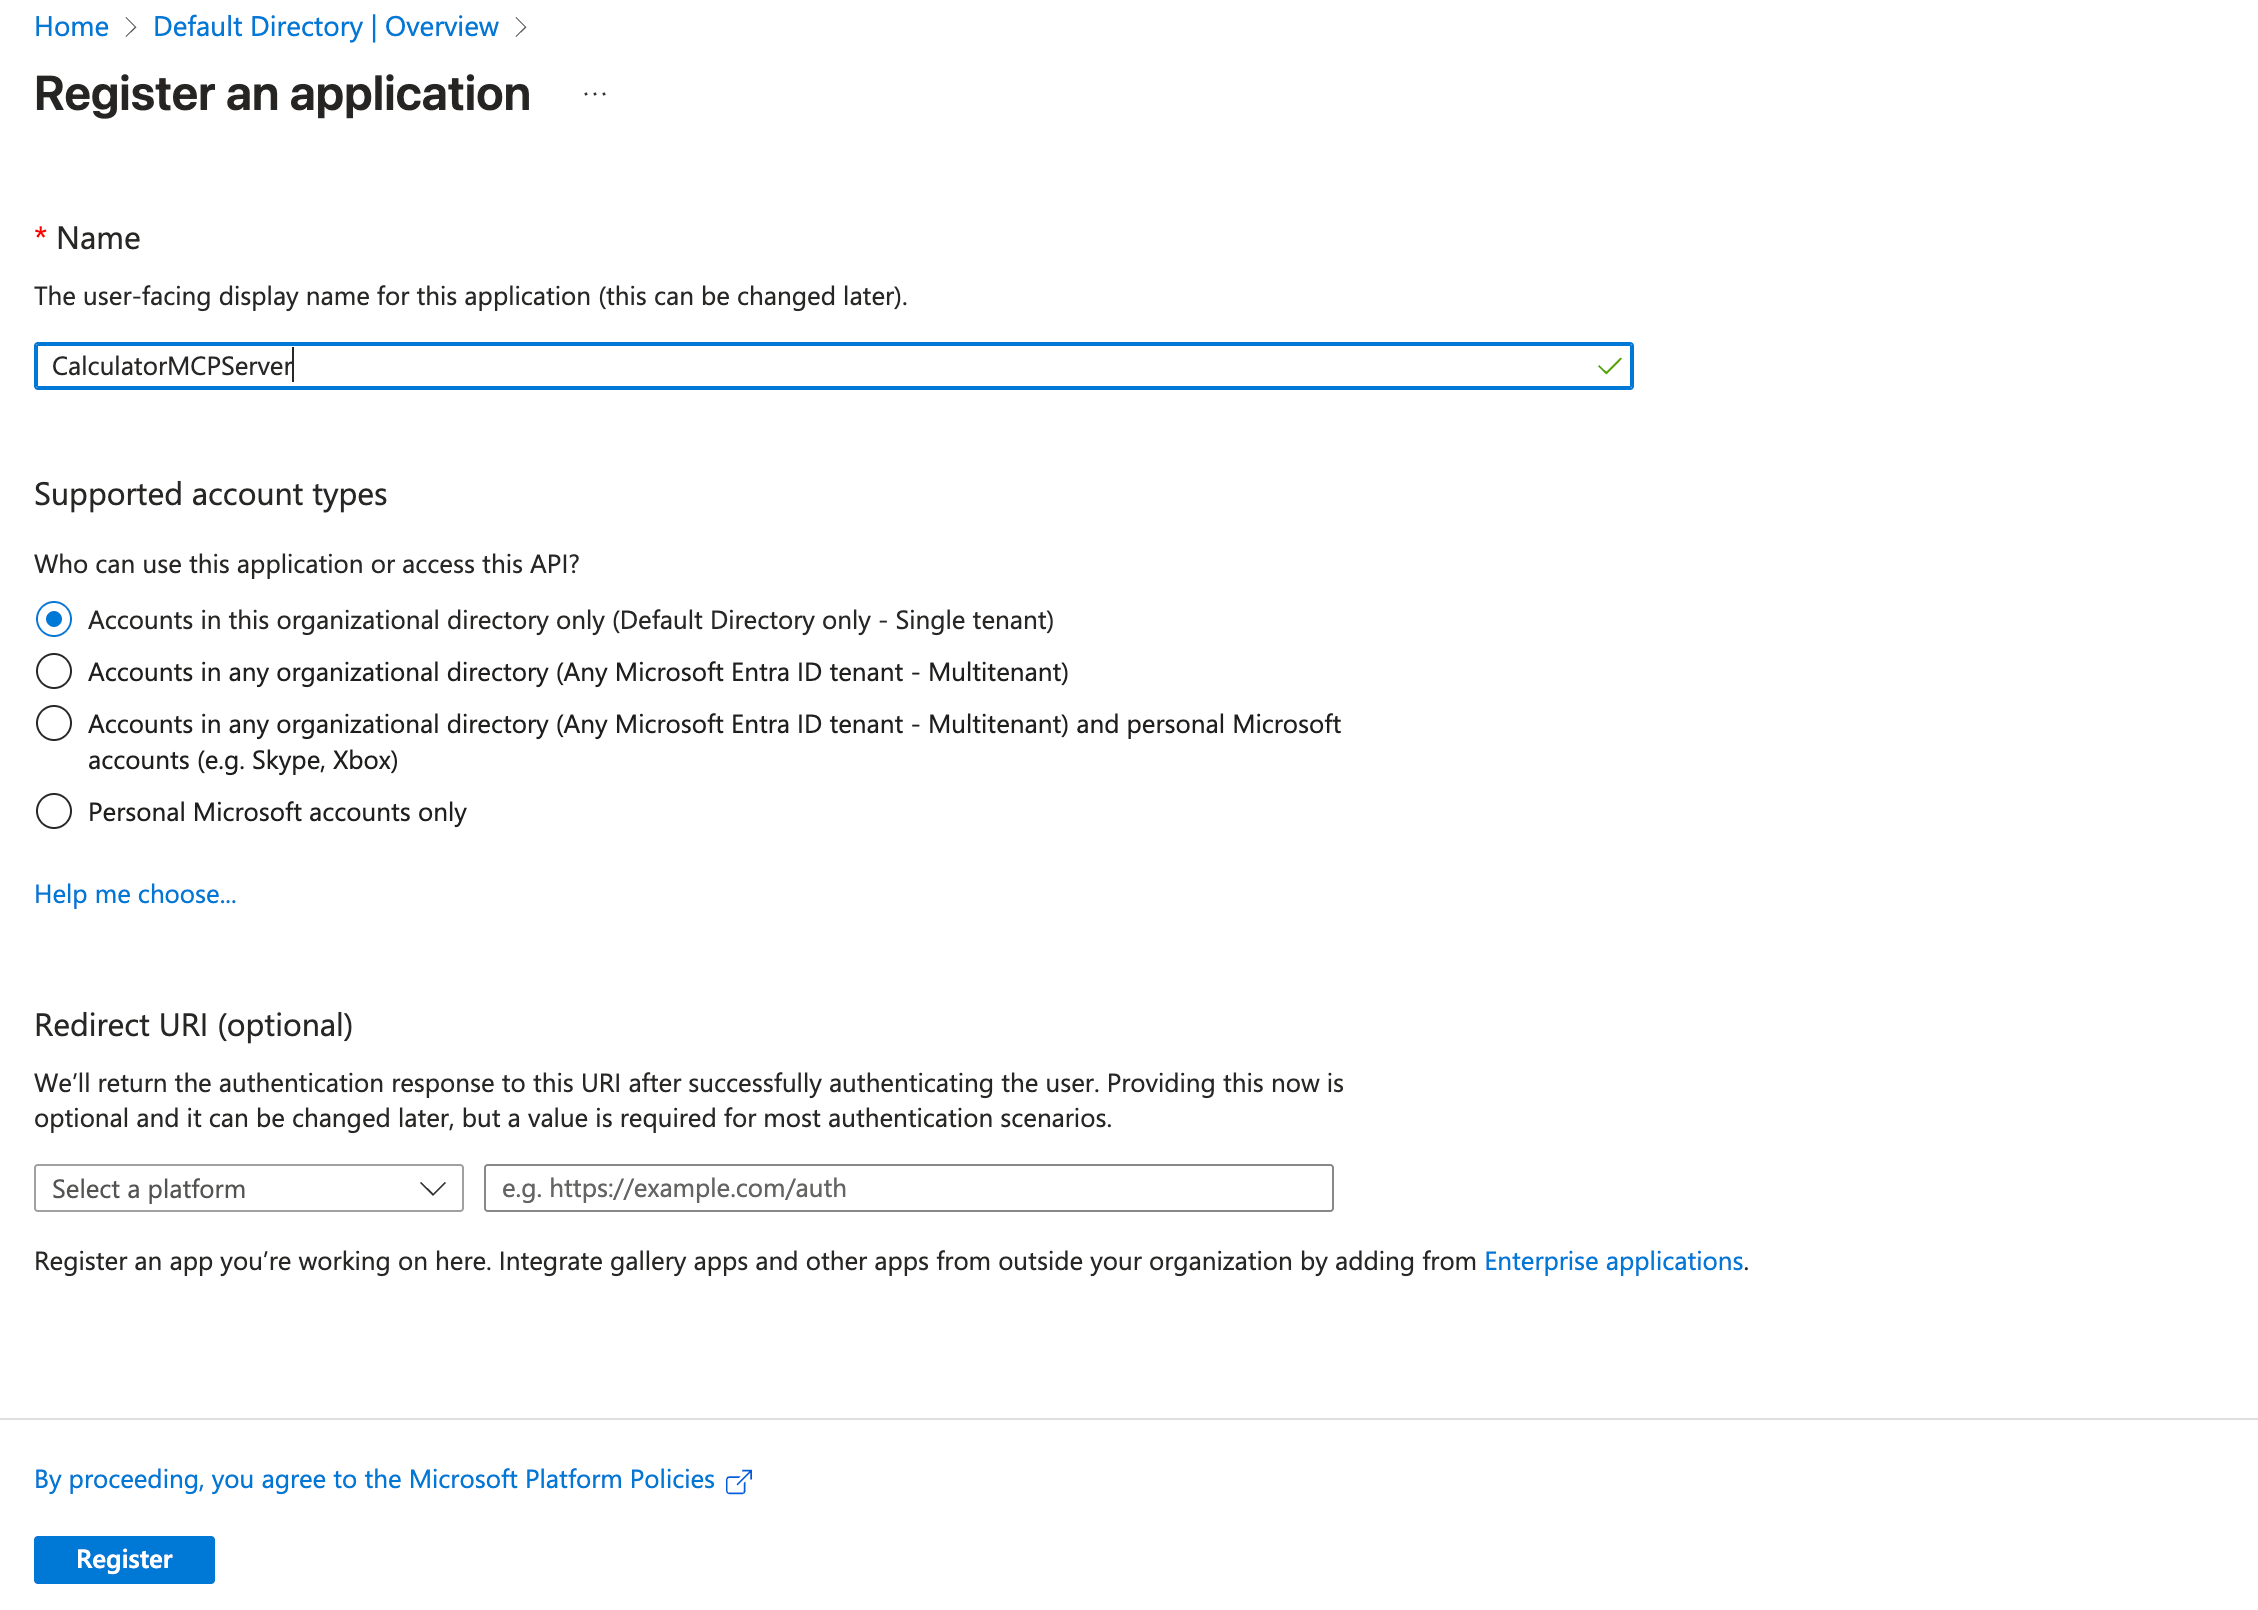
Instructions to create the App Registration
Instructions to create the App Registration
- Navigate to Azure Portal > Microsoft Entra ID > App registrations
- Click New registration
- Configure:
- Name:
CalculatorMCPServer - Supported account types: Choose based on your needs (typically “Accounts in this organizational directory only”)
- Redirect URI: Leave empty for now (this is the API, not the client)
- Name:
- Click Register
- Note down the following from the Overview page:
- Application (client) ID - This will be used as part of your audience
- Directory (tenant) ID - Your Azure AD tenant ID
2
Expose an API and Define Scopes
Now we’ll configure the app registration to expose an API with custom scopes that clients can request.
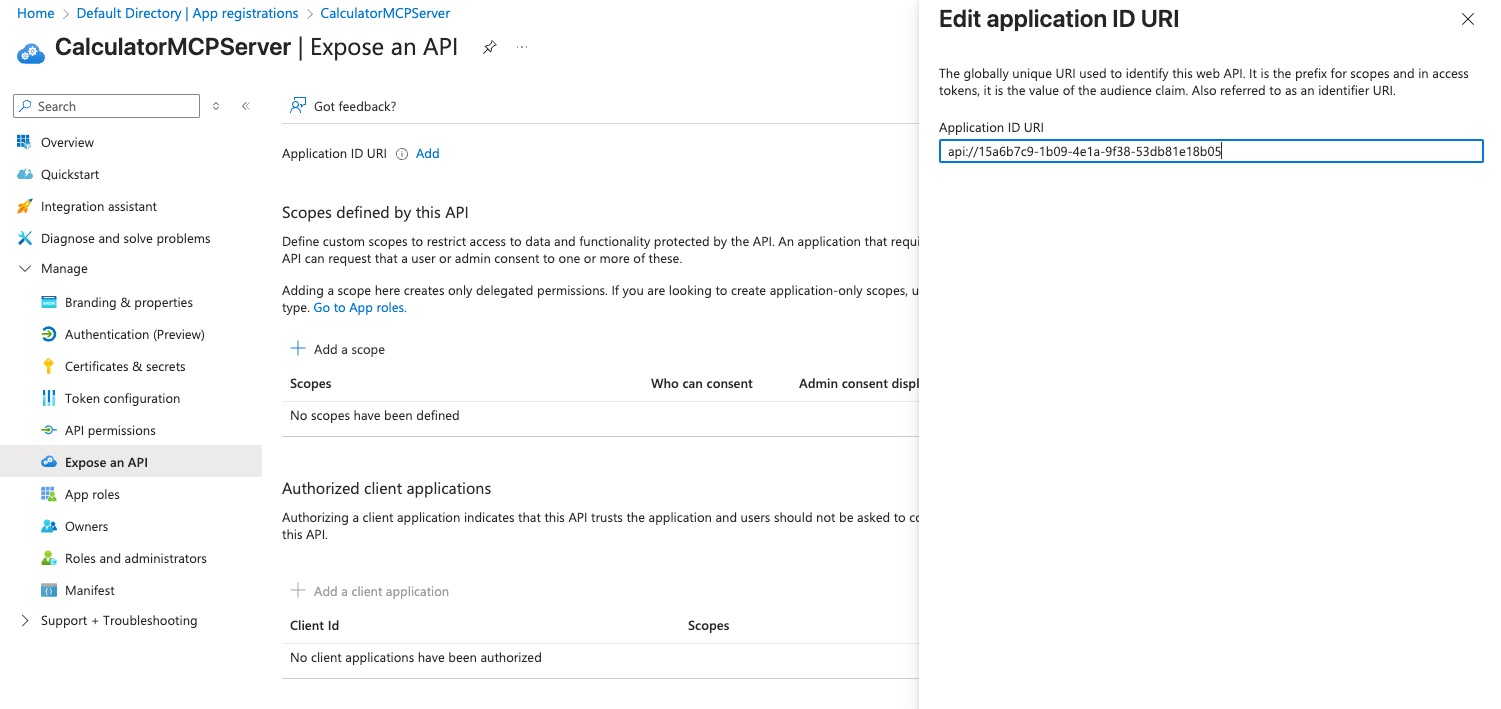
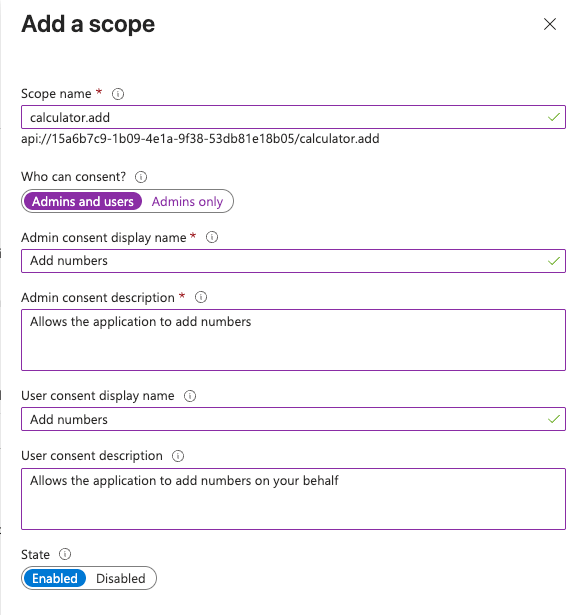
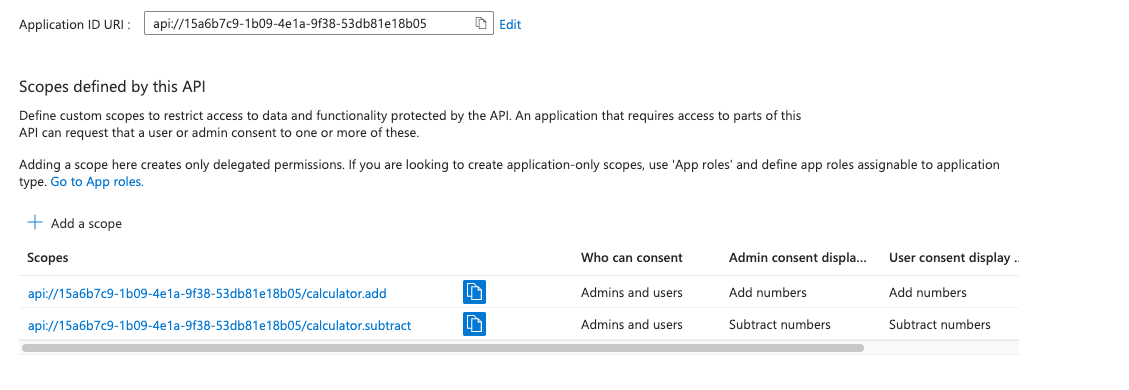
Instructions to expose API and create scopes
Instructions to expose API and create scopes
- In your CalculatorMCPServer app registration, go to Expose an API
- Click Add next to Application ID URI
- Azure will suggest
api://{client-id}- accept this or customize it - This URI becomes your audience value
- Azure will suggest
- Click Add a scope to create custom scopes:
- Scope name:
calculator.add - Who can consent: Admins and users
- Admin consent display name: Add numbers
- Admin consent description: Allows the application to add numbers
- User consent display name: Add numbers
- User consent description: Allows the application to add numbers on your behalf
- State: Enabled
- Scope name:
- Click Add scope
- Repeat to add another scope:
- Scope name:
calculator.subtract - Configure similar display names and descriptions
- Scope name:
Your full scope names will be in the format:
api://{client-id}/calculator.add and api://{client-id}/calculator.subtract3
Create a Client App Registration
This app registration represents the client application (user-facing or machine-to-machine) that will access your MCP server.
Instructions to create the client app
Instructions to create the client app
- Navigate to App registrations > New registration
-
Configure:
- Name:
CalculatorMCPClient - Supported account types: Same as your API app
- Redirect URI:
- Platform: Web
- URI:
https://<your-tfy-control-plane-url>/api/svc/v1/llm-gateway/mcp-servers/oauth2/callback
- Name:
- Click Register
- Note the Application (client) ID - this is your OAuth Client ID
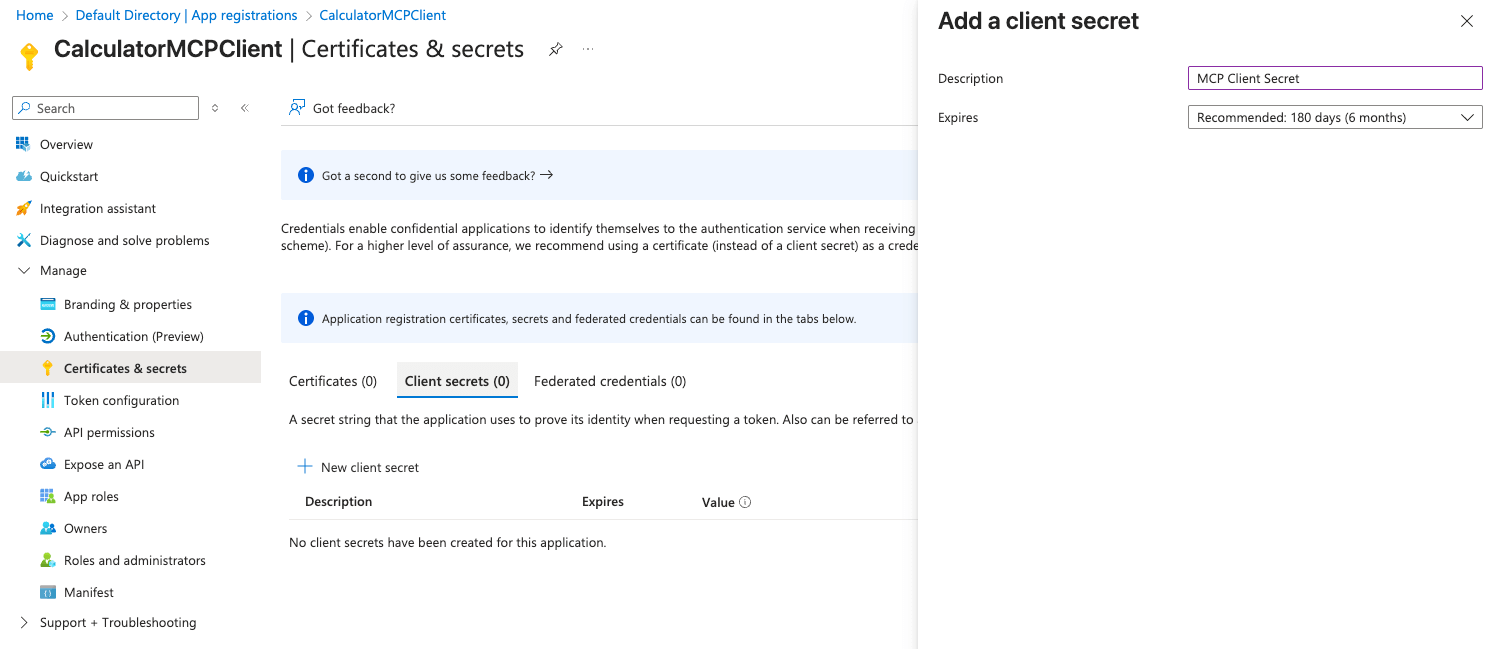
- Go to Certificates & secrets
-
Click New client secret
- Description:
MCP Client Secret - Expires: Choose based on your security requirements
- Description:
- Click Add
- Important: Copy the Value immediately - this is your Client Secret (it won’t be shown again)
- Go to Authentication
-
Under Implicit grant and hybrid flows, ensure:
- Access tokens is checked (for user auth)
- ID tokens is checked (for user auth)
- Under Advanced settings > Allow public client flows: Set to No
4
Grant API Permissions to the Client App
The client app needs permission to access the MCP server API. We’ll grant the scopes we defined earlier.
Instructions to grant API permissions
Instructions to grant API permissions
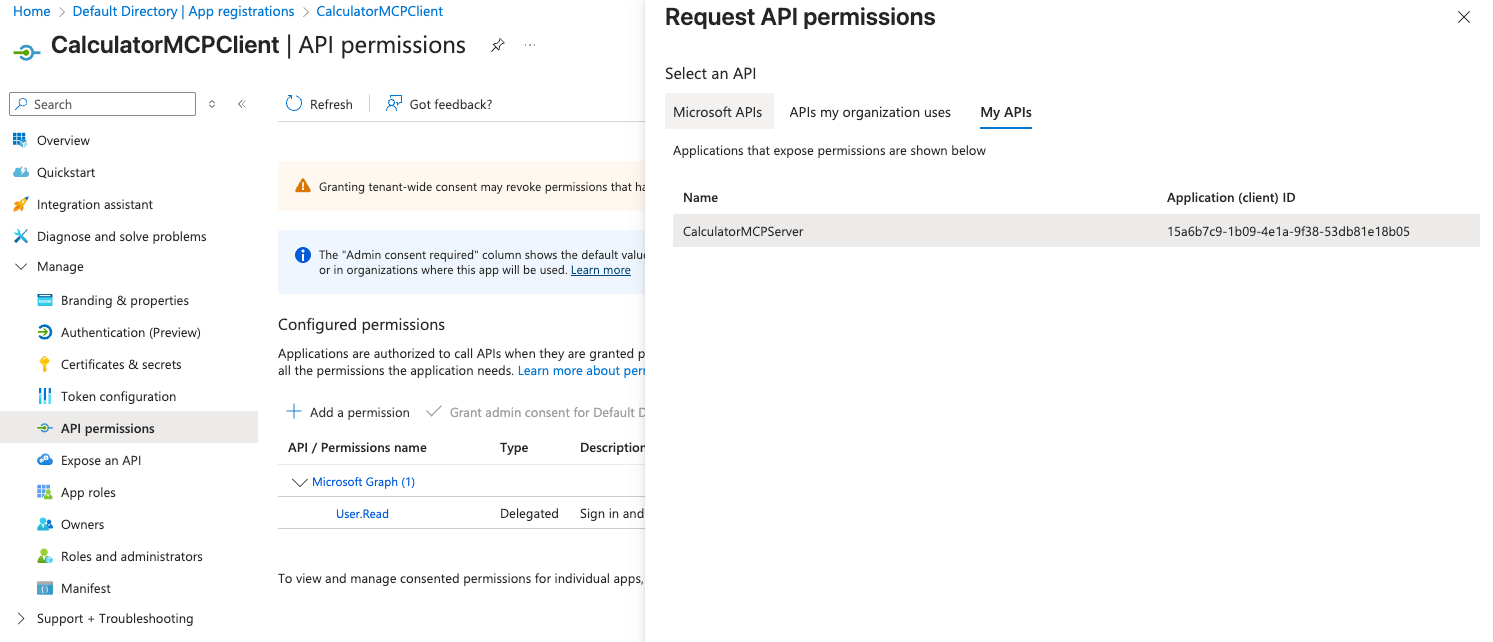
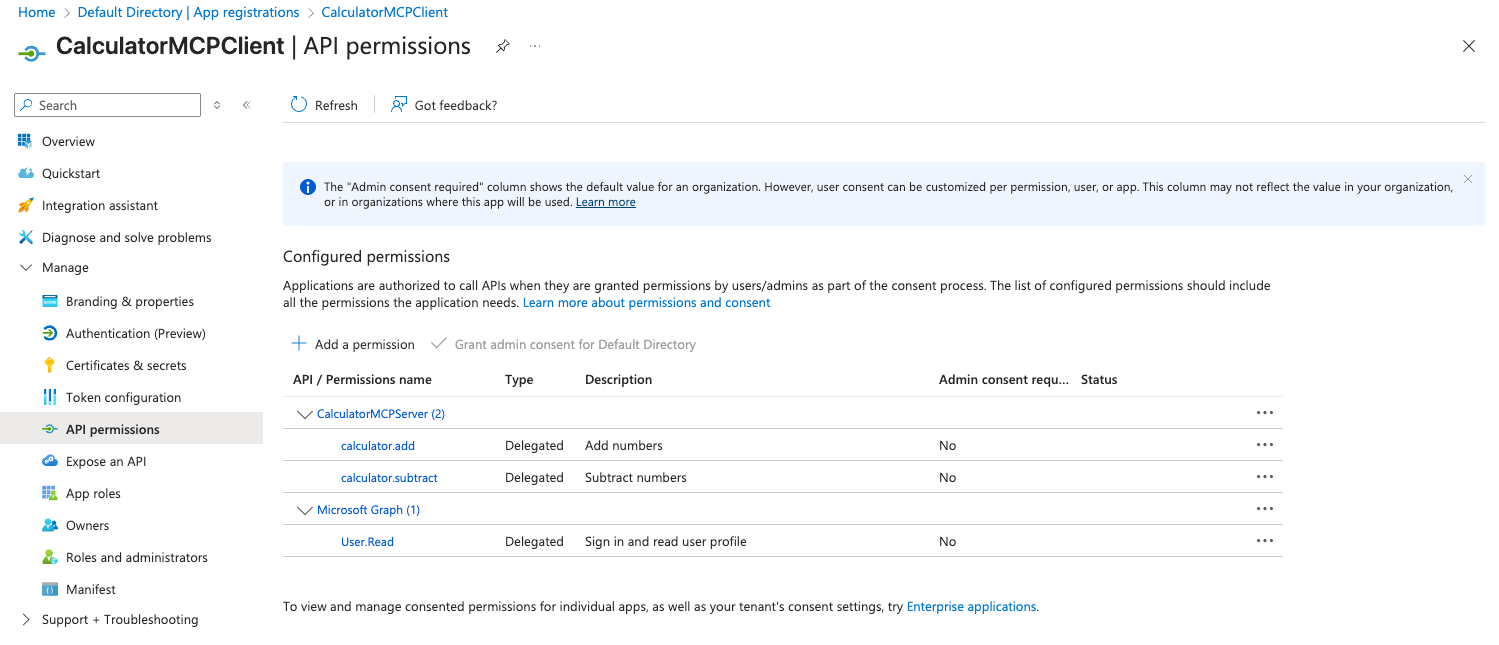
- In your CalculatorMCPClient app registration, go to API permissions
- Click Add a permission
- Go to My APIs tab
- Select CalculatorMCPServer
- Select Delegated permissions (for user authentication)
- Check:
calculator.addcalculator.subtract
- Click Add permissions
- For machine-to-machine authentication, click Add a permission again
- Select CalculatorMCPServer from My APIs
- Select Application permissions
-
Check the same scopes:
calculator.addcalculator.subtract
- Click Add permissions
- Confirm by clicking Yes
“Grant admin consent” is required for the application permissions to work. Delegated permissions can work with or without admin consent depending on your tenant settings.
5
Collect Necessary Information
Gather all the configuration values needed for your MCP server and client applications.From your Azure tenant and app registrations, collect:
From these values, construct:OAUTH_ISSUER:
https://login.microsoftonline.com/{TENANT_ID}/v2.0OAUTH_WELL_KNOWN_URL: https://login.microsoftonline.com/{TENANT_ID}/v2.0/.well-known/openid-configurationOAUTH_JWKS_URI: Access the well-known URL and find the jwks_uri value (typically: https://login.microsoftonline.com/{TENANT_ID}/discovery/v2.0/keys)TOKEN_ENDPOINT: https://login.microsoftonline.com/{TENANT_ID}/oauth2/v2.0/tokenCUSTOM_SCOPES (for Gateway configuration):api://{API_CLIENT_ID}/calculator.addapi://{API_CLIENT_ID}/calculator.subtractoffline_access
These custom scopes won’t appear in Azure’s well-known endpoint. You’ll need to manually enter them when configuring the MCP server in the TrueFoundry AI Gateway.
FAQ
What is Machine to Machine Authentication?
What is Machine to Machine Authentication?
Machine to Machine Authentication is a type of authentication that allows a machine to authenticate to the MCP server without user interaction. For M2M authentication, you can use the OAuth2 Client Credentials grant type to obtain access tokens directly.
What are Application Permissions vs Delegated Permissions?
What are Application Permissions vs Delegated Permissions?
- Delegated permissions: Used when a user is present. The app acts on behalf of the signed-in user. These require user consent (or admin consent).
- Application permissions: Used for machine-to-machine scenarios without a signed-in user. These always require admin consent.
Why use .default scope for client credentials?
Why use .default scope for client credentials?
When using client credentials flow, Azure Entra ID requires the
.default scope format (api://{client-id}/.default). This requests all application permissions that have been pre-consented for your application. You cannot request individual scopes in client credentials flow.Why doesn't Azure include custom scopes in the well-known endpoint?
Why doesn't Azure include custom scopes in the well-known endpoint?
Azure’s
/.well-known/openid-configuration endpoint only returns generic OpenID Connect scopes:openidprofileemailoffline_access
api://{client-id}/calculator.add) are:- Defined per app registration in the “Expose an API” section
- Granted per client in the “API permissions” section
- Not discoverable via the well-known endpoint
What's the difference between Azure and Okta OAuth?
What's the difference between Azure and Okta OAuth?
Key differences:
Both work with TrueFoundry AI Gateway, but Azure requires manually entering custom scopes in the AI Gateway configuration.