June 25, 2026
|
5 min read

Published: March 27, 2026

Blazingly fast way to build, track and deploy your models!
Cursor AI code editor has quickly become one of the most popular AI-powered coding tools, offering a seamless way to write, edit, and understand code using natural language.
Unlike traditional IDE plugins, Cursor is built as an AI-native code editor, meaning AI is deeply integrated into the development workflow—not just added on top.
With Cursor, developers can:
But to get the most out of Cursor, it’s important to set it up correctly.
A proper setup ensures:
In this guide, we’ll walk through how to set up Cursor AI step by step, from installation to basic configuration, so you can start using it effectively.
Before setting up Cursor AI code editor, make sure you have a few basic things in place. This will help you avoid common issues and get started quickly.
Cursor is available for:
Make sure your system meets basic requirements:
While you can explore Cursor without a project, it works best when connected to a real codebase.
This allows Cursor to:
You can:
Cursor relies on external AI models for:
Make sure:
Depending on your setup, you may want to:
This gives you more control over:
Cursor is similar to modern code editors like VS Code. You should be comfortable with:
Let’s walk through how to install and configure Cursor AI code editor so you can start using it effectively.
Once installed, open Cursor.
After launching Cursor, the next step is to load a project.
You can:
Cursor works best when it has access to a full codebase, as it uses this context to generate better suggestions.
Cursor comes with AI capabilities built in, but you may need to:
Check:
Depending on your usage, you may want to customize how Cursor uses AI models.
This can include:
If you’re using your own API keys:
For Cursor to understand your project properly, it needs to build context.
This usually happens automatically, but you can ensure:
This enables:
Before diving into real work, test Cursor with simple tasks:
If everything is working:
Once setup is complete, there are a few features you should start using immediately to get value.
Cursor allows you to edit code directly using prompts.
Example:
This is one of the fastest ways to integrate AI into your workflow.
Cursor can answer questions based on your entire codebase.
You can ask:
This is especially useful for:
Cursor can suggest changes across multiple files.
Use this for:
Cursor can help identify and fix issues.
You can:
Even though Cursor AI code editor is easy to get started with, a few common mistakes can limit how effective it is.
Cursor is not just a chatbot, it’s designed to work within your codebase. Instead of asking generic questions, try:
The more context you provide, the better the output.
Many users only use Cursor for small snippets. But its real strength is understanding the entire codebase.
Make sure:
Cursor can generate high-quality code, but it’s not perfect.
Always:
This is especially important for:
Different models behave differently in terms of:
If you’re using Cursor regularly, it’s worth:
Once you’re set up, small improvements in how you use Cursor can significantly boost productivity.
Instead of:
“Fix this code”
Try:
“Optimize this function for performance and reduce database calls”
Clear instructions lead to better results.
Cursor works best in a loop:
Prompt → Review → Refine → Apply
Avoid trying to solve everything in a single prompt.
Cursor should enhance your workflow—not replace it.
Use it alongside:
Cursor is extremely useful for:
Setting up Cursor for individual use is simple. Scaling it across a team is where things get more interesting.
As adoption grows, teams start to run into challenges like:
These challenges become even more important when Cursor is combined with MCP servers and external integrations.
As teams start using Cursor AI code editor beyond individual workflows, it quickly becomes part of a broader system, one that includes models, MCP integrations, and multiple developers interacting with shared resources.
At this stage, the problem shifts from “how do I use Cursor?” to “how do we manage AI usage across our team and systems?”
What works well for a single developer often breaks down at scale.
Teams typically encounter issues like:
These challenges become even more important when Cursor is combined with MCP servers.
At that point, Cursor is no longer just generating code, it’s:
Without proper control, this can lead to:
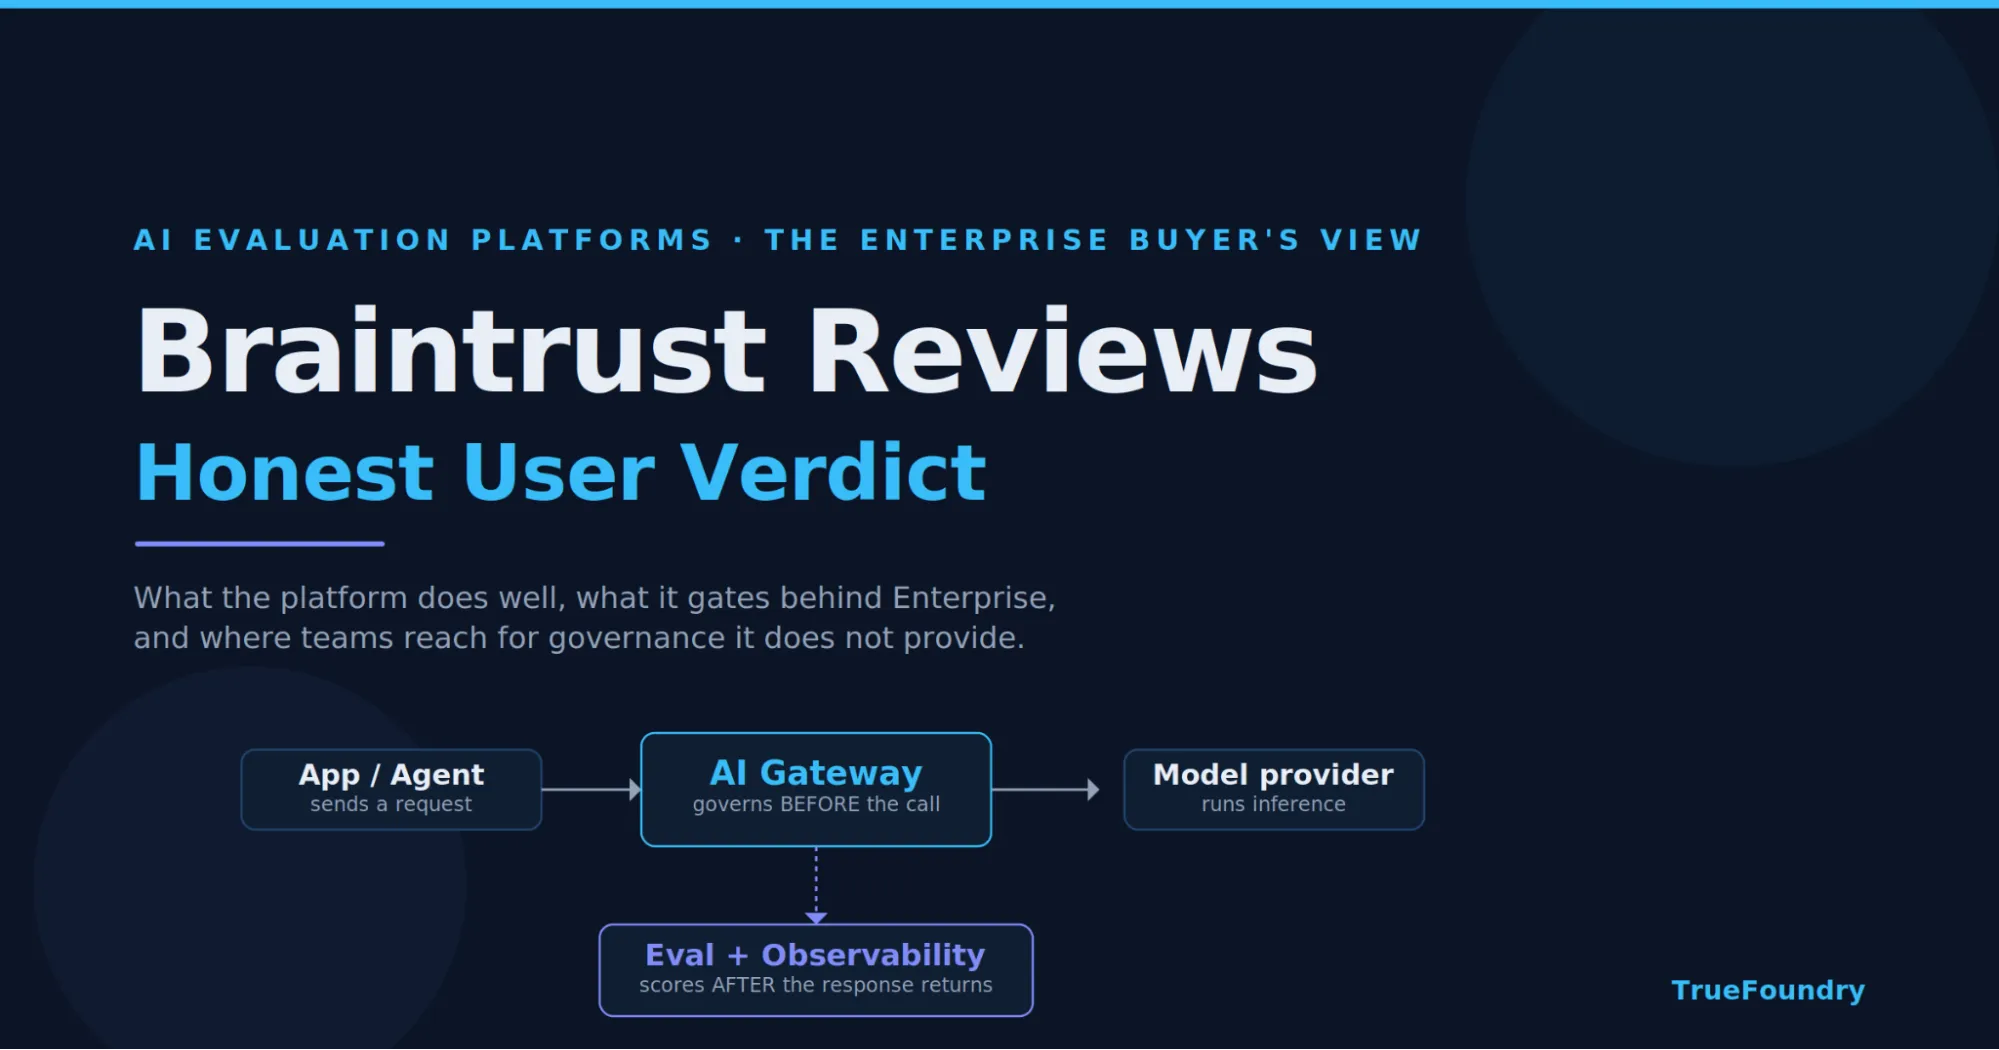
This is where TrueFoundry acts as a control layer for AI-powered development workflows.
Instead of each developer managing everything independently, TrueFoundry provides a centralized way to manage how Cursor (and other AI tools) operate.
TrueFoundry allows teams to:
This ensures:
When Cursor interacts with systems via MCP, guardrails become essential.
With TrueFoundry, teams can:
This prevents risky or unintended actions while still enabling powerful workflows.
Understanding how AI is being used is critical for debugging and improvement.
TrueFoundry provides visibility into:
This makes it easier to:
Instead of each developer setting up Cursor differently, TrueFoundry enables:
Getting started with Cursor AI code editor is straightforward—but using it effectively requires the right setup and workflow.
By configuring Cursor properly and understanding its core features, you can:
However, as usage grows, specially with MCP integrations, the focus shifts from individual productivity to team-wide consistency, control, and scalability. Tools like Cursor improve how developers work. Platforms like TrueFoundry help ensure those workflows remain manageable, secure, and scalable as adoption increases.
TrueFoundry AI Gateway delivers ~3–4 ms latency, handles 350+ RPS on 1 vCPU, scales horizontally with ease, and is production-ready, while LiteLLM suffers from high latency, struggles beyond moderate RPS, lacks built-in scaling, and is best for light or prototype workloads.


The latest news, articles, and resources sent to your inbox
© 2026 All rights reserved.


.webp)
.webp)