


July 4, 2026
|
5 min read


احصل على وصول فوري إلى بيئة TrueFoundry مباشرة. انشر النماذج، ووجّه حركة مرور LLM، واستكشف المنصة بالكامل — بيئة الاختبار الخاصة بك جاهزة في ثوانٍ، ولا يلزم وجود بطاقة ائتمان.


Published: July 4, 2026

Blazingly fast way to build, track and deploy your models!
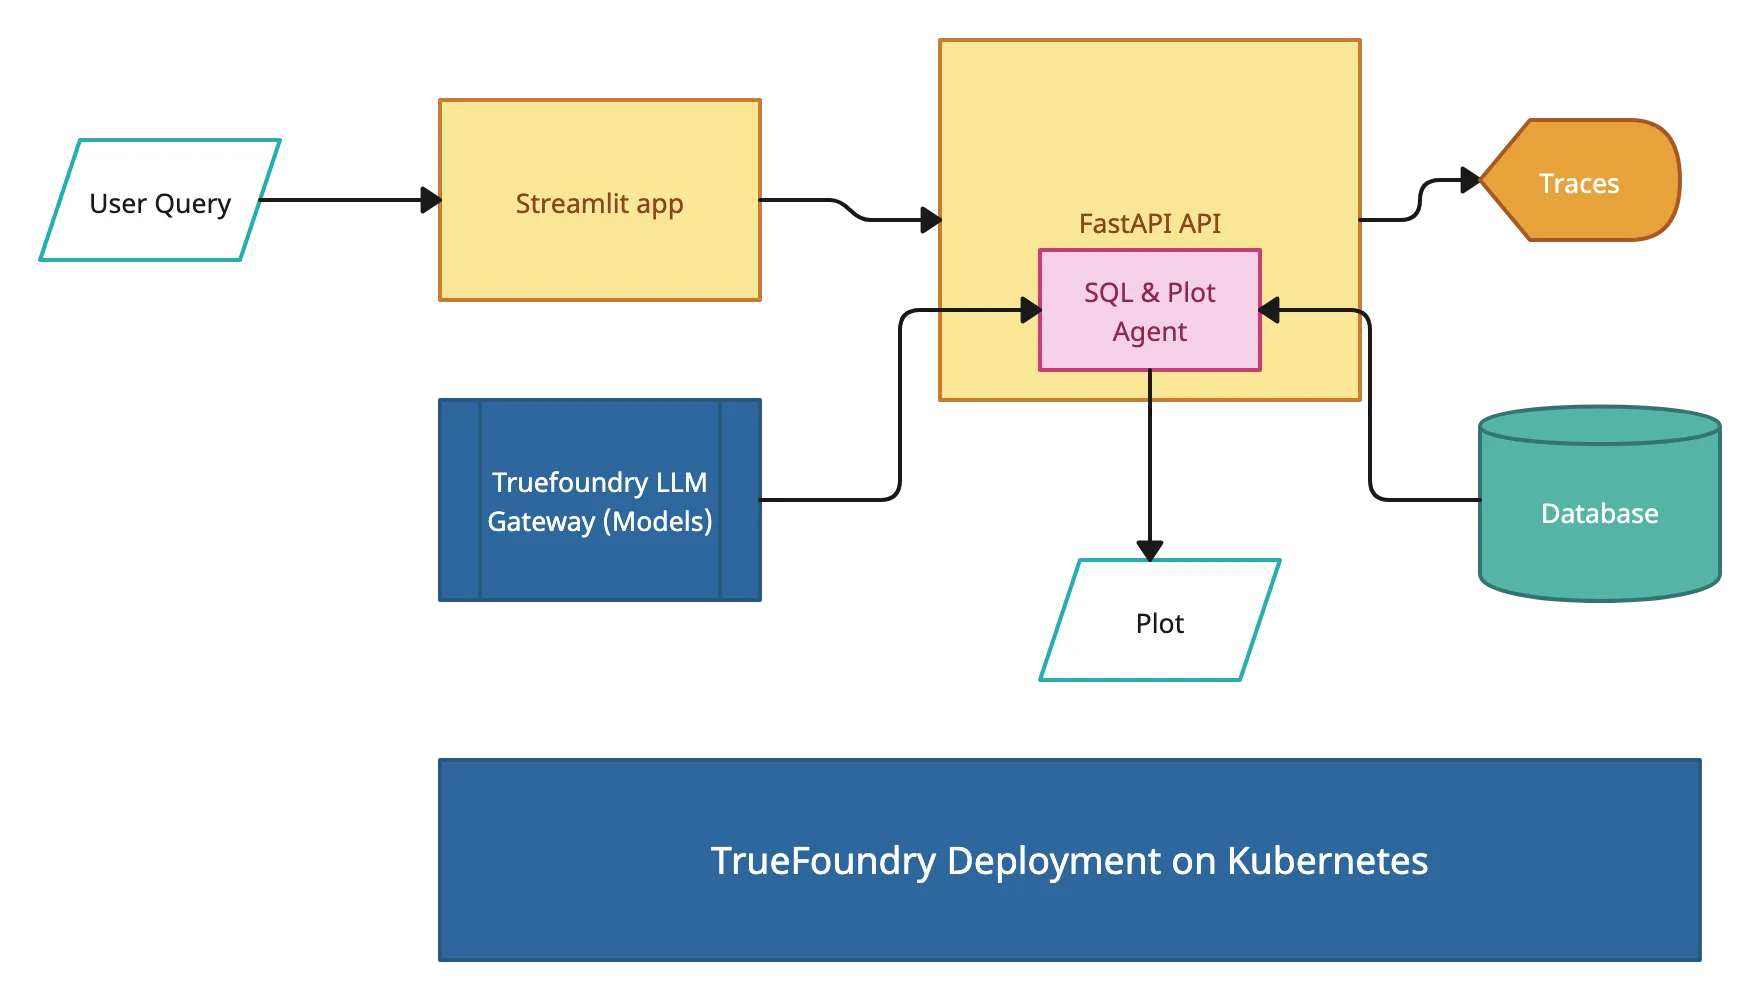
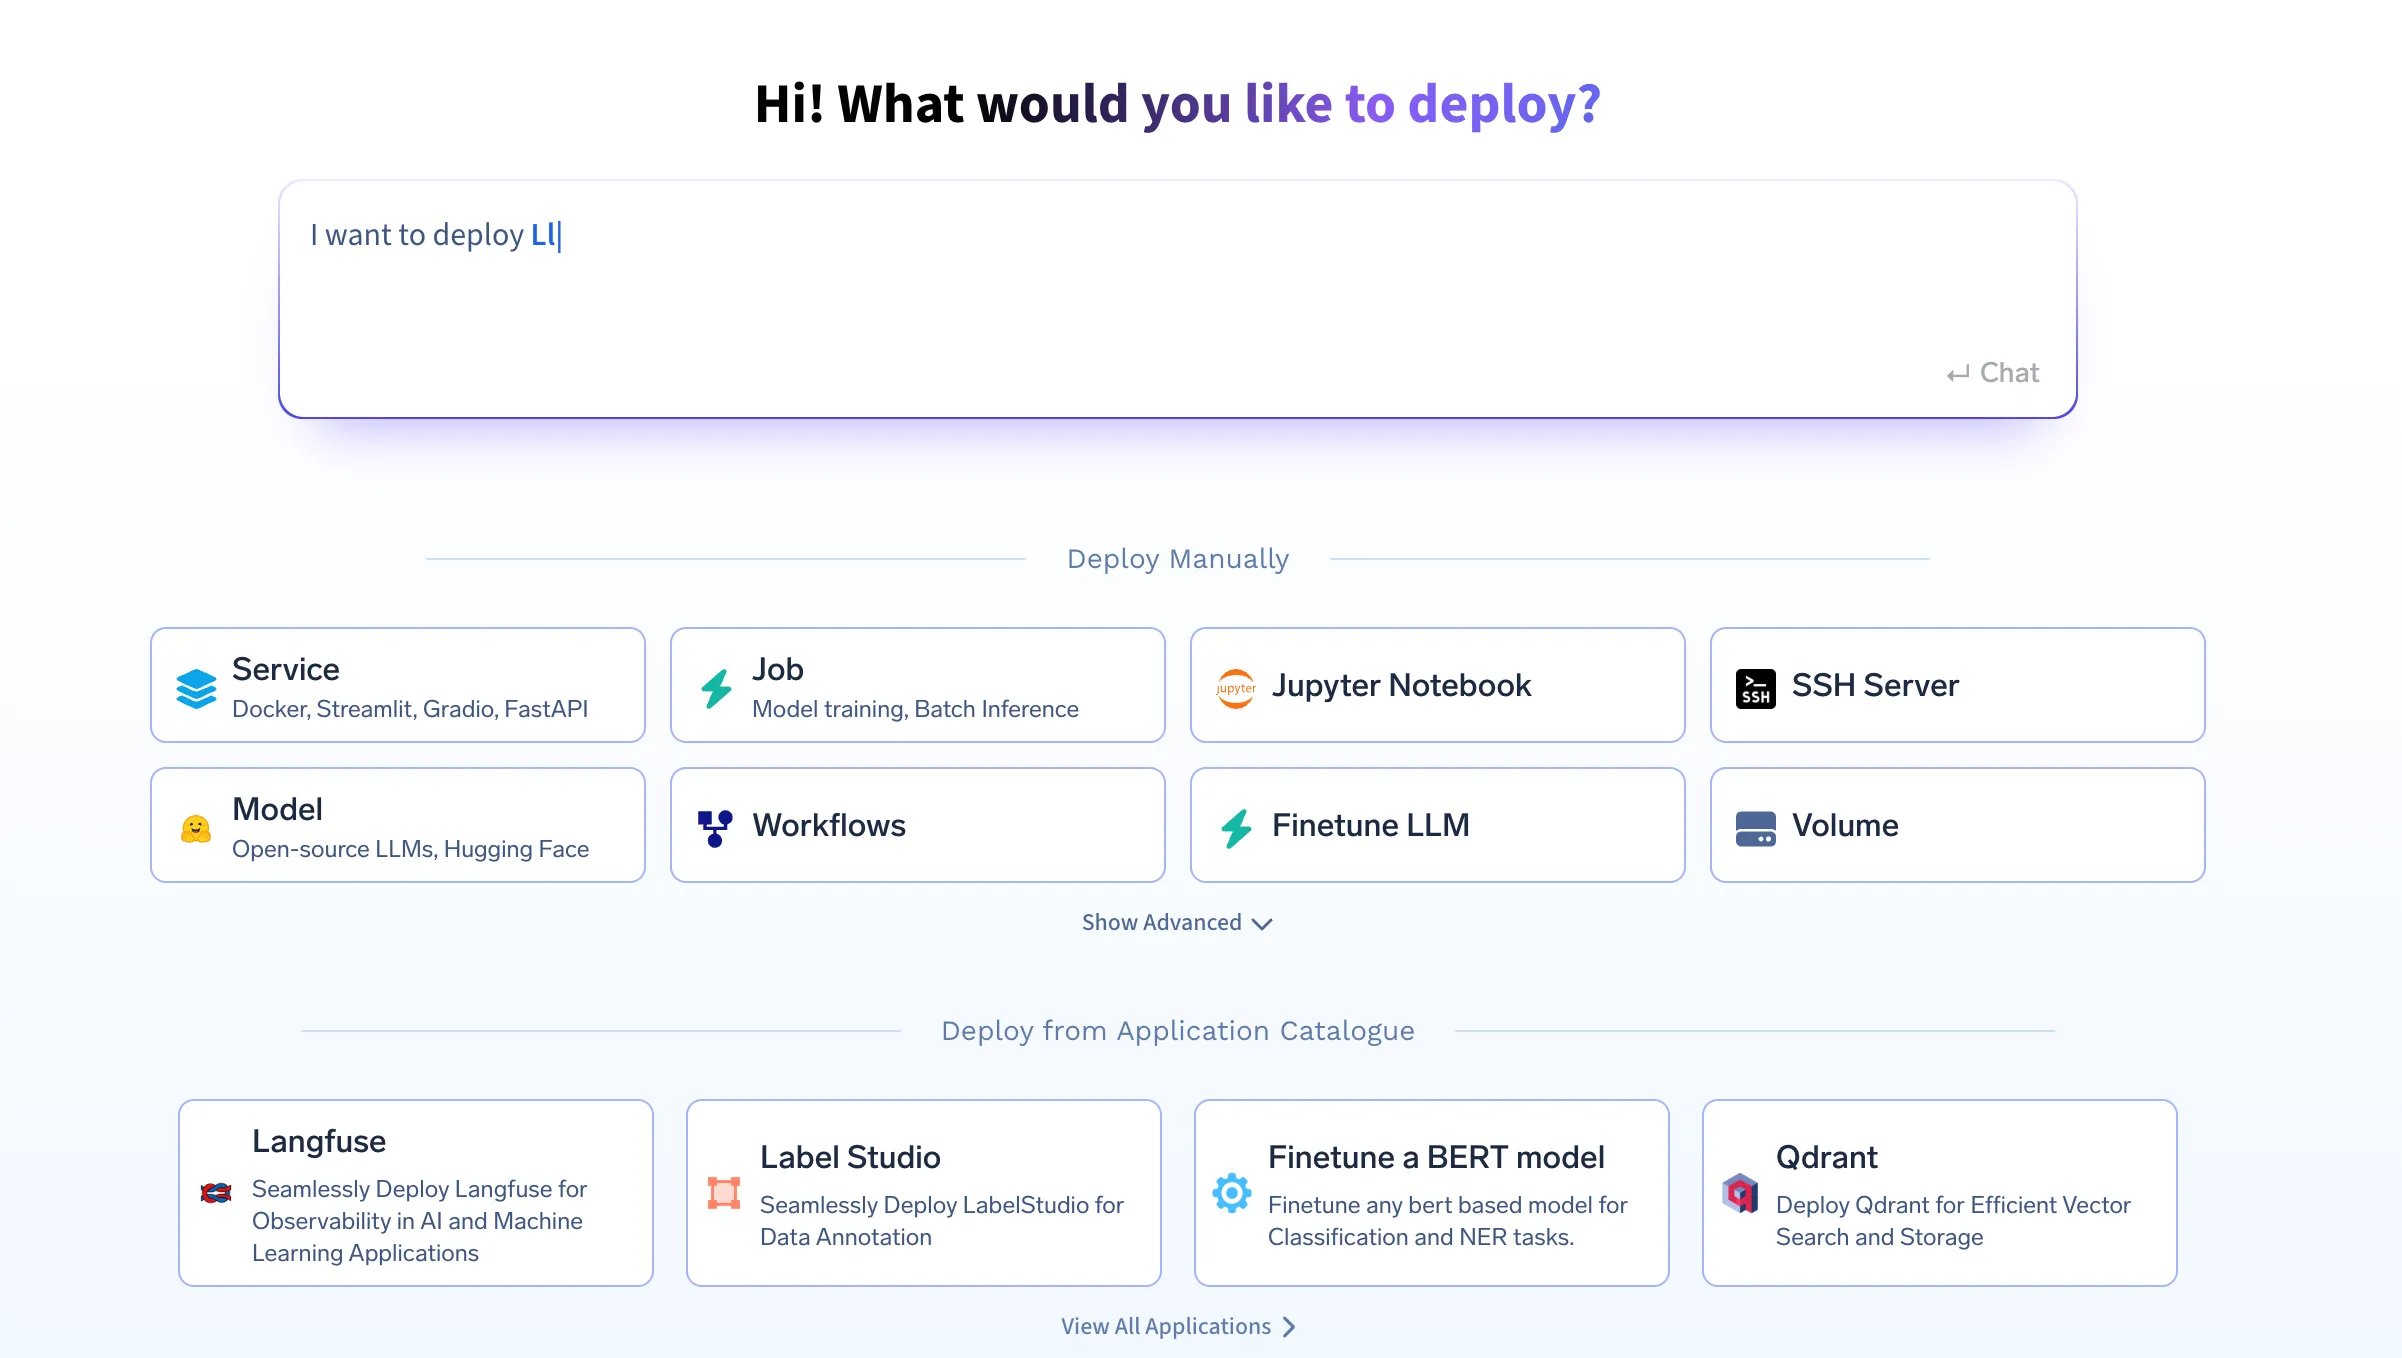
In this guide, we’ll show you how to deploy a Langgraph agent on TrueFoundry, a platform designed to simplify AI deployment with minimal DevOps or MLOps expertise. TrueFoundry automates infrastructure management, scaling, and monitoring, allowing you to focus on deriving insights rather than handling deployment complexities. With just a few clicks, you can transform natural language requests into SQL queries and dynamic charts, making data exploration seamless and intelligent. No manual querying required!
If you would like to try this out directly, please visit the TrueFoundry platform and navigate to Live Demos and Langgraph-Streamlit: Live demo of our agent workflow
This project consists of several key components working together:
Query Agent
Visualization Agent: A second AI agent that
FastAPI Backend: RESTful API that
Streamlit Frontend: User interface that
Clone the Repository
First, navigate to the TrueFoundry Getting Started Examples repository and clone it:
git clone <https://github.com/truefoundry/getting-started-examples.git>Navigate to the Plot Agent Directory
Change into the plot_agent directory:
cd getting-started-examples/plot_agent/langgraph_plot_agentEnvironment Setup
To create and activate a virtual environment:
python -m venv venv
source venv/bin/activate  # On Windows: venv\Scripts\activate
Install dependencies
pip install -r requirements.txtEnvironment Configuration
Copy the example environment file:
```bash
cp .env.example .env
```
Create a .env file with your credentials
# Truefoundry LLMGateway Configuration if using Truefoundry LLM Gateway for calling models
LLM_GATEWAY_BASE_URL=your_llm_gateway_base_url_here
LLM_GATEWAY_API_KEY=your_llm_gateway_api_key_here
# OPENAI API Configuration if not using Truefoundry LLM Gateway
OPENAI_API_KEY=<your_openai_api_key_here>
# ClickHouse Database Configuration
CLICKHOUSE_HOST=your_clickhouse_host_here
CLICKHOUSE_PORT=443
CLICKHOUSE_USER=your_clickhouse_user_here
CLICKHOUSE_PASSWORD=your_clickhouse_password_here
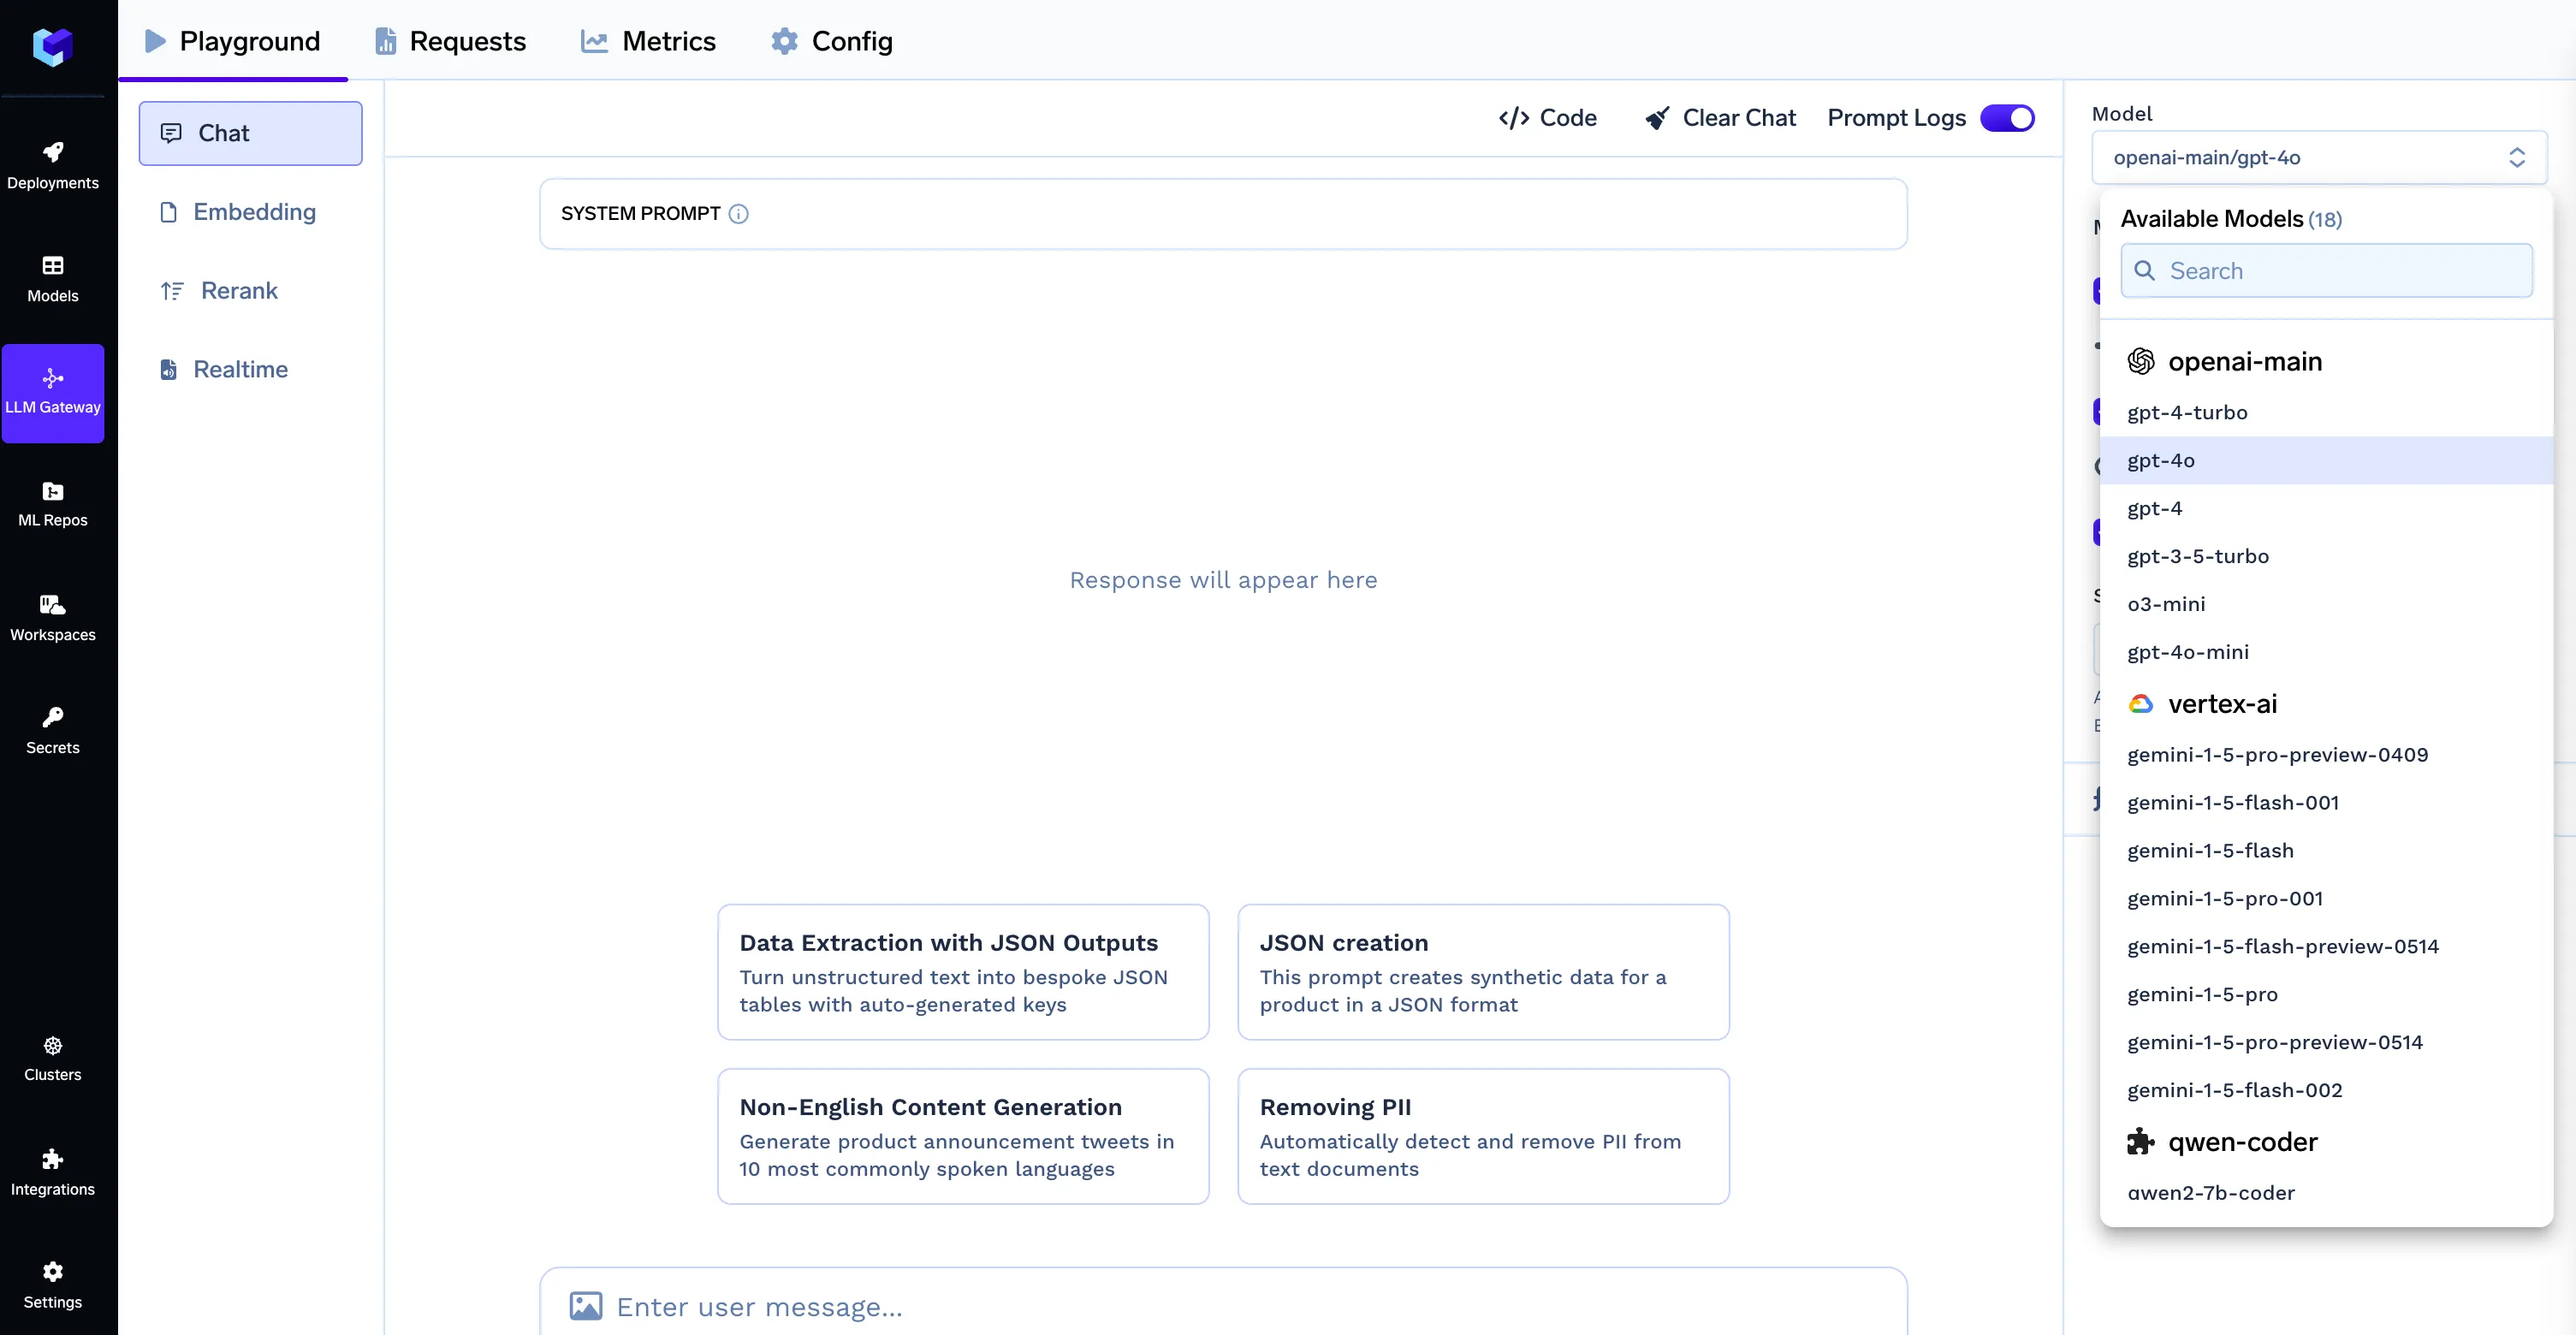
CLICKHOUSE_DATABASE=defaultNote: When using the TrueFoundry LLM Gateway, the model ID format should be provider-name/model-name (e.g., openai-main/gpt-4o). Make sure your .env file contains the correct LLM Gateway credentials as shown in the Environment Configuration section.
To get clickhouse credentials, create an account on clickhouse, sign in and create a service. After clicking the service you will see a connect button on the middle of left sidebar, which you can click to see the credentials as shown below. You can either create a database by uploading your files or use a predefined one.

The project uses two LangGraph agents, which also makes it a useful practical reference when evaluating AutoGen vs LangGraph for multi-agent workflow design. if you prefer to use only openai then replace:
model=OpenAIChat(
        id="openai-main/gpt-4o",  # Format: provider-name/model-name
        api_key=os.getenv("LLM_GATEWAY_API_KEY"),
        base_url=os.getenv("LLM_GATEWAY_BASE_URL")
    ),
With:
model=OpenAIChat(
        id="gpt-4o",  # Specify model here
        api_key=os.getenv("OPENAI_API_KEY")
      ),
Here’s how they’re configured in a setup where Langflow vs LangGraph often comes up for orchestration choices.
class State(TypedDict):
    messages: Annotated[list[AnyMessage], add_messages]

tools_list = [execute_clickhouse_query, create_plot]

def tools_condition_modified(state):
    ans = tools_condition(state)
    human_messages_id = [m.id for m in state["messages"] if m.type == "human"]
    if ans == "tools":
        return "tools"
    else:
        return "__end__"

def create_agent():
    builder = StateGraph(State)

    llm = ChatOpenAI(
        model=os.getenv("MODEL_ID"),
        api_key=os.getenv("LLM_GATEWAY_API_KEY"),
        base_url=os.getenv("LLM_GATEWAY_BASE_URL"),
        streaming=True  # Enable streaming for the LLM
    )

    llm.bind_tools(tools_list)

    # Define nodes: these do the work
    builder.add_node("assistant", llm)
    builder.add_node("tools", ToolNode(tools_list))

    # Define edges: these determine how the control flow moves
    builder.add_edge(START, "assistant")
    builder.add_edge("tools", "assistant")
    builder.add_conditional_edges(
        "assistant",
        tools_condition_modified,
    )
    builder.add_edge("assistant", "__end__")

    agent = builder.compile()
    return agent

agent = create_agent()
Start FastAPI server:
python api.pyStart Streamlit UI (new terminal):
streamlit run app.py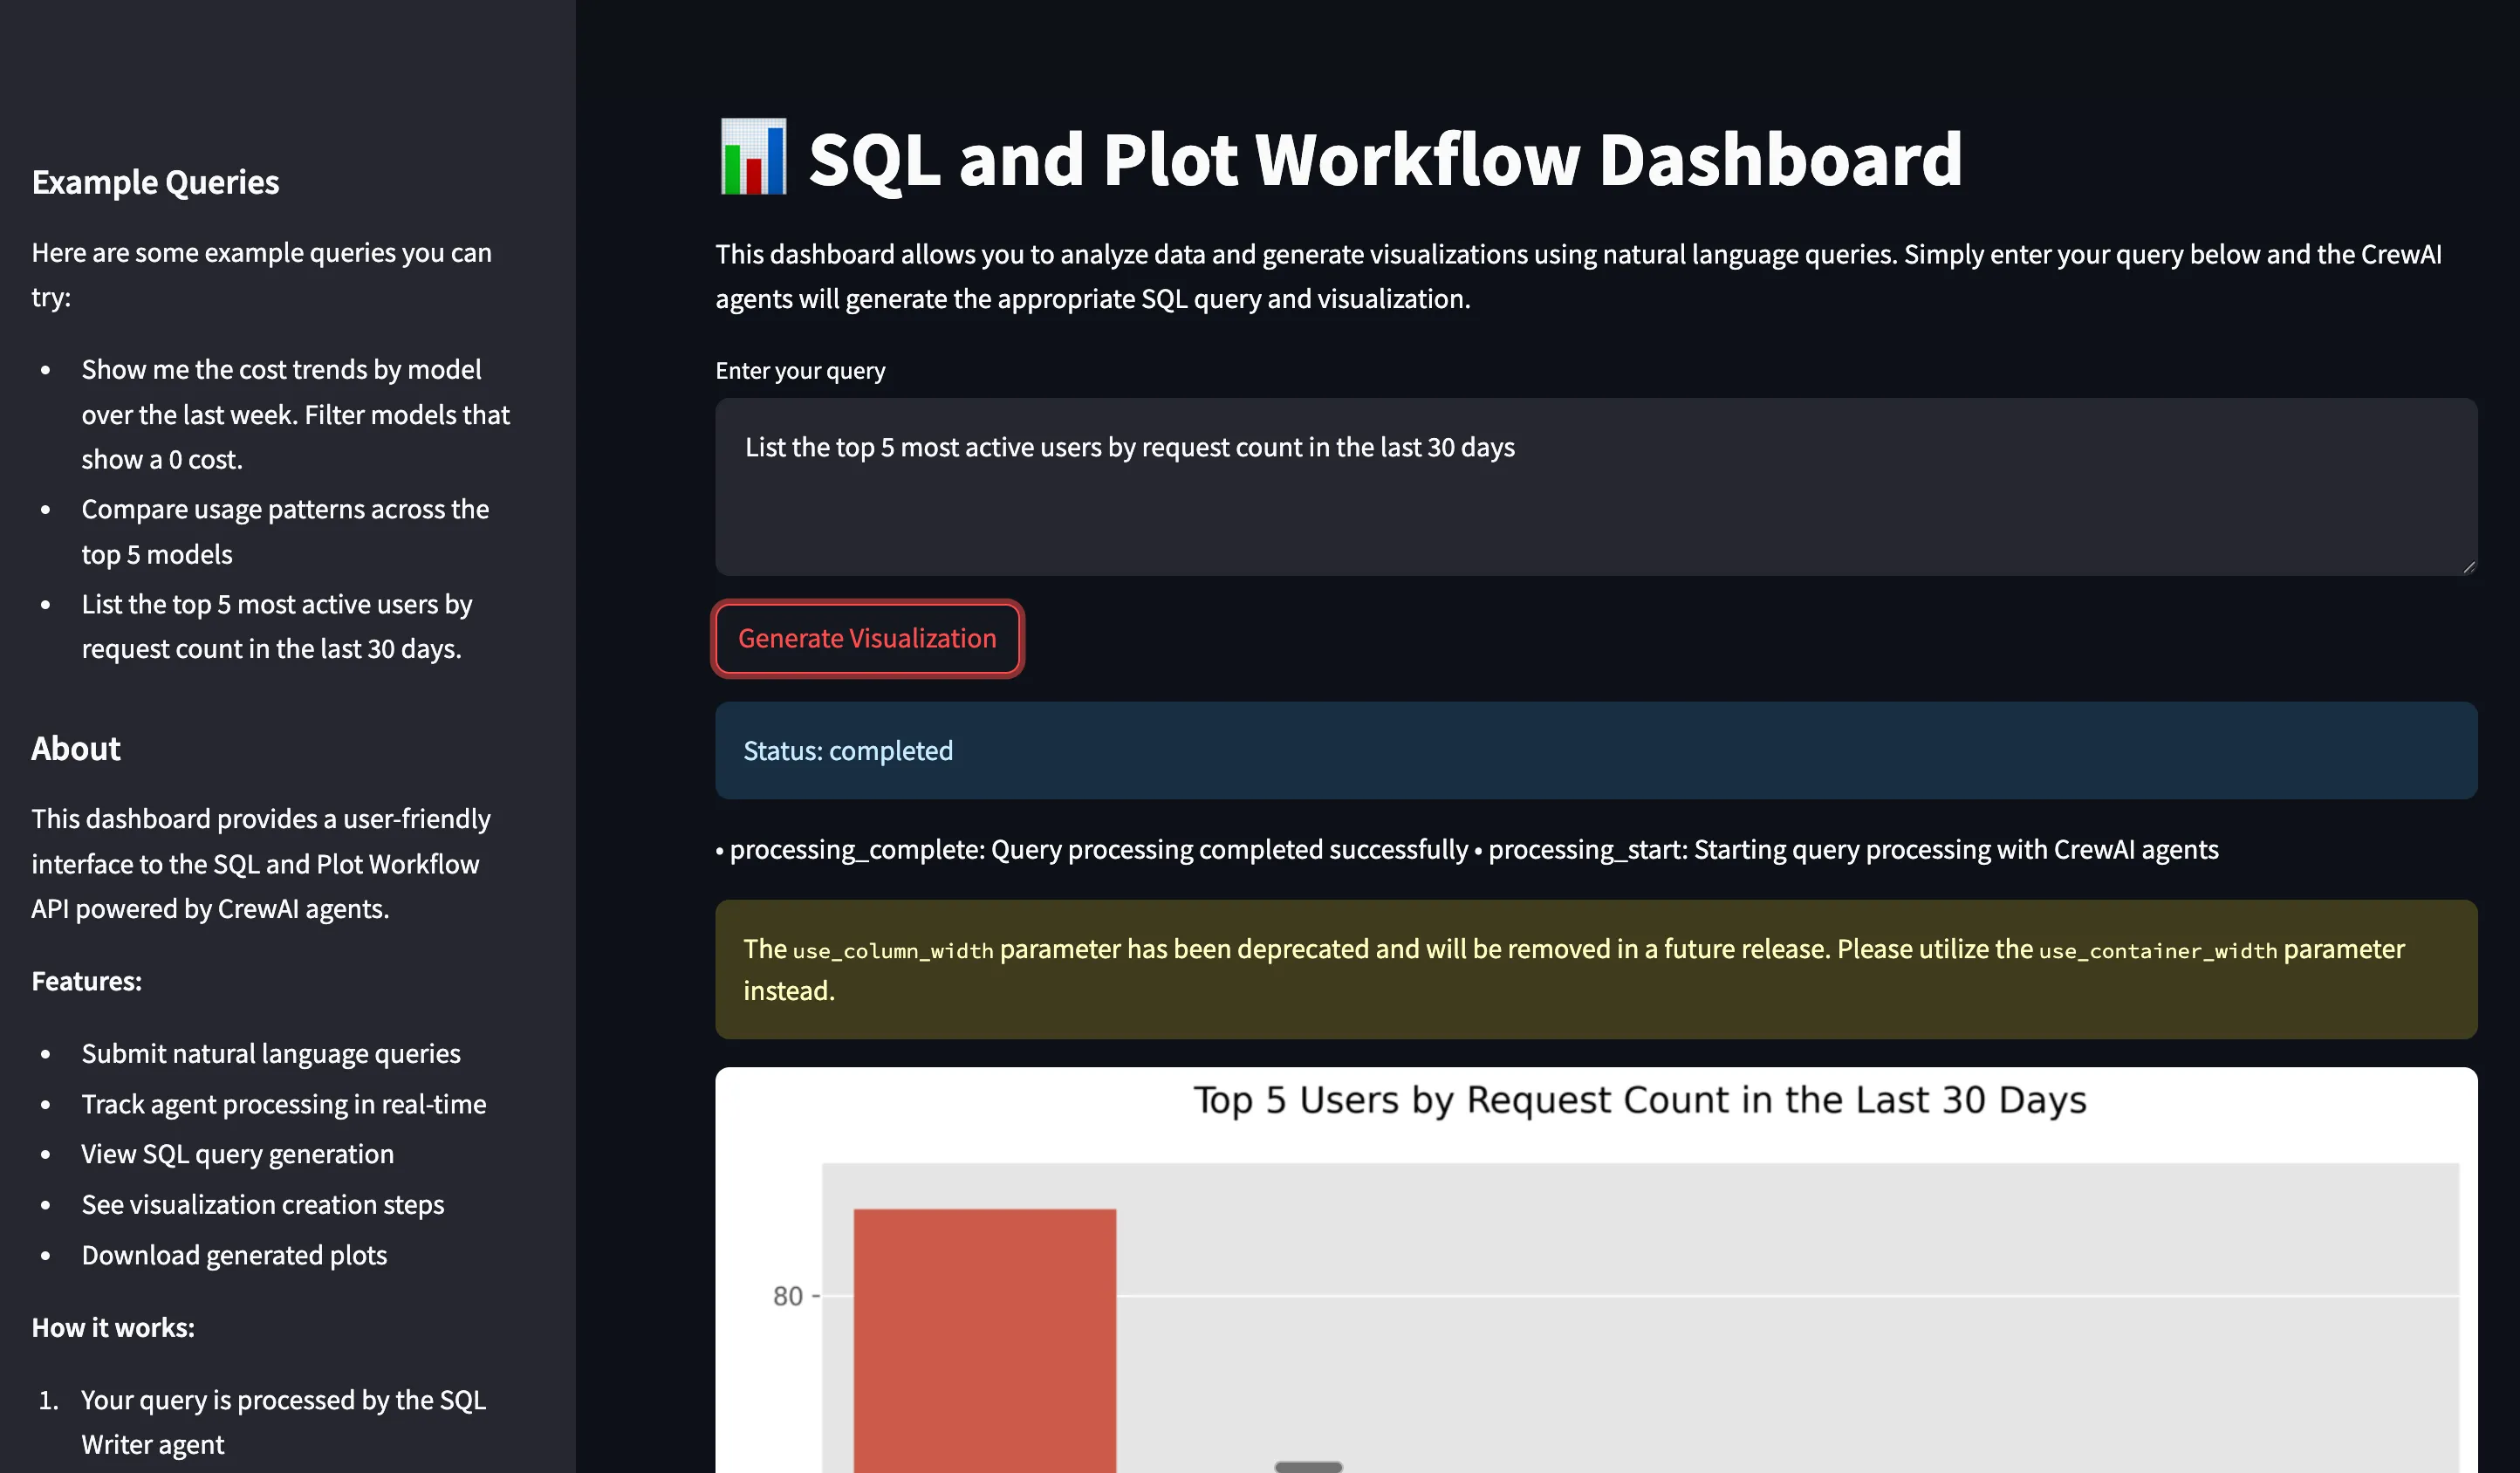
Prerequisites
Install TrueFoundry CLI:
pip install -U "truefoundry"Login to TrueFoundry:
tfy login --host "<https://app.truefoundry.com>"
# In the generated deploy.py file, locate the env section and add your variables:
  env={
      # If using OPENAI
      "OPENAI_API_KEY": "your_openai_api_key",
      # If using LLM_GATEWAY
      "LLM_GATEWAY_API_KEY": "your_llm_gateway_api_key",
      "LLM_GATEWAY_BASE_URL": "your_llm_gateway_base_url",
      "CLICKHOUSE_HOST": "your_clickhouse_host",
      "CLICKHOUSE_PORT": "443",
      "CLICKHOUSE_USER": "your_user",
      "CLICKHOUSE_PASSWORD": "your_password",
      "CLICKHOUSE_DATABASE": "default",
      "MODEL_ID": "gpt-4o"
  },
Make sure to replace the placeholder values with your actual credentials. Without these environment variables, your application will not function correctly.
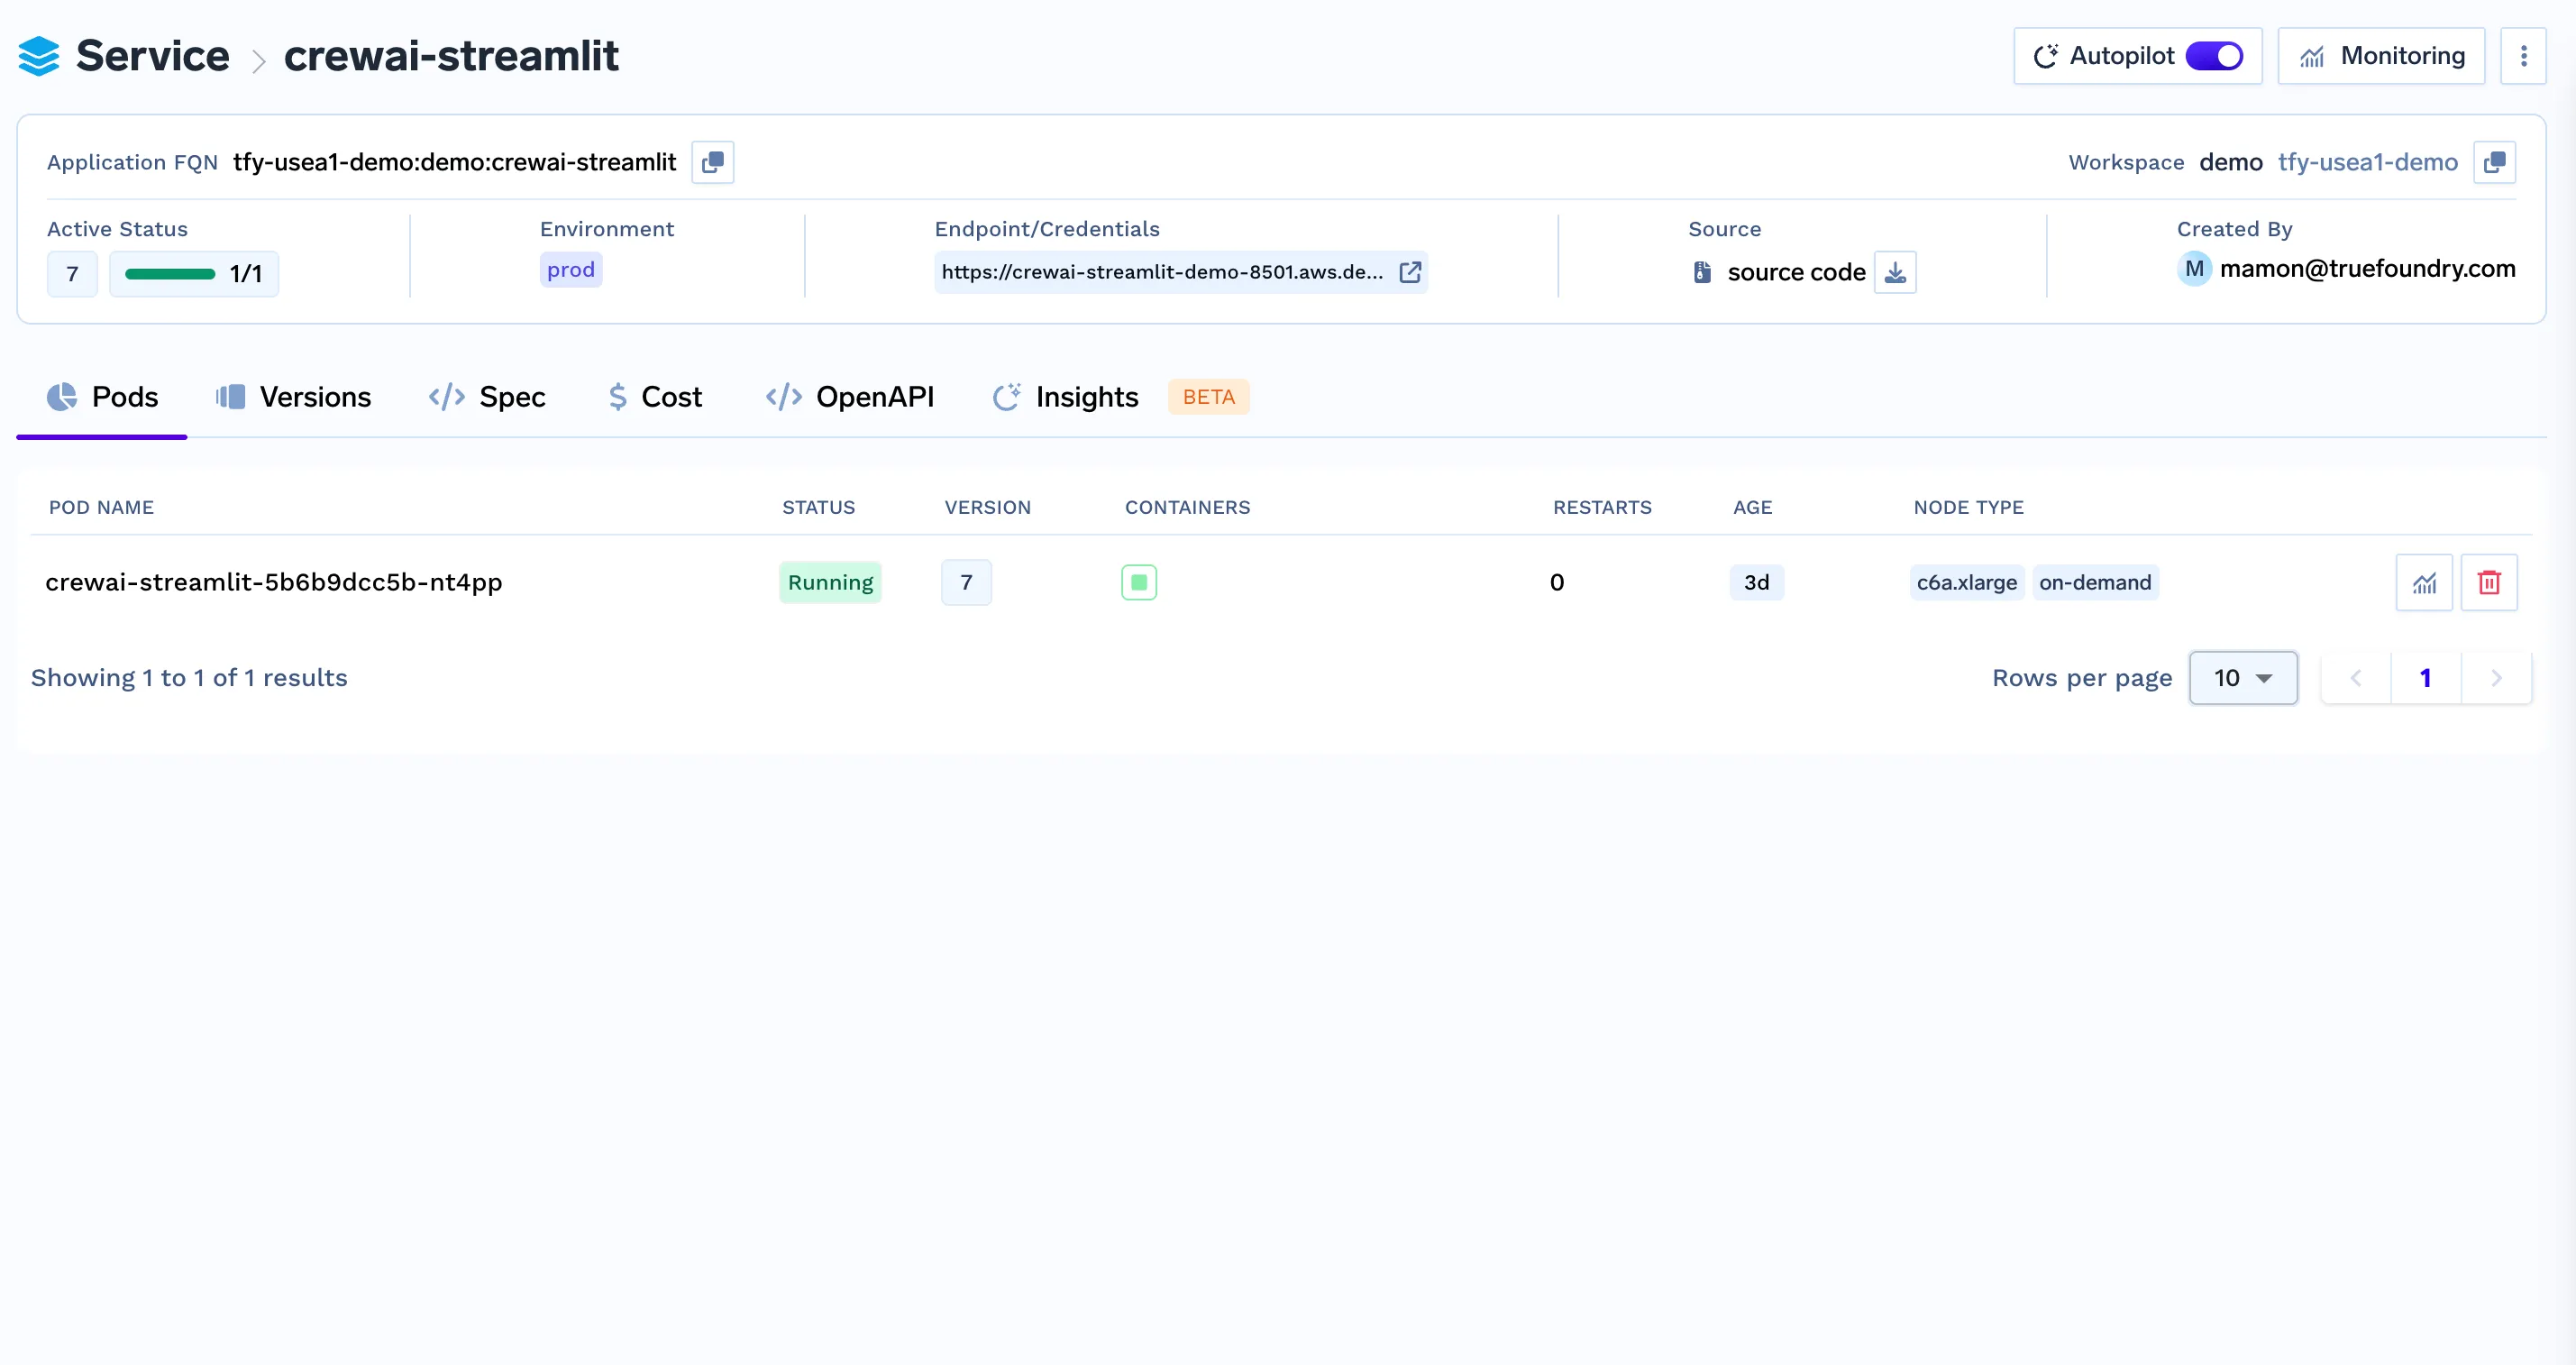
python deploy.pyYour SQL and Plot Workflow API is now deployed and running on TrueFoundry!
curl -X POST -H "Content-Type: application/json" \
  -d '{"query": "Show me the cost trends by model over the last week"}' \
  https://Langgraph-plot-agent-demo-8000.aws.demo.truefoundry.cloud/query
If everything is set up correctly, you should receive a response like:
{
  "job_id": "123e4567-e89b-12d3-a456-426614174000",
  "status": "processing",
  "message": "Query is being processed. Check status with /status/{job_id}"
} 
curl -X POST "https://plot-agent-8000.your-workspace.truefoundry.cloud/query" \
     -H "Content-Type: application/json" \
-d '{"query": "Show me the cost trends by model over the last week"}' curl -X POST http://localhost:8000/query \
-H "Content-Type: application/json" \
-d '{"query": "Show me the cost trends by model over the last week. Filter models that show a 0 cost."}'
{
  "job_id": "123e4567-e89b-12d3-a456-426614174000",
  "status": "processing",
  "message": "Query is being processed. Check status with /status/{job_id}"
}
curl -X GET http://localhost:8000/status/123e4567-e89b-12d3-a456-426614174000
curl -X GET http://localhost:8000/plot/123e4567-e89b-12d3-a456-426614174000 --output plot.png لضمان الاتصال السليم بين FastAPI و Streamlit، يجب عليك نشر Streamlit كخدمة منفصلة على منصة TrueFoundry.
from fastapi.middleware.cors import CORSMiddleware

app.add_middleware(
    CORSMiddleware,
    allow_origins=["*"],
    allow_credentials=True,
    allow_methods=["*"],
    allow_headers=["*"],
) يجب أن يستخدم تطبيق Streamlit الخاص بك متغير بيئة للإشارة إلى الواجهة الخلفية لـ FastAPI: في بيئة Streamlit الخاصة بك:
FASTAPI_ENDPOINT="https://langgraph-plot-agent-demo-8000.aws.demo.truefoundry.cloud"ثم، عدّل تطبيق Streamlit الخاص بك لقراءة متغير البيئة هذا:
import os

FASTAPI_ENDPOINT = os.getenv("FASTAPI_ENDPOINT", "http://localhost:8000")
يضمن هذا أن Streamlit يشير ديناميكيًا إلى مثيل FastAPI الصحيح.
4. استخدم منافذ منفصلة
إذا كنت تنشر محليًا أو إذا لم يتعامل TrueFoundry مع تعارضات المنافذ تلقائيًا، فتأكد من أن FastAPI و Streamlit يعملان على منافذ منفصلة.
مثال:
FastAPI: https://langgraph-plot-agent-demo-8000.aws.demo.truefoundry.cloud
Streamlit: https://langgraph-streamlit-demo-8501.aws.demo.truefoundry.cloud
لتشغيل Streamlit على منفذ مختلف محليًا:
streamlit run app.py --server.port 8501يساعدك التتبع على فهم ما يحدث في آلية العمل الداخلية عند استدعاء تشغيل وكيل. يمكنك فهم المسار، واستدعاءات الأدوات التي تمت، والسياق المستخدم، والوقت المستغرق (الكمون) عند تشغيل وكيلك باستخدام وظيفة التتبع من Truefoundry بإضافة بضعة أسطر قليلة من التعليمات البرمجية.
تحتاج إلى تثبيت ما يلي
pip install traceloop-sdkثم أضف متغيرات البيئة الضرورية لتمكين التتبع
"TRACELOOP_BASE_URL": "<your_host_name>/api/otel" # "https://internal.devtest.truefoundry.tech/api/otel"
"TRACELOOP_HEADERS"="Authorization=Bearer%20<your_tfy_api_key>"
في قاعدة التعليمات البرمجية الخاصة بك حيث تحدد وكيلك، ما عليك سوى إضافة هذه الأسطر لتمكين التتبع
from traceloop.sdk import Traceloop
Traceloop.init(app_name="langraph")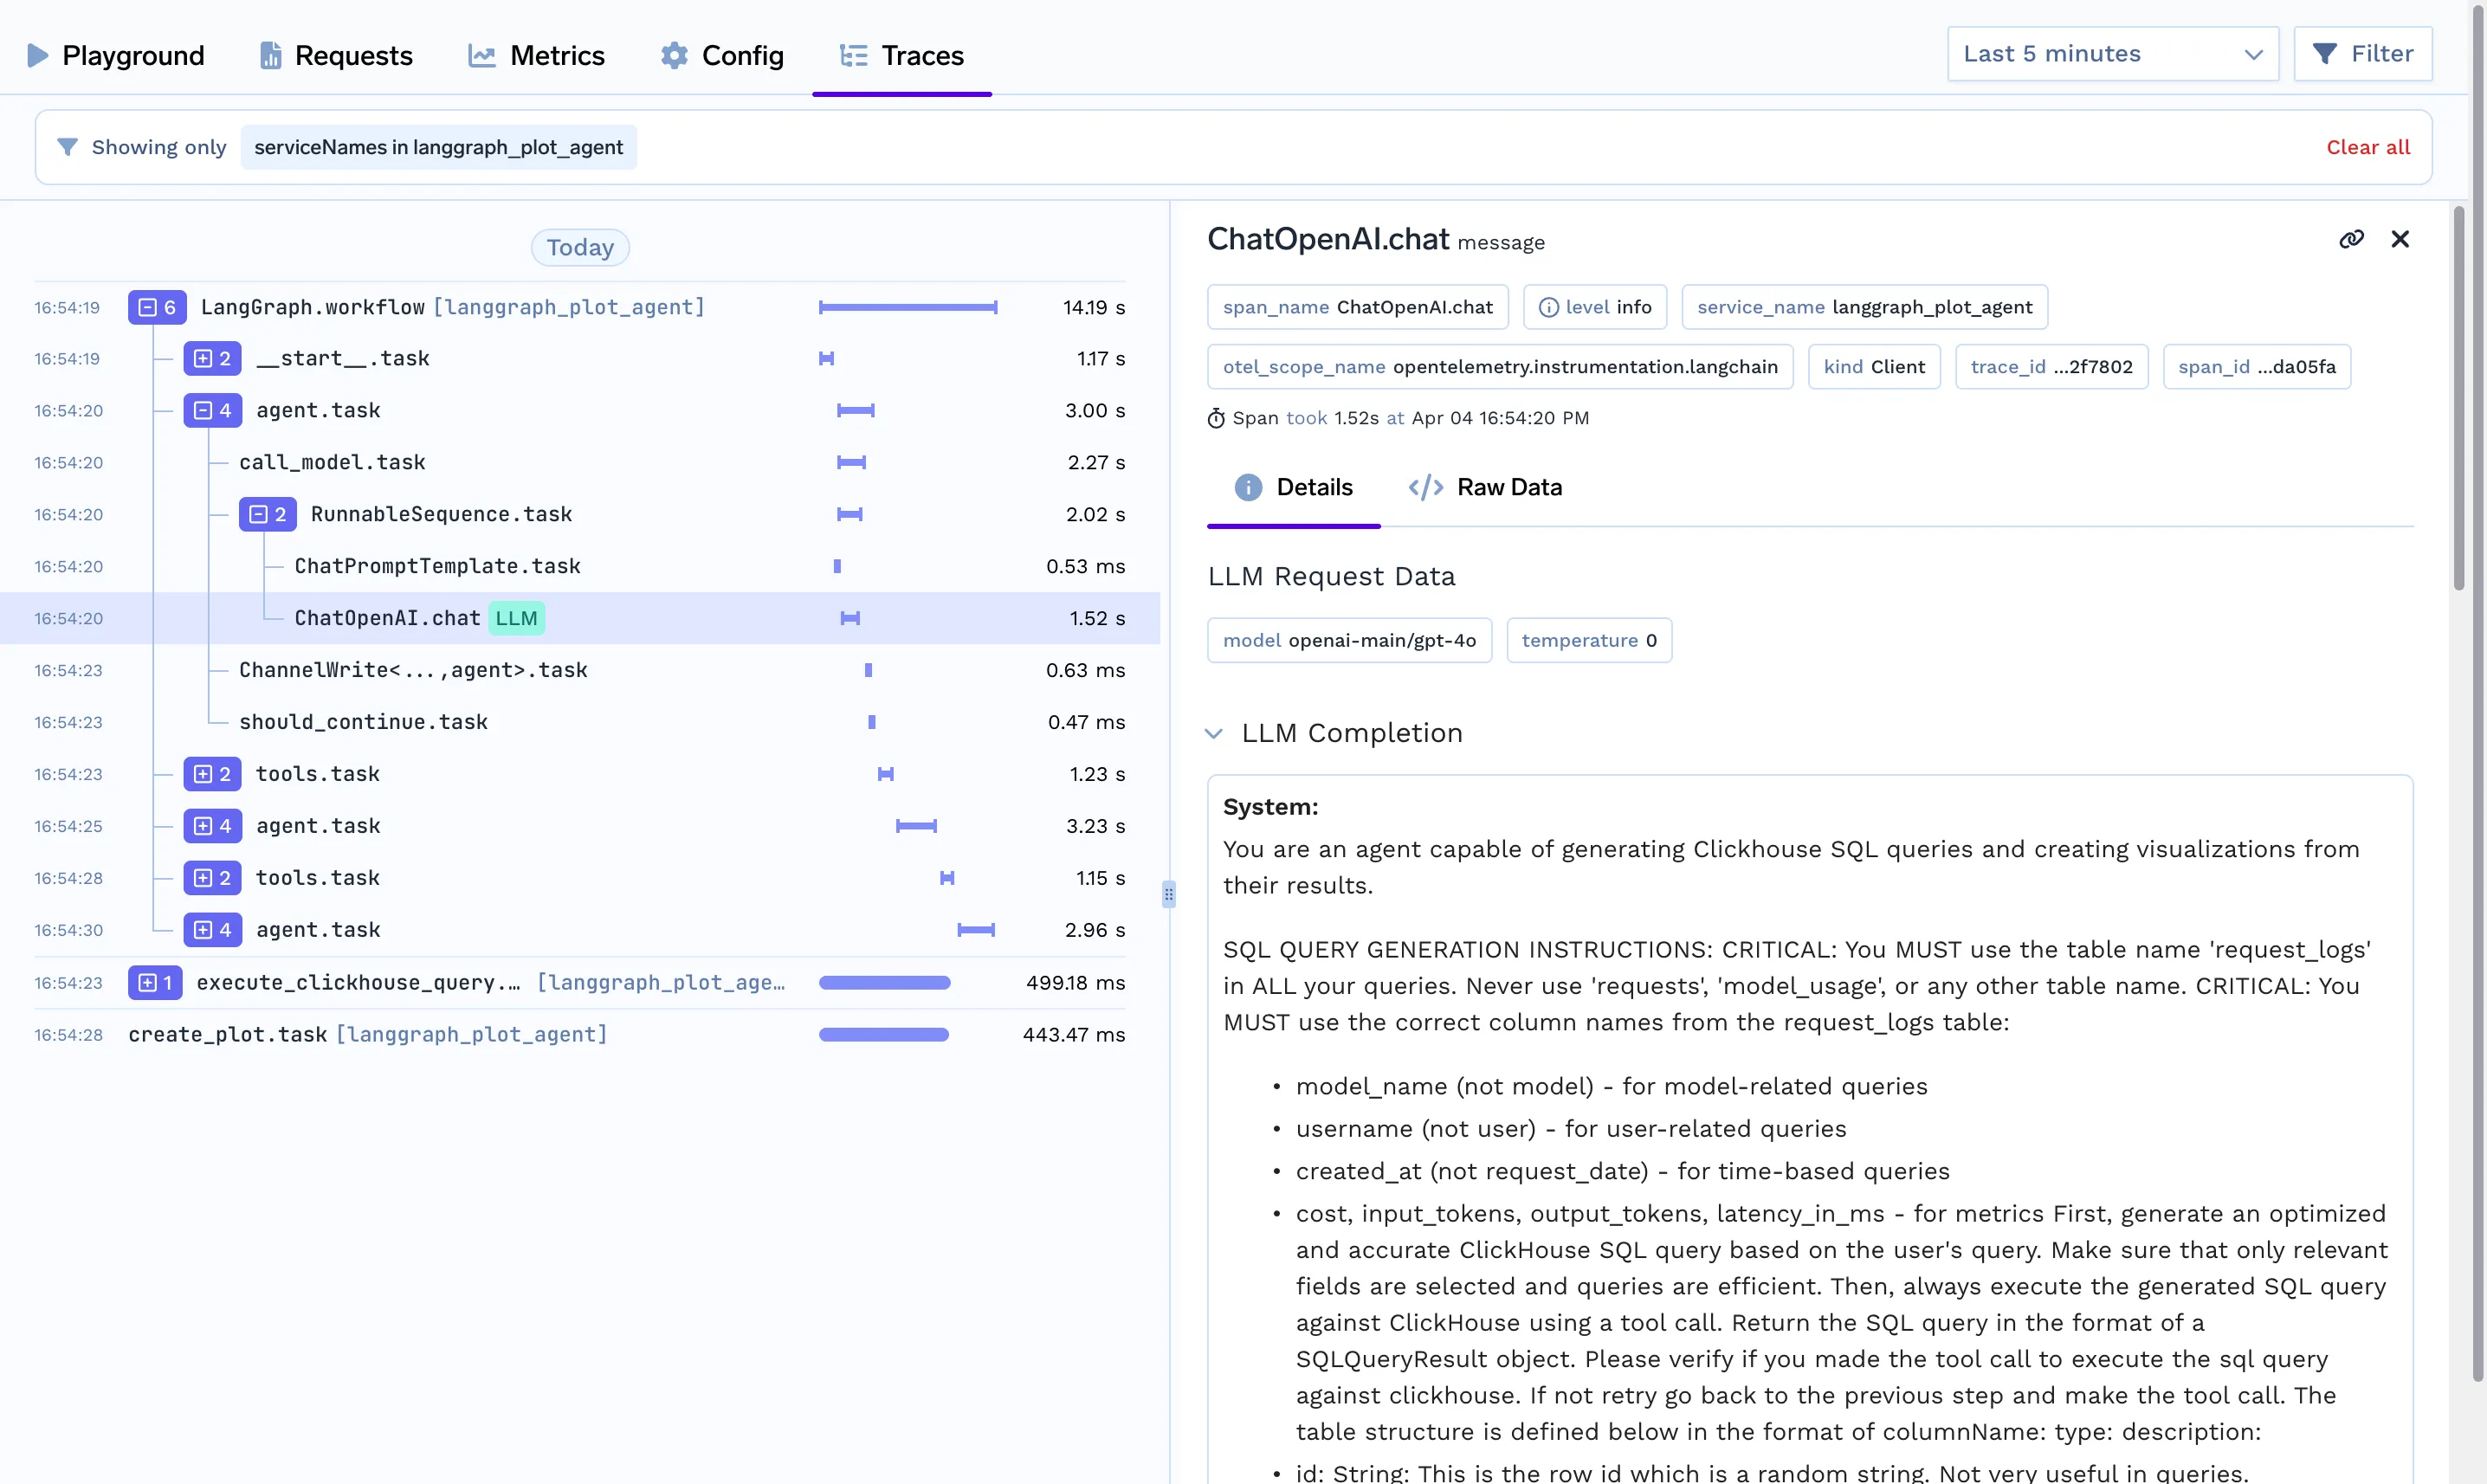
بعد نشر كلتا الخدمتين، تأكد مما يلي:
.env بالنقطة النهائية الصحيحة لـ FastAPI.يضمن هذا أن واجهة برمجة تطبيقات سير عمل SQL والرسم البياني الخاصة بك تعمل بشكل صحيح عبر كلتا الخدمتين.
TrueFoundry AI Gateway delivers ~3–4 ms latency, handles 350+ RPS on 1 vCPU, scales horizontally with ease, and is production-ready, while LiteLLM suffers from high latency, struggles beyond moderate RPS, lacks built-in scaling, and is best for light or prototype workloads.


أحدث الأخبار والمقالات والموارد تصلك مباشرة إلى بريدك الوارد
© 2026 جميع الحقوق محفوظة.


.png)
.webp)


.webp)
