How TrueFoundry Manages the MCP Server
TrueFoundry’s MCP Gateway acts as a reverse proxy between your agents and MCP servers like Notion. When you add Notion as a managed MCP, TrueFoundry handles:- Authentication — Agents authenticate once to the TrueFoundry MCP Gateway. The gateway handles outbound auth to Notion. Authorization happens directly between your account and your Notion workspace through the OAuth2 flow; TrueFoundry does not receive your Notion credentials.
- Tool-level access control — You can selectively enable or disable individual Notion tools per team from the TrueFoundry UI.
- Audit trail — Every tool invocation is traced with the calling user, tool name, input payload, and latency. Traces export via OpenTelemetry to your observability stack.
- Guardrails — TrueFoundry’s guardrail hooks apply at
mcp_pre_tool(before a tool is invoked) andmcp_post_tool(after the tool returns), letting you enforce content policies on Notion requests and results in real time.
Adding Notion to TrueFoundry
Open the MCP Server catalog
Navigate to MCP Servers in the TrueFoundry sidebar and click Add new MCP Server. Select Connect TrueFoundry Managed MCPs to open the catalog, find notion (described as “Notion is a collaboration and productivity tool”), and click + Add. TrueFoundry registers the server and takes you to the Notion MCP server detail page.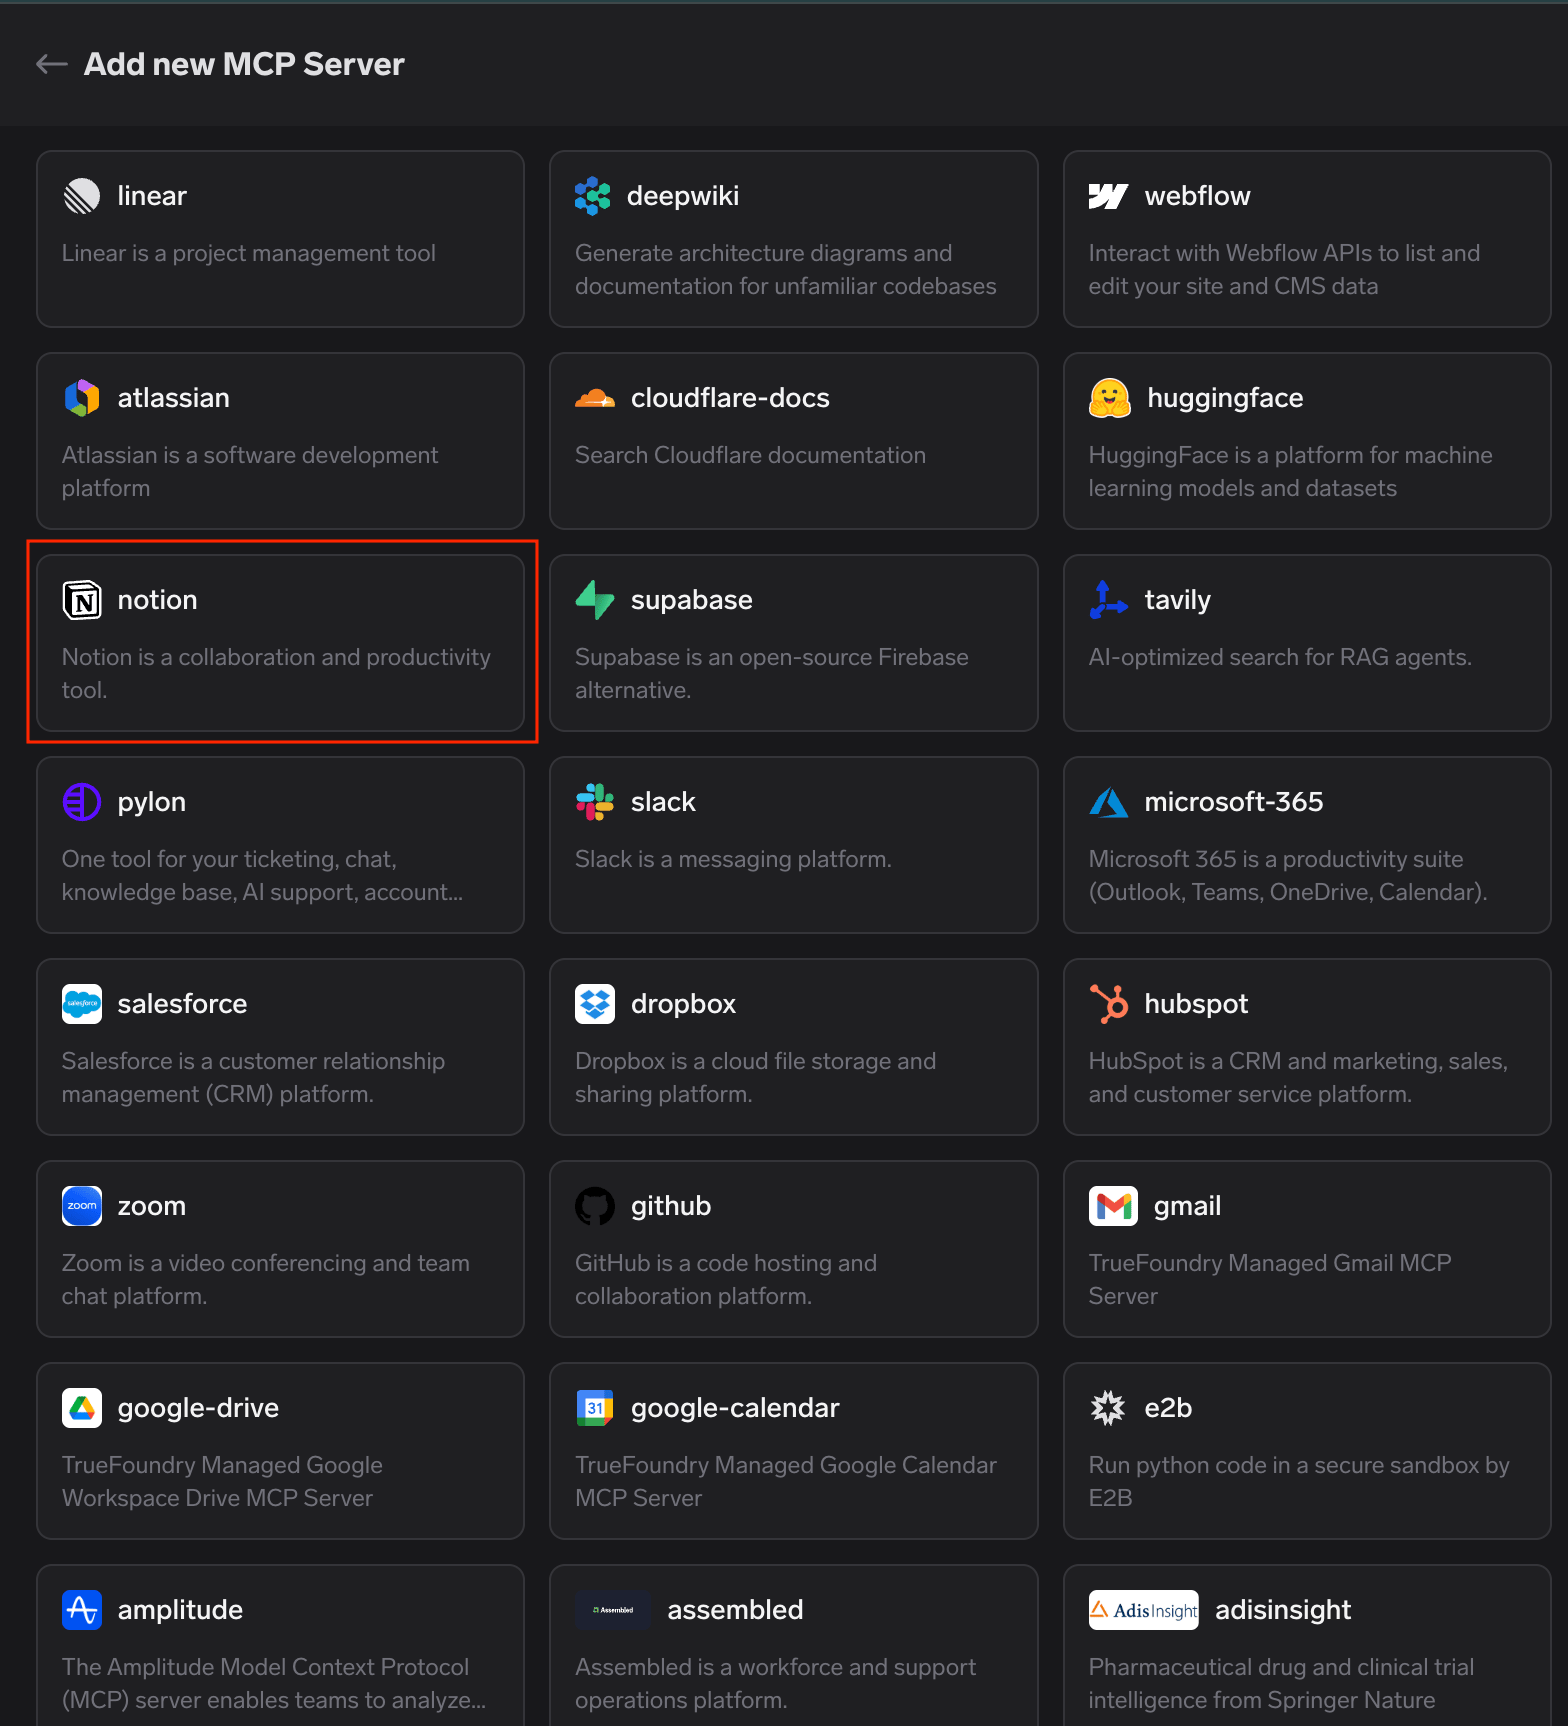
Start the connection
The Tools tab shows “You’re not connected to this MCP Server.” Click Connect Now to begin the OAuth2 authorization.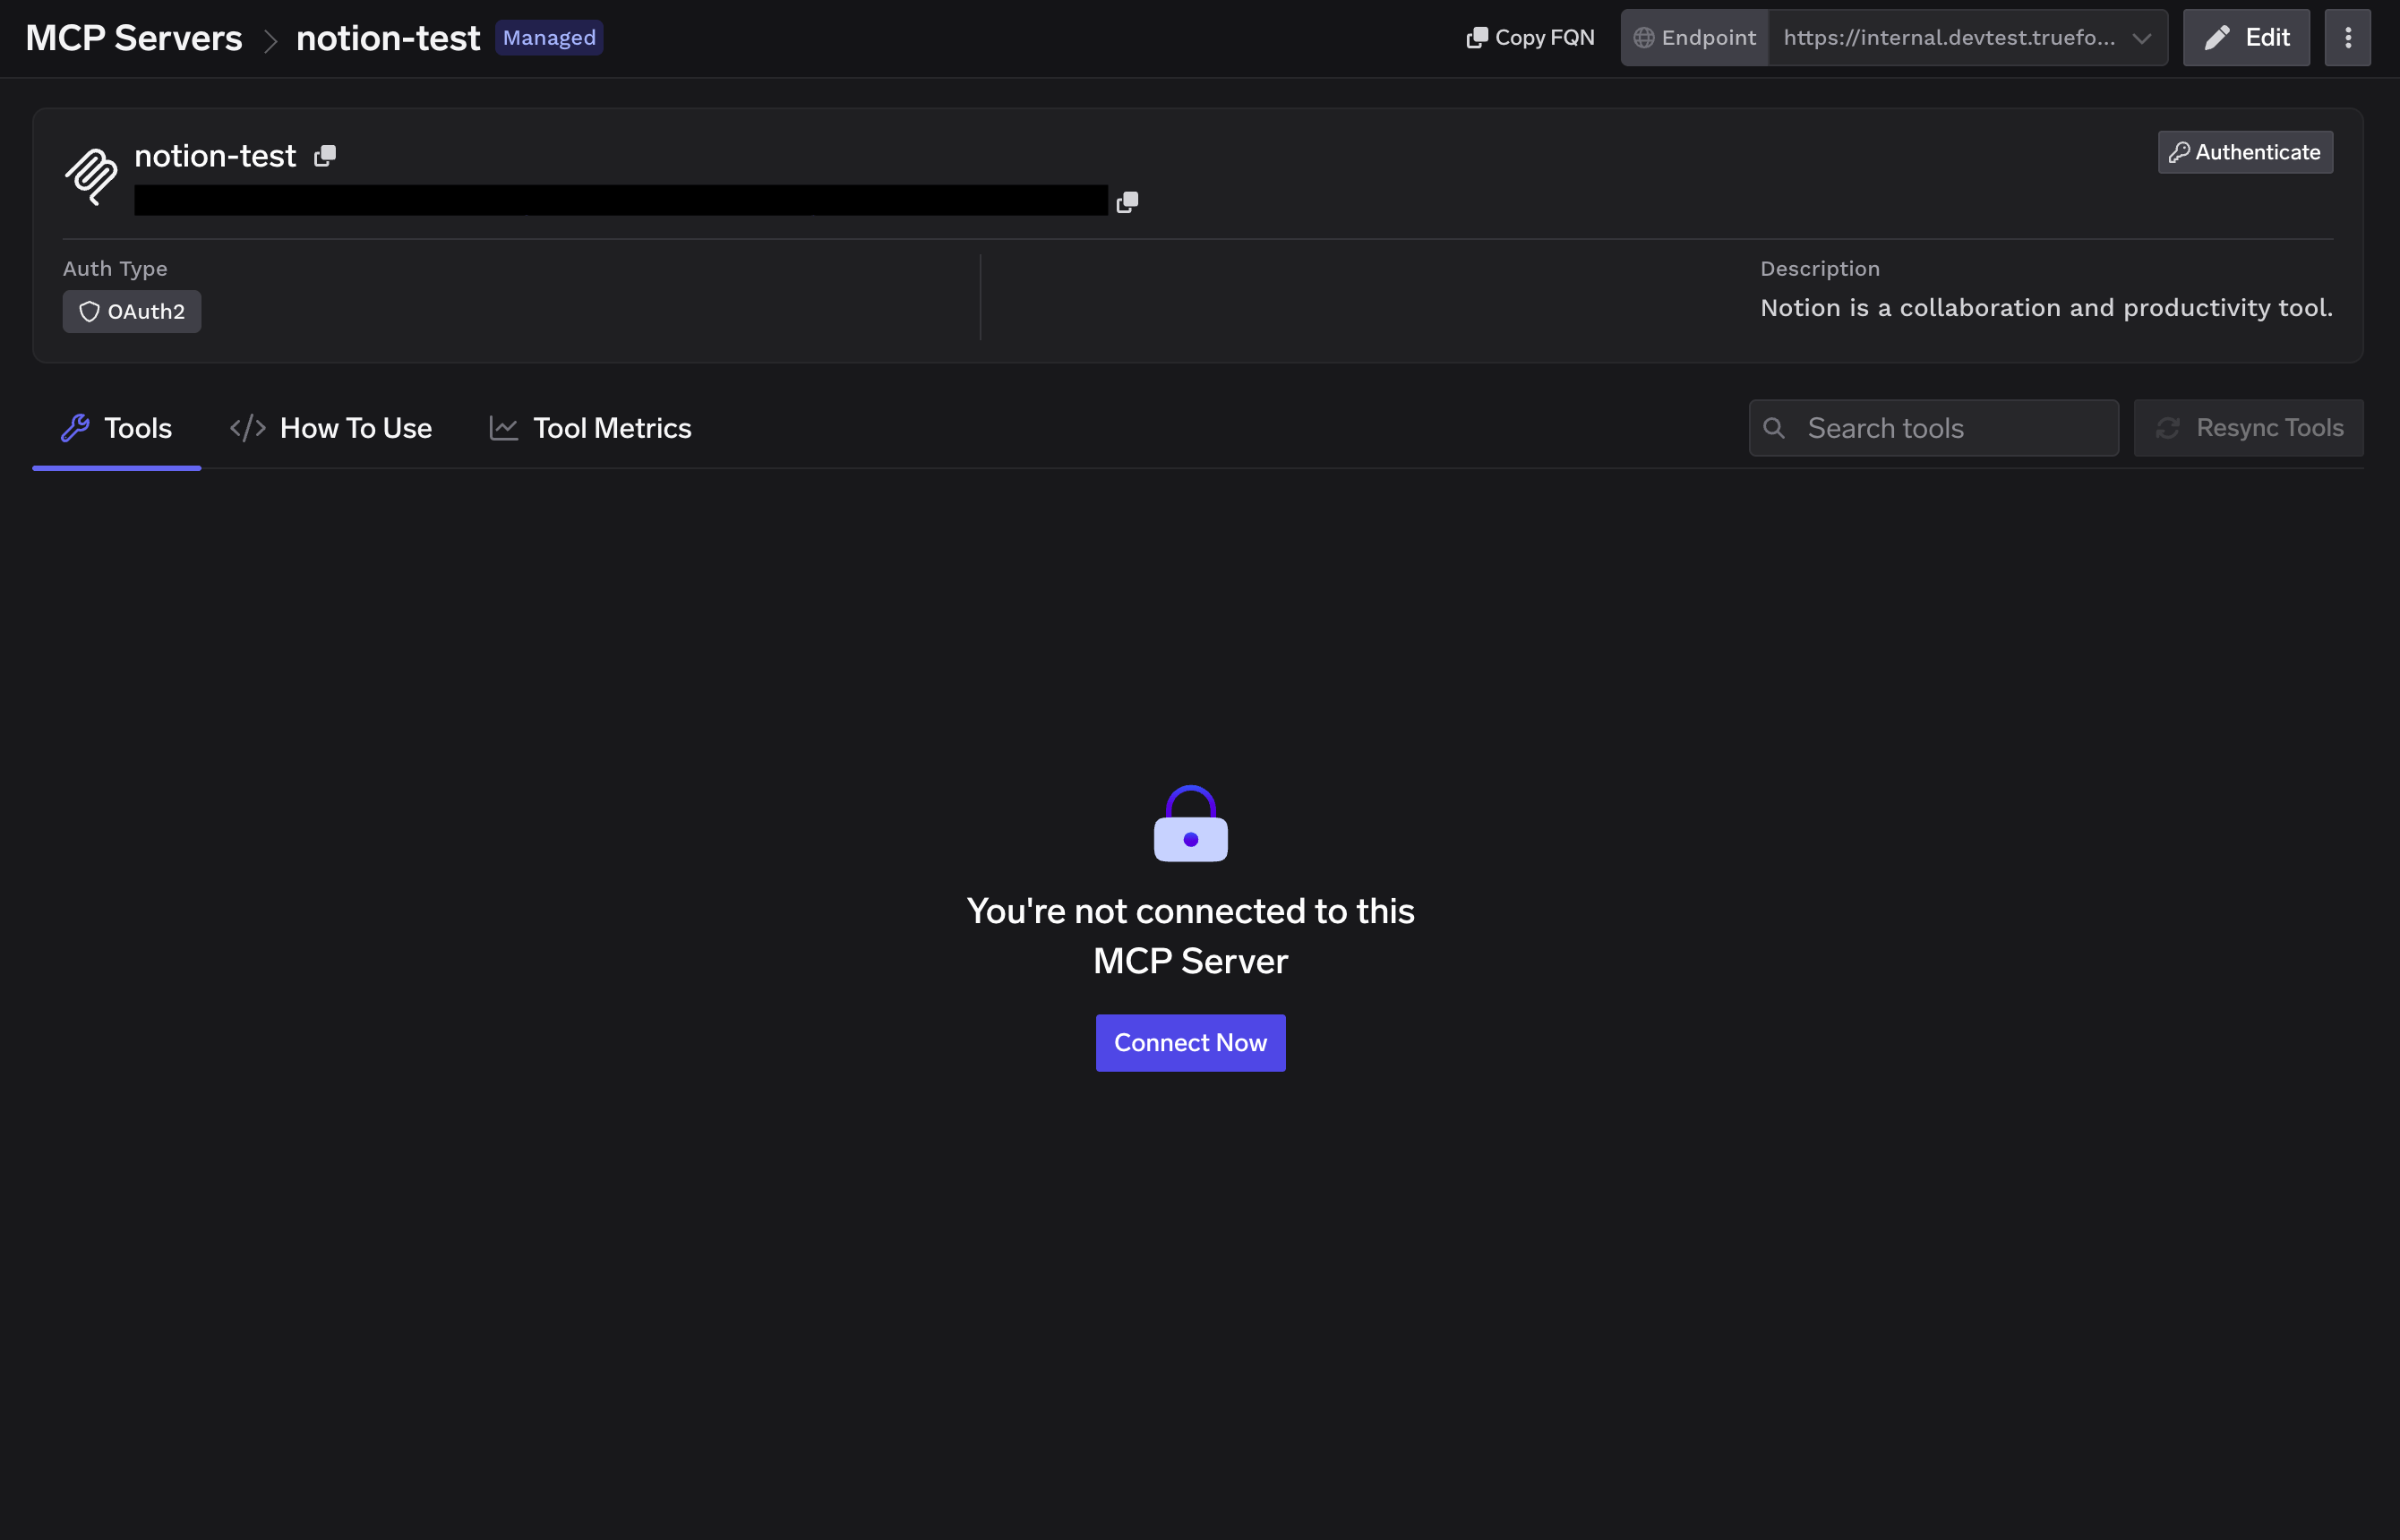
Approve via the TrueFoundry Gateway
A “Connect via Truefoundry Gateway” popup appears showing the MCP Gateway URL, the redirect URL, and the MCP servers to authorize. Review the details and click Approve.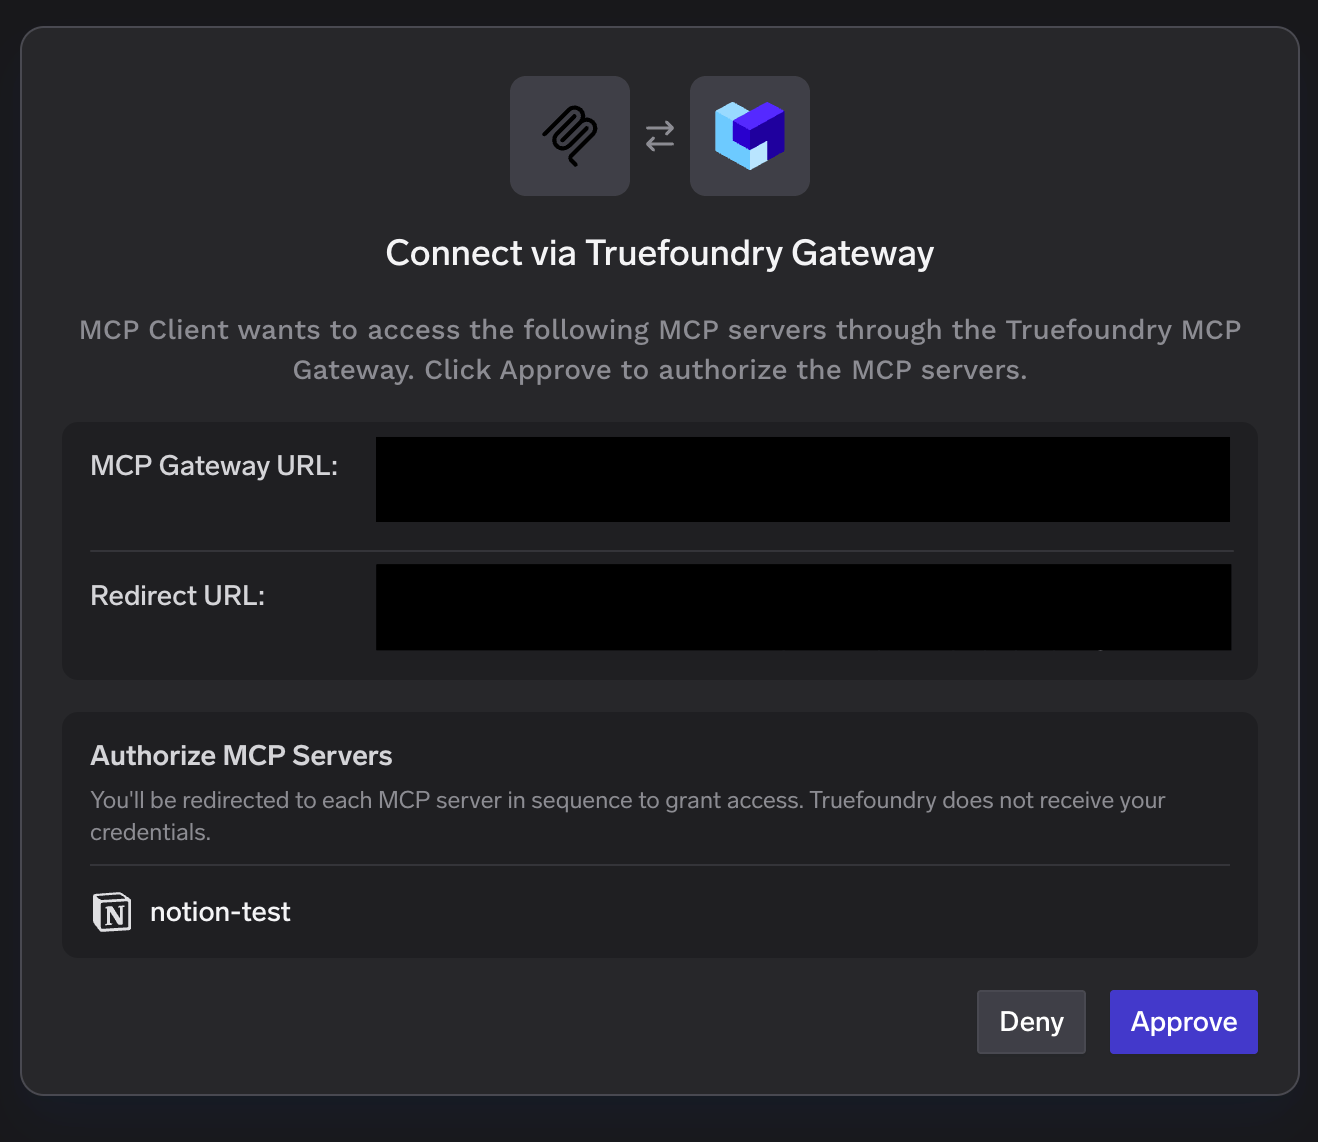
You’ll be redirected to each MCP server in sequence to grant access. TrueFoundry does not receive your credentials.
Authorize your Notion workspace
Notion’s own consent screen opens. Select the workspace to connect, review the access Notion will grant (page and database access, search, workspace users), confirm you trust the redirect URL, and click Continue.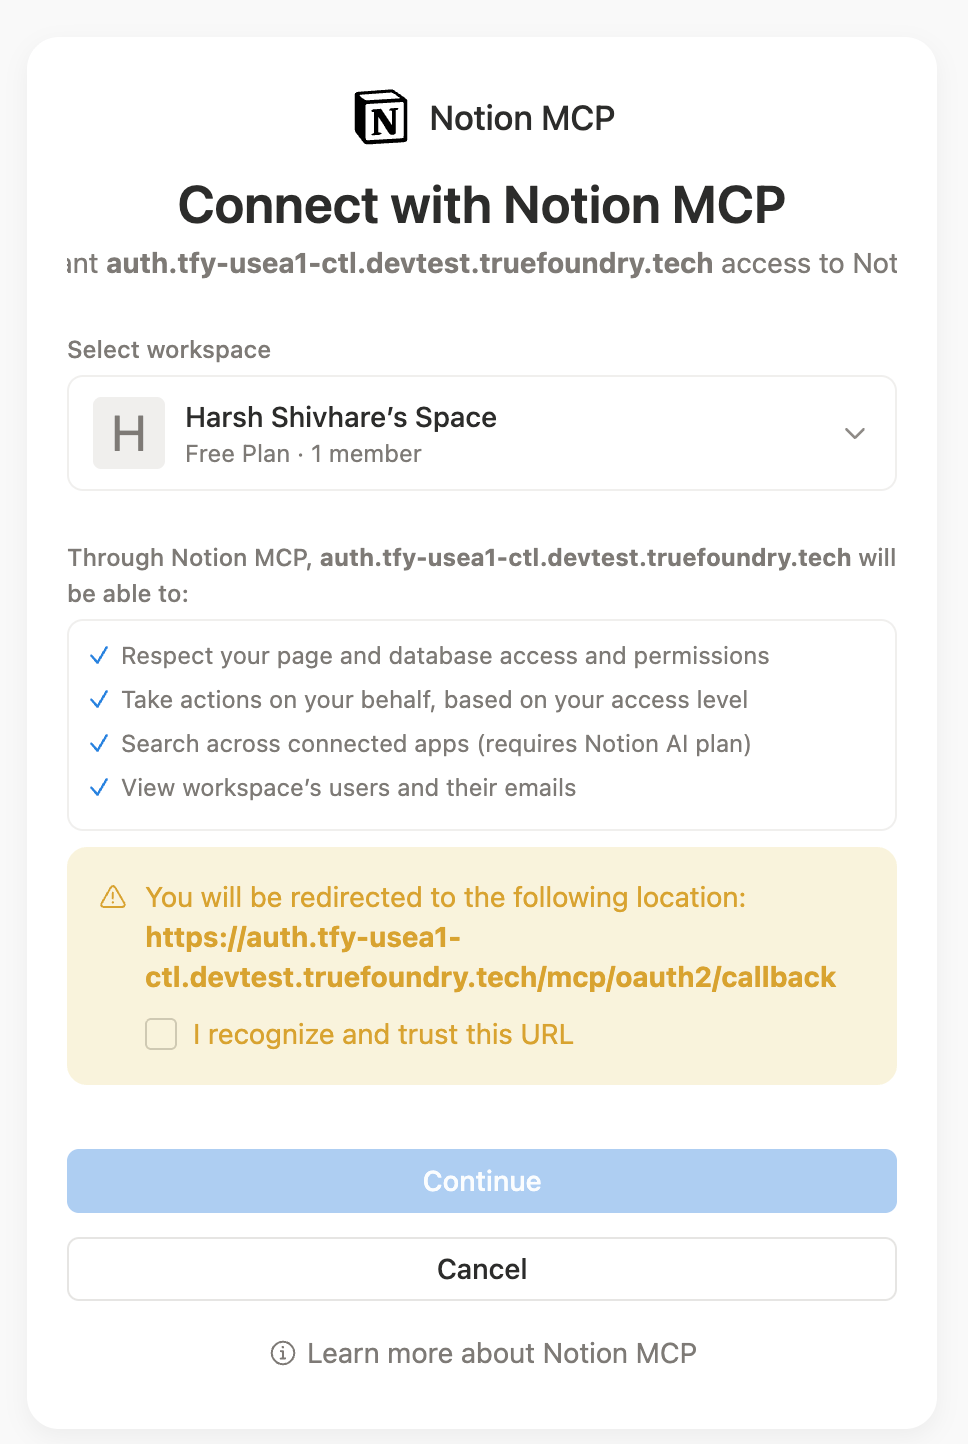
Verify tools
After authorizing, the Tools tab populates with Notion’s available tools — search, fetch, create and update pages, databases, comments, and more. Notion also exposes MCP Resources on its own tab. Each tool shows its description and a Try button so you can test it before wiring it into an agent. Tools are labeled Read-only or Destructive so you can see at a glance which ones modify data.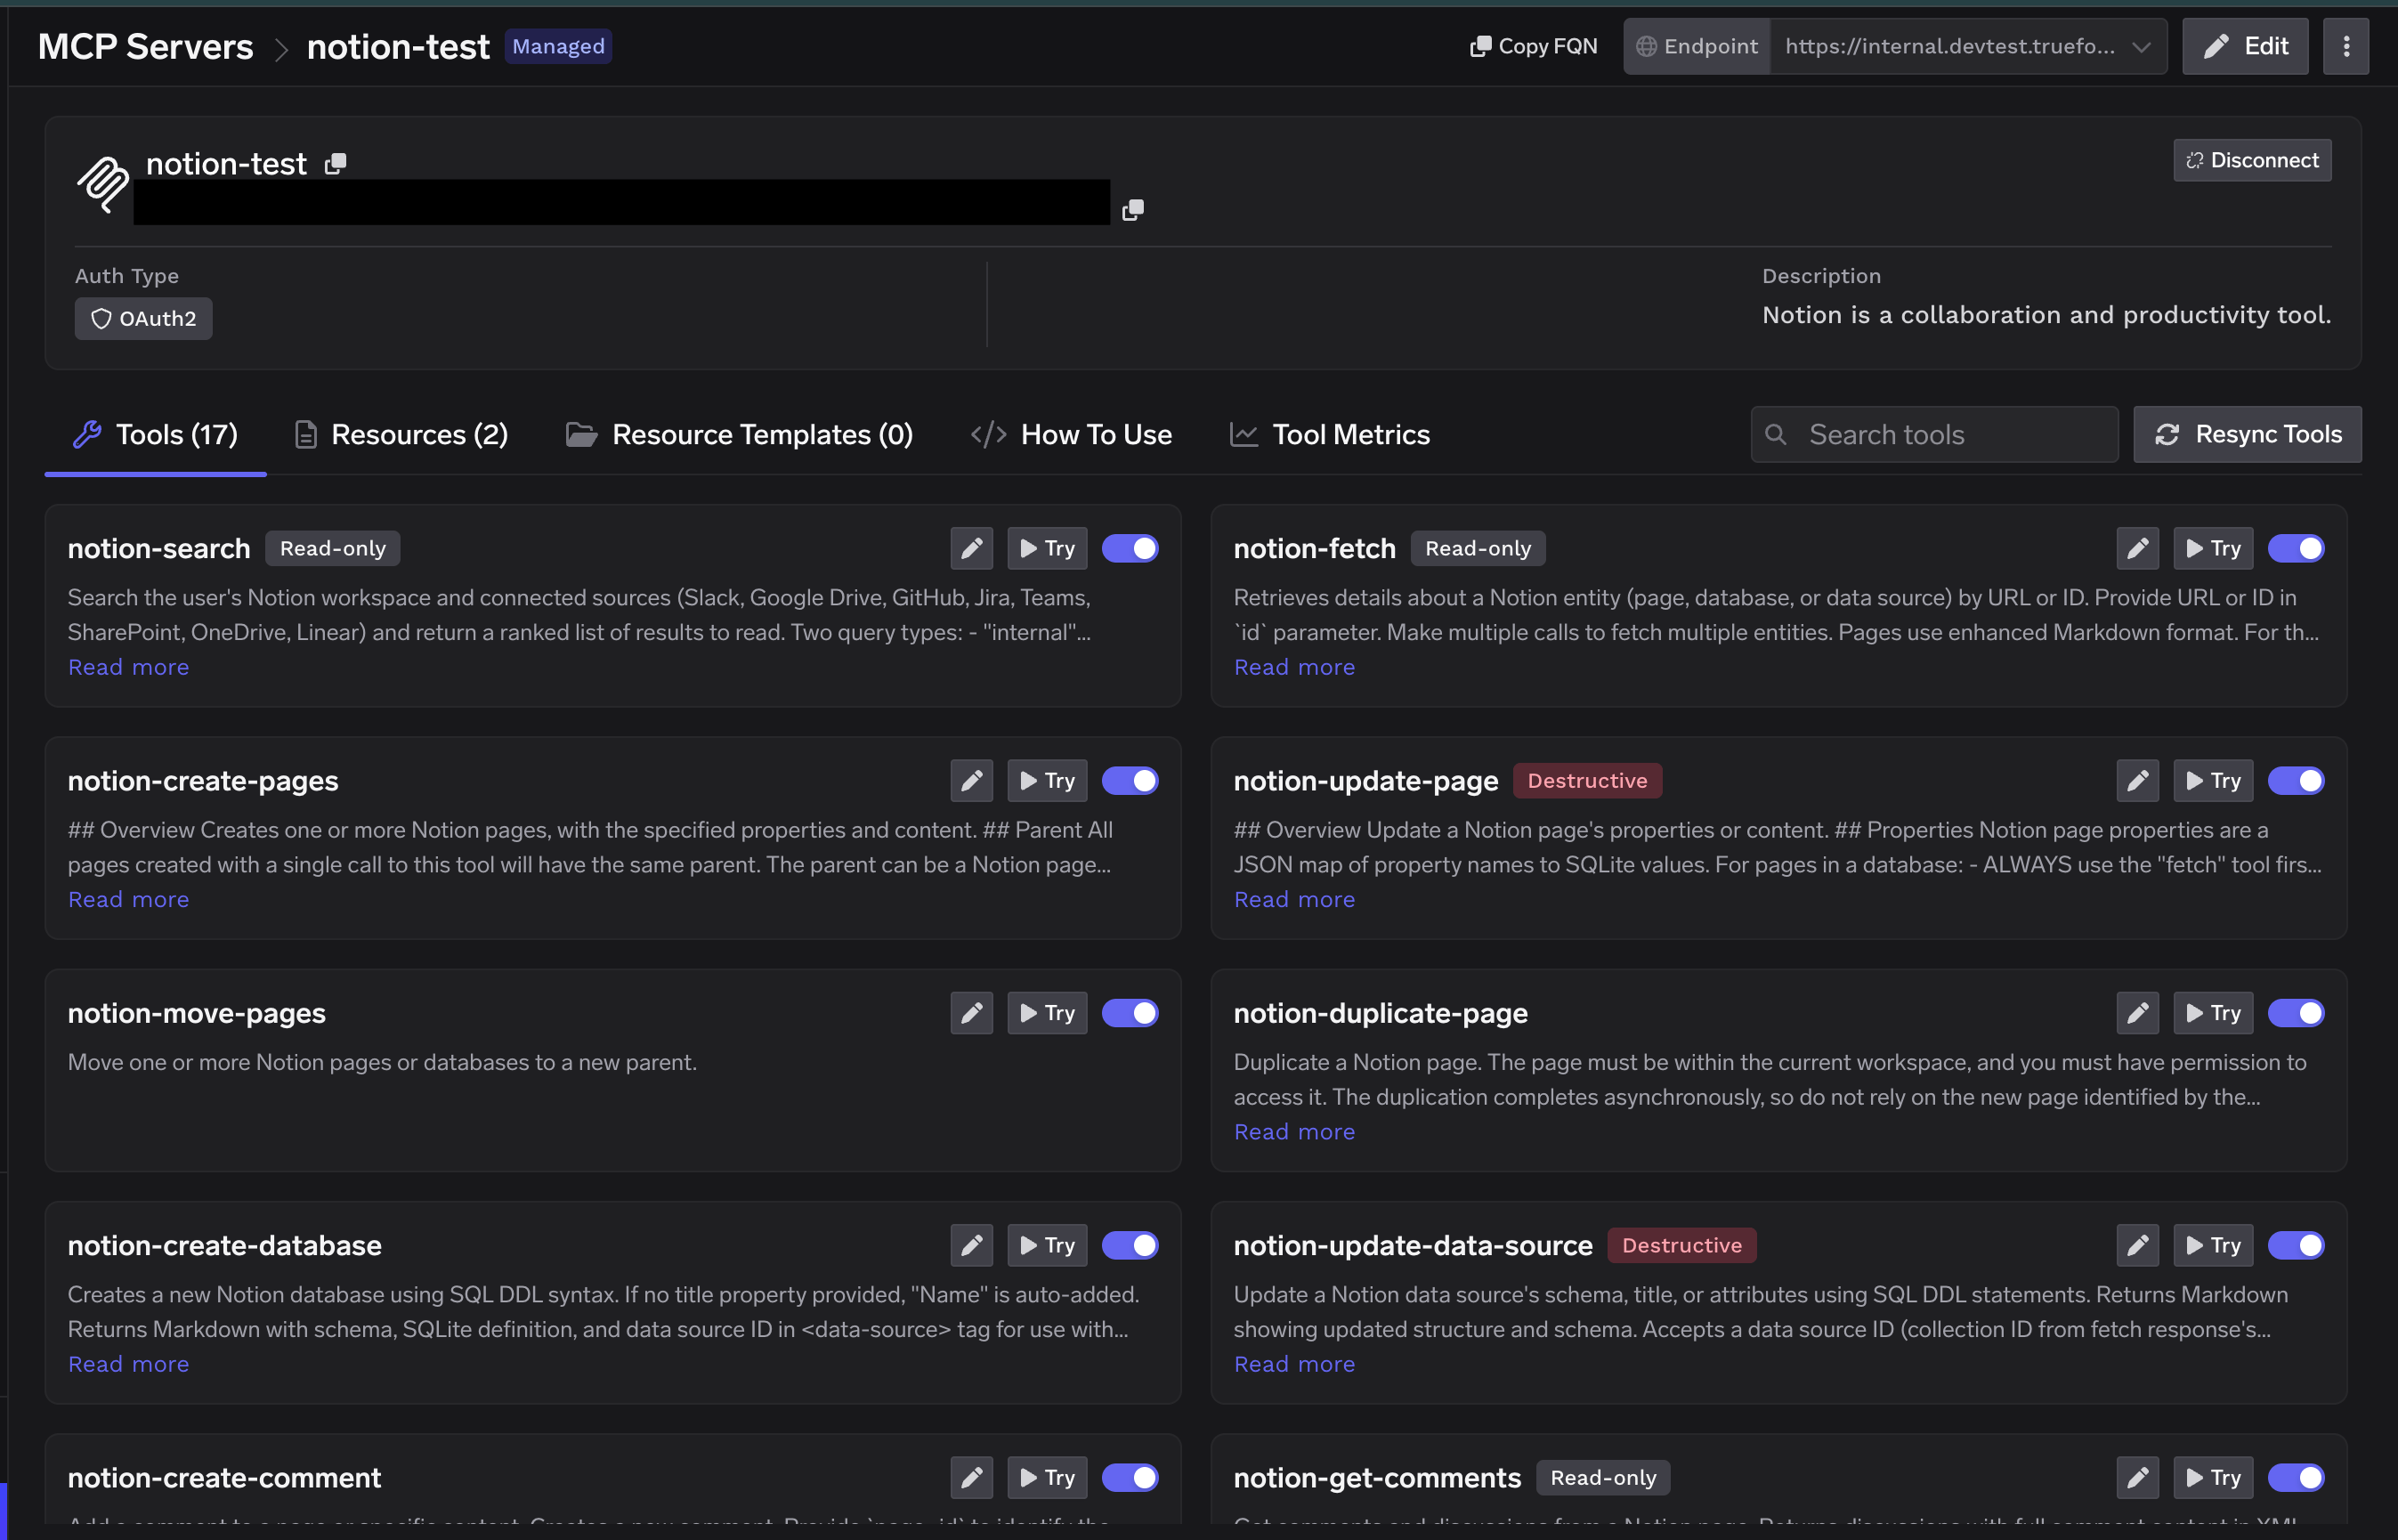
Connecting to an MCP Client
TrueFoundry exposes the Notion MCP server over HTTP transport. The endpoint is specific to your TrueFoundry tenant, so don’t construct it by hand — copy the exact URL and ready-to-paste connection commands from the How To Use tab on the Notion server detail page. The How To Use tab generates connection instructions for every major client, including Cursor, VS Code, Claude Code, Claude Web, Claude Desktop, Windsurf, Codex, and the Python and TypeScript MCP SDKs. Pick your client, copy the snippet, and paste it in. Click Show API Key on that tab to retrieve the API key if your client requires it as a header.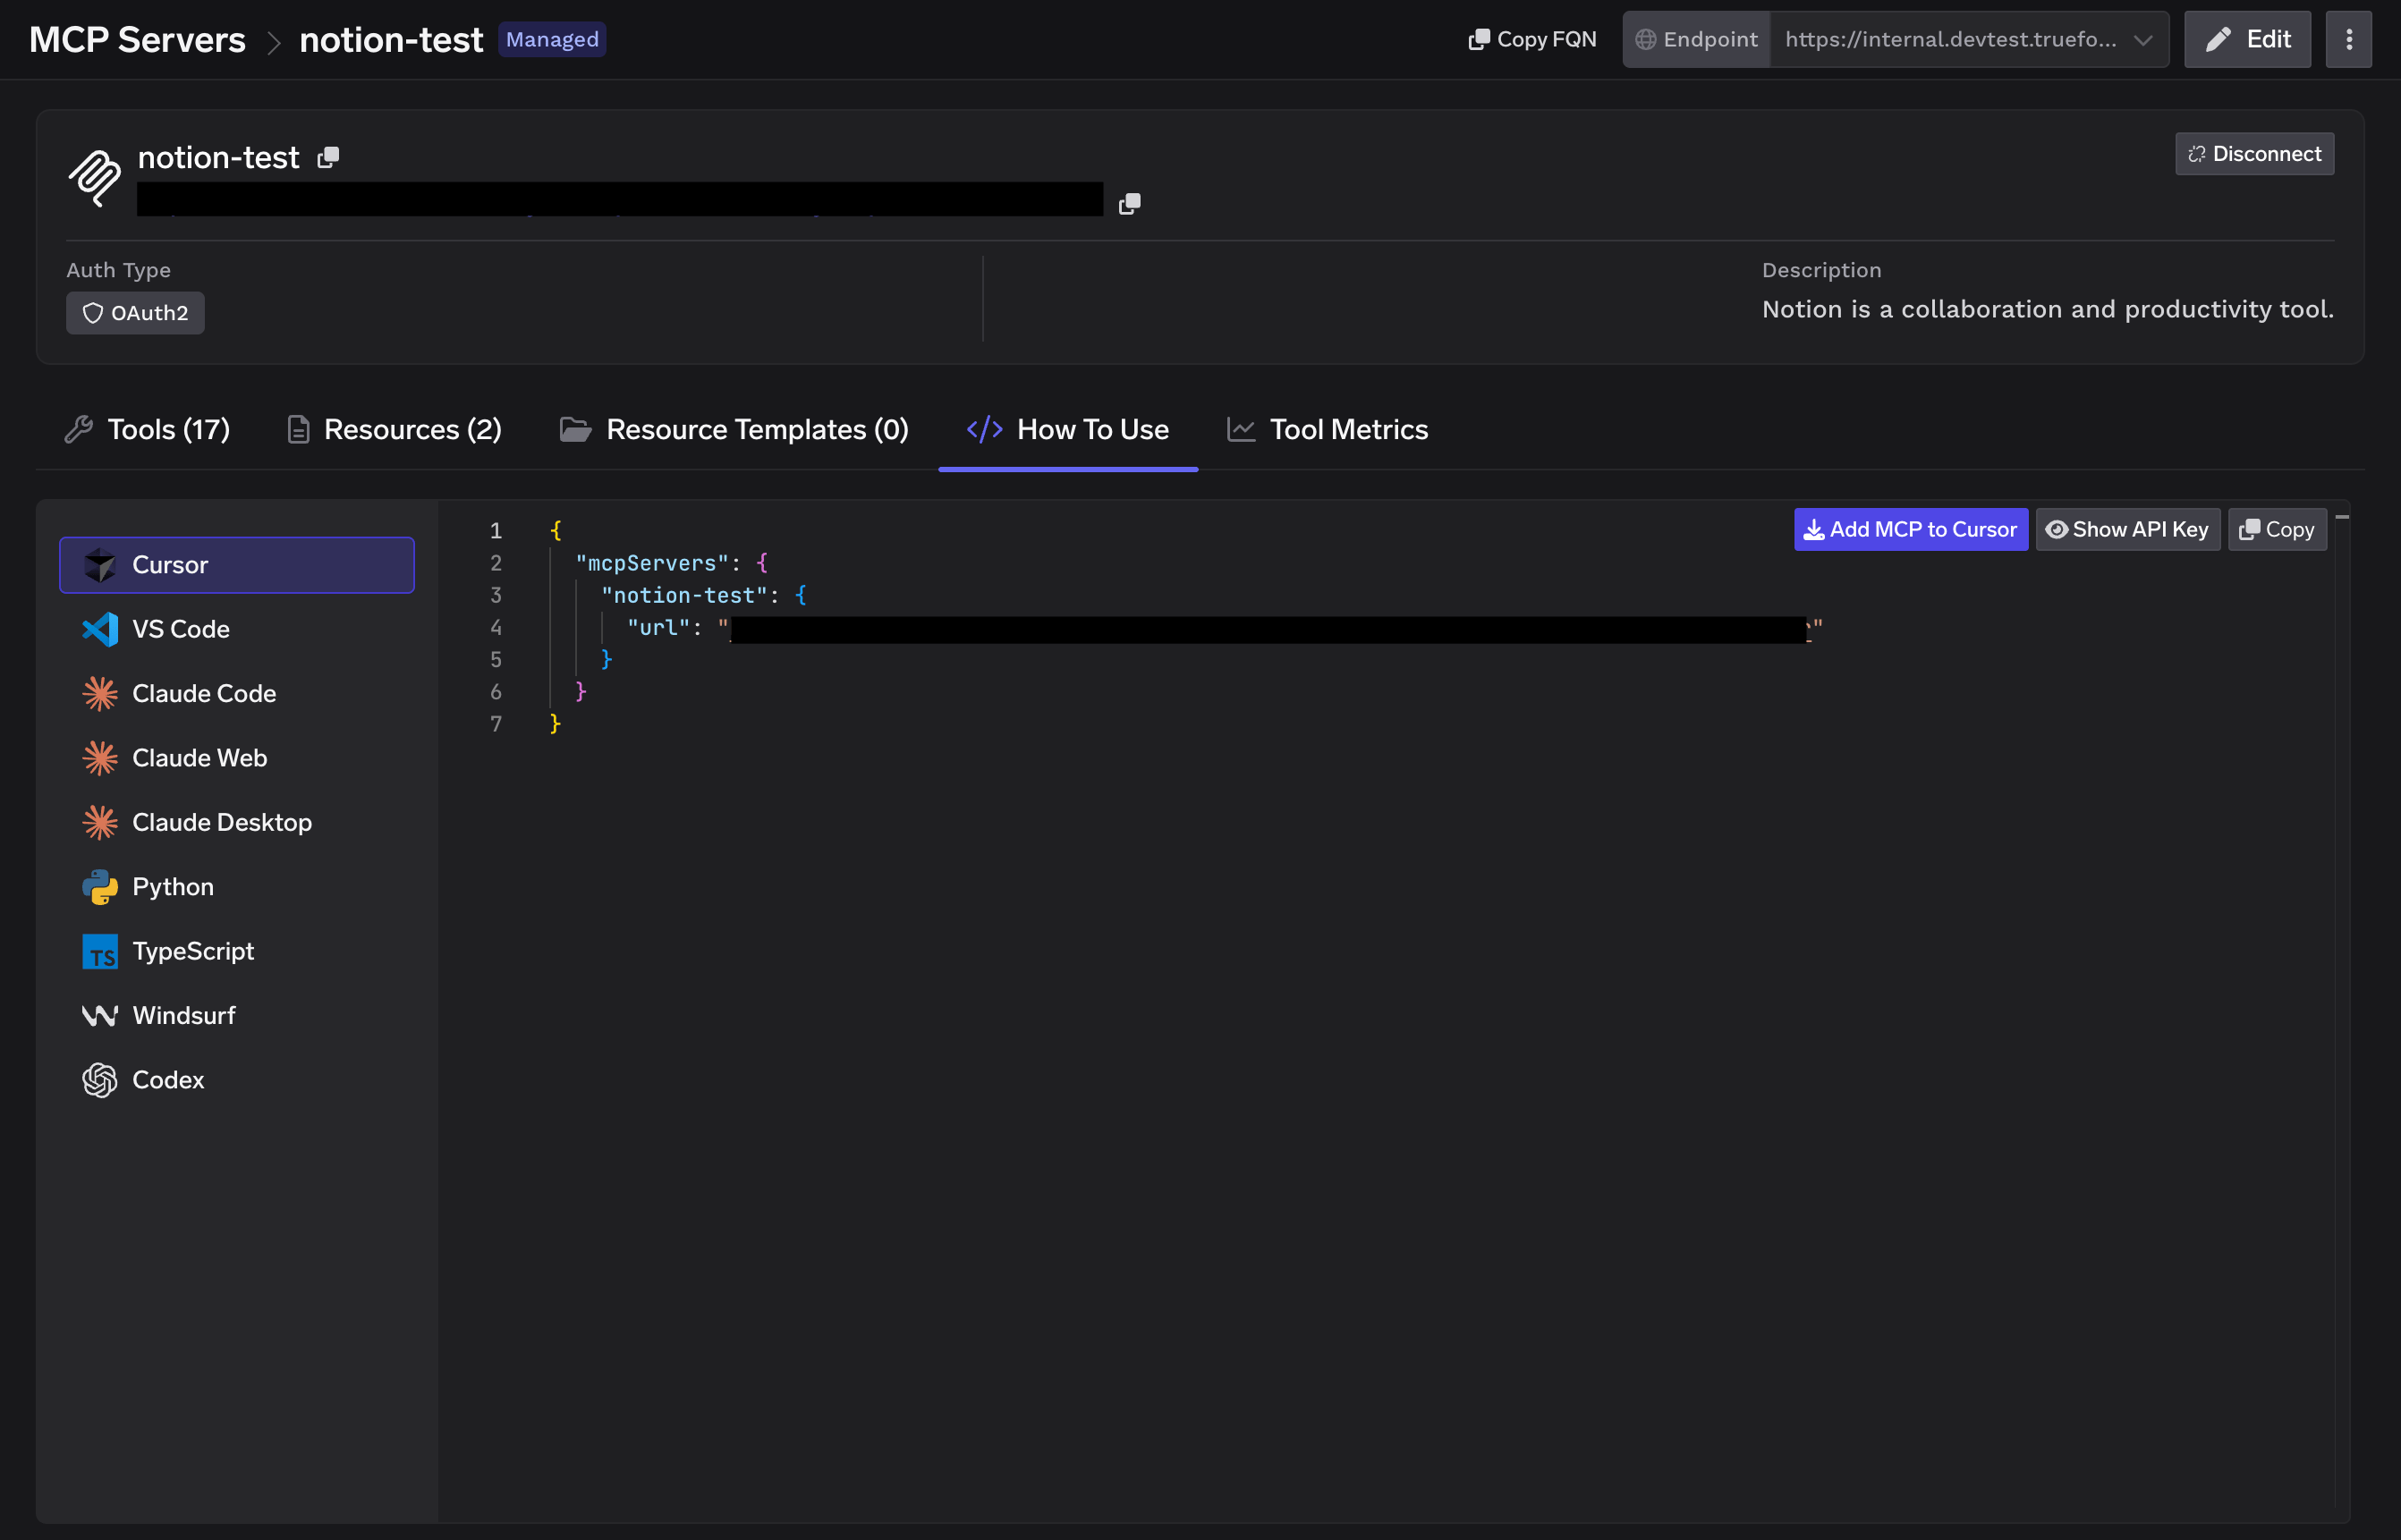
Using the Tool Playground
Before deploying an agent, you can test any Notion tool directly in TrueFoundry:Open a tool
On the Notion MCP server detail page, click Try next to any tool — for example
notion-fetch.Fill in the inputs
Provide the tool’s inputs. For
notion-fetch, enter the page or data source Id (or URL) and optionally toggle Include transcript or Include discussions.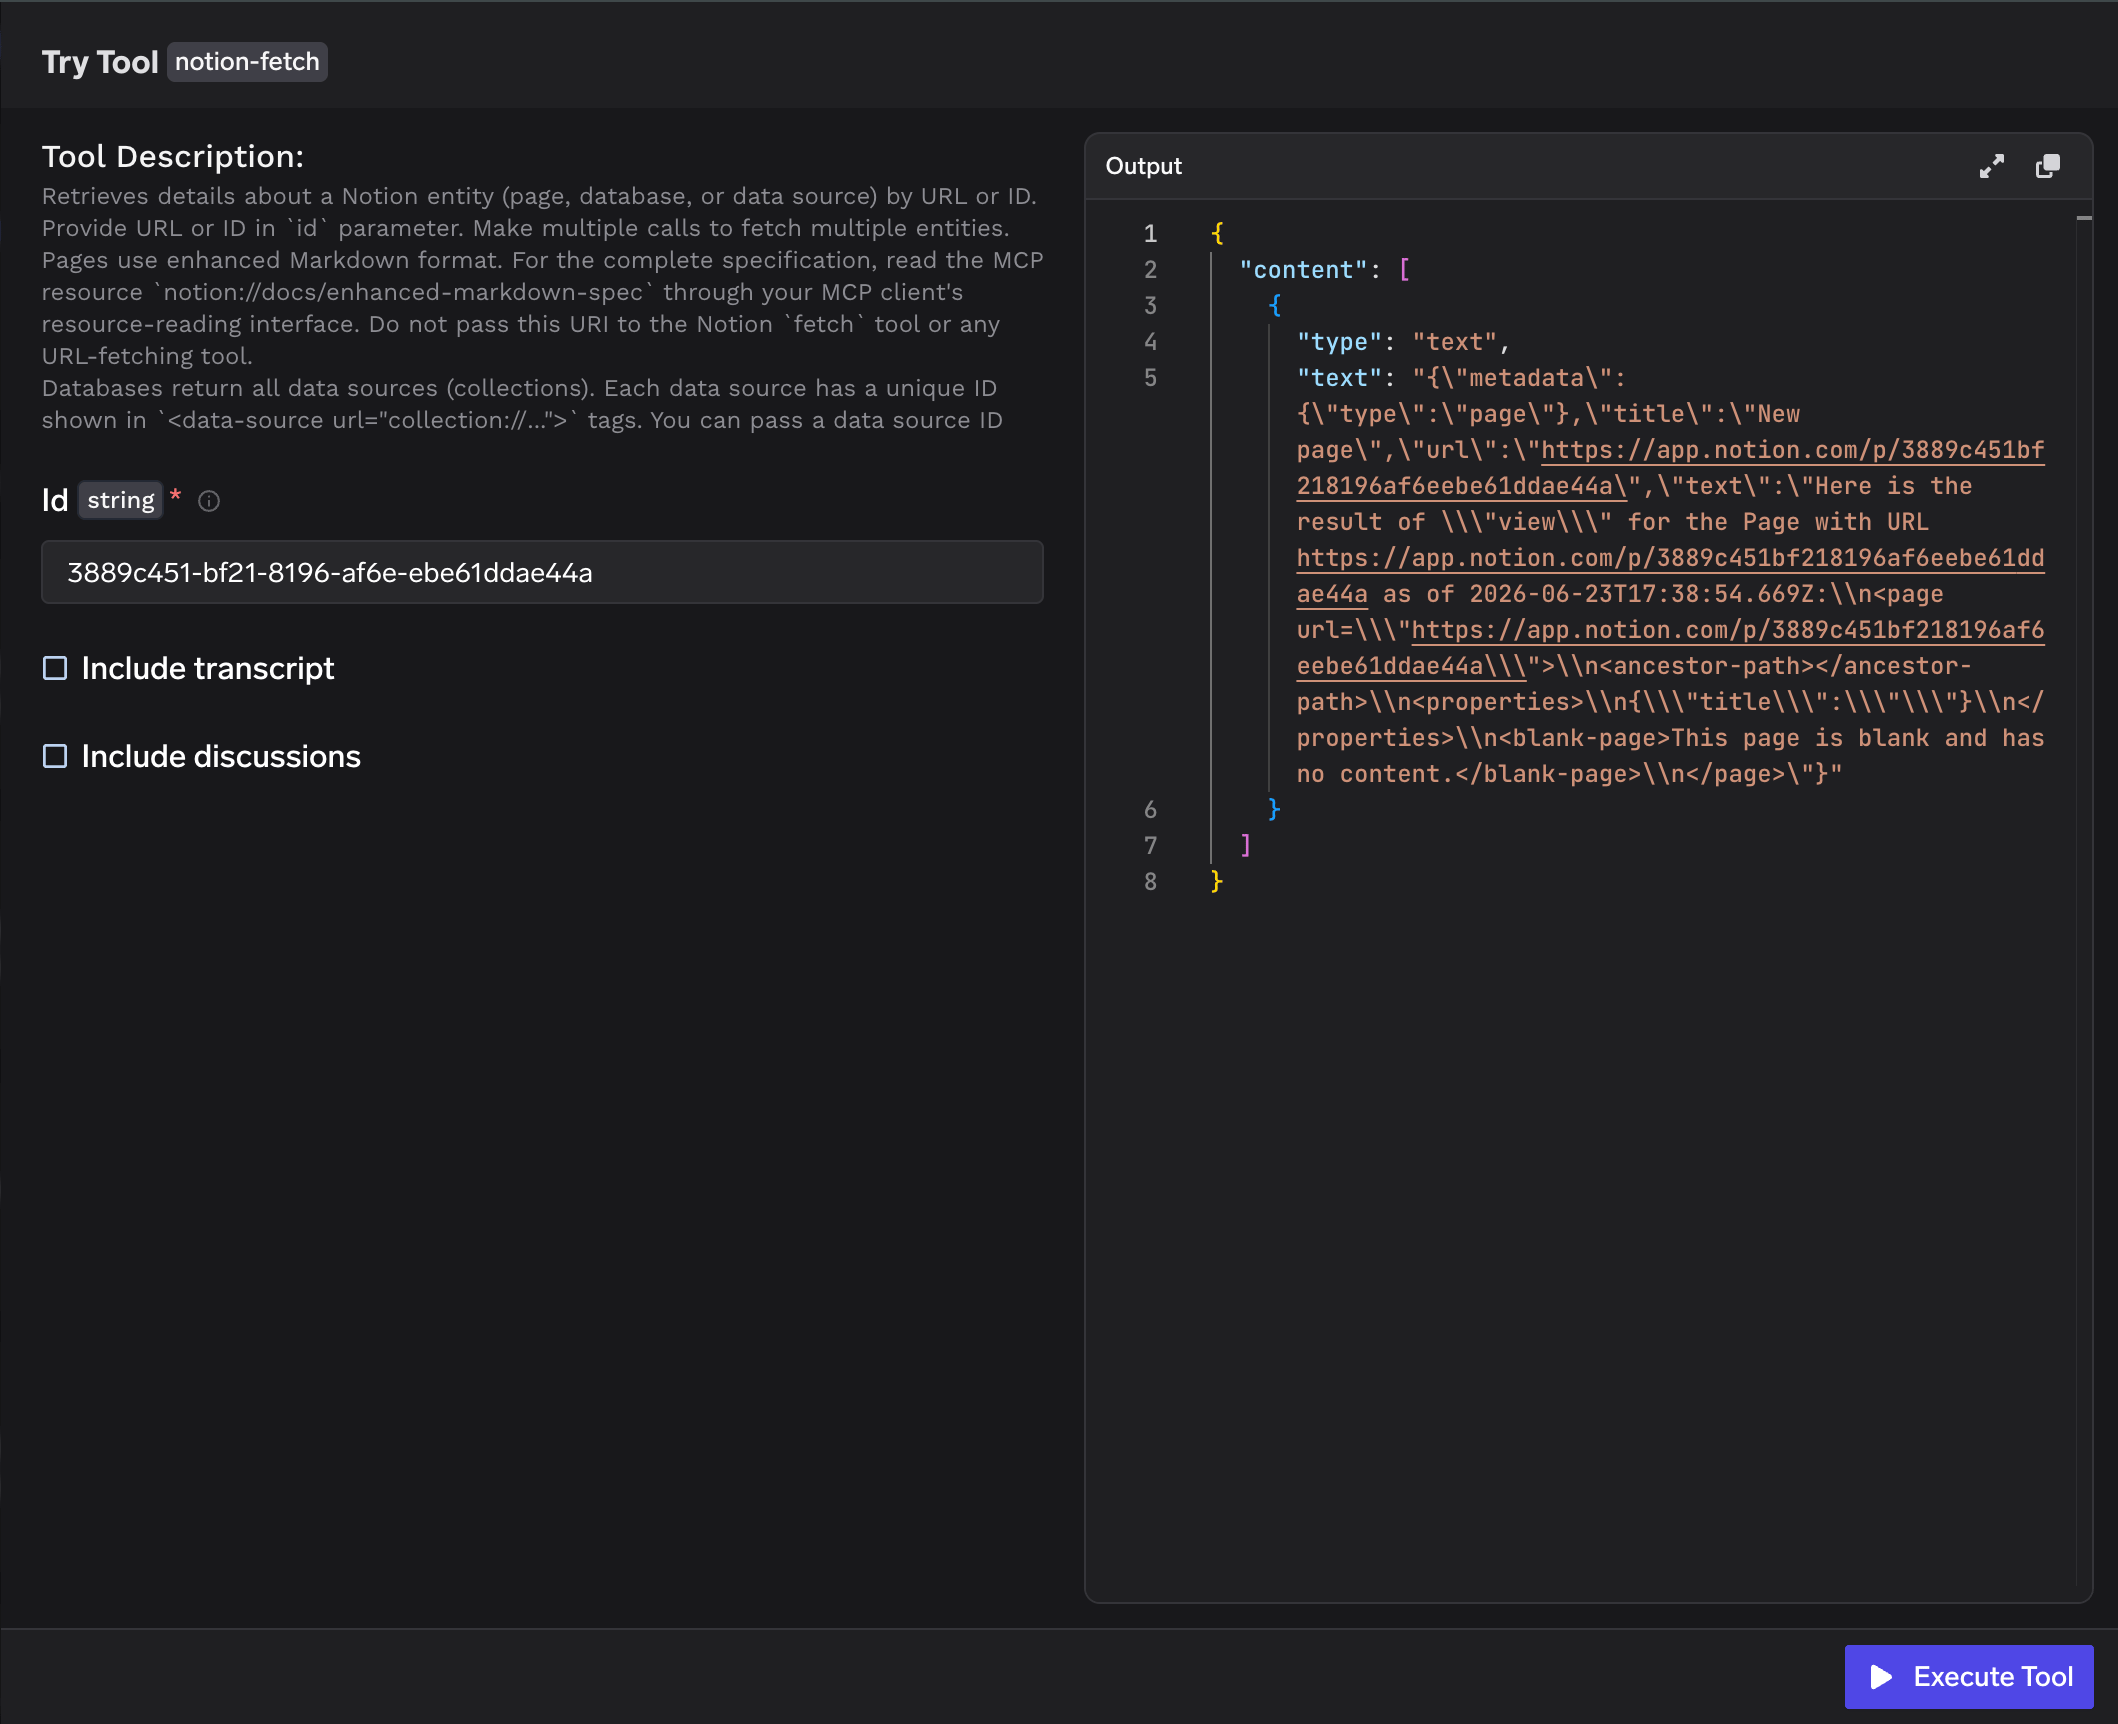
Tool Metrics
The Tool Metrics tab on the Notion server detail page shows per-tool usage data: invocation count, latency distribution, and error rates. Use this to monitor which tools your agents are using and whether any tool is producing errors in production.Disabling Individual Tools
If your use case only needs a subset of Notion’s tools, you can disable the rest from the Tools tab. Each tool has a toggle to enable or disable it. Disabled tools are not callable by agents — they will not appear in the tool list returned to the MCP client. This reduces the tool surface exposed to the agent and avoids unnecessary calls — for example, disabling Destructive tools to keep an agent read-only.Next Steps
TrueFoundry Managed MCPs
Provision pre-vetted MCP servers like Notion from the TrueFoundry catalogue with just a name.
MCP Gateway Getting Started
Add MCP servers and use them in the AI Gateway playground and IDEs.
Notion documentation
Reference for Notion’s API — pages, databases, blocks, and search.
MCP Gateway Security
Configure authentication and guardrails on your MCP servers.