This guide covers rotating each type of credential on the TrueFoundry platform without breaking the applications that use it.

Virtual Account tokens

Virtual Accounts are the API keys your applications use. Rotation is zero-downtime: the new token is issued immediately, and the old one stays valid for a grace period you choose. For scheduled rotation, notifications, and syncing tokens to a secret store, see Manage Virtual Accounts.
1

Open the Virtual Accounts list

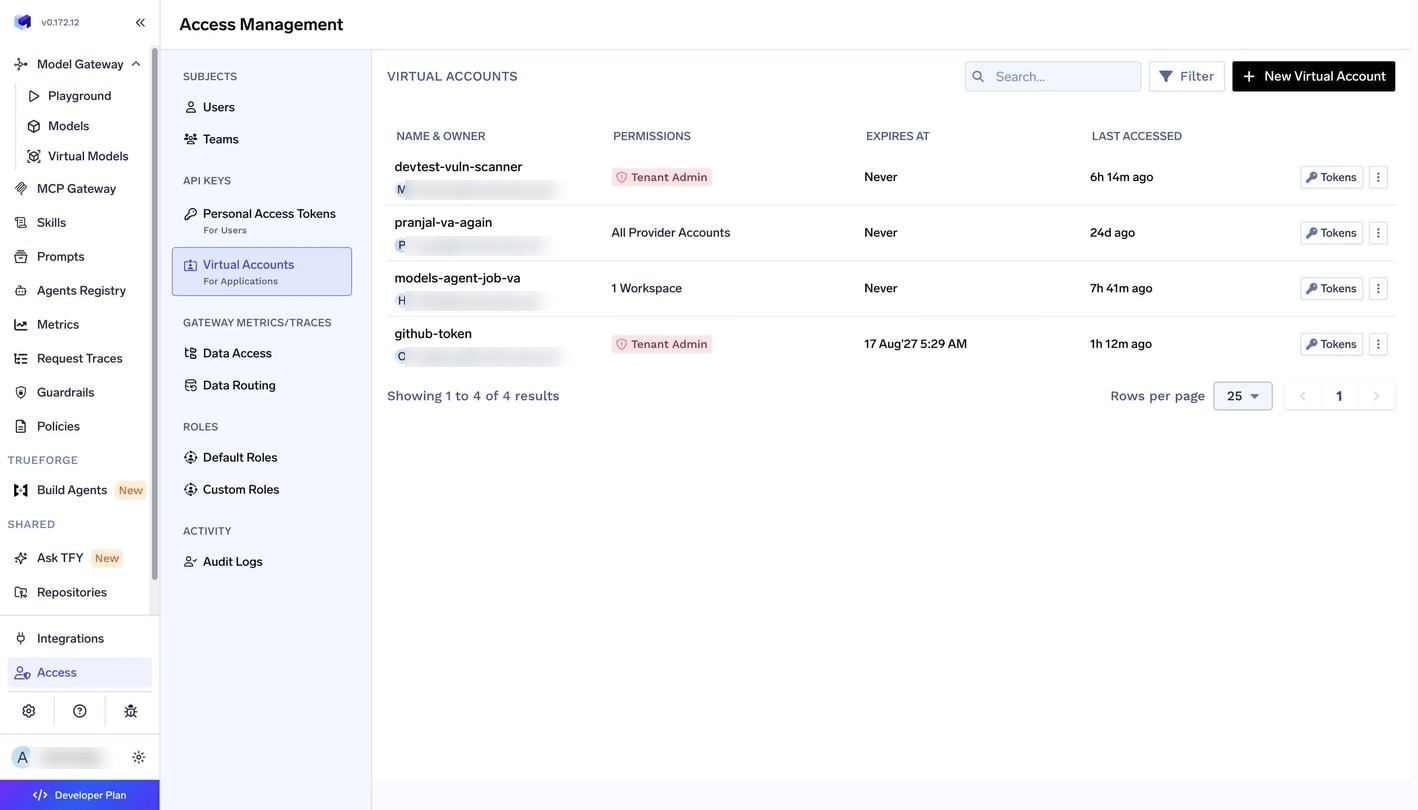
Go to Access Management → API Keys → Virtual Accounts. Find your account and confirm the owner shown under NAME & OWNER matches the team that owns the application. The EXPIRES/ROTATES AT and LAST ACCESSED columns tell you when the current token expires and whether the application is still using it.
Virtual Accounts list showing name and owner, permissions summary, expiry and last accessed time

Virtual Accounts list

2

Open the account's tokens and regenerate
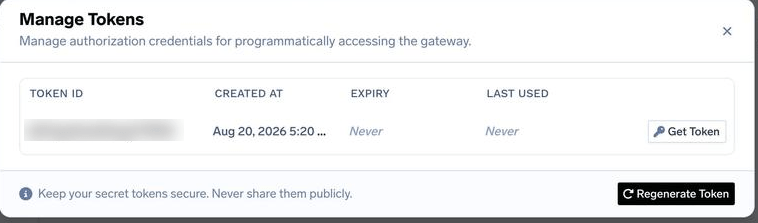
In the MANAGE TOKENS column, click the active token button on your account’s row (for example, 1 active token). This opens the Manage tokens dialog, which lists every token issued for that Virtual Account with its expiry and last use.In the Manage tokens dialog, click Regenerate token at the top right.
Manage Tokens dialog listing token ID, creation time, expiry and last used, with Get Token and Regenerate Token actions

Manage tokens dialog

3

Choose the grace period

The dialog asks for a Grace Period. This is your window to swap the token in everywhere it is used:
  • A new token is created immediately.
  • The old token keeps working for the full grace period.
  • When the grace period expires, the old token is invalidated.
Keep this as short as you safely can — 15 or 30 minutes is usually right — so the old token is retired quickly. Do not go below the time you actually need to update the application.
Be careful with this choice. Pick a period you are confident you can finish inside. Too short and the old token is invalidated mid-swap, and the application starts failing authentication. Too long and a retired token stays valid longer than it should.
4

Swap it in and verify

Back in the Manage tokens dialog, click Get token next to the new token to copy it. Put it in your secret manager (never into a ticket or chat), redeploy the consuming services, then confirm traffic has moved over via the LAST ACCESSED column — before the grace period expires.

Personal Access Tokens

PATs are per-user credentials.

For individual users

Revocation is immediate — every existing PAT stops working the moment the admin clicks Revoke all PAT. Each user then generates a new token under Access → Personal Access Tokens and uses that one from then on. To revoke PATs for a single user instead of the whole tenant, use Revoke All PATs on that user from Access → Users. See User management.

For scripts, CLI sessions, and integrations

Any script, CLI session, or integration authenticating with a PAT will fail until its token is updated. Plan this outside business hours as much as possible.
1

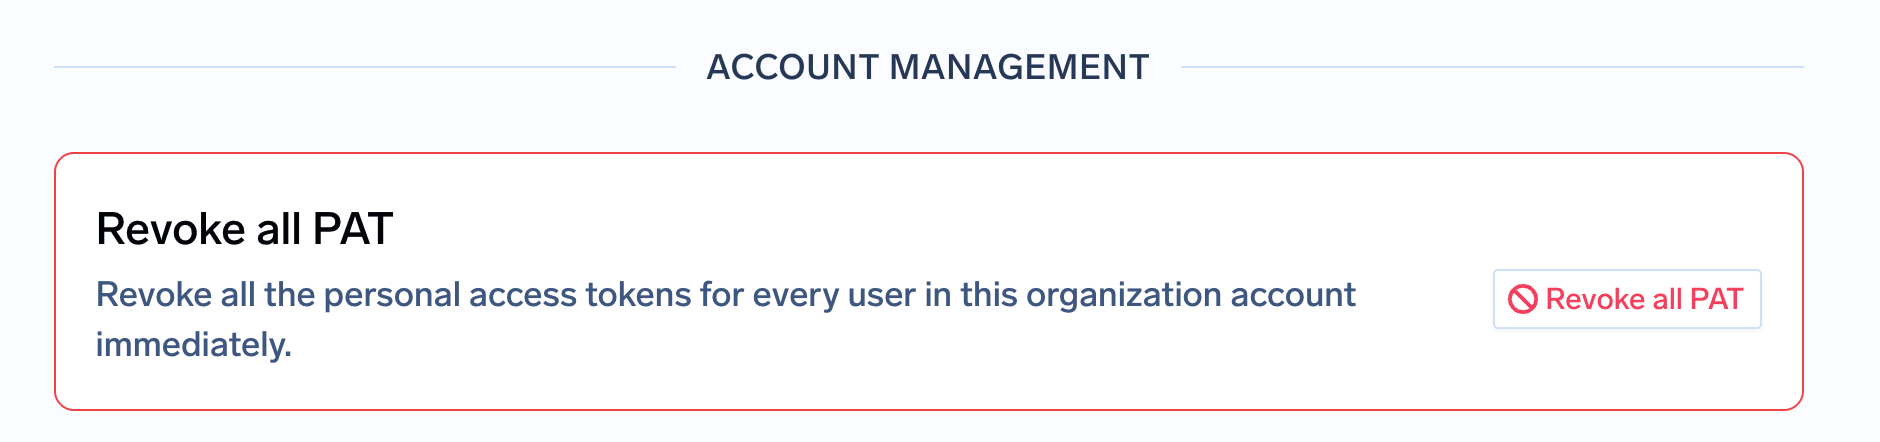
Open Revoke all PAT

Go to Settings → Organisation → Account Management → Revoke all PAT.
2

Revoke every PAT

Click the Revoke all PAT button. This deletes tokens for every user immediately and cannot be undone.
Revoke all PAT section under Account Management settings

Revoke all PAT in Account Management

3

Issue new tokens

Each user creates a new PAT under Access → Personal Access Tokens and updates any script, CLI session, or integration that still held the old value. See API Keys.
Production workloads should use Virtual Account tokens with auto-rotation, not PATs. See Security settings.

MCP Server credentials

MCP server credentials have no grace period, so rotation is a three-step process: create the new credential at your provider, update it in TrueFoundry, then invalidate the old one. For auth architecture and revoking every stored token on a server at once, see MCP Gateway authentication and security.
1

Generate a new credential at your provider

This depends on the MCP server. Go to the provider that issues the credential and create a new one — an OAuth2 client credential or a direct API key / token, whichever that server uses. Leave the old credential active for now so nothing breaks before the next step.
2

Update the credential in TrueFoundry

Open MCP Gateway → MCP Registry, click ⋮ on the server → Edit, and go to Auth Data. Then follow whichever section below matches your auth type.
With API Key selected, replace the value in the Headers row (for example, the Authorization header). The header name stays the same; only the value changes.
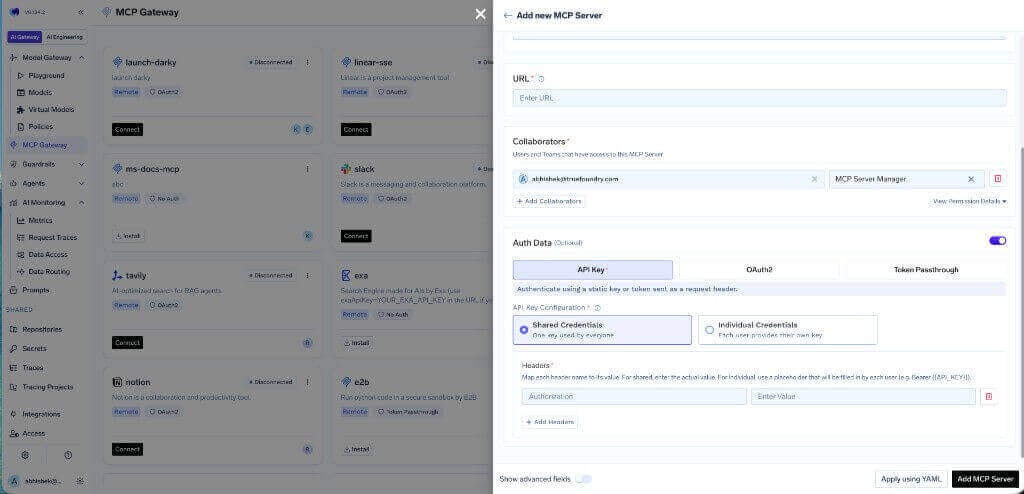
MCP server Auth Data form with API Key selected and a shared Authorization header value

API Key auth with a shared header value

If the server uses Individual Credentials, the header holds a placeholder such as Bearer {{API_KEY}} and each user updates their own key instead — no change is needed here. See Auth Overrides.
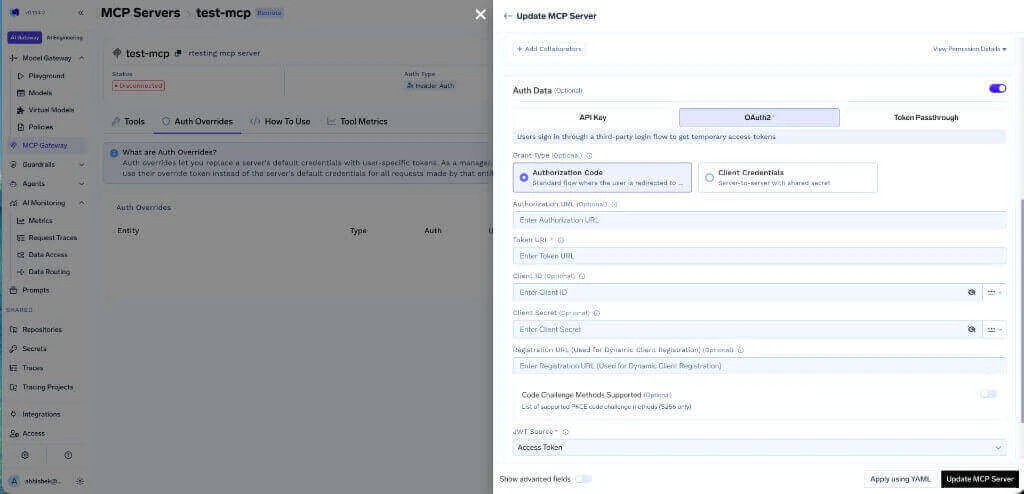
Save the server, then re-run a request through it to confirm the new credentials authenticate. Users on an Authorization Code flow may need to sign in again.
3

Invalidate the old credential at your provider

Once the new credential is confirmed working, go back to your provider and revoke or delete the old token / OAuth credential so it can no longer be used.

Gateway installation tokens

The gateway installation token (GatewayToken) is how a self-hosted AI Gateway authenticates to the TrueFoundry control plane. Tokens are bound to a gateway installation entry — there is no regenerate action — so rotation means creating a new installation, cutting the running gateway over to its token, deleting the old installation, and restoring the real URL on the new one. You create the new entry with a temporary example URL because the real gateway URL is still attached to the old installation. After the old entry is deleted, you edit the new entry and set the real URL. For the create and token APIs used at first install, see Deploy Gateway Plane.
1

Note the current installation

Go to Settings → Gateway Endpoints. Record the existing installation’s name and URL (for example, https://gateway.example.com). You need the URL again when you fix the new entry at the end.
2

Create a new gateway installation with an example URL

Create a second gateway endpoint with a unique name. Use a temporary example URL that is not already taken — for example, https://gateway-rotate-temp.example.com — so the create succeeds while the real URL still belongs to the old installation.
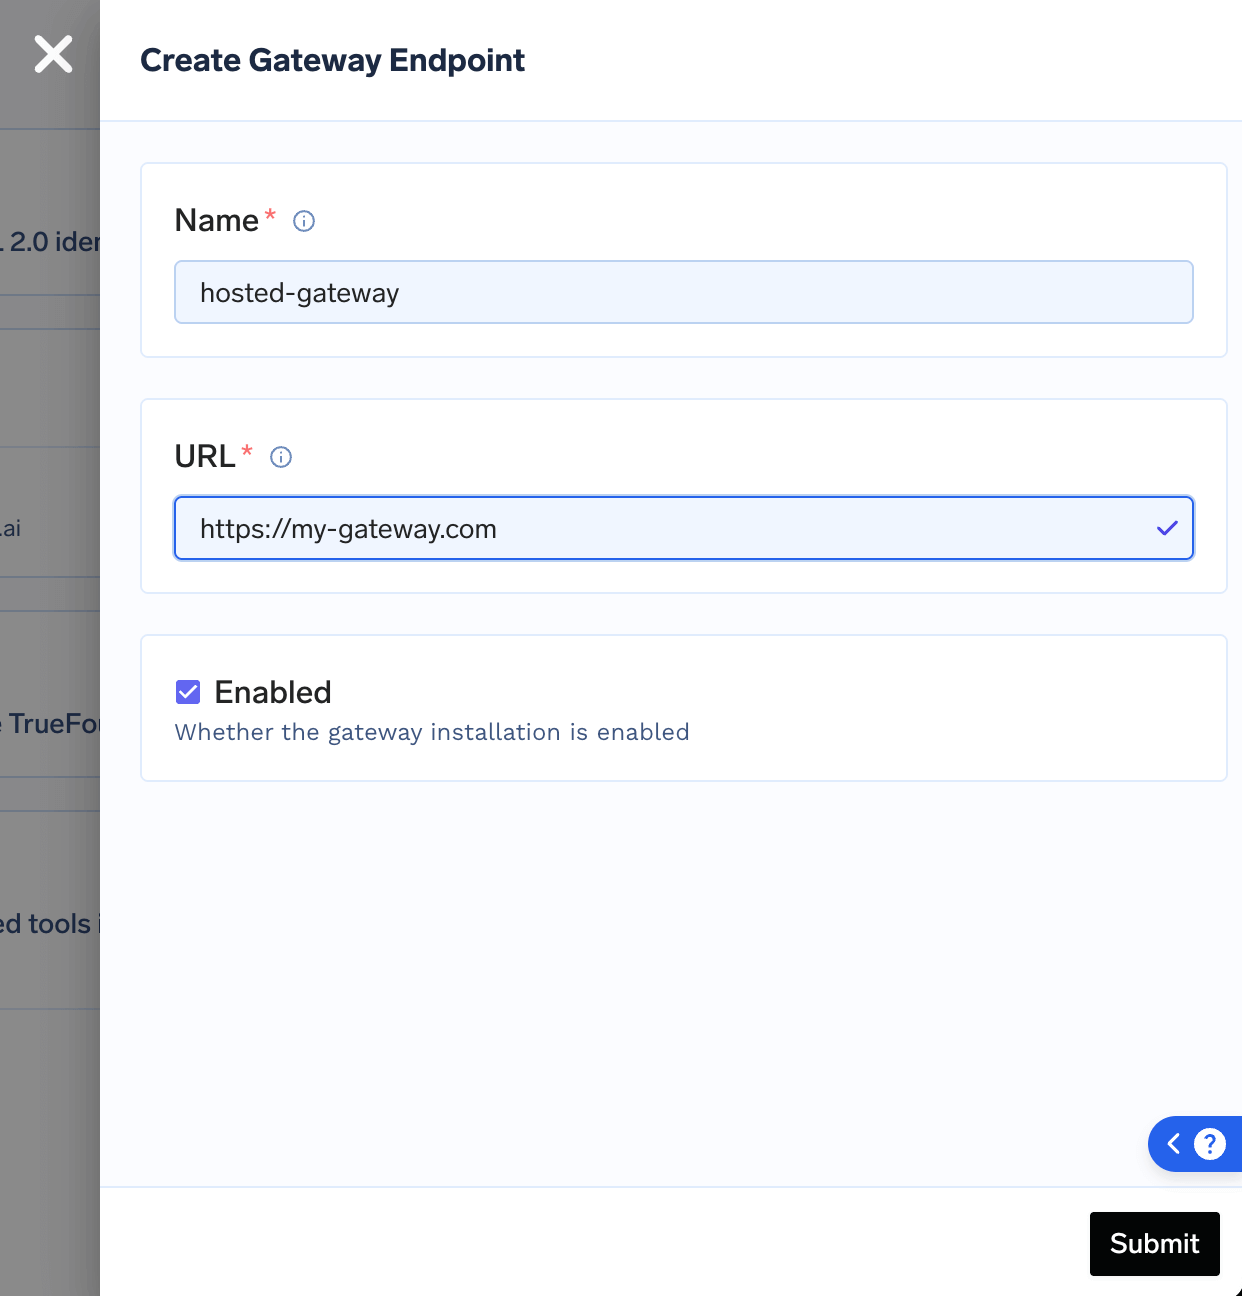
Create Gateway Endpoint form with name and URL fields

Create Gateway Endpoint

Or via the API:
3

Generate the new GatewayToken and cut over the running gateway

Generate a token for the new installation name:
Copy the new GatewayToken, store it securely, then update the Kubernetes secret the gateway reads (typically TFY_API_KEY on truefoundry-creds) and restart the gateway so it authenticates with the new token. Confirm the gateway is healthy against the control plane before continuing.
Do not delete the old installation until the running gateway is using the new token. Deleting first disconnects the gateway immediately.
4

Delete the old gateway installation

In Settings → Gateway Endpoints, delete the previous installation. That frees the real gateway URL so the new entry can take it.
5

Fix the URL on the new installation

Edit the new gateway endpoint and replace the temporary example URL with the real URL you recorded in step 1 (for example, https://gateway.example.com). Save, then confirm clients still reach the gateway at that URL and that the gateway remains connected to the control plane.Via the API, send the full manifest including isDefault:

SCIM tokens

The SCIM bearer token is what your identity provider uses to call TrueFoundry’s SCIM API for user and team provisioning. Rotation issues a new token immediately; the previous token stays valid until its expiry period ends, so you can update the IdP before provisioning breaks. For first-time SCIM setup, see SCIM provisioning and the IdP-specific guides under SSO.
1

Open SCIM configuration

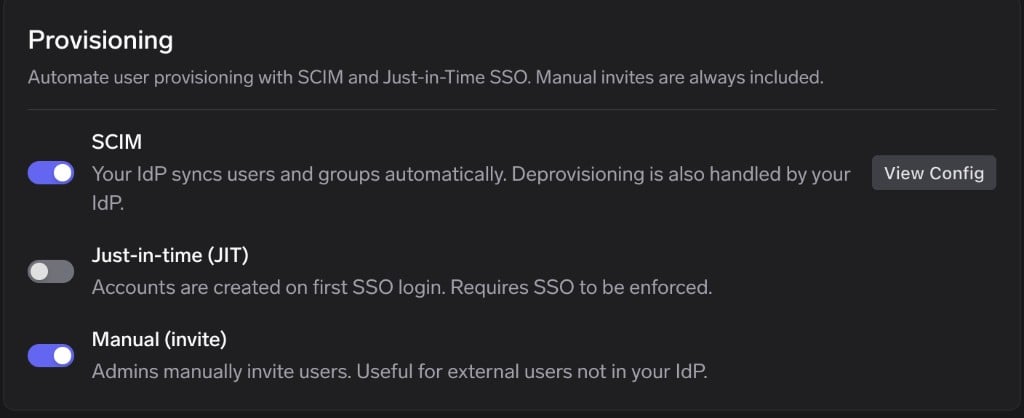
Go to Settings → Security & Access → Provisioning. On the SCIM row, click View Config.
Provisioning settings with SCIM enabled and View Config button

SCIM on the Provisioning page

2

Regenerate the token

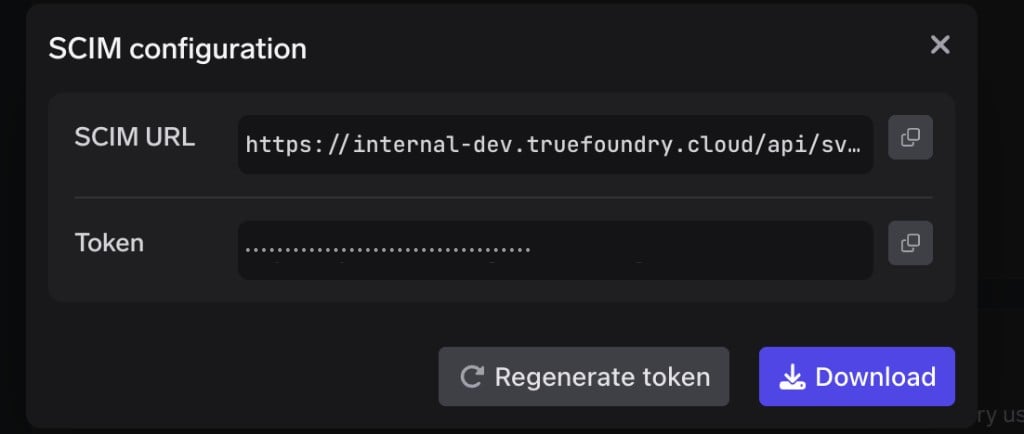
In the SCIM configuration dialog, click Regenerate token. Copy the new Token, or click Download to save the credentials. Treat it like a password.
SCIM configuration dialog with Regenerate token and Download

SCIM configuration with Regenerate token

The previous token stays valid only until its expiry period ends. Update your IdP with the new bearer token before then, or SCIM provisioning will start failing with 401 responses.
3

Update the bearer token in your IdP

In your identity provider’s SCIM / provisioning settings, replace the Bearer Token / Secret Token / API Token with the new value from TrueFoundry. Leave the SCIM Base URL unchanged unless it has also moved.Then test the connector or trigger a provisioning sync. Confirm users and groups still sync into TrueFoundry.

Anything not covered here

This guide covers Virtual Account tokens, Personal Access Tokens, MCP server credentials, gateway installation tokens, and SCIM tokens. For anything else — other settings, edge cases, or a step that does not match what you see — follow the rest of the TrueFoundry docs, or contact [email protected] and we will help you through it.