

Deployment models
There are two ways to wire your IdP up to TrueFoundry. Most customers use Option 1; Option 2 exists for regulated, fully self-contained environments.Option 1 — TrueFoundry Auth Server + your IdP
login.truefoundry.com) brokers the SSO flow with your IdP.Option 2 — Direct IdP (no TrueFoundry Auth Server)
Option 1 — TrueFoundry Auth Server + your IdP (default)
The TrueFoundry Auth Server (login.truefoundry.com) sits between your control plane and your IdP. When a user signs in, the control plane hands off to the auth server, which then hands off to your IdP. After the IdP authenticates the user, the auth server validates the response, creates or updates the user record, and returns tokens to the control plane.
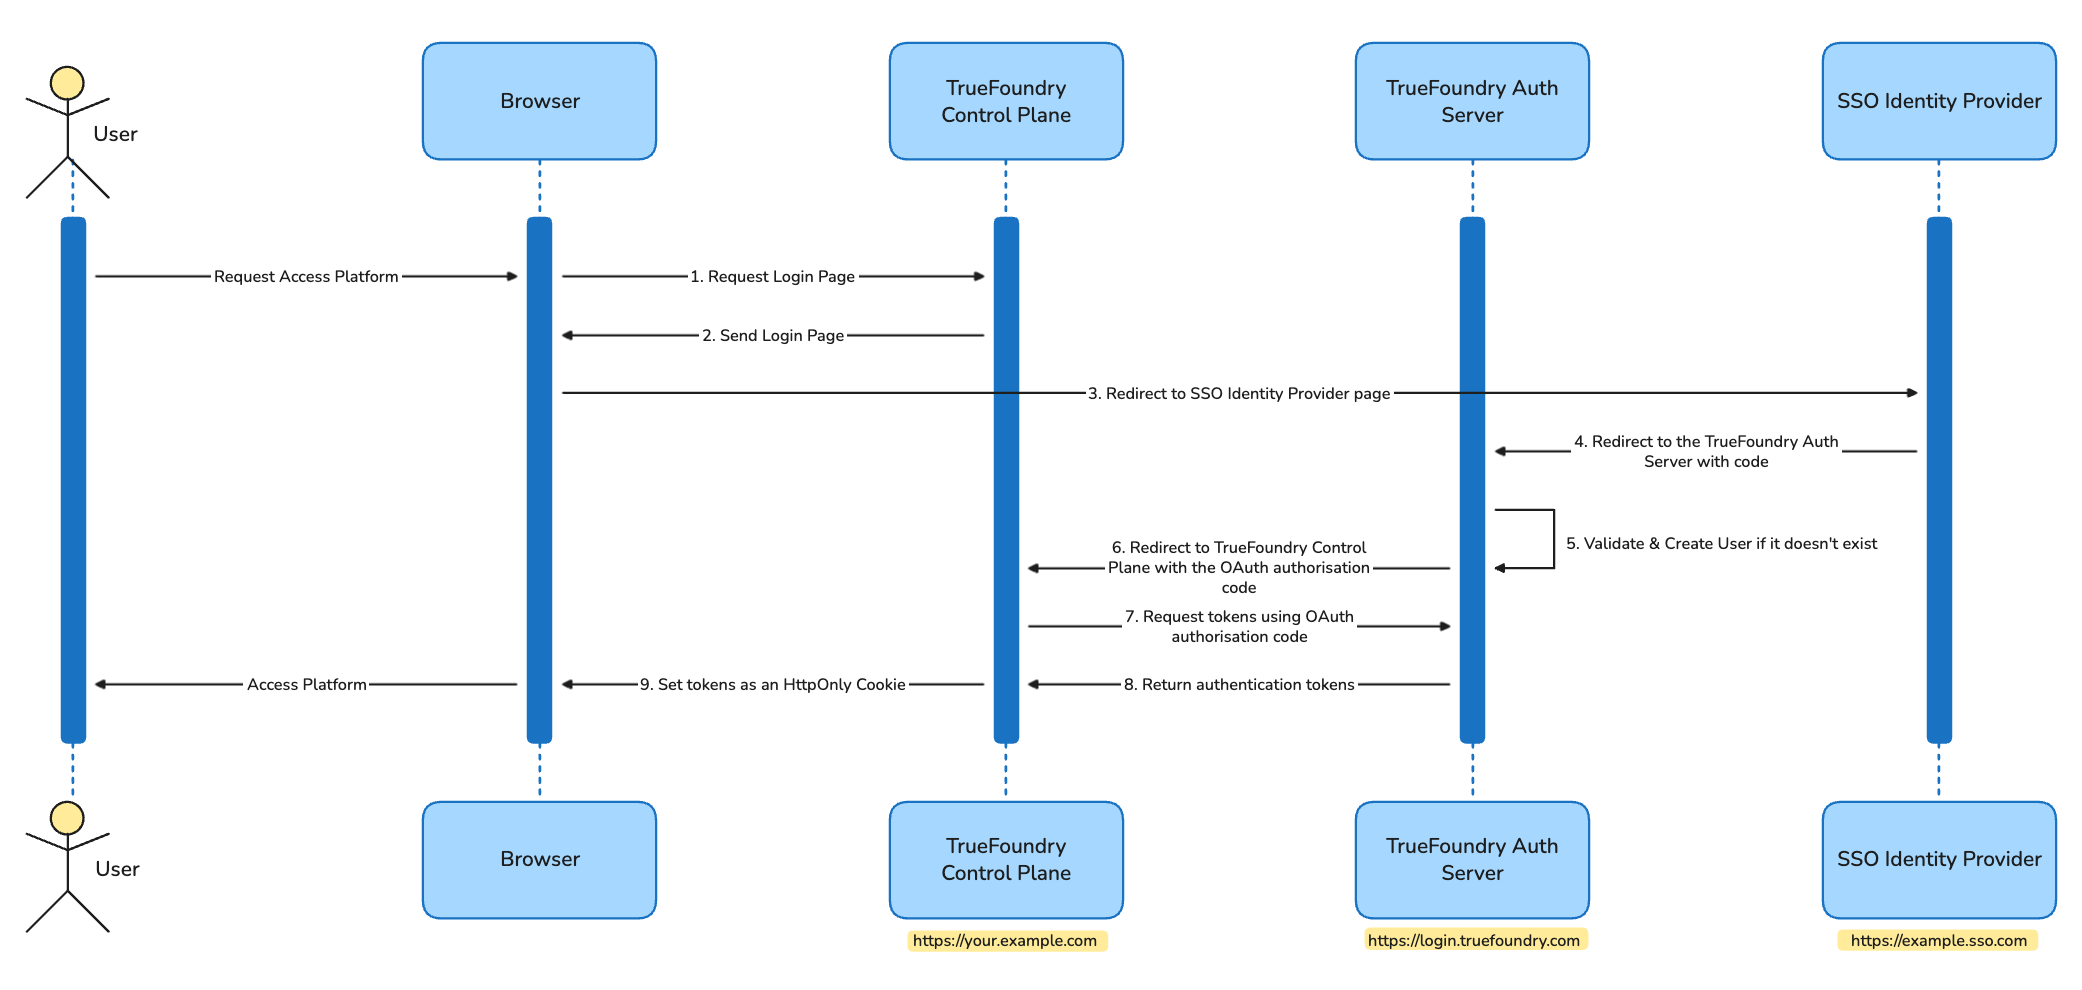
High-level auth flow with the TrueFoundry Auth Server
- Works identically on SaaS and on-prem installations.
- TrueFoundry handles OIDC/SAML quirks, key rotation, and SCIM endpoints centrally.
- Only the user’s email and a request count are sent to
login.truefoundry.com— used for licensing and tenant routing. - Lets you swap IdPs without redeploying the control plane.
Detailed authentication flow (step-by-step with request/response examples)
Detailed authentication flow (step-by-step with request/response examples)
Request Login Page
Example Request/Response
Example Request/Response
Send Login Page
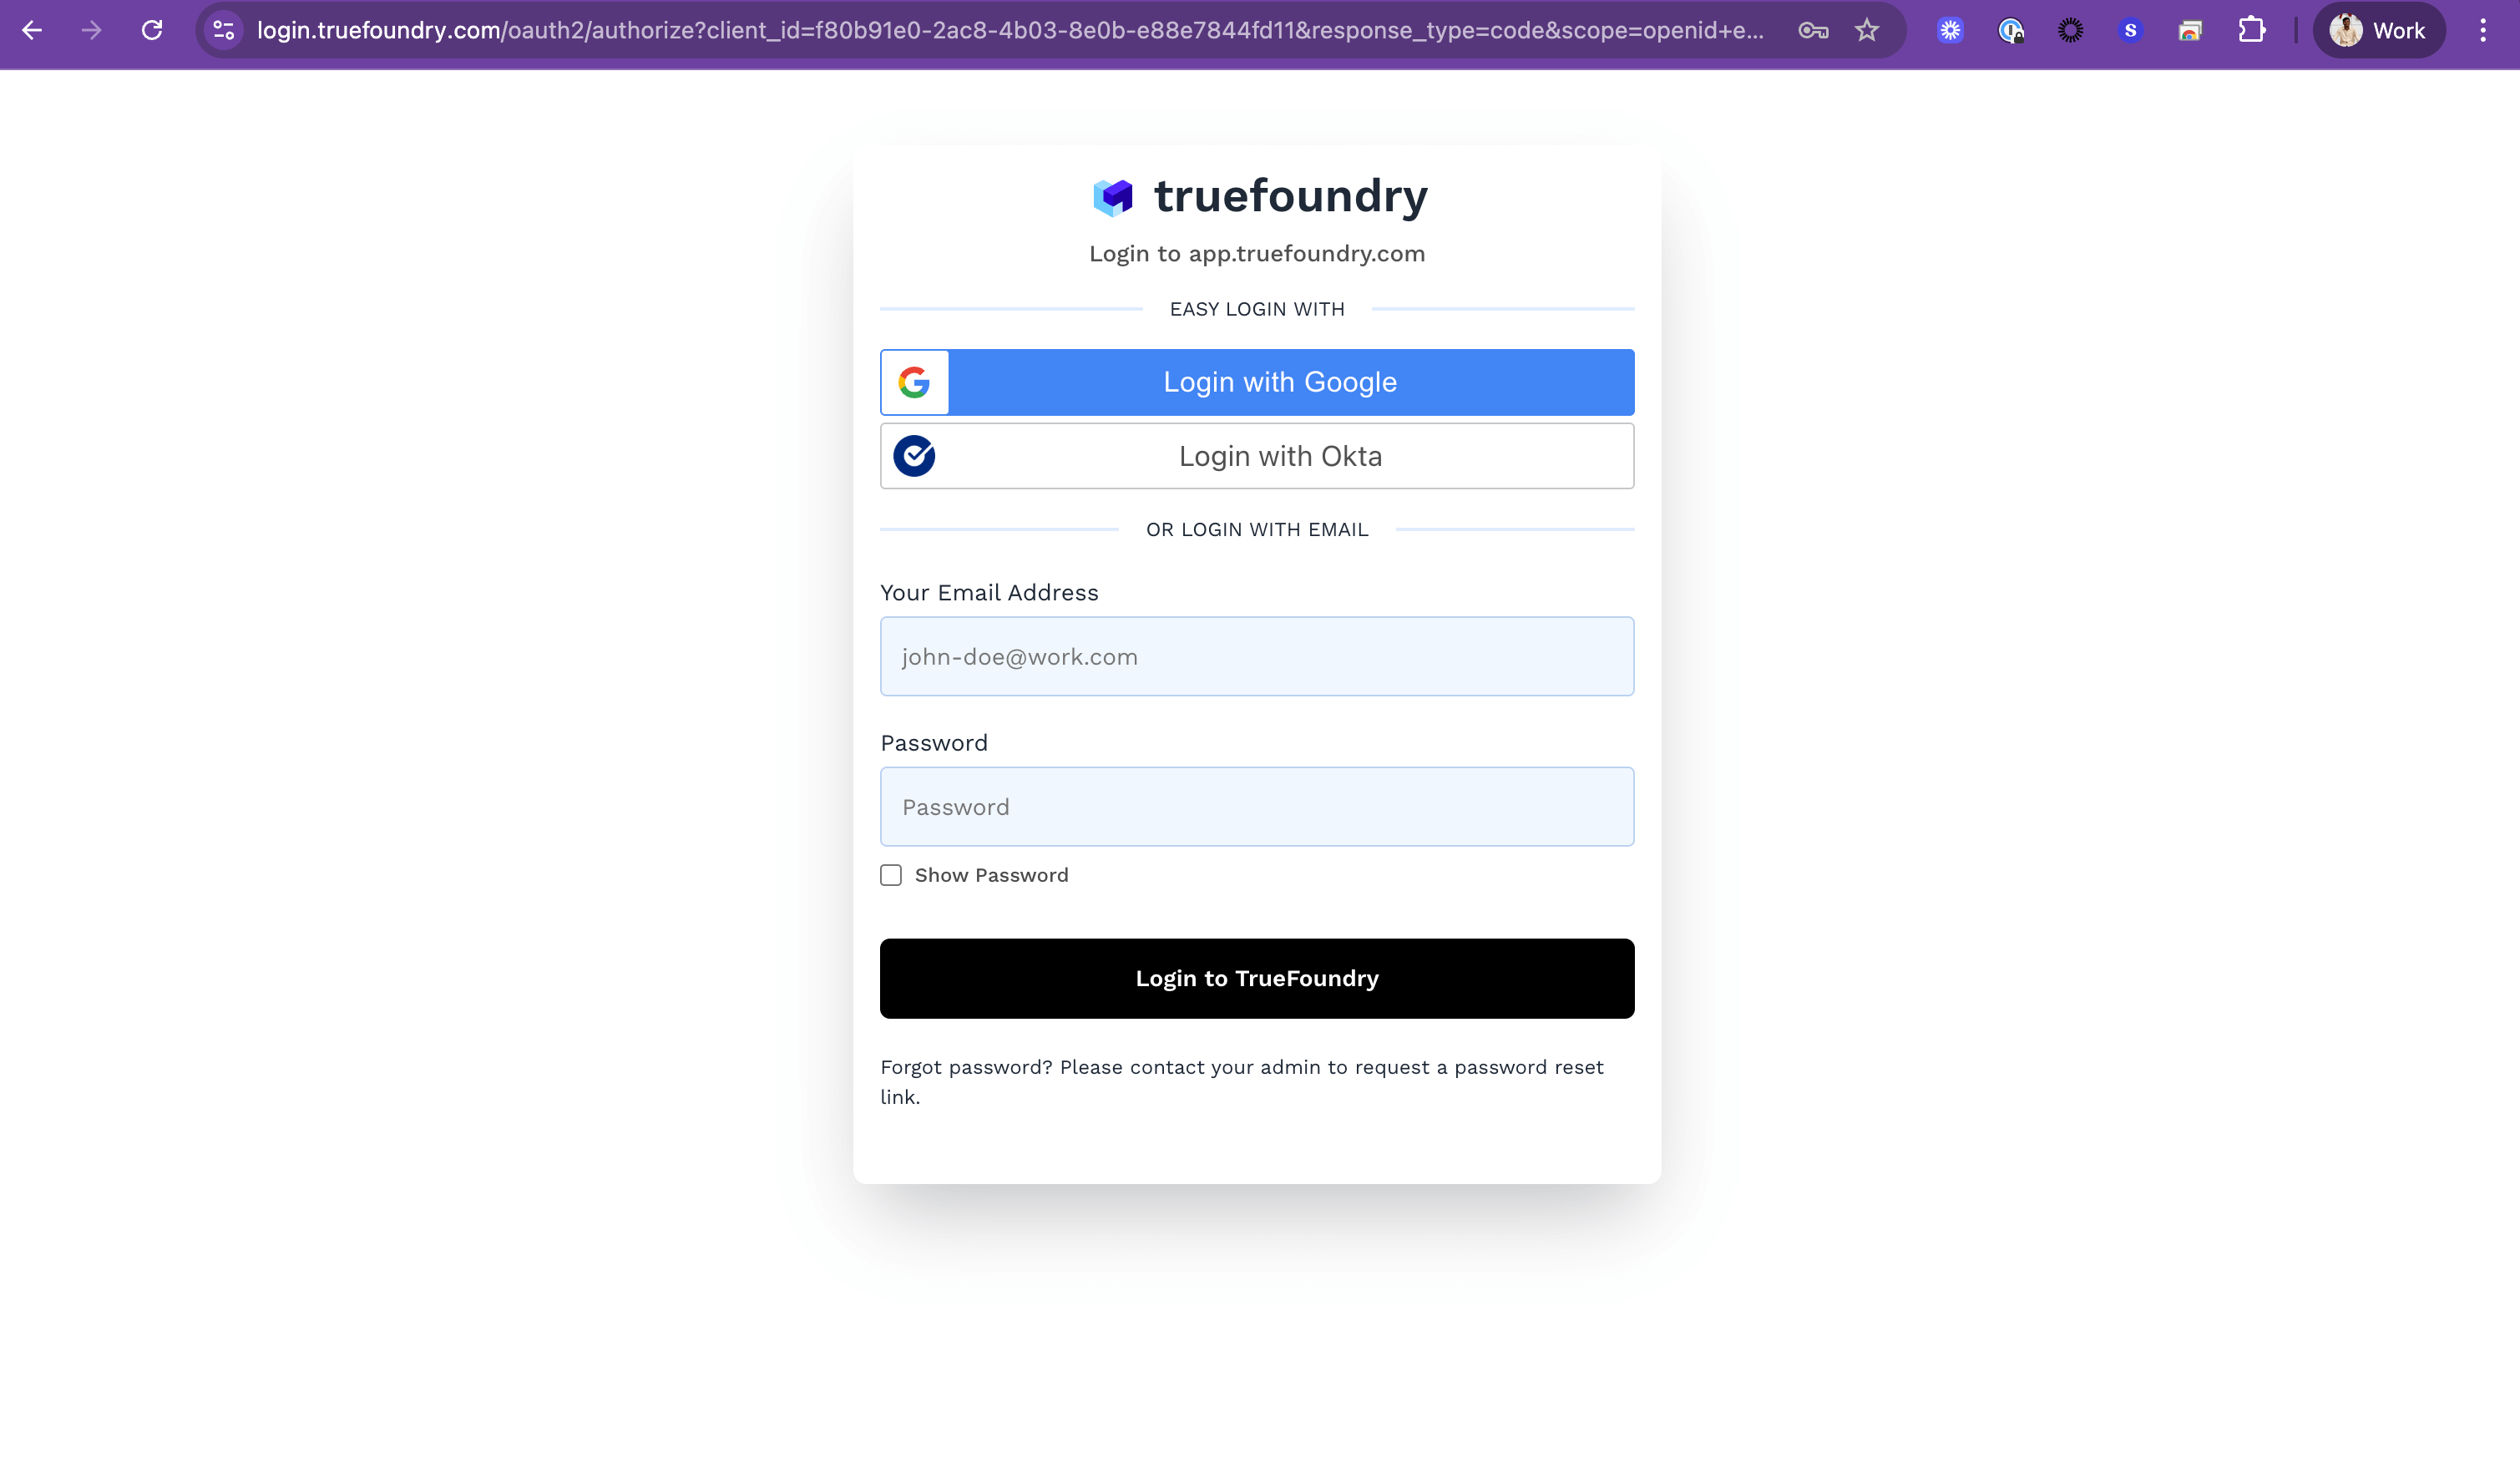
Redirect to SSO Identity Provider page
Example Request/Response
Example Request/Response
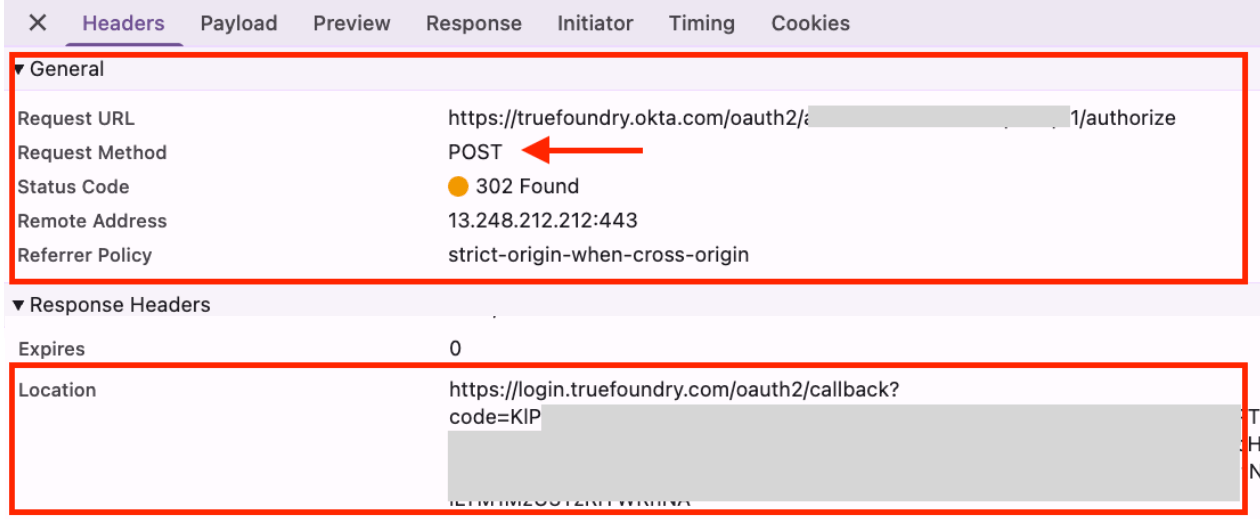
Redirect back to the TrueFoundry Auth Server with code
Example Request/Response
Example Request/Response
Validate & create user if it doesn't exist
Example Request/Response
Example Request/Response
example@example.com to the user in the TrueFoundry Auth Server and redirect to the TrueFoundry Control Plane.Redirect to TrueFoundry Control Plane with authorization code
Example Request/Response
Example Request/Response
Exchange code for tokens
Example Request/Response
Example Request/Response
Return authentication tokens
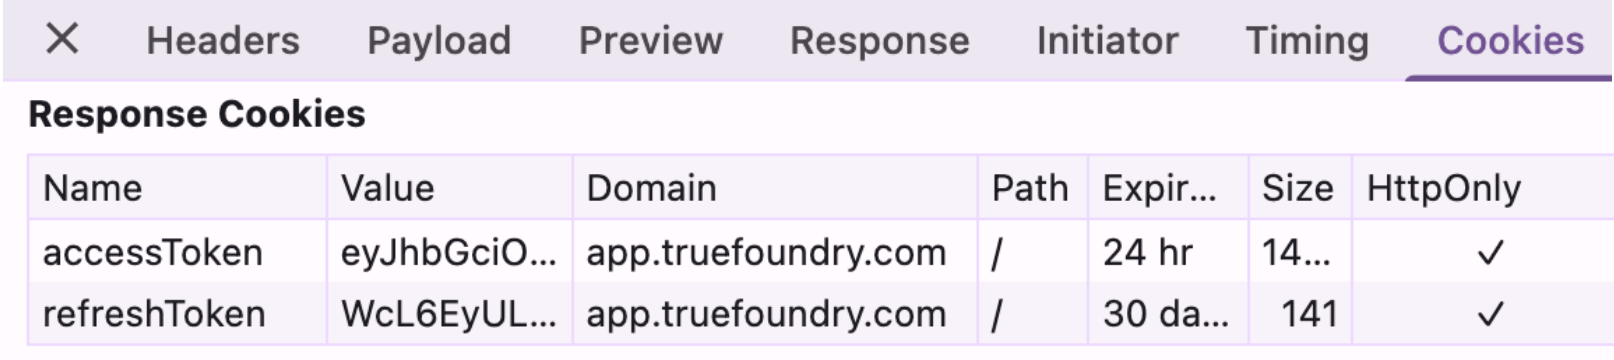
Set tokens as HttpOnly cookies
Option 2 — Direct IdP integration (no TrueFoundry Auth Server)
login.truefoundry.com is not in the loop. User emails and request counts never leave your network.
How it works
- The control plane is configured at install time with your IdP’s OIDC issuer or SAML metadata (via
servicefoundryServer.envin Helm values). - When a user logs in, the control plane redirects them straight to your IdP.
- After the IdP authenticates, the user returns directly to the control plane — tokens are signed locally using a private JWKS issued by TrueFoundry.
- TrueFoundry support provides the
INTERNAL_JWT_JWKSmaterial required to sign tokens within your environment.
login.truefoundry.com or stays entirely within your environment.Pick your identity provider
The guides below assume the default Option 1 flow (TrueFoundry Auth Server). Pick your IdP from the cards below — each guide covers SSO via SAML or OIDC and, where supported, SCIM provisioning.Microsoft Entra ID (Azure AD)

Okta

Google Workspace
JumpCloud
OneLogin

Auth0

Keycloak
Microsoft AD FS
PingOne / PingFederate
Rippling
Configure SSO in TrueFoundry
Go to Settings → Security & Access → SSO, toggle Enabled, pick your SSO Provider, and choose OIDC or SAML v2 under Authentication Configuration.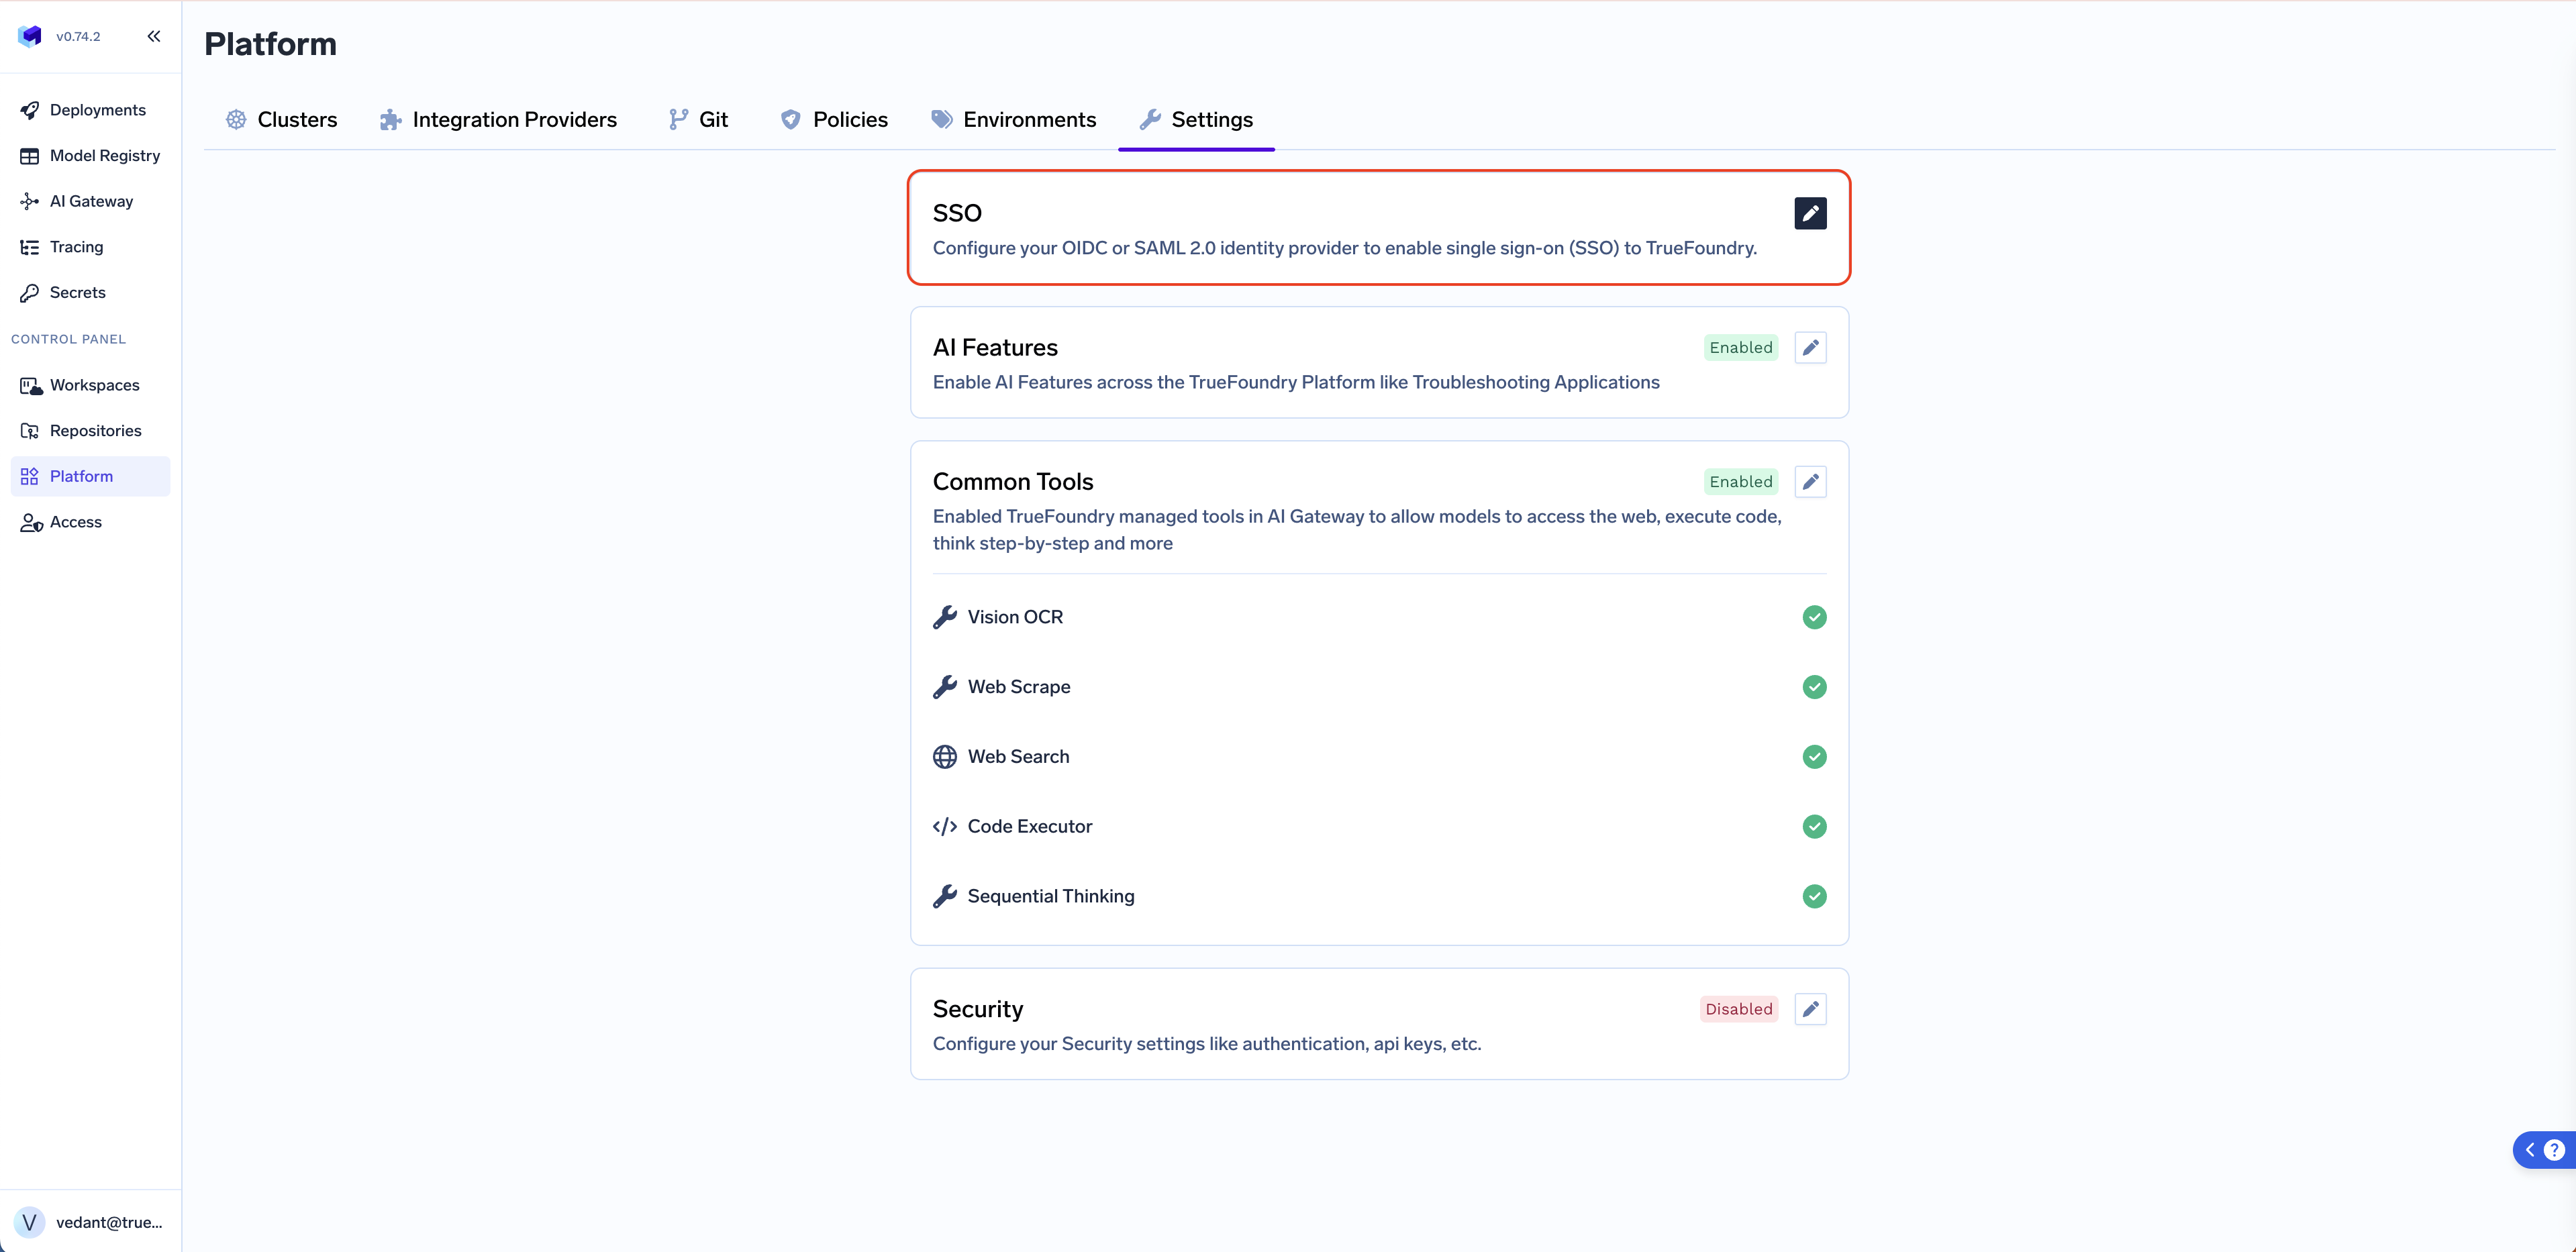
- OIDC
- SAML v2
Create a client application in your IdP
https://login.truefoundry.com/oauth2/callback.Fill in the TrueFoundry SSO form
- Client ID — application/client ID issued by your IdP.
- Client Secret — client secret value generated for the application.
- Issuer URL — your IdP’s OIDC issuer (e.g.
https://<tenant>.okta.comorhttps://login.microsoftonline.com/<tenant-id>/v2.0). - Discover endpoints — leave enabled to auto-fetch metadata from
<Issuer URL>/.well-known/openid-configuration. If your IdP doesn’t expose a discovery document, disable this and manually fill in Authorization Endpoint, Token Endpoint, UserInfo Endpoint, and JWKS Endpoint. - Scopes (optional) — space-separated additional scopes. Defaults to
openid email.
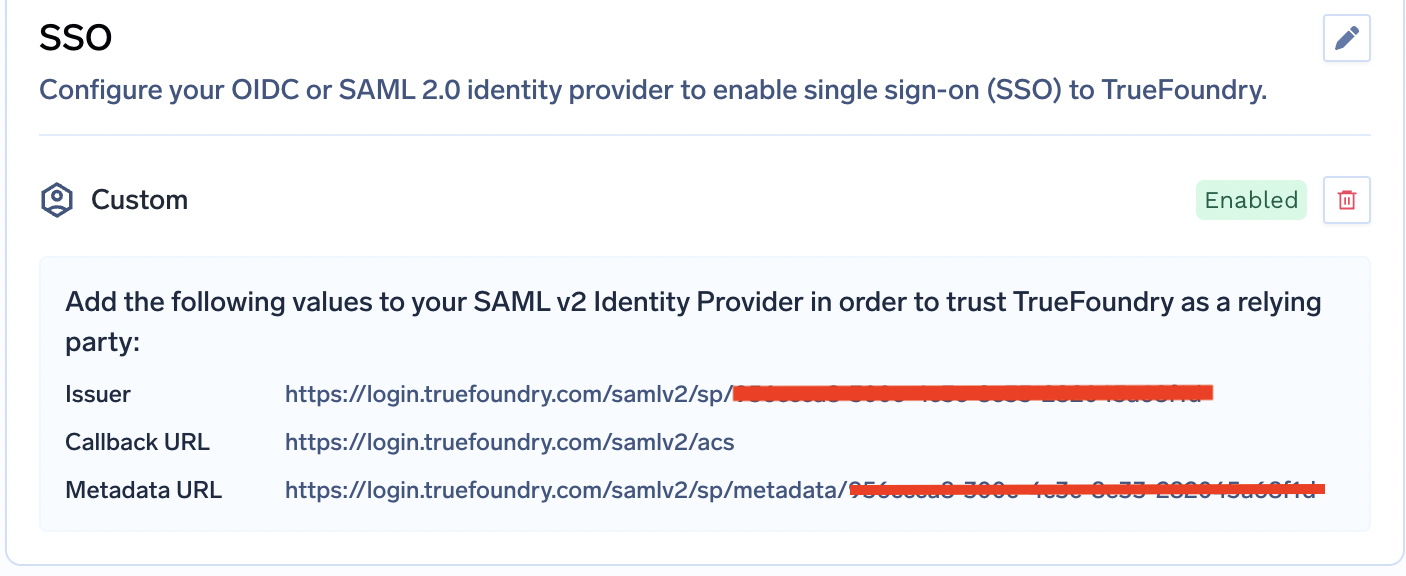
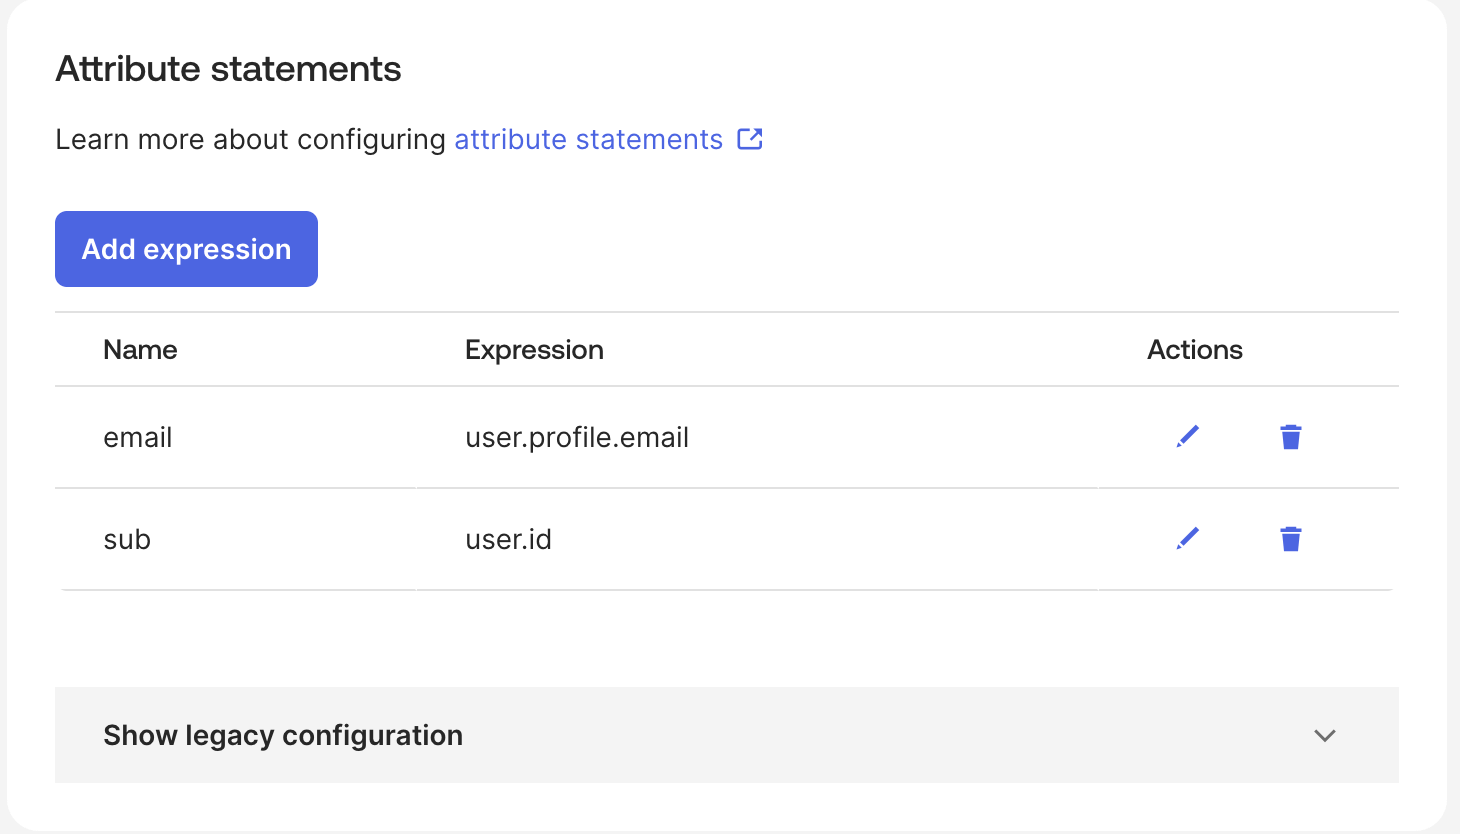
Values you'll exchange with your IdP (full reference)
Values you'll exchange with your IdP (full reference)
From TrueFoundry → your IdP
TrueFoundry generates these once you create the SSO configuration under Settings → Security & Access → SSO. They’re shown in the SSO configuration panel after you click Save.- OIDC
- SAML v2
From your IdP → TrueFoundry
You collect these from your IdP’s admin console and paste them into the Configure Settings for SSO dialog at Settings → Security & Access → SSO.- OIDC
- SAML v2
Advanced customizations (OIDC and SAML)
Click Show advanced fields in the SSO dialog to override defaults:- Button Text / Button Image URL — customize the SSO button on the TrueFoundry login screen.
- Email Claim — claim/attribute carrying the user’s email. Defaults to
email. - Unique ID Claim — claim/attribute carrying the user’s unique ID. Defaults to
sub.
Disable username password login
After SSO is working, you can turn off username and password so users can sign in only through your identity provider. This is the Disable Password Grant setting on the SSO configuration.What changes
Configure disable username password login
Open your SSO configuration
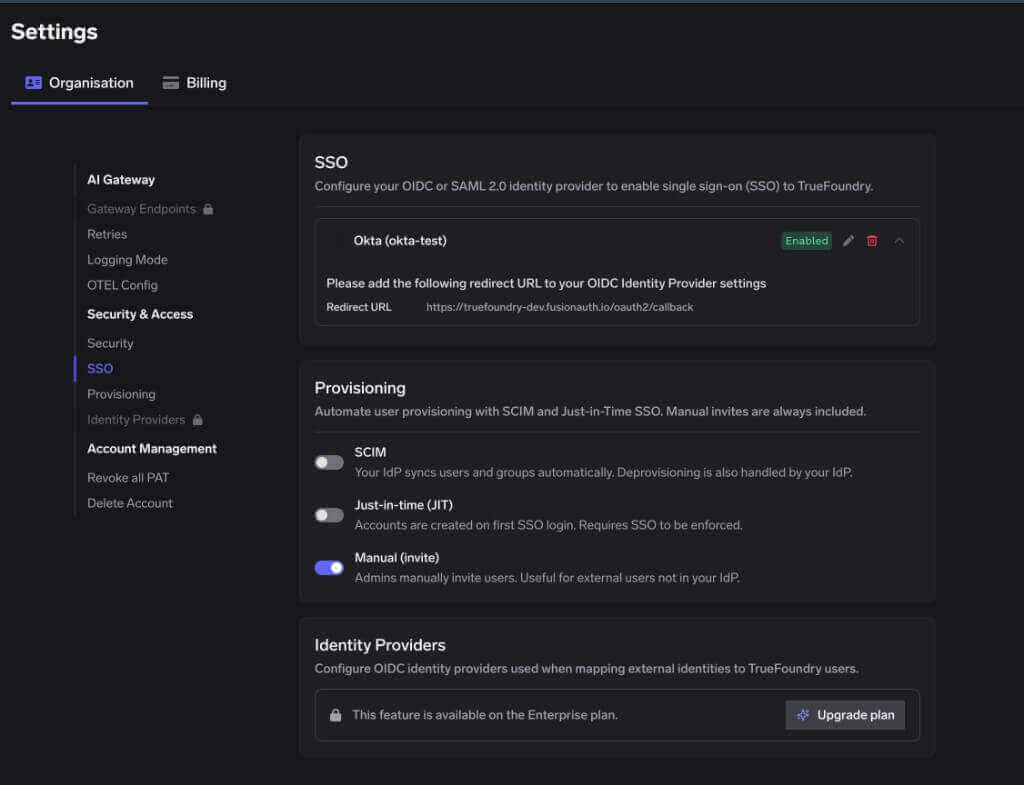
SSO, provisioning, and identity provider settings
Enable Disable Password Grant
- Keep Enabled checked. Password grant can be disabled only while SSO is on.
- Check Disable Password Grant.
- Click Save.
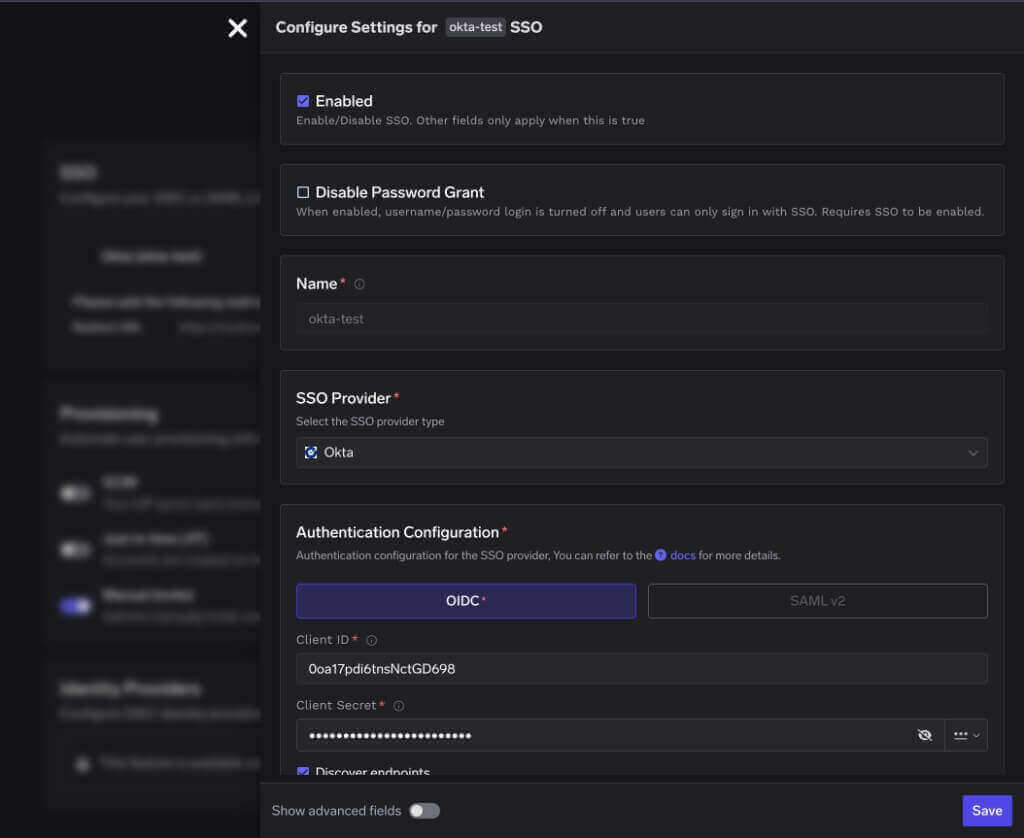
Disable Password Grant on the SSO configuration
Confirm the login screen
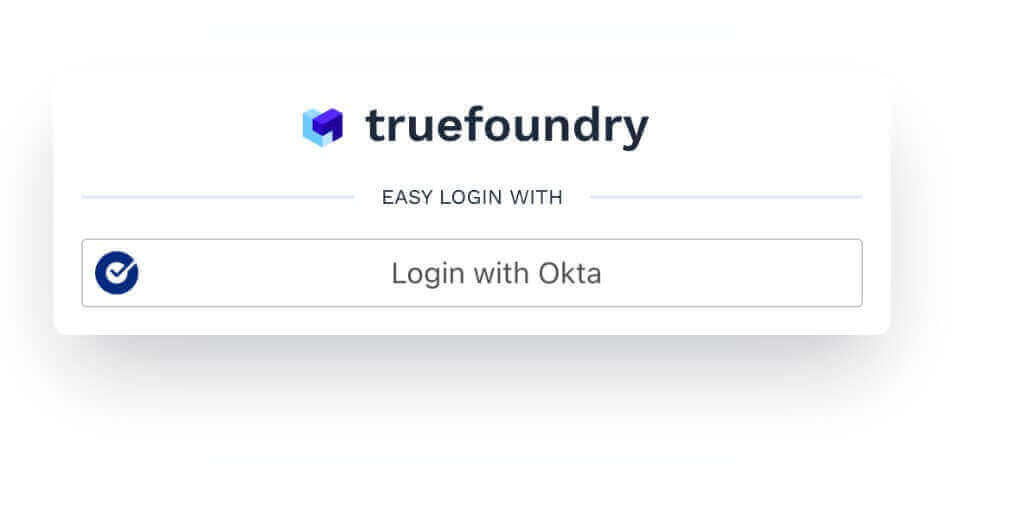
Login page after password grant is disabled
SCIM provisioning at a glance
For IdPs that support SCIM, you can automatically create, update, and deactivate TrueFoundry users from your IdP. SCIM works alongside SSO (OIDC or SAML).Enable SCIM in TrueFoundry
Copy the SCIM Base URL and token from TrueFoundry
Configure your IdP
- Base URL / Tenant URL to the SCIM URL from TrueFoundry.
- Authentication to Bearer token.
- Bearer Token / Secret Token to the SCIM token from TrueFoundry.
Troubleshooting
Deleting an SSO configuration fails with “out of sync with the central auth server”
This SSO configuration is out of sync with the central auth server and could not be deleted automatically. Retry the delete request with the force flag set to true to remove the local configuration.To remove the SSO configuration anyway, retry the delete with the
force=true query parameter:
<your-control-plane-host>— your TrueFoundry control plane URL.<settings-id>— the id of the SSO settings entry (theidfield returned by the settings list API).<your-api-key>— a TrueFoundry API key belonging to a user/account with the Manage Settings permission on the tenant.
force=true, TrueFoundry ignores the central auth server cleanup failure and deletes the SSO configuration.
Before you start
- You’ll need admin access to both TrueFoundry and your IdP.
- Each tenant has its own SSO and provisioning configuration — make sure you’re configuring the correct tenant.
- For Option 1, TrueFoundry’s authentication server is
login.truefoundry.comfor all customers and the OIDC redirect/callback URL is alwayshttps://login.truefoundry.com/oauth2/callback. - For Option 2, work with TrueFoundry support to obtain the
INTERNAL_JWT_JWKSmaterial and follow External SSO (OIDC/SAML) at install time. - Once SSO is saved, click the row in the SSO list to view the Callback URL and Issuer that you’ll feed back into your IdP for SAML.