

Supported features
Prerequisites
- A TrueFoundry tenant with Admin access to Settings → Security & Access → SSO.
- An Okta Workforce Identity Cloud tenant with permission to add applications (Super Admin or App Admin).
- Your TrueFoundry control plane hostname (for example,
your-tenant.truefoundry.cloud). - Your Okta tenant domain (for example,
https://your-org.okta.com).
Configuration
1. Add TrueFoundry from the Okta catalog
In the Okta Admin Console, go to Applications → Applications → Browse App Catalog, search for TrueFoundry, and click Add Integration.2. Set the Control Plane Host
On the General tab, under App Settings, set:- Application label: a display name such as
TrueFoundry. - Control Plane Host: the hostname of your TrueFoundry control plane (for example,
your-tenant.truefoundry.cloud). Do not includehttps://.
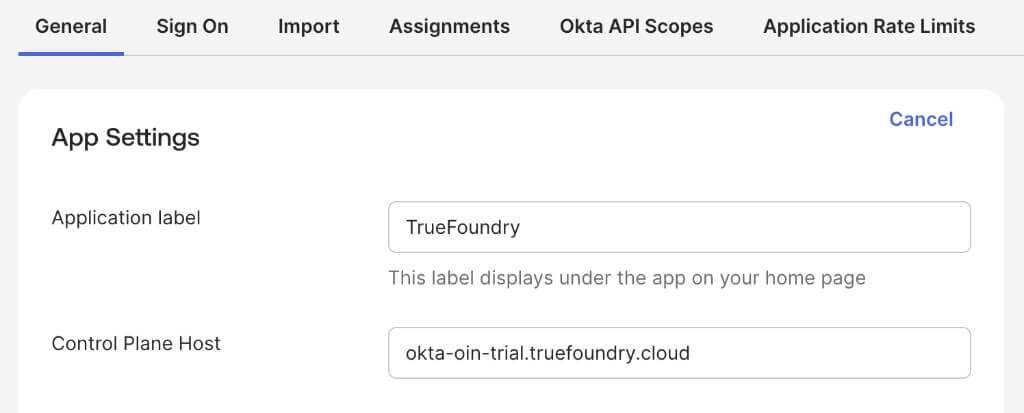
Enter the Control Plane Host under App Settings on the General tab.
3. Get your OIDC credentials
Open the TrueFoundry app you just added. On the Sign On tab, under Sign on methods → OpenID Connect, copy the Client ID and Client secret. Your issuer is your Okta domain — for example,https://your-org.okta.com.
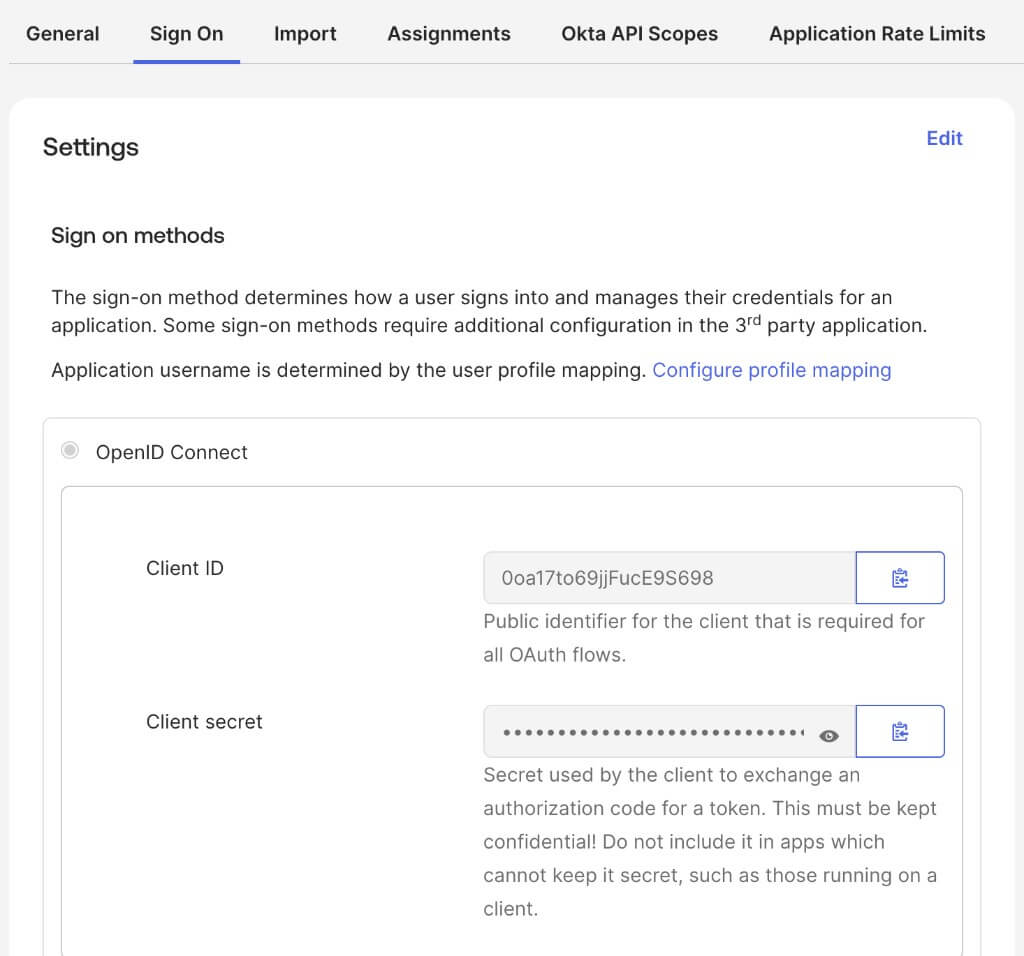
Copy the Client ID and Client secret from the Sign On tab.
The Sign-in redirect URI ships with the OIN integration as
https://login.truefoundry.com/oauth2/callback. Confirm it is present under the app’s General → Sign-in redirect URIs — you do not need to add it manually.4. Complete the connection in TrueFoundry
In TrueFoundry, go to Settings → Security & Access → SSO, add an Okta OIDC configuration, and paste:- Issuer URL: your Okta domain (for example,
https://your-org.okta.com) - Client ID: the Client ID from step 3
- Client Secret: the Client secret from step 3
5. Assign users
On the TrueFoundry app’s Assignments tab in Okta, assign the users or groups that should have access. Only assigned users can sign in.6. Test
Sign out, return to your TrueFoundry login page, and click Login with Okta. You are redirected to Okta; on success you land in the TrueFoundry dashboard.Provisioning
TrueFoundry provisions users just-in-time. On a user’s first successful SSO sign-in, TrueFoundry creates their account when JIT provisioning is enabled. No SCIM or pre-sync is required for SSO alone; access follows your Okta app assignment — an unassigned user can no longer sign in. For automatic user and group sync with SCIM, see SCIM with Okta.Sign-in flows
SP-initiated: users go to the TrueFoundry login page, click Login with Okta, and are redirected to Okta.Reference
Troubleshoot
- SSO fails after adding the OIN app — Confirm Control Plane Host on the General tab matches your TrueFoundry hostname exactly (no
https://, no trailing slash). - “Invalid issuer” when saving in TrueFoundry — Confirm the Issuer URL is exactly your Okta tenant URL (for example,
https://acme.okta.com) with no trailing slash and no/oauth2/defaultsuffix. - “You are not assigned to the client application” — Assign the user (or their group) to the TrueFoundry app under Assignments in Okta.