

Prerequisites
- A TrueFoundry tenant with Admin access to Settings → Security & Access → SSO.
- An Okta Workforce Identity Cloud tenant with permission to create new Applications (Super Admin or App Admin).
- Your Okta tenant domain — the hostname you use to reach the admin console, for example
https://acme.okta.comorhttps://acme.okta-emea.com.
Configuration overview
Create an OIDC Web Application in Okta
Collect the Client ID, Client Secret, and Issuer
Configure TrueFoundry
Assign users and test
Step 1 — Create an OIDC application in Okta
Open the Okta admin console
https://<your-tenant>-admin.okta.com) as an administrator.In the left navigation, expand Applications → Applications and click Create App Integration.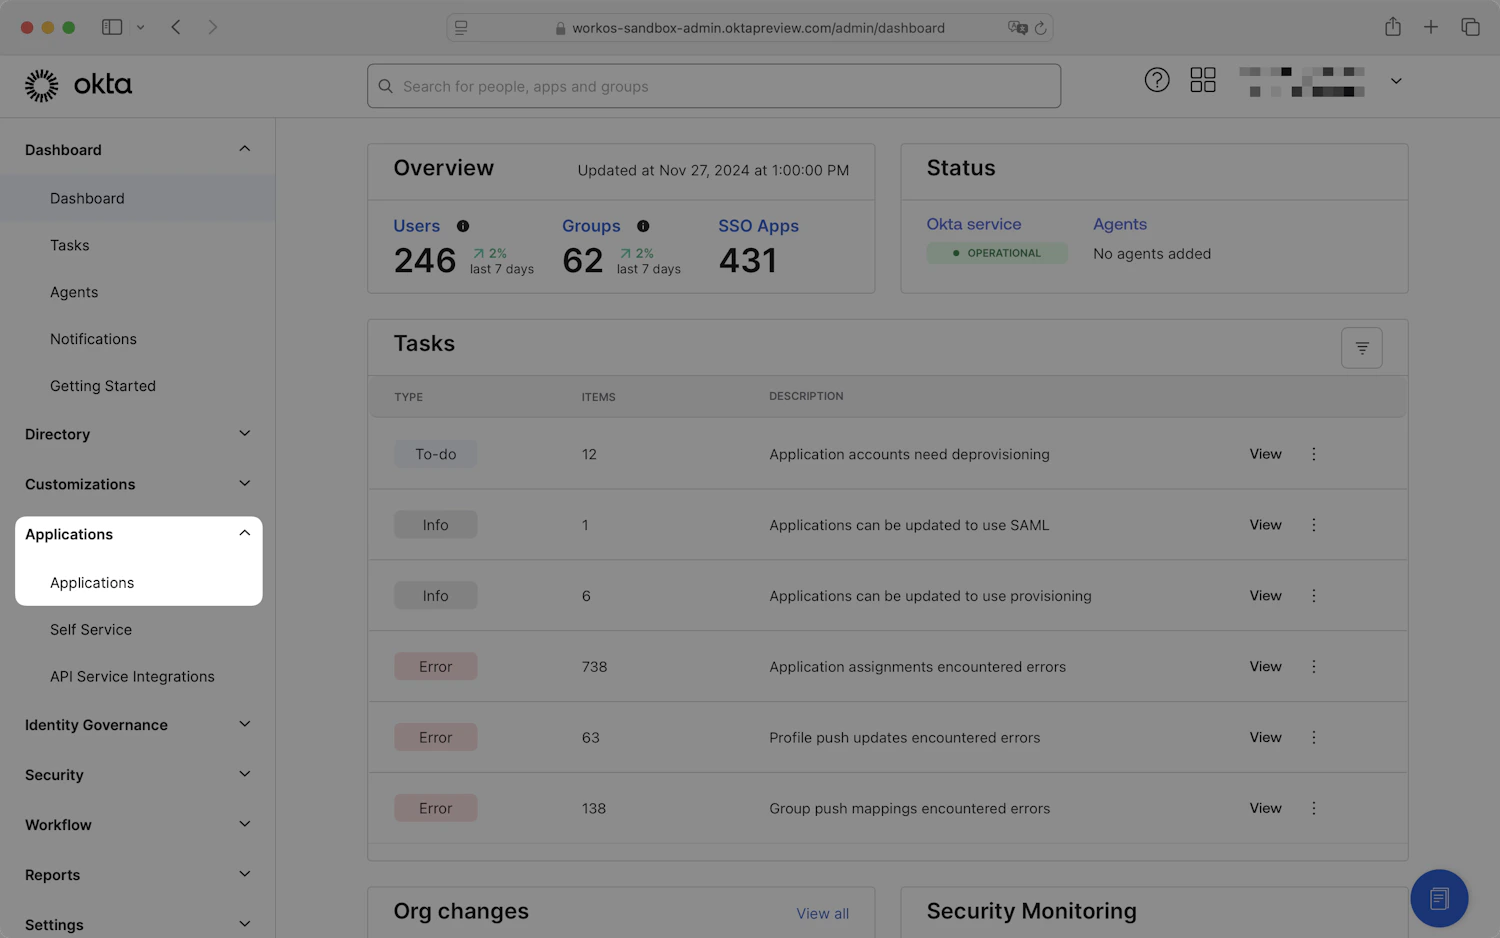
Expand Applications in the left nav of the Okta admin console.
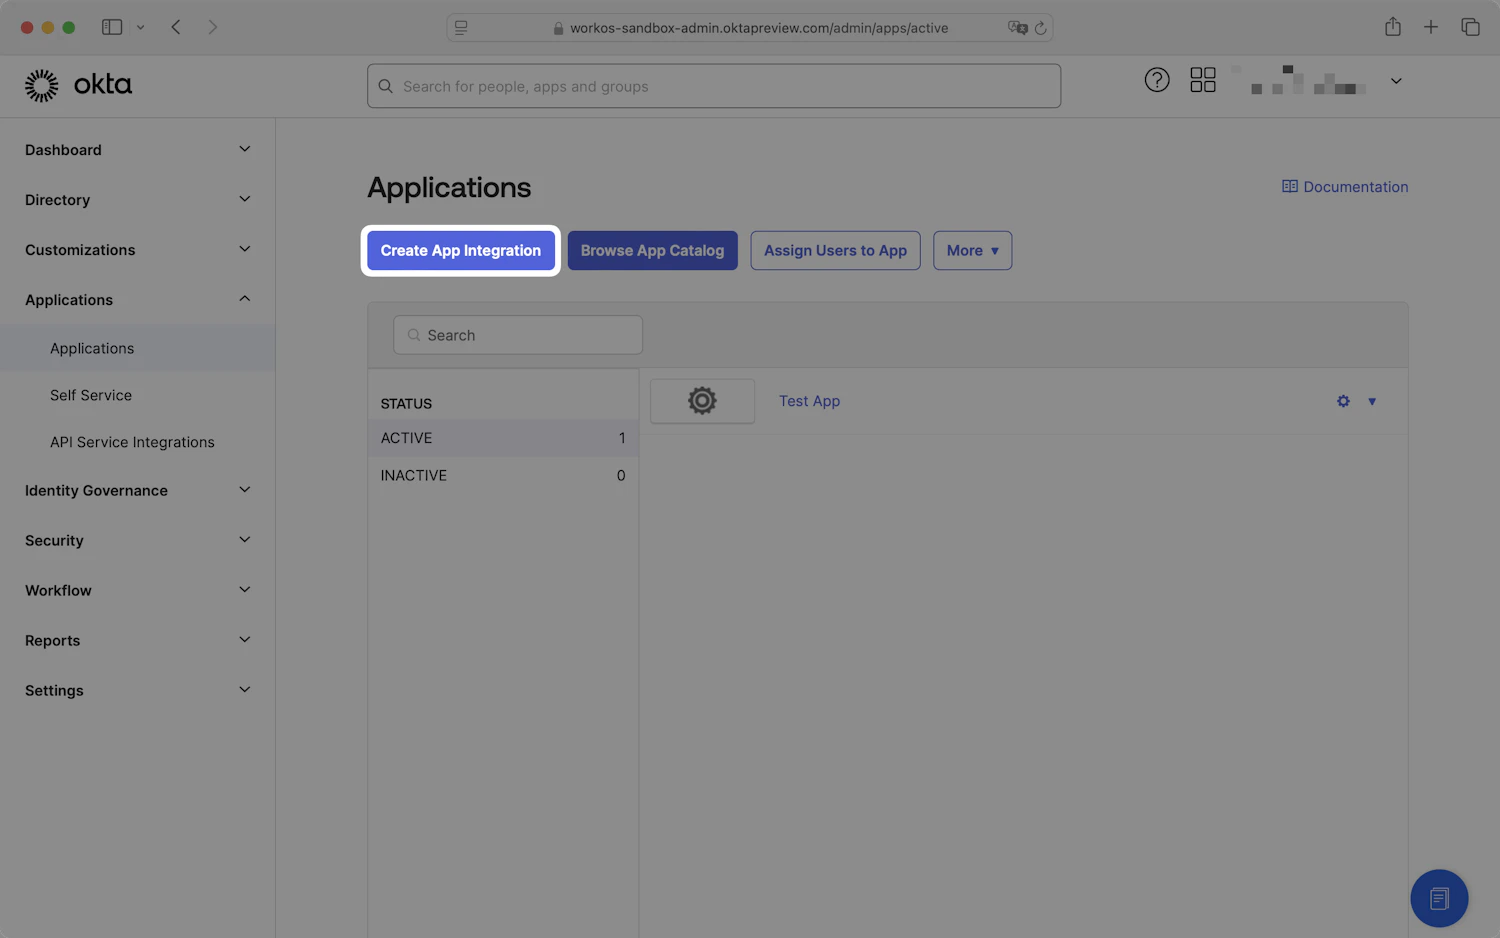
Click Create App Integration on the Applications page.
Pick OIDC – Web Application
- Sign-in method: choose OIDC – OpenID Connect.
- Application type: choose Web Application.
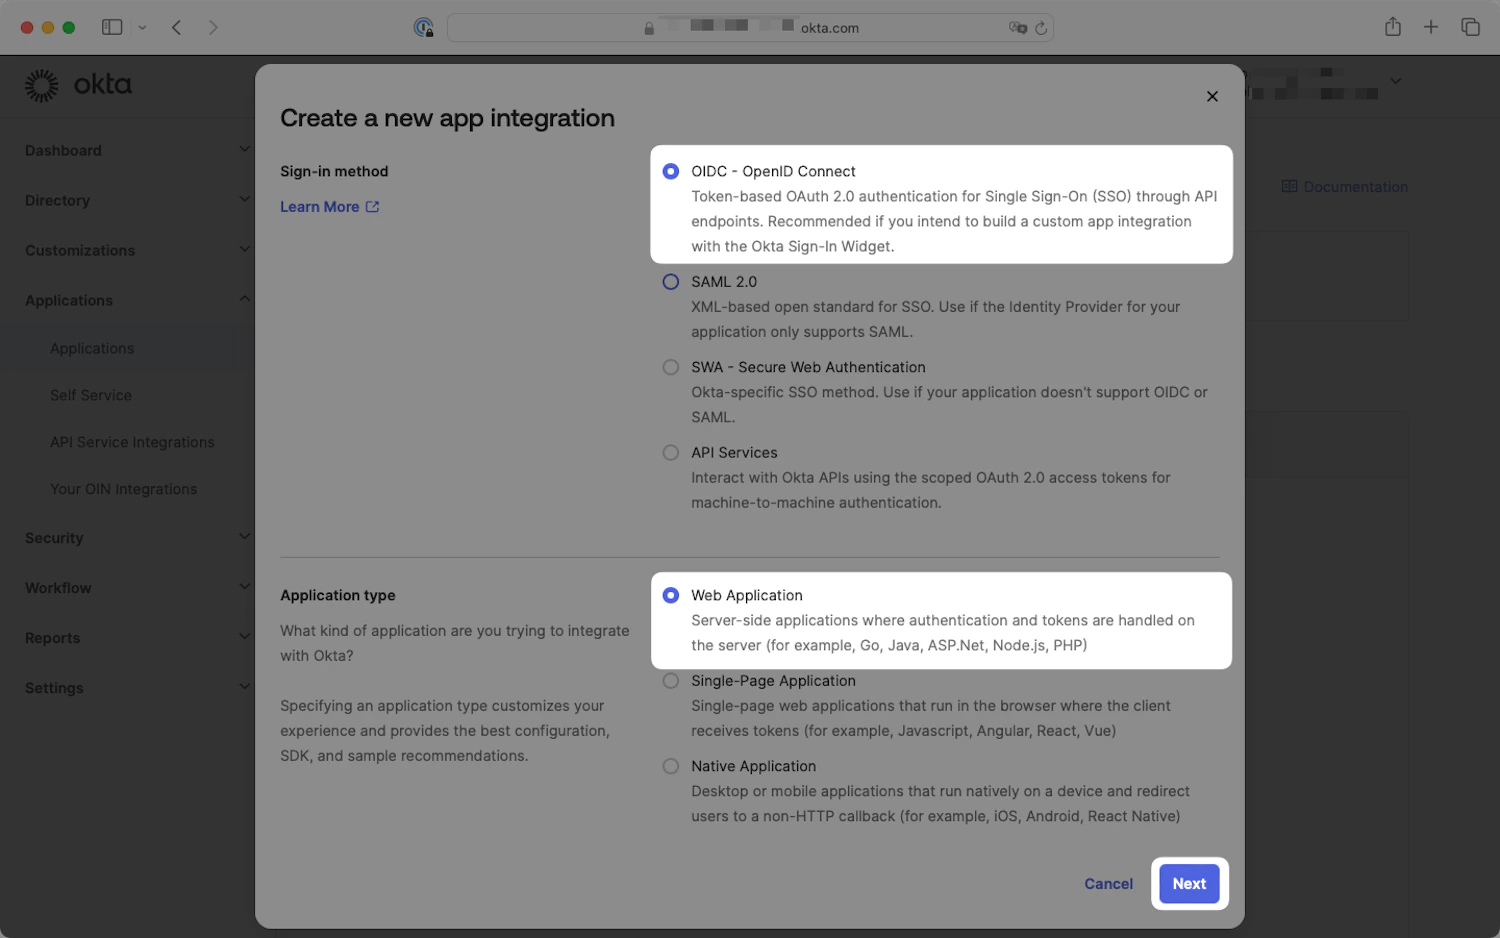
Select OIDC – OpenID Connect and Web Application in the Create a new app integration dialog.
Configure the integration
-
App integration name: a label such as
TrueFoundry. - Grant type: ensure Authorization Code is checked. Leave the other grant types unchecked unless you have a specific reason.
-
Sign-in redirect URIs: click Add URI and enter:
- Sign-out redirect URIs: leave blank (or set it to your TrueFoundry login URL if you want a custom post-logout redirect).
- Assignments: choose Skip group assignment for now — you’ll assign users in Step 4.
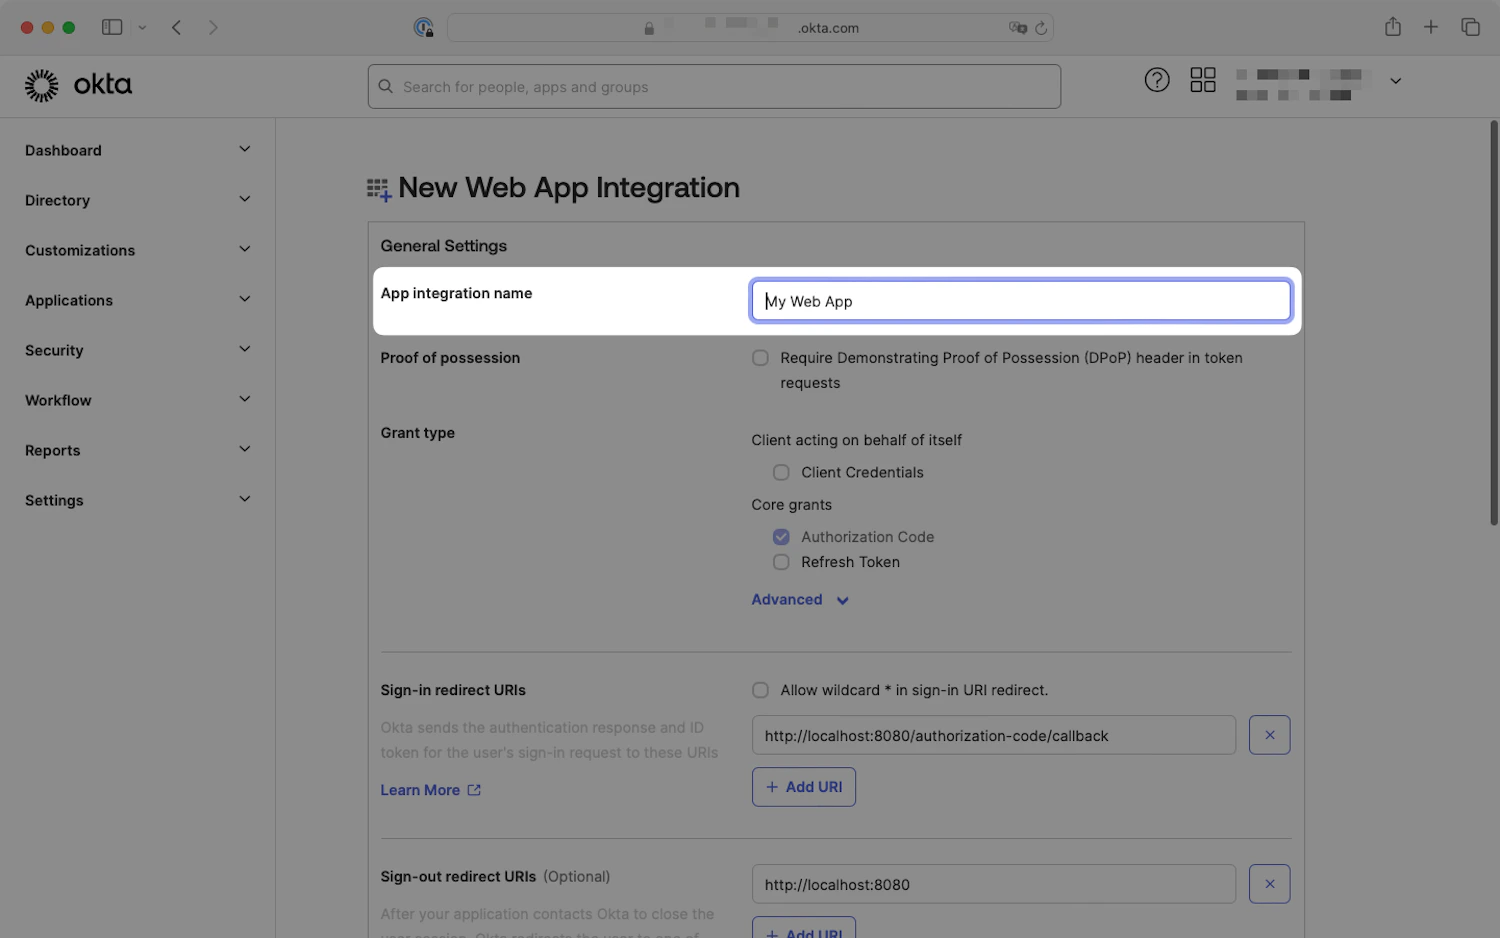
Set the app integration name and confirm Authorization Code is the only checked grant type.
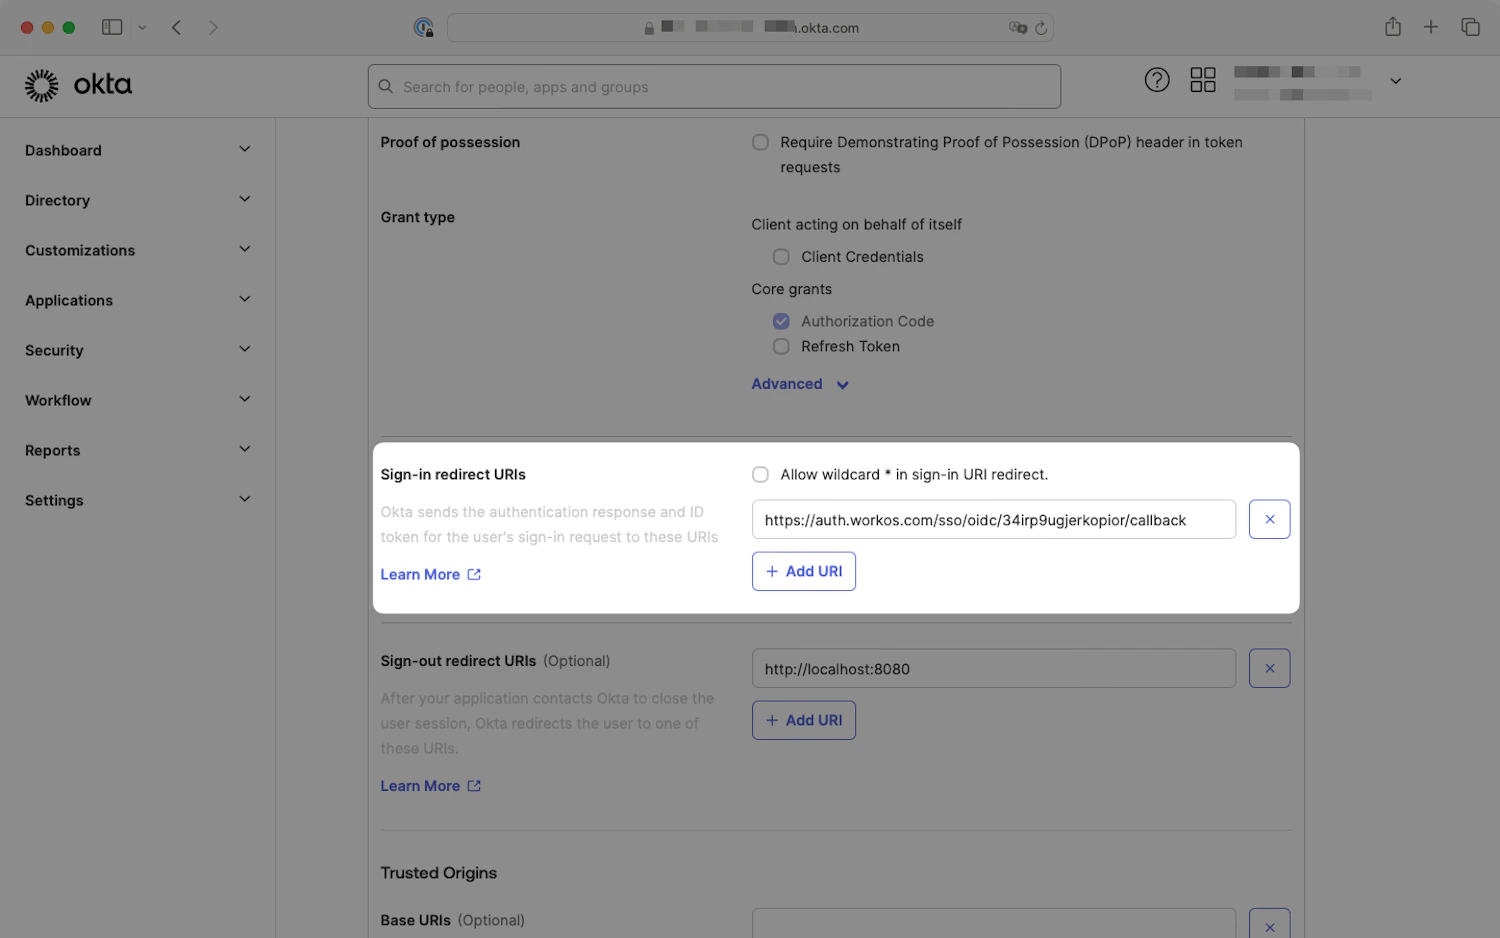
Click Add URI under Sign-in redirect URIs and paste the TrueFoundry callback URL.
Step 2 — Collect the credentials
After saving, Okta opens the application’s General tab.Copy the Client ID and Client Secret
- Client ID
- Client secret — click Show if it isn’t already visible.
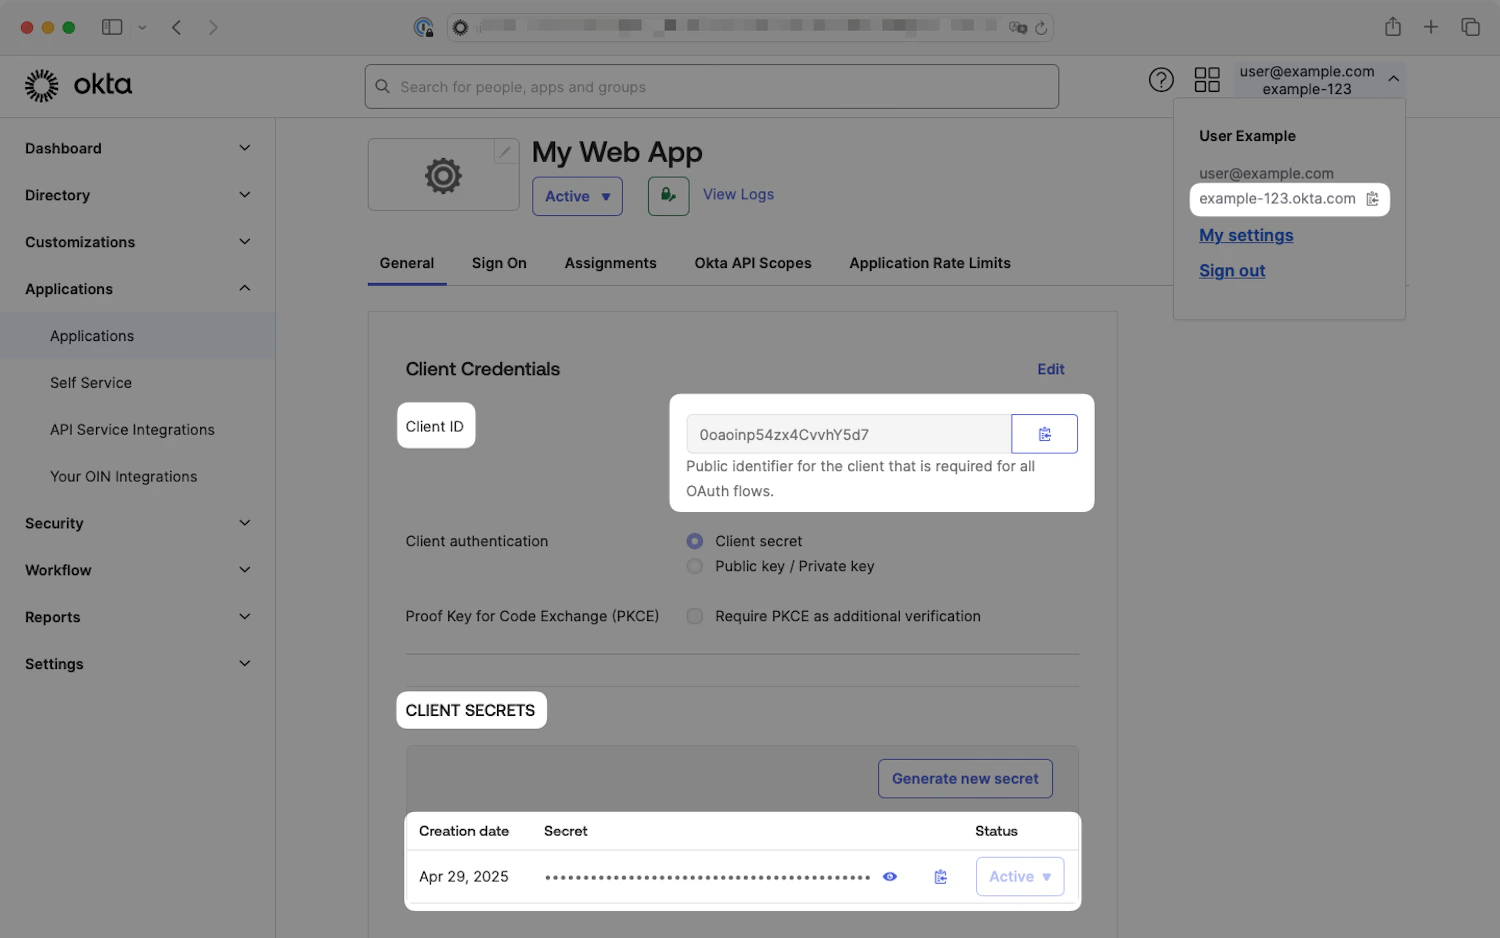
Copy the Client ID and Client secret from the General tab. Your Okta tenant domain appears in the user dropdown at the top right.
Confirm the Issuer URL
https://<your-tenant>.okta-emea.com; for preview tenants it’s https://<your-tenant>.oktapreview.com. Use whichever matches your environment.Step 3 — Configure TrueFoundry
Open SSO settings
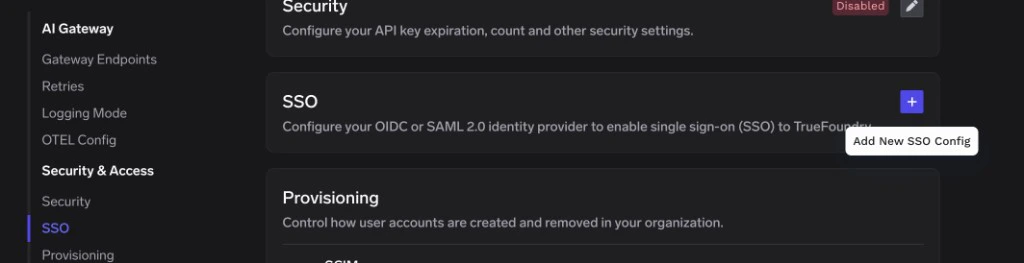
SSO page in TrueFoundry — click the + icon to add a new SSO configuration
Fill in the SSO form
- Enabled: turn this on.
-
Name: a lowercase alphanumeric label — for example,
oktaoidc. - SSO Provider: select Okta.
- Authentication Configuration: choose OIDC.
- Client ID: the Client ID from Okta.
- Client Secret: the Client secret from Okta.
- Discover endpoints: leave enabled.
-
Issuer URL: your Okta tenant URL — for example:
-
Scopes (optional): leave blank to use the default
openid email. Addprofileif you want first and last name in the token.
Save
/.well-known/openid-configuration from it and stores the credentials.Step 4 — Assign users in Okta
Okta only lets users sign in to applications they’ve been explicitly assigned to.Open Assignments
Pick people or groups
Step 5 — Test single sign-on
- Open a private/incognito window and visit your TrueFoundry login page.
- Click Login with Okta.
- Authenticate with an assigned Okta user.
Optional next steps
- Add TrueFoundry from the Okta App Catalog — see SSO via OIN.
- Sync users and groups automatically — see SCIM with Okta.
- Use SAML instead — see SAML with Okta.
Troubleshooting
'Invalid issuer' or 'Discovery endpoint not found' when saving
'Invalid issuer' or 'Discovery endpoint not found' when saving
https://acme.okta.com) with no trailing slash and no /oauth2/default suffix. You can test it directly by visiting <issuer>/.well-known/openid-configuration in your browser.Sign-in works but the user's email is empty
Sign-in works but the user's email is empty
email, and (if you want first/last name) profile. If you renamed claims on the Okta side, expand Show advanced fields in TrueFoundry and set the Email Claim to the claim name Okta is emitting.'You are not assigned to the client application'
'You are not assigned to the client application'