Configure SAML 2.0 single sign-on between TrueFoundry and JumpCloud using a Custom SAML Application.
This guide walks you through setting up SAML 2.0 single sign-on between TrueFoundry and JumpCloud. JumpCloud doesn’t ship a TrueFoundry connector in its SSO catalog, so you’ll create a Custom Application. Once finished, members of your JumpCloud directory can sign in to TrueFoundry through a Login with JumpCloud button.
If you will provision these user groups with SCIM, rename them in JumpCloud before setup. The group name becomes the TrueFoundry team name, and it must start with a letter, use only letters, numbers, hyphens (-), and underscores (_), end with a letter or number, and be 3–50 characters. Spaces are not allowed — a name like Executive Team will not provision. See SCIM with JumpCloud.
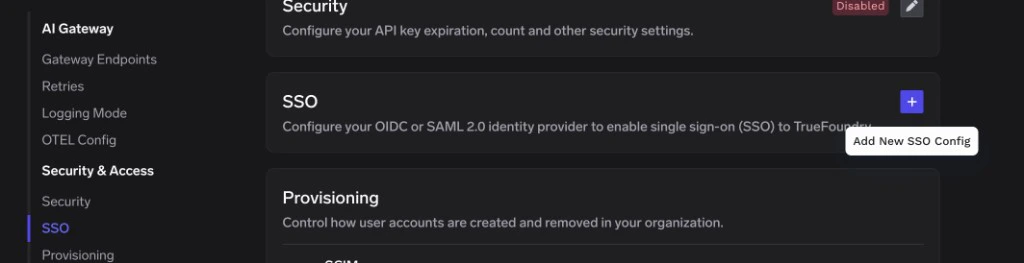
A TrueFoundry tenant with Admin access to Settings → Security & Access → SSO.
A JumpCloud admin account with permission to create SSO Applications and assign User Groups.
Keep the JumpCloud admin console and TrueFoundry SSO settings open in side-by-side tabs — you’ll copy a handful of URLs and a certificate between them.
Step 2 — Create a Custom SAML Application in JumpCloud
1
Open SSO Applications
Sign in to the JumpCloud admin console and click SSO Applications in the left navigation.Click Add New Application in the top-left corner. (If your tenant has no SSO applications yet, click Get Started instead.)
2
Pick the Custom Application tile
On the Create New Application Integration page, scroll to the Custom Application card and click Select, then click Next.
3
Choose Configure SSO with SAML
On the Select Options screen, check Manage Single Sign-On (SSO). The radio buttons will expand — pick Configure SSO with SAML, then click Next.
4
Set a Display Label
On the Enter General Info step, set the Display Label to something users will recognise on their JumpCloud portal — for example, TrueFoundry.Click Save Application, then click Configure Application on the confirmation screen to open the SAML configuration.
Step 3 — Enter TrueFoundry’s details into JumpCloud
Switch back to the JumpCloud SAML configuration screen for your Custom Application and open the SSO tab.
1
Set the entity IDs and ACS URL
Fill in the following fields:
JumpCloud field
Value
IdP Entity ID
A descriptive identifier you choose — for example, jumpcloud-truefoundry. JumpCloud doesn’t generate this; it just needs to be unique within your tenant.
SP Entity ID
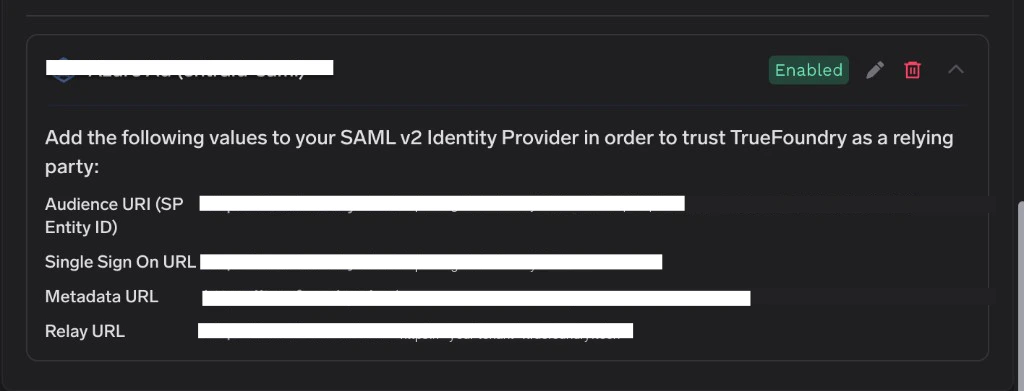
TrueFoundry Audience URI (SP Entity ID)
ACS URL
TrueFoundry Single Sign On URL
2
Switch Sign to Assertion and Response
Scroll down to the Sign option and change the radio button from the default to Assertion and Response.
This step is critical. JumpCloud’s default signing mode signs only the assertion, which TrueFoundry rejects with a signature validation error. You must select Assertion and Response.
3
Enable Declare Redirect Endpoint
Tick the Declare Redirect Endpoint checkbox. Without this, JumpCloud won’t advertise a redirect (HTTP-Redirect) binding in its metadata, and TrueFoundry’s login button will fail to start the SAML handshake.
4
Map SAML attributes
In the Attributes section, add the following user attributes. JumpCloud uses lowercase user property names on the right-hand side.
JumpCloud only lets users sign in to applications that are bound to a user group containing them.
1
Open the User Groups tab
Inside the same SAML application, click the User Groups tab at the top.
2
Pick the groups that should have access
Tick one or more user groups to grant them access to TrueFoundry.
If you don’t have a suitable group yet, exit the application, click User Groups in the left navigation, click the + icon, name the group, add Users, then come back to this step.
3
Activate the application
Click Activate (or Save if the app is already active) in the bottom-right corner. JumpCloud confirms with a green toast.
Step 5 — Copy JumpCloud’s details back to TrueFoundry
With the application activated, JumpCloud exposes the IdP signing certificate and login URL on the SSO tab.
1
Download the IDP certificate
On the left side of the SSO panel, click IDP Certificate Valid → Download Certificate. JumpCloud downloads a file named certificate.pem.Open the file in a text editor and copy the entire contents — including the -----BEGIN CERTIFICATE----- and -----END CERTIFICATE----- lines.
2
Copy the IDP URL
Scroll down to the field labelled IDP URL and copy its value. This is JumpCloud’s HTTP-Redirect SSO endpoint.
3
Paste into TrueFoundry
Return to Settings → Security & Access → SSO in TrueFoundry and edit the SSO configuration you created in Step 1. Set:
Identity Provider Endpoint → the IDP URL from JumpCloud.
X.509 Certificate → the certificate text you copied from certificate.pem.
Click Save.
4
(Optional) Customise the login button
Expand Show advanced fields in the TrueFoundry SSO form to override:
Button Text — for example, Login with JumpCloud.
Button Image URL — a publicly reachable URL pointing at a JumpCloud icon.
Email Claim / Unique ID Claim — only needed if you mapped custom attribute names in JumpCloud.
Open a private/incognito window and go to your TrueFoundry login page.
Click Login with JumpCloud (or whichever button label you set under Show advanced fields → Button Text).
Authenticate with a JumpCloud user that belongs to one of the assigned user groups.
If the sign-in succeeds, you’ll land in the TrueFoundry dashboard. The user is created automatically if JIT provisioning is on; otherwise they must already exist in TrueFoundry, be invited, or be synced via SCIM.
'Invalid Signature' or 'Could not validate SAML response'
The most common cause is forgetting to switch JumpCloud’s Sign option from the default to Assertion and Response. Re-open the SAML application’s SSO tab, change the radio button, and click Save.If the error persists, re-download certificate.pem from JumpCloud and paste the full PEM (including the BEGIN/END lines) into TrueFoundry’s X.509 Certificate field.
The login button does nothing or returns an SSO error before reaching JumpCloud
Make sure Declare Redirect Endpoint is checked on the JumpCloud SSO tab. Without it, JumpCloud doesn’t publish an HTTP-Redirect binding, and TrueFoundry can’t start the SAML AuthnRequest.
'You are not authorized to access this application'
The JumpCloud user isn’t a member of any user group bound to the SAML application. Go back to Step 4 and make sure the user belongs to one of the assigned User Groups.
The login succeeds but the user gets 'no matching user found' inside TrueFoundry
Check the provisioning mode under Settings → Security & Access → Provisioning:
Invite-only — the user must be invited from Access → Users first.
JIT — the user is created on first login automatically.
SCIM — the user must be synced from JumpCloud first. See SCIM with JumpCloud.
Users sign in but email or unique ID is empty
Confirm the SAML attribute mapping in JumpCloud includes email → email and sub → id as described in Step 3. If you renamed the attributes, expand Show advanced fields in TrueFoundry and set Email Claim and Unique ID Claim to match.
Was this page helpful?
Assistant
Responses are generated using AI and may contain mistakes.