

Prerequisites
- A TrueFoundry tenant with Admin access to Settings → Security & Access → SSO.
- A Rippling account with the IT Admin role (or higher) so you can create custom apps under IT Management.
Configuration overview
Create the SSO configuration in TrueFoundry
Create a Custom App in Rippling
Disable InResponseTo and map attributes
Paste Rippling's values back into TrueFoundry
Step 1 — Create the SSO configuration in TrueFoundry
Open SSO settings
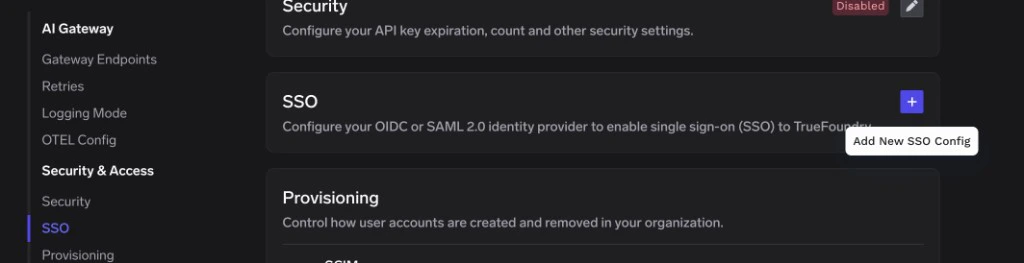
SSO page in TrueFoundry — click the + icon to add a new SSO configuration
Fill in the basic fields
- Enabled: turn this on.
- Name: a lowercase alphanumeric label — for example,
rippleingsaml. - SSO Provider: choose Custom.
- Authentication Configuration: select SAML v2.
Save to reveal the Single sign-on URL, Audience URI (SP Entity ID), and Relay URL
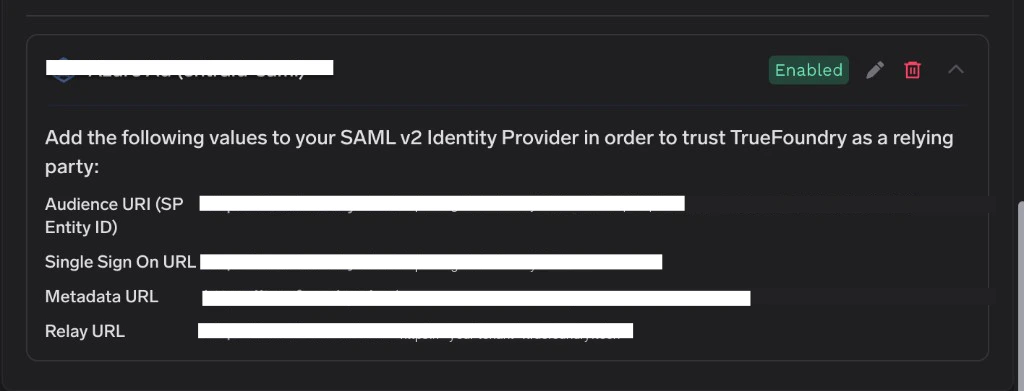
TrueFoundry SSO configuration card showing the SAML values to copy into Rippling
Step 2 — Create a Custom App in Rippling
Open Custom Apps
Create a new app
- Enter an App Name — for example,
TrueFoundry. - Pick a Category (e.g. Developer Tools).
- Upload a logo (optional, used for the Rippling launcher tile).
- For What type of app would you like to create?, select Single Sign-On (SAML).
Configure the service provider settings
Step 3 — Disable InResponseTo and map attributes
Open Advanced SAML Settings
Disable the InResponseTo field
Add SAML attribute mappings
Step 4 — Paste Rippling’s values back into TrueFoundry
Rippling exposes its IdP details on the same SSO Setup Instructions screen you saw in Step 2. The simplest path is to copy the IdP Metadata URL; if your environment cannot fetch external metadata, open the URL in a browser to view the metadata XML and pull values directly from it.Locate the IdP details
- IdP SSO URL — also called Single Sign-On URL or Login URL. This is the
Locationof theSingleSignOnServiceelement in the IdP metadata. - X.509 Signing Certificate — the certificate Rippling uses to sign assertions. This is the
X509Certificateelement underKeyDescriptor use="signing"in the metadata.
-----BEGIN CERTIFICATE----- / -----END CERTIFICATE----- lines to produce a valid PEM.Paste into TrueFoundry
- Identity Provider Endpoint → the IdP SSO URL from Rippling.
- X.509 Certificate → the full PEM body of the signing certificate (including the
-----BEGIN CERTIFICATE-----and-----END CERTIFICATE-----lines).
(Optional) Customise the login button
- Button Text — for example,
Login with Rippling. - Button Image URL — a public URL to your Rippling or corporate logo.
- Email Claim →
email - Unique ID Claim → leave blank to use the SAML
NameID(which Rippling defaults to the user’s email).
Step 5 — Assign users in Rippling
Rippling controls who can sign in via the app’s Groups assignment.Open Groups
Assign users or groups
All Employees or Engineering) that should be able to sign in to TrueFoundry. Save.Step 6 — Test single sign-on
- Open a private/incognito window and go to your TrueFoundry login page.
- Click Login with Rippling (or the button label you chose).
- Authenticate with a Rippling user that is assigned to the TrueFoundry app.
Troubleshooting
'InResponseTo validation failed' when launching from Rippling
'InResponseTo validation failed' when launching from Rippling
InResponseTo values. Return to the app’s Settings → Advanced SAML Settings, click Edit, and confirm the Disable ‘InResponseTo’ field in assertions for IdP initiated SSO checkbox is checked. Save and retry — SP-initiated sign-in from the TrueFoundry login page is unaffected, but IdP-initiated launches from Rippling require this toggle.Sign-in succeeds but email is empty in the TrueFoundry profile
Sign-in succeeds but email is empty in the TrueFoundry profile
email attribute. Go to Settings → SAML Attributes on the custom app, add a Global attribute with name email and value User’s email address, and save. Then expand Show advanced fields in the TrueFoundry SSO form and set Email Claim to email.'Invalid Signature' or 'Could not validate SAML response'
'Invalid Signature' or 'Could not validate SAML response'
X509Certificate value, wrap it with PEM headers, and paste it into TrueFoundry’s X.509 Certificate field.The TrueFoundry tile is missing from the Rippling launcher
The TrueFoundry tile is missing from the Rippling launcher
All Employees).'Audience mismatch' error
'Audience mismatch' error