Documentation Index

Fetch the complete documentation index at: https://www.truefoundry.com/llms.txt

Use this file to discover all available pages before exploring further.

This guide explains how to push users and groups from Microsoft Entra ID into TrueFoundry automatically using SCIM 2.0. With SCIM enabled, assigning a user to your Entra application creates them in TrueFoundry; removing the assignment deactivates them. Entra group memberships sync as TrueFoundry teams.

Prerequisites

  • Single sign-on between TrueFoundry and Entra is already configured. Follow SAML with Microsoft Entra ID or OIDC with Microsoft Entra ID first.
  • You have Admin access in both TrueFoundry and Entra.
  • You’re on TrueFoundry v0.143 or higher. (On earlier versions, SCIM is configured directly inside the SSO form.)
Entra’s SCIM implementation has a few well-known quirks. If sync behaves unexpectedly, see the Troubleshooting section below and Microsoft’s SCIM compatibility flags reference.

Step 1 — Generate the SCIM credentials in TrueFoundry

1

Enable SCIM provisioning

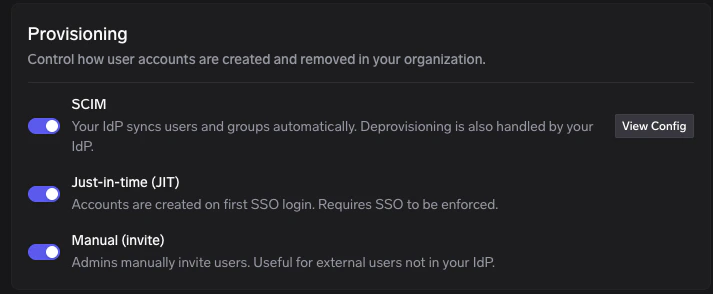
In TrueFoundry, go to Settings → Security & Access → Provisioning and turn on the SCIM toggle.
2

Open View Config

On the Provisioning page, click View Config on the SCIM row.
TrueFoundry Provisioning settings with the SCIM row and View Config button highlighted
3

Copy the SCIM URL and token

In the SCIM configuration dialog, copy both values using the copy icons next to each field:
  • SCIM URL — this is the value Entra calls the Tenant URL.
  • Token — this is the value Entra calls the Secret Token.
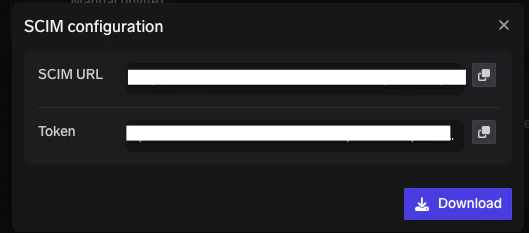
TrueFoundry SCIM configuration dialog showing SCIM URL and Token fields with copy buttons
Store the token somewhere safe and treat it like a password. If you lose it, open View Config again to generate a new token — which invalidates the previous one.

Step 2 — Open the Entra Enterprise Application

If you don’t already have an Entra Enterprise Application for TrueFoundry, create one first by following the SAML SSO guide. SCIM provisioning is configured inside the same application.
1

Open Enterprise applications

Sign in to the Microsoft Entra admin center and go to Identity → Applications → Enterprise applications.
2

Select your TrueFoundry application

Click the row for the TrueFoundry application you created for SSO.

Step 3 — Create a provisioning configuration

1

Open Provisioning and create a configuration
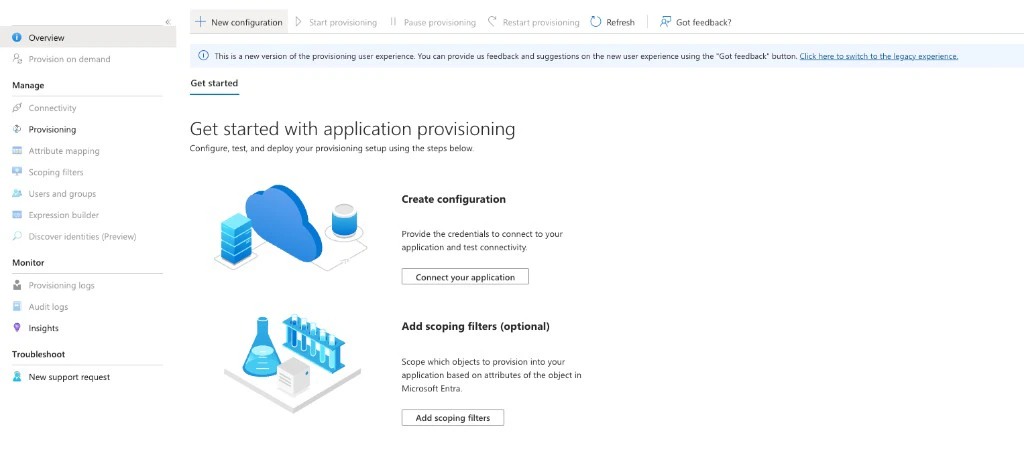
In the application’s left sidebar, click Provisioning, then click + New configuration at the top of the page.
Entra application Provisioning page with the New configuration button highlighted in the toolbar
2

Enter credentials, test, and create

On the New provisioning configuration page, leave Bearer authentication selected and fill in:
  • Tenant URL — paste the SCIM URL from TrueFoundry.
  • Secret Token — paste the Token from TrueFoundry.
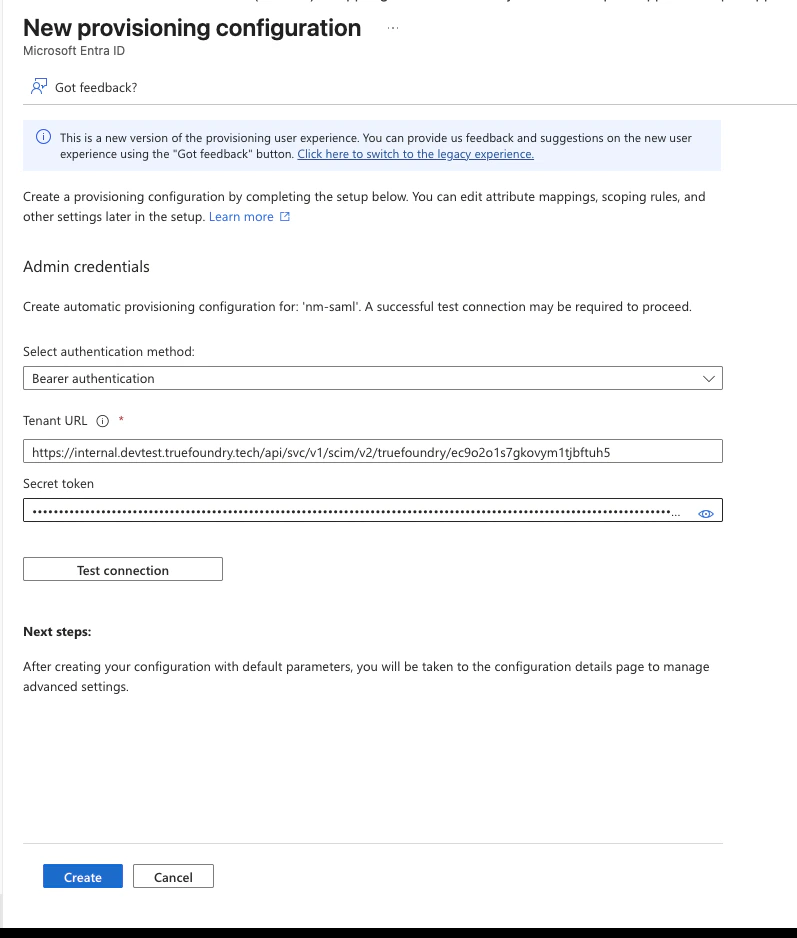
Click Test connection. When successful, a green confirmation appears. Then click Create to save the provisioning configuration.
Entra New provisioning configuration page showing Bearer authentication, Tenant URL, Secret Token, Test connection, and Create buttons
If the test fails with a 401 response, your token is wrong or expired. Open View Config on the SCIM row in TrueFoundry to generate a new token and re-paste it.

Step 4 — Confirm mappings and scope

Entra ships with default attribute mappings that work with TrueFoundry. You only need to confirm them and choose the scope.
1

Open Mappings

Expand the Mappings section on the provisioning page. Both Provision Microsoft Entra ID Groups and Provision Microsoft Entra ID Users should be Enabled.The defaults map mailemails, userPrincipalNameuserName, givenNamename.givenName, surnamename.familyName, and objectIdexternalId. No changes are needed for a standard TrueFoundry tenant.
2

Adjust settings

Expand the Settings section and set:
  • ScopeSync only assigned users and groups (recommended).
  • Provisioning StatusOn.
3

Save

Click Save at the top.

Step 5 — Assign users and groups

1

Open Users and groups

From the application’s left sidebar, click Users and groups, then Add user/group.
2

Pick who should be synced

Select the users or security groups that should appear in TrueFoundry and click Assign.
Assign groups rather than individual users whenever possible. Group memberships sync as TrueFoundry teams, and managing membership at the IdP level is easier in the long run.

Step 6 — Start provisioning

1

Return to Provisioning → Overview

Inside the application, navigate back to Provisioning tab.
2

Start provisioning

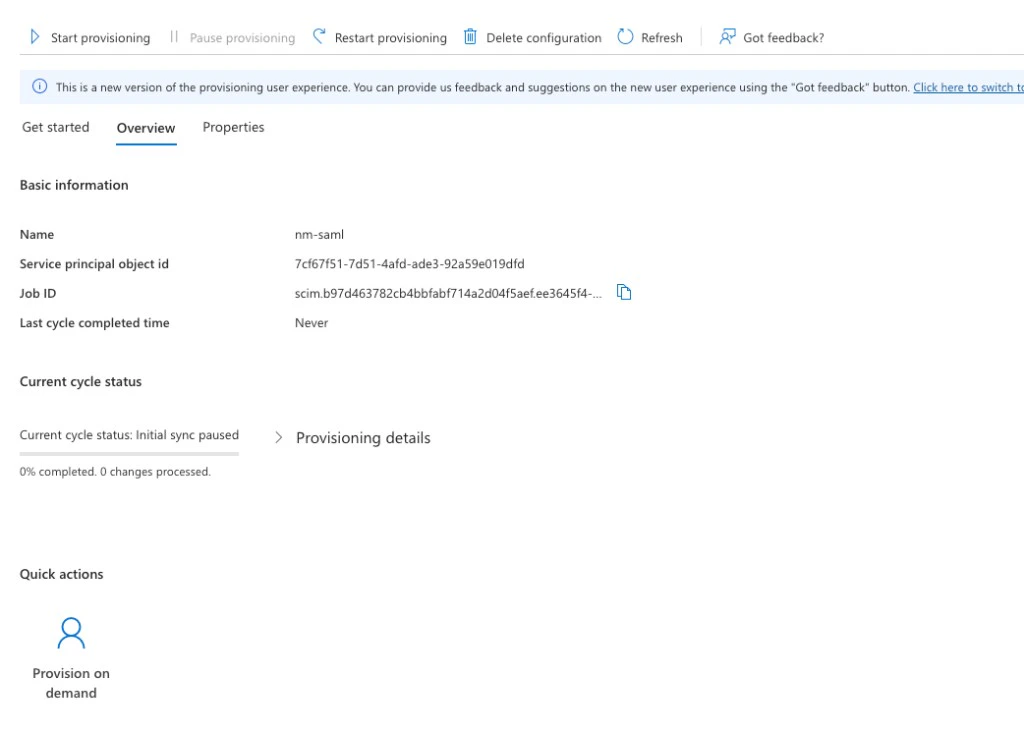
On the Overview tab, click Start provisioning in the toolbar.Entra runs the initial sync within a few minutes and re-syncs every 40 minutes thereafter. To sync a single user immediately without waiting for the cycle, use Provision on demand under Quick actions.
Entra provisioning configuration Overview tab showing Start provisioning in the toolbar and Provision on demand under Quick actions
3

Verify in TrueFoundry

Go to Access → Users in TrueFoundry. Assigned Entra users should appear within a few minutes, with their email and team memberships populated. Groups appear under Access → Teams.

How SCIM behaves with Entra

  • Sync cadence — Entra performs SCIM sync on a 20–40 minute interval. Force an immediate run with Provision on demand for a single user.
  • Deactivation — When you unassign a user, Entra sends a PATCH that sets active=false. TrueFoundry then deactivates the user (instead of deleting them).
  • Group naming — Entra group display names sync as TrueFoundry team names. See Provision teams via SCIM for naming rules.

Troubleshooting

This is a known issue with Entra’s SCIM client. Append the query parameter ?aadOptscim062020 to the Tenant URL in Entra — this enables the standards-compliant PATCH behaviour Microsoft documents under SCIM compatibility flags.
The bearer token is incorrect or expired. Open View Config on the SCIM row in TrueFoundry to generate a new token, paste it into Entra’s Secret Token field, and click Test connection again.
  1. In Entra, open the provisioning configuration and click View provisioning logs to see what happened for that user.
  2. Confirm Scope is set to Sync only assigned users and groups and that the user (or one of their groups) is assigned.
  3. Run Provision on demand for the user to skip the sync interval.
Make sure you assigned the group itself (not just the users) to the Enterprise Application, and that Provision Microsoft Entra ID Groups is enabled under Mappings. Nested groups are not supported by Entra SCIM — only direct members of an assigned group are synced.