

Prerequisites
- A TrueFoundry tenant with Admin access to Settings → Security & Access → SSO.
- An Auth0 tenant with permission to create Applications and configure Addons.
Configuration overview
Create the SSO configuration in TrueFoundry
Create an Auth0 application
Enable the SAML2 Web App addon in Auth0
email and sub.Paste Auth0's IdP details into TrueFoundry
Test sign-in
Step 1 — Create the SSO configuration in TrueFoundry
Open SSO settings
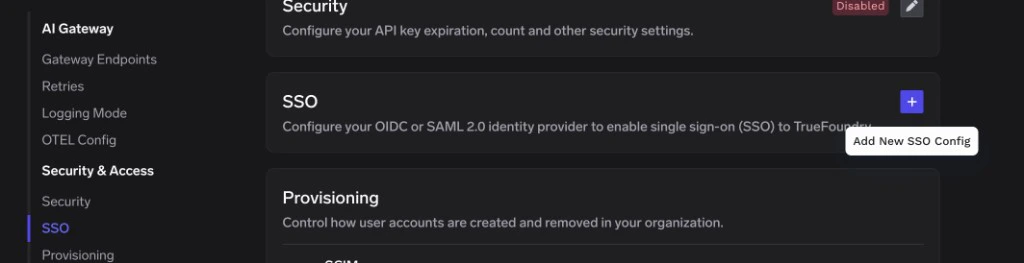
SSO page in TrueFoundry — click the + icon to add a new SSO configuration
Fill in the basic fields
- Enabled: turn this on.
- Name: a lowercase alphanumeric label — for example,
auth0saml. - SSO Provider: choose Custom.
- Authentication Configuration: select SAML v2.
Save to reveal the Single sign-on URL, Audience URI (SP Entity ID), and Relay URL
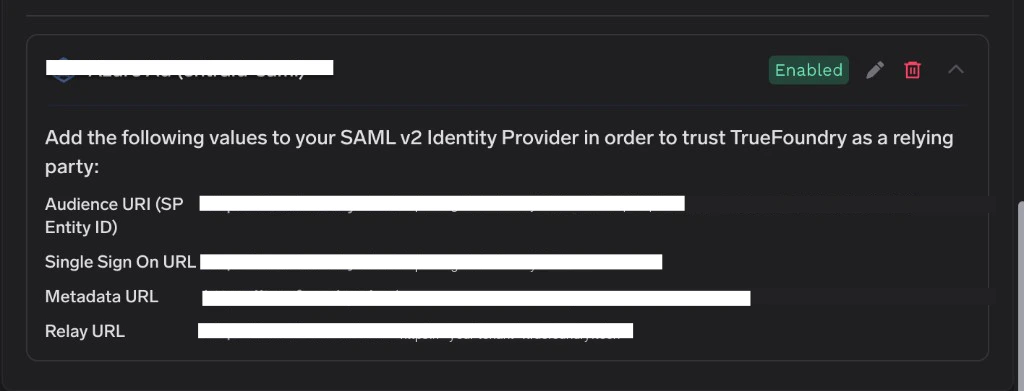
TrueFoundry SSO configuration card showing the SAML values to copy into Auth0
Step 2 — Create an Auth0 application
Open Applications
Create a new application
TrueFoundry, select Regular Web Applications, and click Create.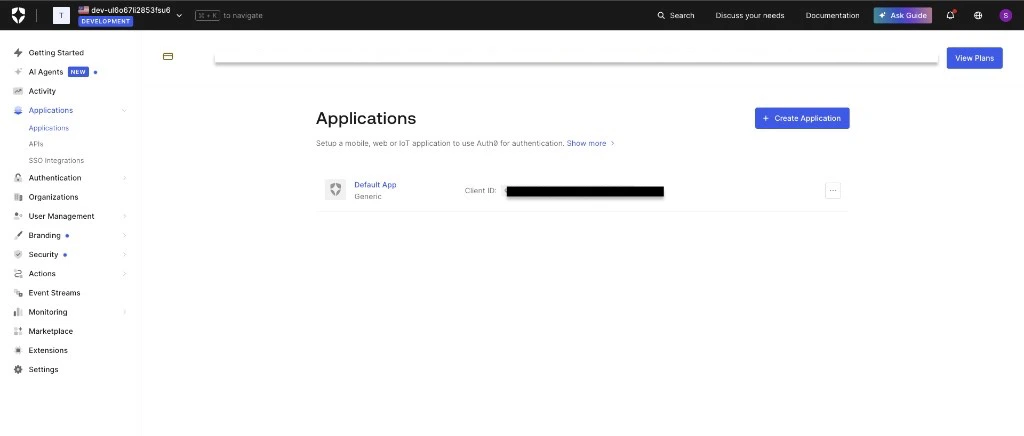
Applications page — click + Create Application
Step 3 — Enable the SAML2 Web App addon
Back in your Auth0 application, open the Addons tab.Enable SAML2 WEB APP
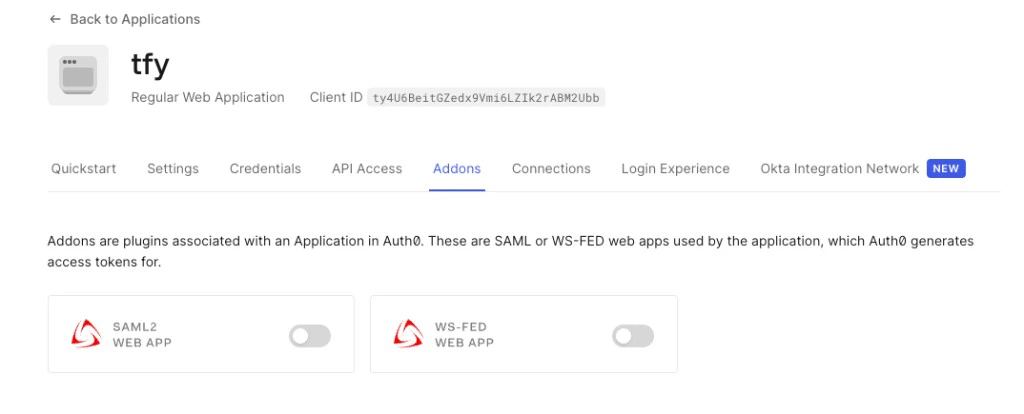
Addons tab — open SAML2 WEB APP
Set the Application Callback URL
Configure the addon settings JSON
audience value with the Audience URI (SP Entity ID) from TrueFoundry: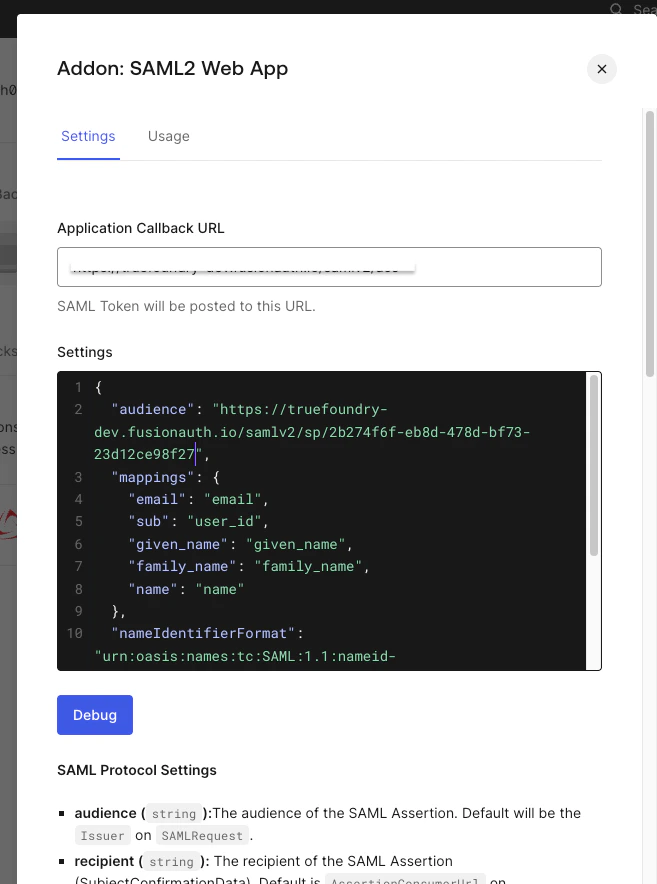
Addon Settings — Application Callback URL and Settings JSON
Enable the addon
Step 4 — Copy Auth0’s IdP details into TrueFoundry
Re-open the Addon: SAML2 Web App dialog and switch to the Usage tab.Copy the Identity Provider Login URL
Copy the Identity Provider Certificate
<X509Certificate> block from the metadata XML).Open the downloaded .pem file in a text editor and copy the entire contents — including the -----BEGIN CERTIFICATE----- and -----END CERTIFICATE----- lines.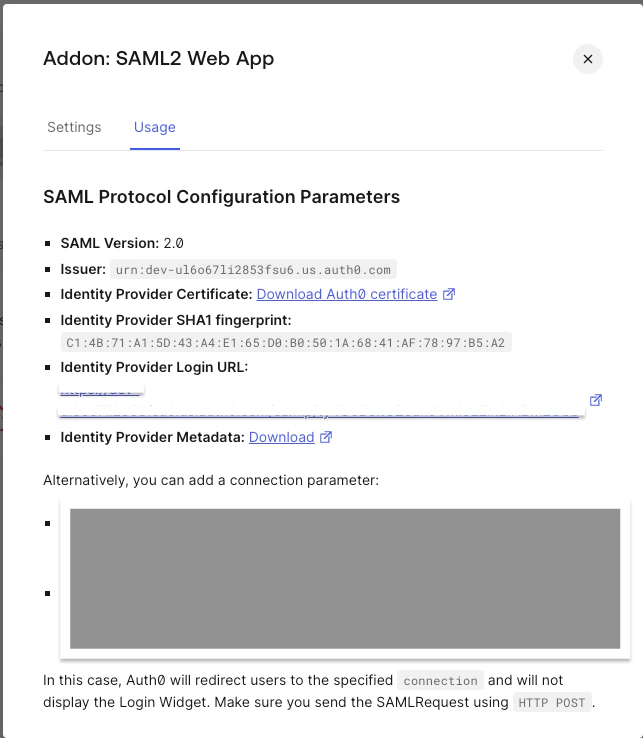
Addon Usage — Identity Provider Login URL and certificate download
Paste into TrueFoundry
- Identity Provider Endpoint → the Identity Provider Login URL from Auth0.
- X.509 Certificate → the certificate text you copied from the
.pemfile.
Step 5 — Test single sign-on
- Open a private/incognito window and go to your TrueFoundry login page.
- Click Login with Auth0 (or whichever button label you chose under Show advanced fields → Button Text).
- Authenticate with an Auth0 user.
Optional next steps
- Use OIDC instead of SAML — see OIDC with Auth0 for the equivalent OpenID Connect flow.
Troubleshooting
'Invalid Signature' or 'Could not validate SAML response'
'Invalid Signature' or 'Could not validate SAML response'
-----BEGIN CERTIFICATE----- and -----END CERTIFICATE----- lines) into TrueFoundry.If you’re pasting from the metadata XML directly, wrap the bare base64 inside the BEGIN/END markers before saving.'AudienceRestriction' mismatch error
'AudienceRestriction' mismatch error
audience value inside the Auth0 addon’s Settings JSON must exactly match TrueFoundry’s Audience URI (SP Entity ID). Re-copy the value from the TrueFoundry SSO configuration card and update the addon settings.Sign-in works but the user's email is empty
Sign-in works but the user's email is empty
http://schemas.xmlsoap.org/ws/2005/05/identity/claims/emailaddress rather than email. Either:- Keep the
mappingsblock from Step 3 (which renames the attribute toemail), or - Expand Show advanced fields in TrueFoundry and set Email Claim to
http://schemas.xmlsoap.org/ws/2005/05/identity/claims/emailaddress.