Configure SAML 2.0 single sign-on between TrueFoundry and an on-premise Microsoft Active Directory Federation Services (AD FS) deployment.
This guide walks you through setting up SAML 2.0 single sign-on between TrueFoundry and Microsoft Active Directory Federation Services (AD FS). Once finished, users in your AD forest can sign in to TrueFoundry through a Login with AD FS button.
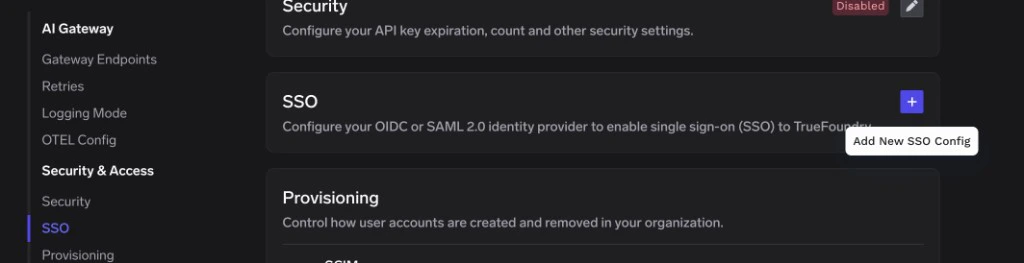
A TrueFoundry tenant with Admin access to Settings → Security & Access → SSO.
An AD FS server (Windows Server 2016 or newer) with administrative access to AD FS Management and Windows PowerShell as an administrator.
Network reachability from end-user browsers to both the AD FS sign-in endpoint (typically https://<adfs-server>/adfs/ls/) and your TrueFoundry control plane.
You will switch between AD FS Management on the Windows server and TrueFoundry → Settings → Security & Access → SSO in your browser. Keep both open in adjacent windows to copy values across.
On your AD FS server, open Server Manager → Tools → AD FS Management.In the left navigation, select Relying Party Trusts, then under Actions, click Add Relying Party Trust….
2
Choose Claims aware
On the Welcome page of the wizard, select Claims aware and click Start.
3
Select the data source
On Select Data Source, pick one of the following based on how your TrueFoundry control plane is reachable:
Public / reachable URL
Internal / manual entry
Choose Import data about the relying party published online or on a local network and enter the metadata URL of your TrueFoundry control plane. This is the recommended option when AD FS can reach the control plane.
Choose Enter data about the relying party manually and supply the values manually on the following screens:
Display name — any descriptive label (used in PowerShell later).
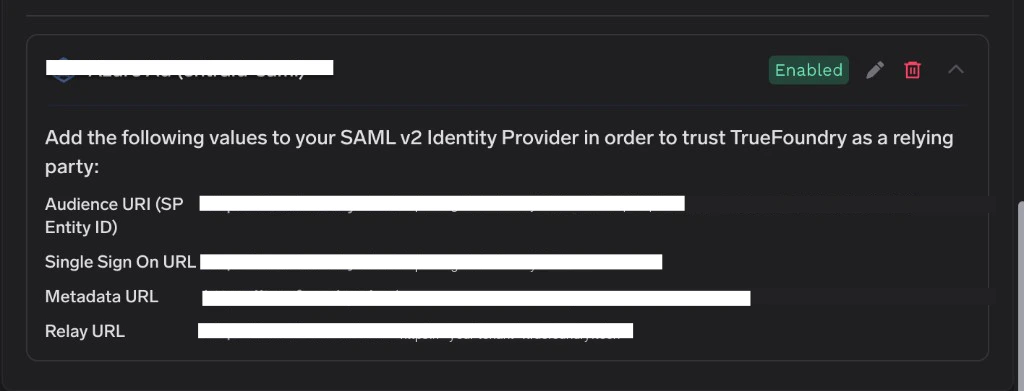
Configure URL — enable SAML 2.0 and paste the TrueFoundry Single Sign On URL as the Assertion Consumer Service URL.
Configure Identifiers — add the TrueFoundry Audience URI (SP Entity ID) as the Relying Party Trust Identifier.
Click Next.
4
Specify a display name
On Specify Display Name, enter a Display name such as TrueFoundry. Optionally add notes, then click Next.
Remember this exact display name — you will pass it to PowerShell in Step 4.
5
Choose an access control policy
On Choose Access Control Policy, select Permit everyone for a typical deployment, or pick a more restrictive policy (such as Permit specific group) if you want only specific AD groups to use TrueFoundry. Click Next.
6
Finalize the trust
Review the configuration on Ready to Add Trust and click Next. On Finish, leave Configure claims issuance policy for this application checked and click Close. The Edit Claim Issuance Policy dialog opens automatically.
In the Edit Claim Issuance Policy dialog, add two rules: one to send LDAP attributes as claims, and one to transform the email claim into a properly formatted NameID.
1
Add a 'Send LDAP Attributes as Claims' rule
Click Add Rule…, choose Send LDAP Attributes as Claims, and click Next.Enter a Claim rule name such as LDAP attributes, select Active Directory as the Attribute store, and add the following mappings:
LDAP Attribute
Outgoing Claim Type
E-Mail-Addresses
E-Mail Address
E-Mail-Addresses
email
Object-Guid
sub
Given-Name
Given Name
Surname
Surname
User-Principal-Name
Name ID
Click Finish.
2
Add a NameID transform rule
Click Add Rule… again, choose Transform an Incoming Claim, and click Next.Configure the rule as follows:
Claim rule name: Email to NameID
Incoming claim type: E-Mail Address
Outgoing claim type: Name ID
Outgoing name ID format: Email
Select Pass through all claim values.
Click Finish.
If you prefer to write the rule in the Claim Rule Language directly (for example to script the deployment), the equivalent rule is:
Click OK to close the Edit Claim Issuance Policy dialog.
Without the NameID transform rule, AD FS sends NameID with Format="Unspecified". TrueFoundry will reject the assertion with an InvalidNameIDPolicy error.
Step 4 — Sign both the SAML response and assertion
By default AD FS only signs the SAML assertion, but TrueFoundry requires both the response message and the assertion to be signed.Open Windows PowerShell as an administrator on the AD FS server and run:
You can confirm this value by browsing to AD FS Management → Service → Endpoints and locating the row of type SAML 2.0/WS-Federation with URL path /adfs/ls/.
2
Export the token-signing certificate
In AD FS Management, expand Service → Certificates. Right-click the Token-signing certificate and choose View Certificate….
Open the Details tab and click Copy to File….
Choose Base-64 encoded X.509 (.CER) and save the certificate to disk.
Open the saved .cer file in a text editor and copy the entire contents — including the -----BEGIN CERTIFICATE----- and -----END CERTIFICATE----- lines.
3
Paste the values into TrueFoundry
Return to Settings → Security & Access → SSO in TrueFoundry and edit the SSO configuration you created in Step 1. Set:
X.509 Certificate → the PEM-encoded certificate text you just copied.
Click Save.
4
(Optional) Customise the login button
Expand Show advanced fields in the SSO form to set:
Button Text — for example, Login with AD FS.
Button Image URL — a public URL to your AD FS / corporate logo.
Leave Email Claim and Unique ID Claim at their defaults; the claim rules you added in Step 3 already emit the standard claim types TrueFoundry expects.
Open a private/incognito window and go to your TrueFoundry login page.
Click Login with AD FS (or the button label you chose).
Authenticate with an Active Directory user that is permitted by your access control policy.
If sign-in succeeds you will land in the TrueFoundry dashboard. The user is created automatically when JIT provisioning is enabled; otherwise they must already exist in TrueFoundry or be invited first.
'InvalidNameIDPolicy' or 'NameID policy not satisfied' on sign-in
AD FS is sending NameID with Format="Unspecified". Re-open Edit Claim Issuance Policy on the Relying Party Trust and confirm the Email to NameID transform rule from Step 3 is present and ordered after the LDAP attribute rule.
'Invalid Signature' or 'SAML response was not signed'
AD FS only signed the assertion, not the response. Re-run the PowerShell command from Step 4:
'Could not validate SAML response' / certificate mismatch
The token-signing certificate copied into TrueFoundry no longer matches the active certificate on AD FS — usually after an AD FS certificate rollover. Re-export the current Token-signing certificate from AD FS Management → Service → Certificates and paste the full PEM (including the BEGIN/END lines) back into TrueFoundry.
Users sign in but email or unique ID is empty
Confirm the Send LDAP Attributes as Claims rule emits email and sub as described in Step 3, and that the user has populated mail / userPrincipalName and objectGUID values in Active Directory. If your AD schema uses different attribute names, expand Show advanced fields in TrueFoundry and set Email Claim and Unique ID Claim to match the outgoing claim types you configured.
AD FS shows 'access denied' before the user reaches TrueFoundry
Your Access Control Policy on the Relying Party Trust is rejecting the user. Switch the policy to Permit everyone, or add the user’s AD group to the existing policy under Edit Access Control Policy….
Was this page helpful?
Assistant
Responses are generated using AI and may contain mistakes.