
n8n is a powerful, open-source workflow automation platform that lets you create complex workflows using a visual, node-based interface. While n8n offers a cloud version, the ability to self host n8n gives you complete control over your data, costs, and instance performance.
With TrueFoundry's deployment platform, you can easily self host n8n in your own infrastructure without getting lost in complex Kubernetes configurations. This guide will walk you through the entire process to get your n8n self hosted instance running, from setting up storage to deploying the application.
Prerequisites for Deploying n8n
Before you begin, ensure you have the following set up. These are essential for a smooth deployment experience.
- TrueFoundry Account & Cluster: You need an active TrueFoundry account connected to your Kubernetes cluster. If you haven't done this yet, follow our account setup guide.
- TrueFoundry CLI: The TrueFoundry Command Line Interface (CLI) is required to deploy from your terminal. Install and configure it using our CLI setup guide.
- Workspace: All deployments in TrueFoundry happen within a workspace. Create a new workspace or identify the target workspace you wish to deploy n8n into. You can learn more about workspaces in our key concepts documentation.
Why Self-Host n8n? The Key Advantages
While cloud platforms offer convenience, self-hosting your n8n instance unlocks a new level of power, control, and efficiency that is critical for businesses with serious automation goals. It’s about moving from a rented space to owning your own factory.
Here are the core advantages:
Complete Data Sovereignty and Security
- Keep Your Data Private: When you self-host, your sensitive data—including credentials, customer information, and proprietary business logic within your workflows—never leaves your own infrastructure.
- Meet Compliance Head-On: For industries with strict data regulations like GDPR, HIPAA, or SOC 2, self-hosting is often a requirement, not just a preference. It provides a clear and auditable data processing environment.
- Control Your Security Posture: You define the network policies, manage access controls, and implement security protocols that align with your company's standards.
Predictable Cost and Unlimited Scale
- Escape Per-Execution Pricing: Instead of paying a variable cost for every workflow run, your costs are tied to the infrastructure you provision, making them predictable and often significantly lower at scale.
- No Artificial Limits: Remove the constraints on the number of active workflows, users, or execution times imposed by tiered cloud plans. You are only limited by the power of the infrastructure you give it.
Unmatched Performance and Customization
- Dedicated Performance: Your n8n instance runs on dedicated resources. This means faster execution times and no "noisy neighbor" effect, which is crucial for time-sensitive automations.
- Full Customization: Need to install a custom community node or a private, in-house node? With a self-hosted instance, you have the freedom to extend and customize your n8n environment without restrictions.
Section 2: The Common Challenges of Self-Hosting n8n
While the benefits are clear, setting up and managing a production-ready, self-hosted n8n instance from scratch can be a significant technical challenge. Developers and platform teams often face a steep learning curve and encounter several common hurdles:
1. Complex Kubernetes Configuration
- YAML Overload: Manually writing and maintaining Kubernetes YAML files for deployments, services, ingress, and secrets is tedious and highly prone to error.
- Networking and Ingress: Correctly configuring network policies, setting up an ingress controller, and managing SSL/TLS certificates to expose n8n securely to the internet is a complex task.
2. Managing Persistent Data
- Stateful Application Woes: As a stateful application, n8n requires a persistent volume to store workflow and credential data. Properly configuring
PersistentVolumeClaimsand ensuring the volume is correctly mounted can be tricky. - Database Management: For production use, a robust database like PostgreSQL is recommended over the default SQLite. This adds another component to deploy, manage, secure, and connect to.
3. Scaling for Production Workloads
- Beyond a Single Instance: Scaling n8n for high-volume workflows requires moving to a multi-node setup with dedicated workers, which involves configuring queues (like Redis), load balancers, and ensuring high availability.
- Monitoring and Maintenance: A self-hosted instance requires active monitoring to track resource usage (CPU/Memory) and ensure uptime. Upgrading to new n8n versions also requires a careful, manual process.
These challenges often divert valuable engineering time from building automations to managing infrastructure. This is precisely where a streamlined deployment platform becomes essential
How to self host n8n using Truefoundry
Step 1: Create a Persistent Volume for n8n
Any n8n self hosted instance requires persistent storage to save your workflows, credentials, and execution data. If the instance restarts, this volume ensures that all your data is safe. You can create this volume using either the TrueFoundry UI or our Python SDK.
Option A: Using the TrueFoundry UI
For a no-code approach, you can create the required volume directly through our web interface. Follow the detailed steps in our volume creation guide.
.png)
Option B: Using Python Deployment
For a code-based, repeatable setup, you can define the volume in a Python script.
- Create a file named
volume_deploy.py. - Add the following code. Remember to replace the placeholder values for
storage_classandworkspace_fqn.
import logging
from truefoundry.deploy import (
    DynamicVolumeConfig,
    Volume,
)

logging.basicConfig(level=logging.INFO)

# Define the persistent volume for n8n data
volume = Volume(
    name="n8n-volume",
    # Replace with your cluster's storage class size
    config=DynamicVolumeConfig(storage_class="efs-sc", size=2),
    workspace_fqn="<your-workspace-fqn>", # Paste your Workspace FQN here
)

# Deploy the volume to your workspace
volume.deploy(workspace_fqn="<your-workspace-fqn>", wait=False)- Run the script from your terminal:
python volume_deploy.pyStep 2: Deploy the n8n Service
With the storage volume ready, you can now deploy the n8n application itself. This service will run the n8n docker container and connect it to the volume you created.
- Create a new file named
service_deploy.py. - Paste the following code. You will need to replace the placeholders for
host,volume_fqn, andworkspace_fqn.
import logging
from truefoundry.deploy import (
    Image,
    VolumeMount,
    Service,
    Port,
)

logging.basicConfig(level=logging.INFO)

service = Service(
    name="n8n-svc",
    image=Image(image_uri="docker.n8n.io/n8nio/n8n"),
    ports=[
        Port(
            port=5678,
            protocol="TCP",
            expose=True,
            app_protocol="http",
            host="<your-host-name>", # e.g., n8n.your-company.com
        )
    ],
    env={}, # Add license keys or other env vars here
    mounts=[
        VolumeMount(
            mount_path="/home/node/.n8n",
            volume_fqn="<your-volume-fqn>", # Paste the FQN of the volume from Step 1
        )
    ],
    workspace_fqn="<your-workspace-fqn>", # Paste your Workspace FQN here
)

service.deploy(workspace_fqn="<your-workspace-fqn>", wait=False)
Configuration Notes:
host: This is the public URL where you will access n8n. Find your available host domain by following our ports and domains guide.volume_fqn: This is the Fully Qualified Name of the volume you created in Step 1. You can find this on the volume's page in the TrueFoundry dashboard.workspace_fqn: The FQN of the workspace where you want to deploy the service.
- Run the script to deploy the n8n service:
python service_deploy.py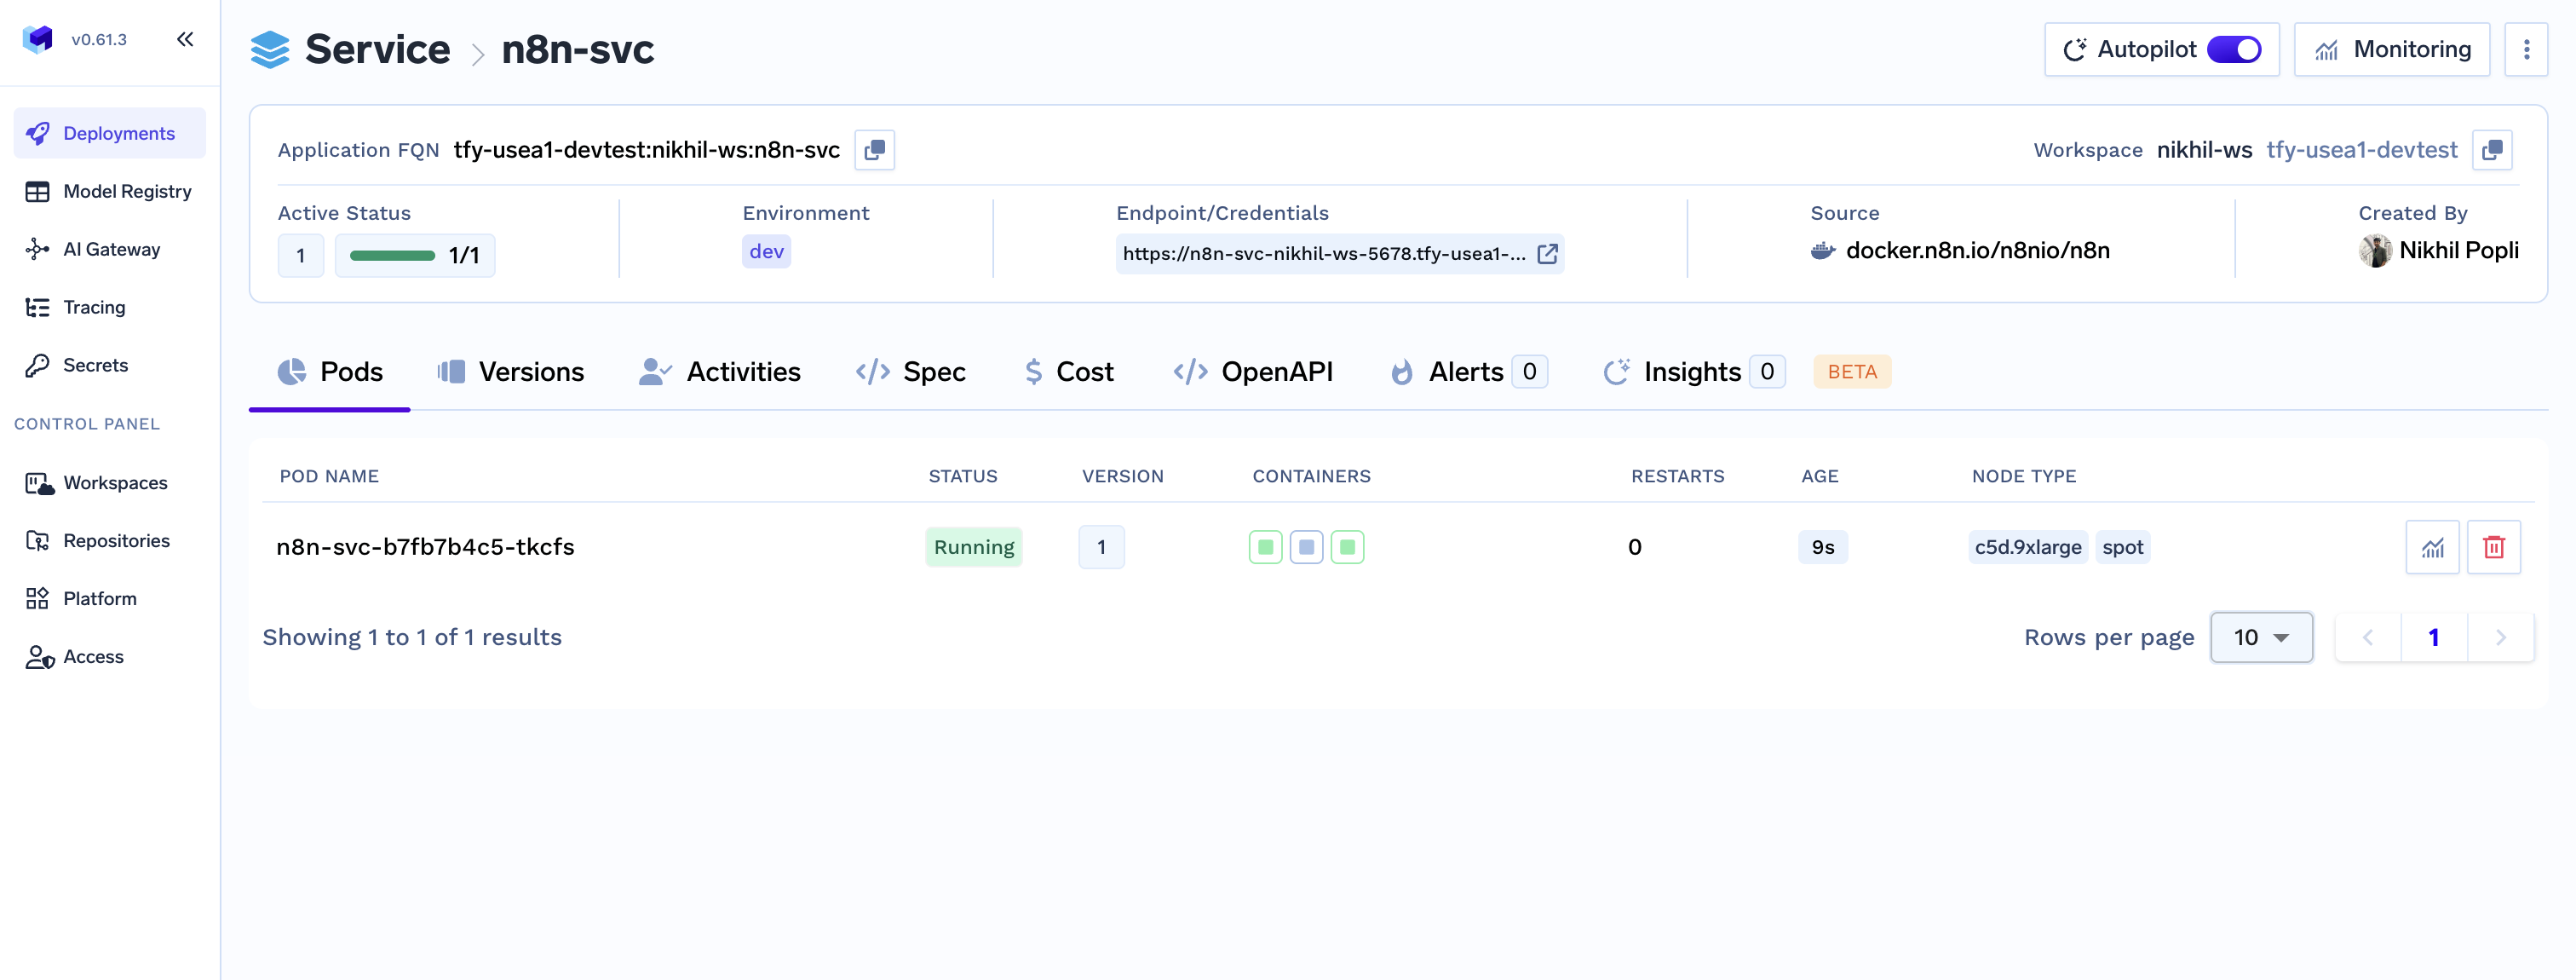
Step 3: Access Your n8n Instance
Once the deployment is complete, navigate to the host URL you configured in the service_deploy.py file. You will be greeted by the n8n setup screen.
You can now:
- Create powerful workflow automations.
- Connect to hundreds of different services and APIs.
- Build complex data processing pipelines.
- Set up scheduled tasks and triggers for your jobs.
.png)
Your n8n instance is now fully operational and running on your own infrastructure with persistent storage, ensuring your workflows and credentials are preserved across any restarts.
Unlocking n8n Enterprise Features
This guide deploys the community edition of n8n. If you have an enterprise license, you can unlock additional features by adding your license key to the env dictionary in the service_deploy.py file.
You can find more details on environment variables in the official n8n documentation.
Troubleshooting
If you run into issues, here are a few things to check first:
- Invalid Storage Class: Ensure the
storage_classyou specified involume_deploy.pyis available and compatible with your cluster. - Incorrect FQN: Double-check that the
workspace_fqnandvolume_fqnvalues are correct and do not contain typos. - Deployment Logs: If a deployment fails, check the service logs in the TrueFoundry dashboard for detailed error messages.
Conclusion
Congratulations! You have successfully learned how to self host n8n using TrueFoundry. This n8n self hosted setup not only gives you complete control over your workflows and data but also provides a scalable and robust foundation for all your automation needs.
Built for Speed: ~10ms Latency, Even Under Load
Blazingly fast way to build, track and deploy your models!
- Handles 350+ RPS on just 1 vCPU — no tuning needed
- Production-ready with full enterprise support
TrueFoundry AI Gateway delivers ~3–4 ms latency, handles 350+ RPS on 1 vCPU, scales horizontally with ease, and is production-ready, while LiteLLM suffers from high latency, struggles beyond moderate RPS, lacks built-in scaling, and is best for light or prototype workloads.