What is Grok Build?
Grok Build is xAI’s coding agent that runs in your terminal as an interactive TUI, headlessly in scripts, or through the Agent Client Protocol (ACP). The CLI is invoked with thegrok command.
Grok Build supports custom models, which lets you point it at the TrueFoundry AI Gateway and route requests through a single endpoint with unified auth, logging, and governance.
Prerequisites
Before integrating Grok Build with TrueFoundry, ensure you have:- TrueFoundry Account: Create a TrueFoundry account with at least one model provider configured and generate a Personal Access Token by following the instructions in Generating Tokens. For a quick setup guide, see our Gateway Quick Start
- Grok Build Installation: Install the
grokCLI using the appropriate command for your platform:
- macOS / Linux
- Windows (PowerShell)
Setup Process
1. Get Configuration Details
Get thebase URL and model name from your TrueFoundry AI Gateway playground using the unified code snippet:
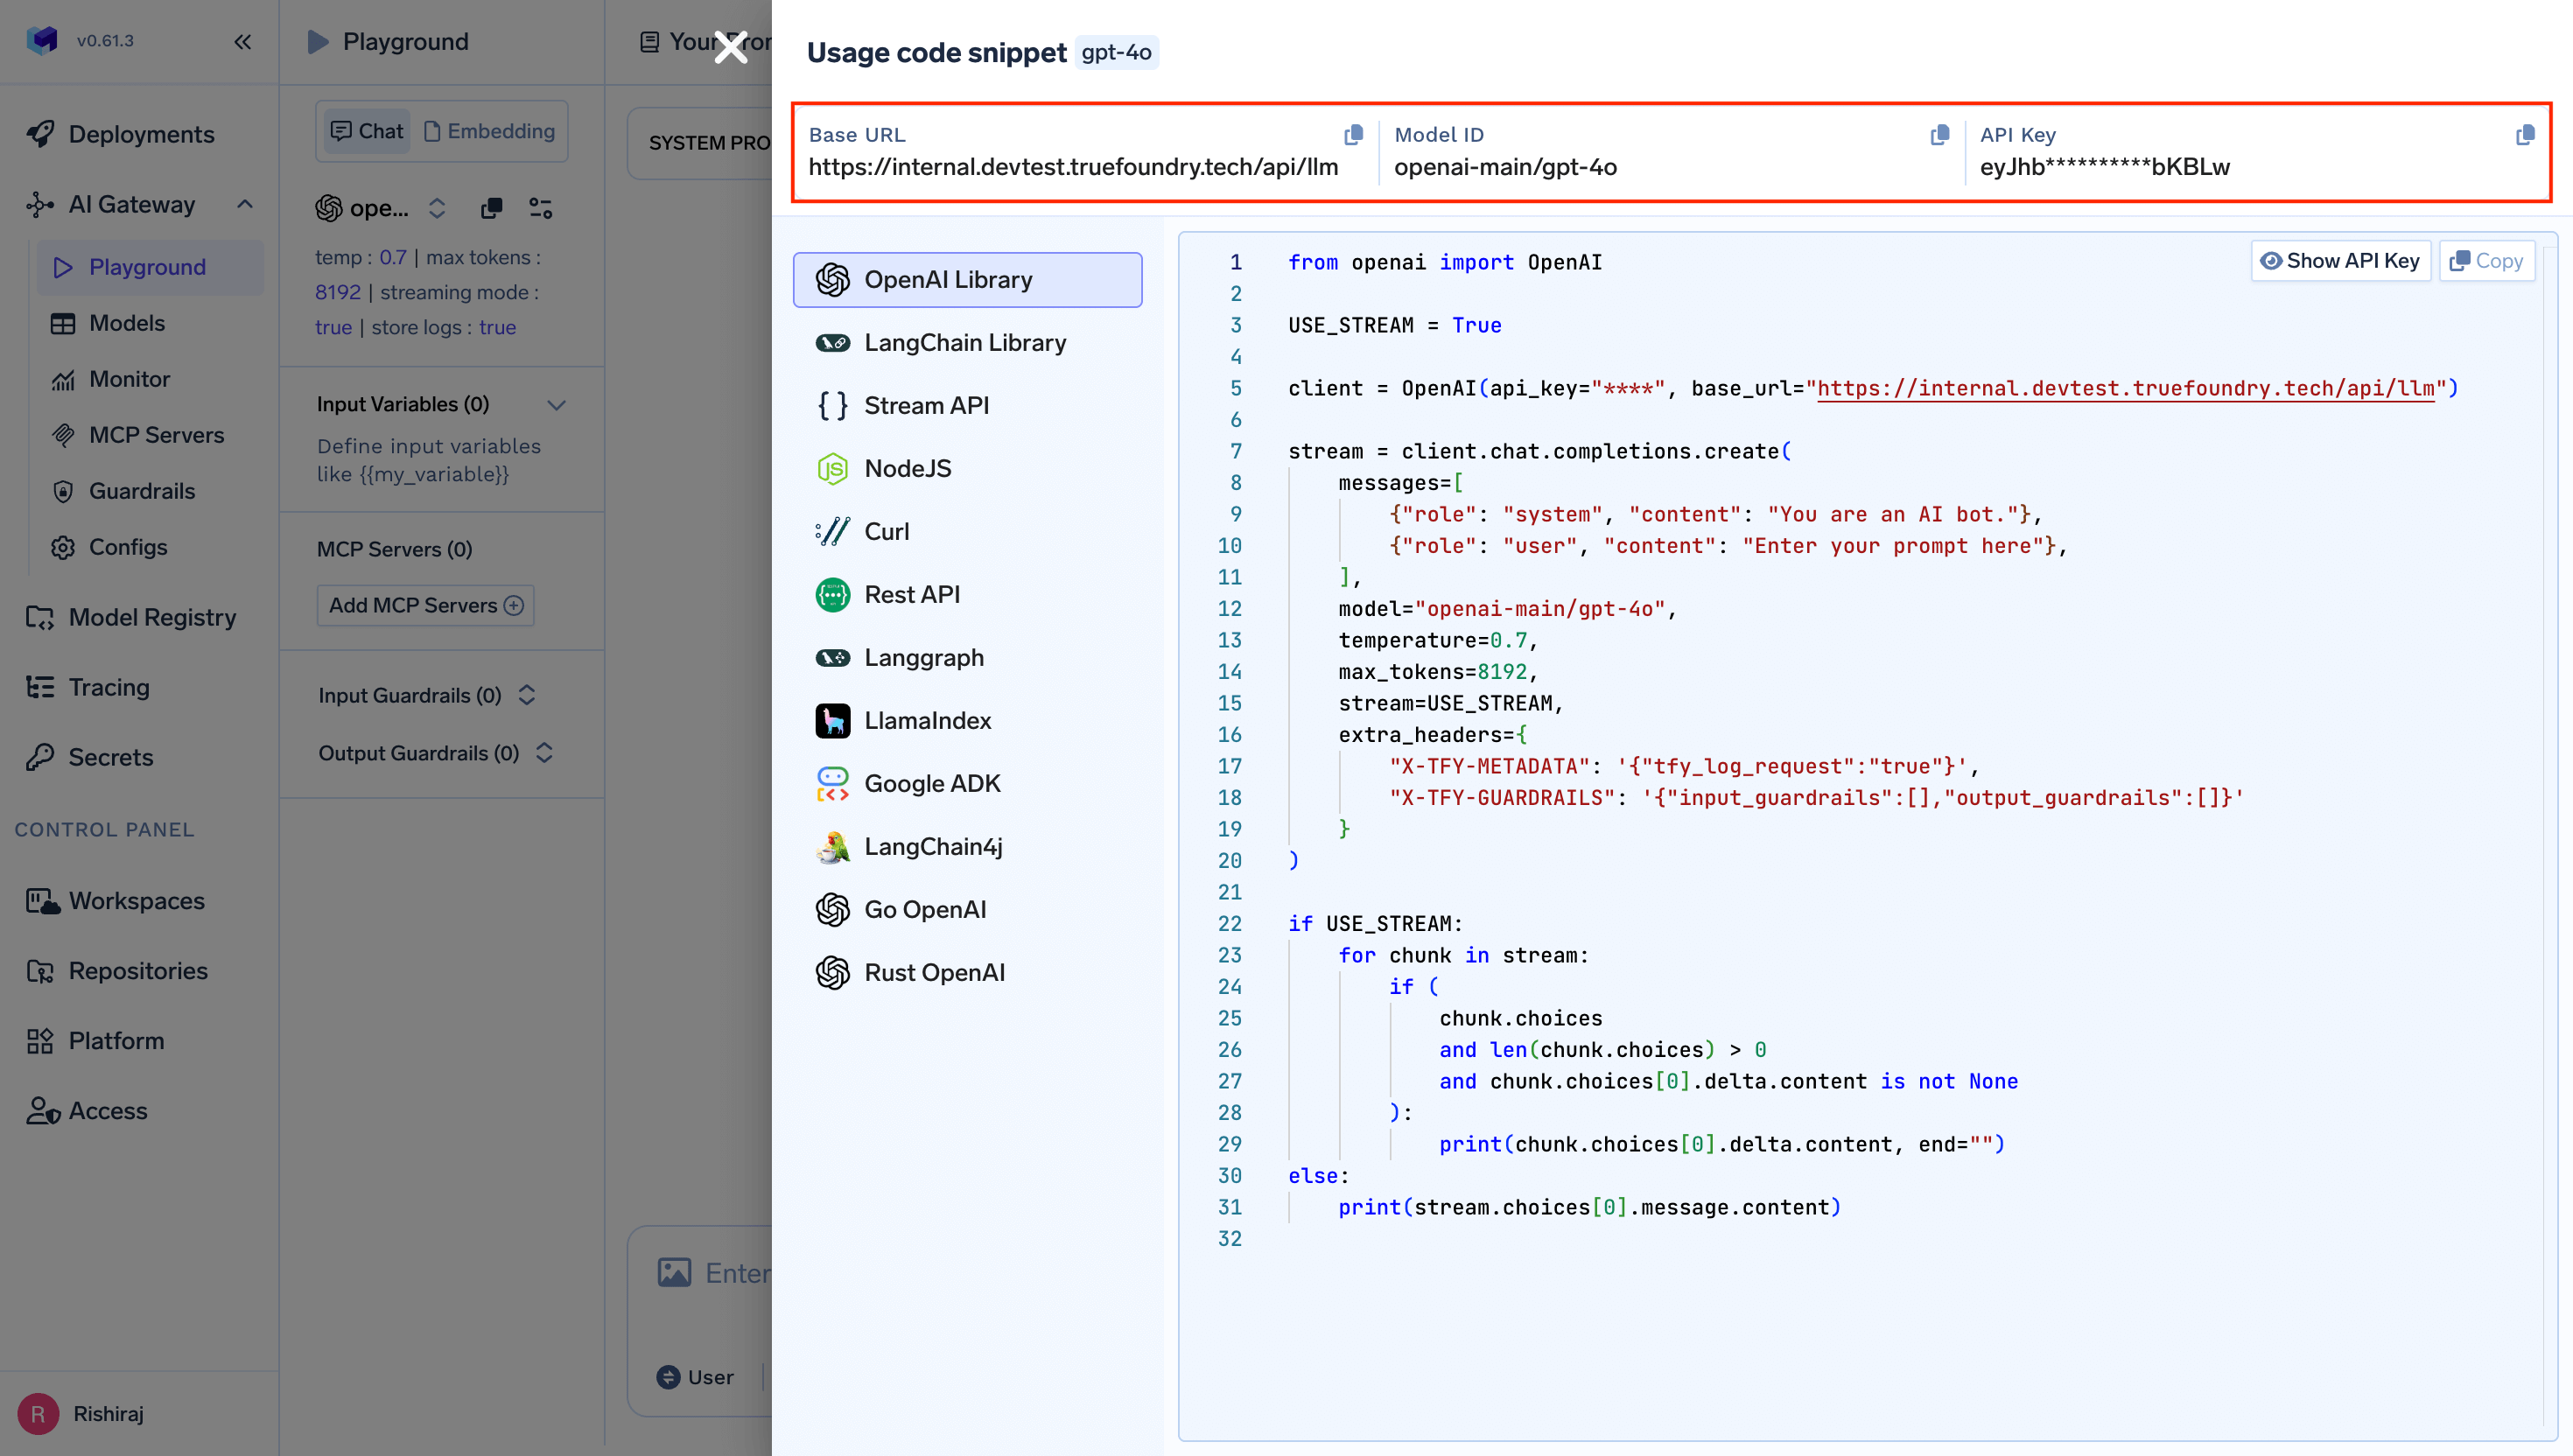
Get Base URL and Model Name from Unified Code Snippet
2. Configure Grok Build
Grok Build reads configuration from~/.grok/config.toml. Create the file (and the ~/.grok directory) if it does not exist, then register the TrueFoundry Gateway as a custom model:
.bashrc, .zshrc, etc.) to make it persistent:
{GATEWAY_BASE_URL}→ Your TrueFoundry Gateway Base URL (how to find it)your-truefoundry-api-key→ Your TrueFoundry Personal Access Token from Generating Tokensxai-main/grok-build-0.1→ Your desired model inprovider-account-name/model-nameformat
The
model value must be the fully qualified model name as shown in the TrueFoundry AI Gateway playground (e.g. xai-main/grok-build-0.1, openai-main/gpt-5.4, anthropic/claude-opus-4-7). The [model.<key>] section name (grok-build above) is just a local alias you use to select this model with the -m flag or the /model command in the TUI — pick whatever name is convenient.3. Configure Multiple Models (Optional)
You can register multiple models from different providers and switch between them inside a session with/model <alias>:
models_base_url and TFY_API_KEY, so the Gateway routes each request to the correct upstream provider based on the model value.
Usage Examples
Interactive Mode
Launch the TUI in your project directory:/model <alias>.
Headless Mode
Use the-p flag to run Grok Build without the interactive UI — ideal for scripts, automation, and CI/CD:
Inspect Configuration
Verify that Grok Build picked up your TrueFoundry models, config sources, and MCP servers:Observability
All requests routed through the TrueFoundry AI Gateway are automatically logged and available for monitoring. View request traces, latencies, token usage, and full request/response details in the TrueFoundry dashboard. This gives you full visibility into:- Request traces: See every request made by Grok Build, including the model used and response times
- Token usage: Track input and output token consumption across sessions
- Cost monitoring: Monitor spend across different models and providers
- Governance: Enforce policies, rate limits, and access controls on all AI requests