What is GitHub Copilot?
GitHub Copilot is an AI-powered coding assistant that integrates directly into your editor. It provides intelligent code completions, chat-based coding help, and agent-driven workflows across VS Code, JetBrains IDEs, Visual Studio, Eclipse, and Xcode.Key Features
- Inline Code Suggestions: Context-aware code completions and multi-line suggestions as you type
- Copilot Chat: Conversational AI assistant for code explanation, generation, debugging, and refactoring
- Agent Mode: Agentic workflows that can autonomously plan, edit files, and run terminal commands to complete complex tasks
- Bring Your Own Key (BYOK): Use custom models from any OpenAI-compatible provider — including TrueFoundry AI Gateway
Copilot routes through the gateway only via BYOK — you point Copilot at TrueFoundry as an OpenAI-compatible endpoint. Only Chat, agent, and CLI traffic can be routed this way. Inline ghost-text completions always run on GitHub’s hosted models and cannot be routed through any gateway.
Prerequisites
Before integrating GitHub Copilot with TrueFoundry, ensure you have:- TrueFoundry Account: Create a TrueFoundry account with at least one model provider configured and generate a Personal Access Token by following the instructions in Generating Tokens. For a quick setup guide, see our Gateway Quick Start
- GitHub Copilot Subscription: An active GitHub Copilot plan (Free, Pro, Business, or Enterprise)
- VS Code or Copilot CLI: Visual Studio Code (stable) with the GitHub Copilot extension, or the GitHub Copilot CLI
The credential Copilot asks for is always your TrueFoundry Personal Access Token (PAT) — not an OpenAI/Anthropic provider key. Provider credentials stay in the gateway and are never seen by Copilot. The model must support tool calling and streaming (Copilot is agentic); ≥128k context is recommended.
Integration Guide (VS Code)
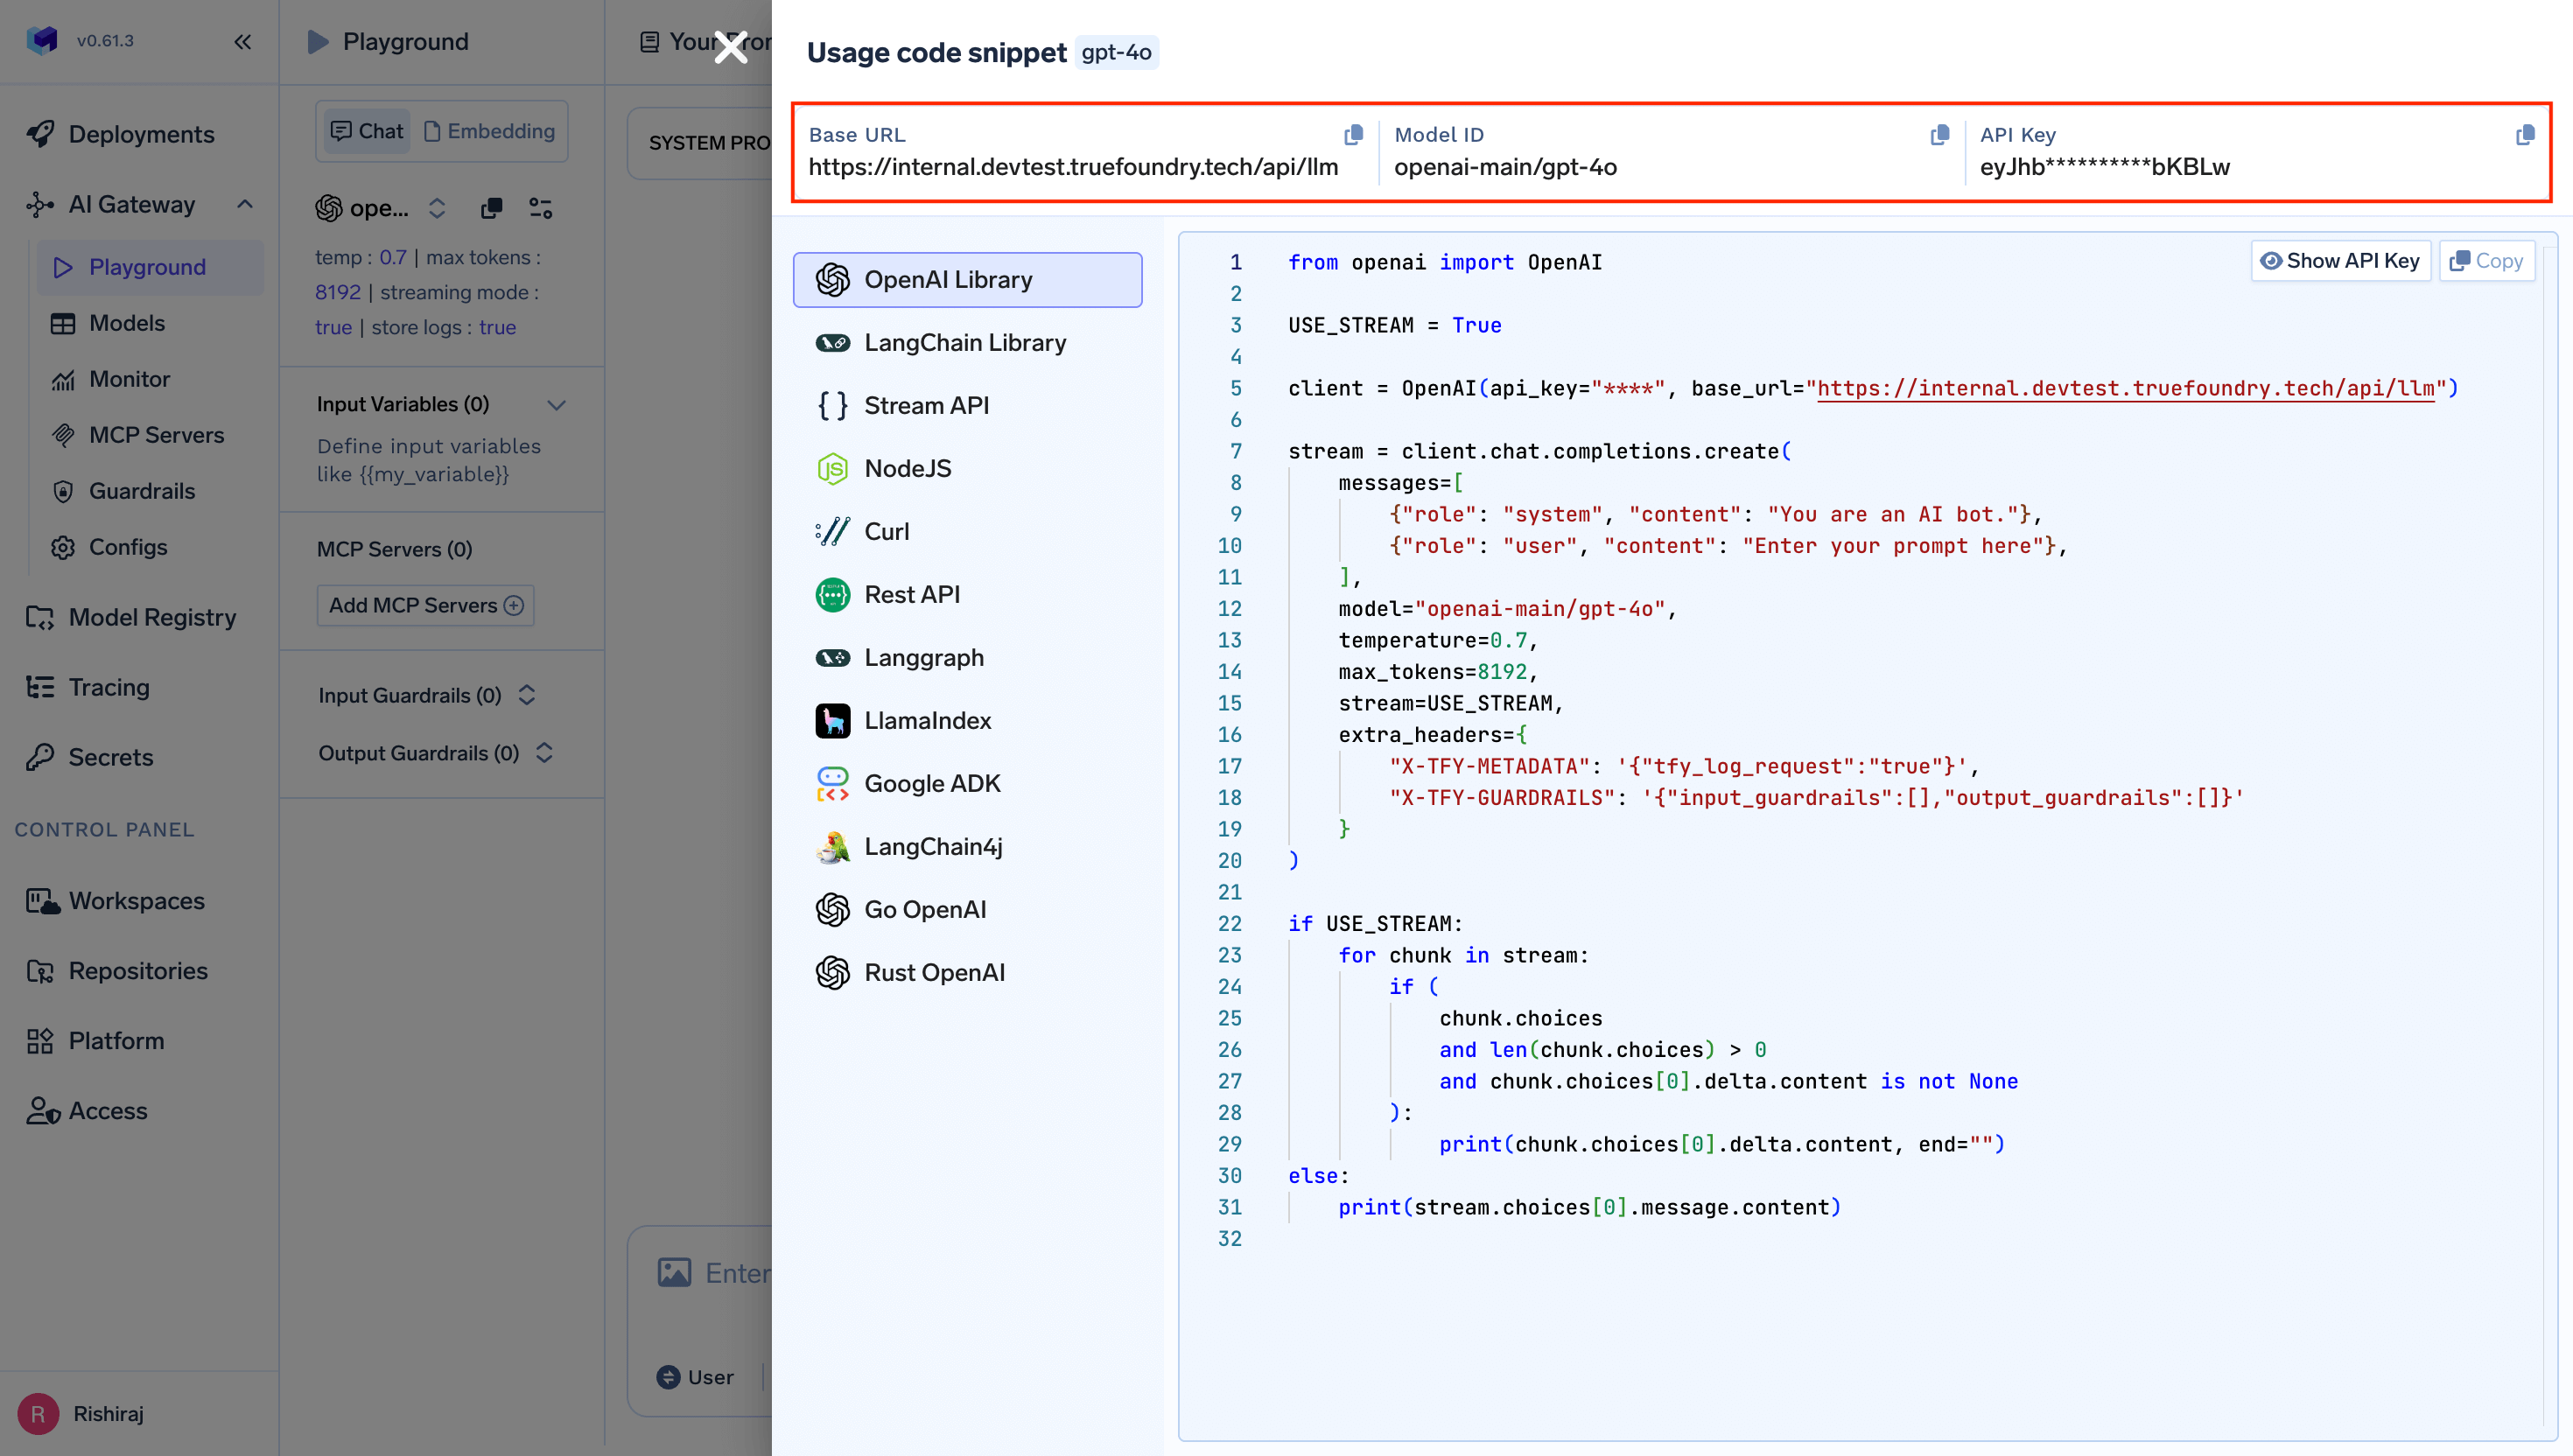
The Custom Endpoint provider is generally available in stable VS Code. There is no longer any need for VS Code Insiders or a community extension.1. Get Configuration Details
Get thebase URL and model name from your TrueFoundry AI Gateway playground using the unified code snippet:
2. Add TrueFoundry as a Custom Endpoint
Open Manage Language Models
Open the Command Palette (
Ctrl+Shift+P / Cmd+Shift+P) and run Chat: Manage Language Models.Add a Custom Endpoint provider
Click Add Models and select Custom Endpoint from the list of providers.
Enter provider details
When prompted, enter:
- Group / provider name: A short identifier (e.g.,
truefoundry) - Display name: A friendly name shown in the picker
- API key: Your TrueFoundry Personal Access Token (stored securely by VS Code, not in the config file)
- API type: Chat Completions
Configure models in chatLanguageModels.json
VS Code opens Replace
chatLanguageModels.json. Add your gateway base URL and the models you want to expose, using the fully qualified provider-name/model-name format:{GATEWAY_BASE_URL} with your TrueFoundry AI Gateway Base URL (how to find it) and update id to match your TrueFoundry model.The Custom Endpoint provider supports custom HTTP headers via the
requestHeaders field on each model. This lets you attach TrueFoundry headers such as x-tfy-metadata for per-request metadata logging. Reserved, forwarding, and internal headers are stripped by VS Code.3. Use TrueFoundry Models in Copilot Chat
Your TrueFoundry models now appear in the model dropdown in Copilot Chat. Select any of them to route requests through the TrueFoundry AI Gateway.For a model to work in Agent Mode, it must support tool calling (set
"toolCalling": true). Most large models (GPT-4o, Claude Sonnet, etc.) support this. If a model doesn’t support tool calling, it will only be available in Ask and Edit modes.Integration Guide (Copilot CLI)
The GitHub Copilot CLI supports BYOK through three environment variables. It uses the OpenAI JS SDK and calls{BASE_URL}/chat/completions.
- No
settings.jsonfor BYOK.~/.copilot/settings.jsoncannot set the provider base URL or API key. Persist the configuration via your shell profile, direnv, or MDM-pushed environment variables. - No custom headers. The CLI sends only a single
Authorization: Bearerheader — it has no equivalent of the VS CoderequestHeadersfield. If you need to attach headers (e.g.,x-tfy-metadata), bake the values into the PAT / virtual account on the gateway side, or run a local proxy that injects them.
In BYOK mode the CLI authenticates with only your
COPILOT_PROVIDER_API_KEY (the TrueFoundry PAT). No GitHub OAuth token or Copilot session token is sent to the gateway, and no gateway traffic is visible to GitHub.Enterprise / Organization BYOK
For GitHub Copilot Business and Enterprise users, organization and enterprise admins can register TrueFoundry as a custom model provider at the org or enterprise level. This pushes TrueFoundry-routed models to every team member’s Copilot Chat model picker.Navigate to Copilot Settings
Go to your GitHub organization or enterprise settings, then navigate to Copilot → AI controls → Configure allowed models → Custom models tab.
Add TrueFoundry API Key
Click Add API key and configure:
- Provider: Select OpenAI-compatible providers
- Name: Enter a descriptive name (e.g., “TrueFoundry AI Gateway”)
- API Key: Enter your TrueFoundry Personal Access Token
- Available models: Add your desired models using the fully qualified
provider-name/model-nameformat
Configure Access
Choose which organizations can access the models and save the configuration. The models will appear in the Copilot Chat model picker for all enabled users, listed under your enterprise or organization name. When set at the enterprise level, the configuration is non-overridable by member organizations.
With Enterprise BYOK, usage is billed directly through your TrueFoundry account and does not count against GitHub Copilot’s built-in premium request quotas. This lets teams leverage existing contracts and credits.
Virtual Model Configuration (Optional)
If your models or Copilot setup requires standard model names (e.g.,gpt-4o instead of openai-main/gpt-4o), create a Virtual Model in TrueFoundry to map standard names to fully qualified model names:
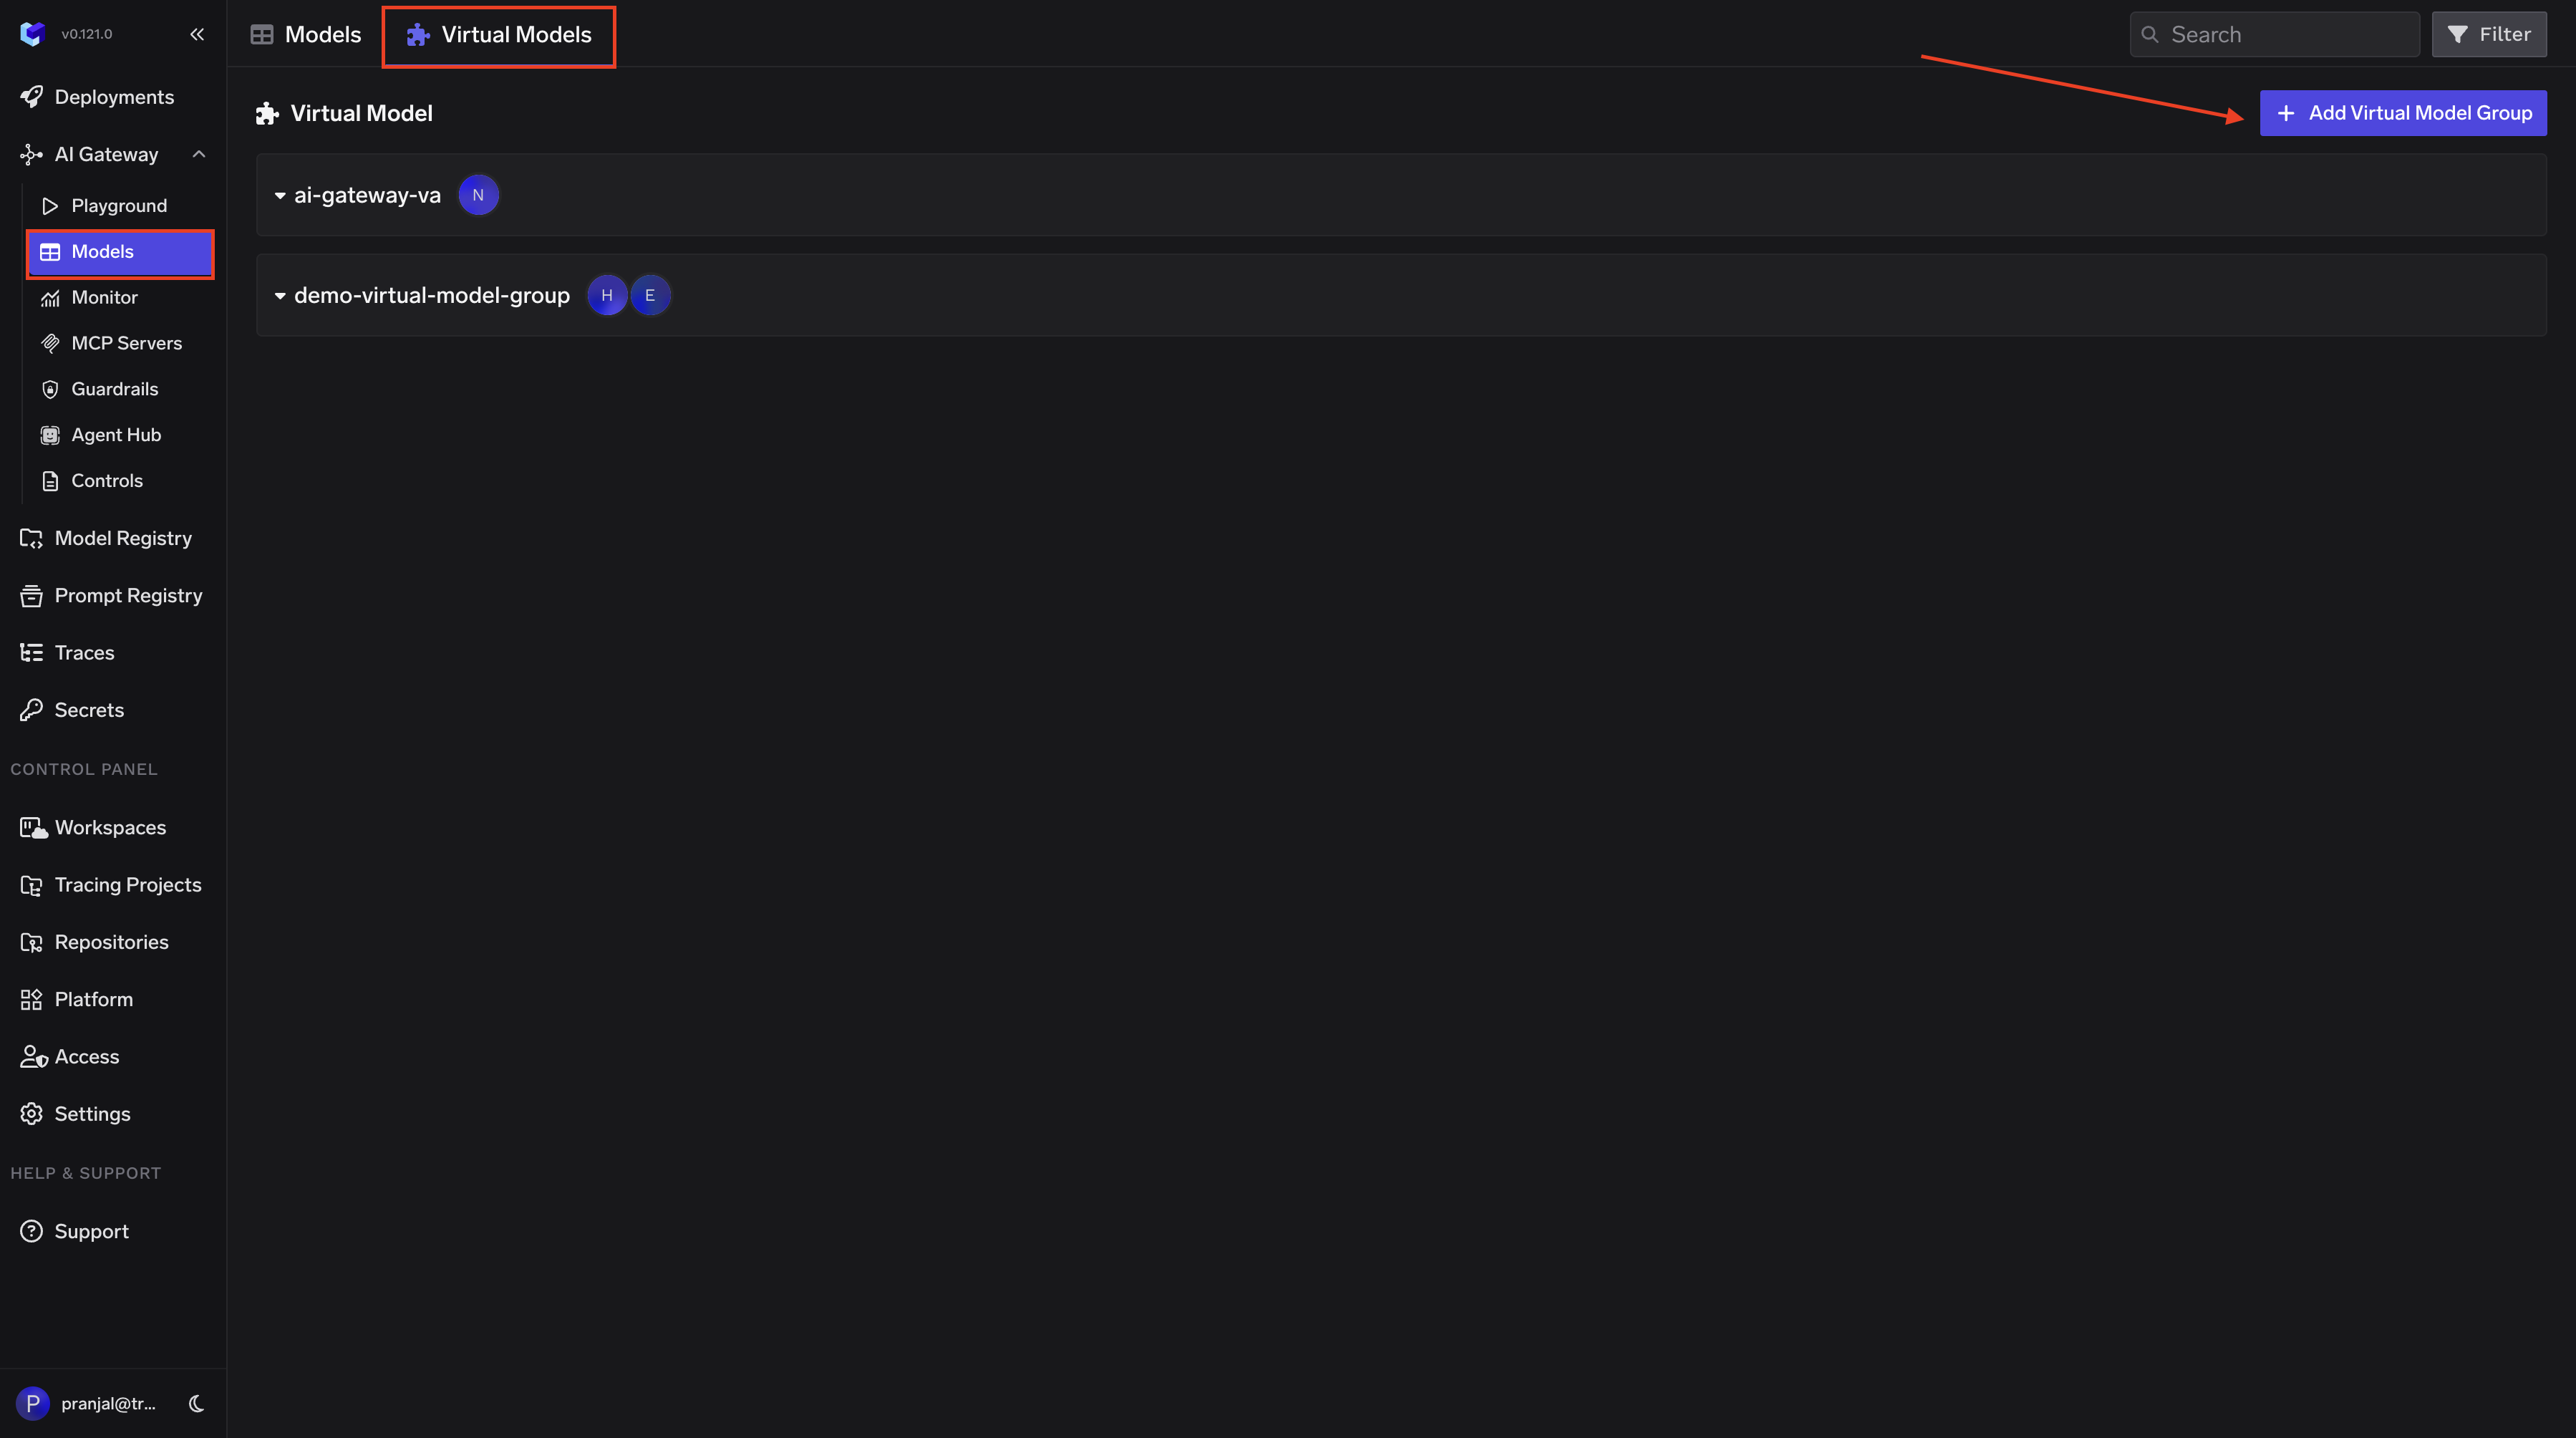
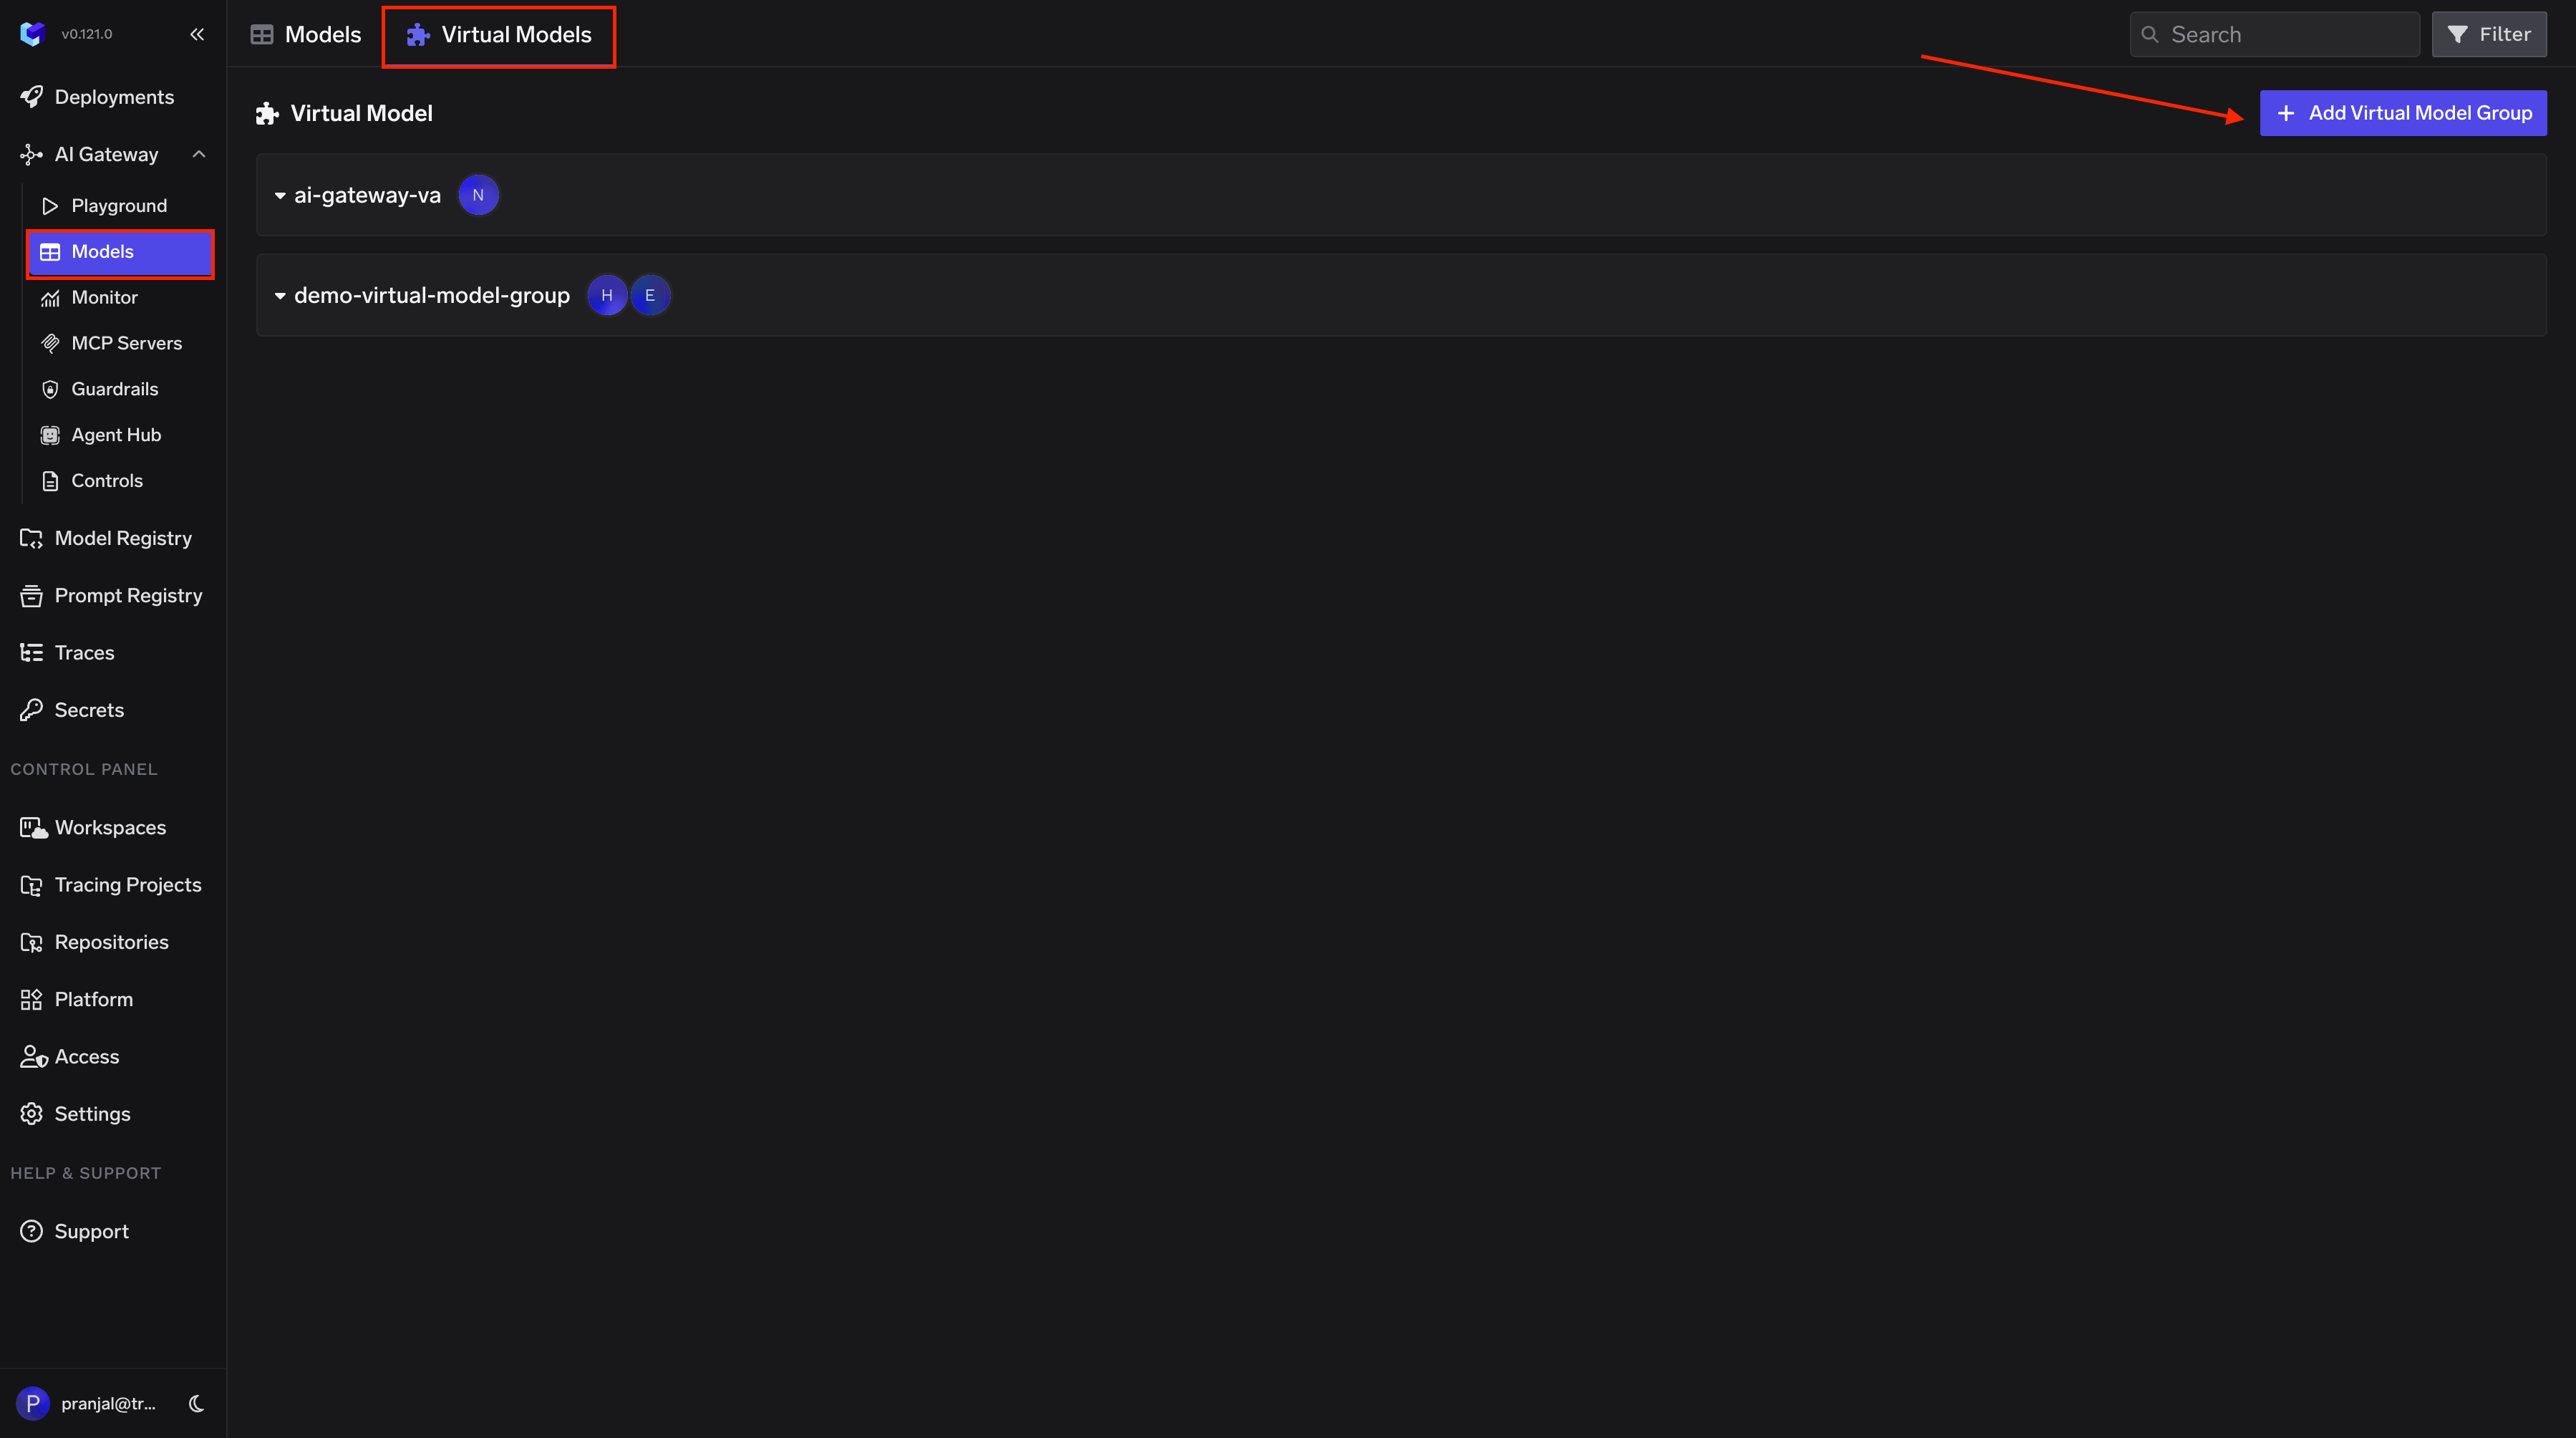
- Navigate to AI Gateway → Models → Virtual Model in the TrueFoundry dashboard.
-
Create a new Virtual Model Provider Group with a name (e.g.,
copilot-vm) and configure collaborators for access control. -
Add your target model (e.g.,
openai-main/gpt-4o) under the provider group. Set the Virtual Model name to the standard model name (e.g.,gpt-4o), so requests forgpt-4oare automatically routed toopenai-main/gpt-4othrough the TrueFoundry Gateway.