

MS Teams Webhook Notification Integration
To add an MS Teams webhook notification integration:- Go to the Integrations page in the TrueFoundry UI.
- Click on ‘Add Integration Provider’.
- Select ‘MS Teams’ as the provider type.
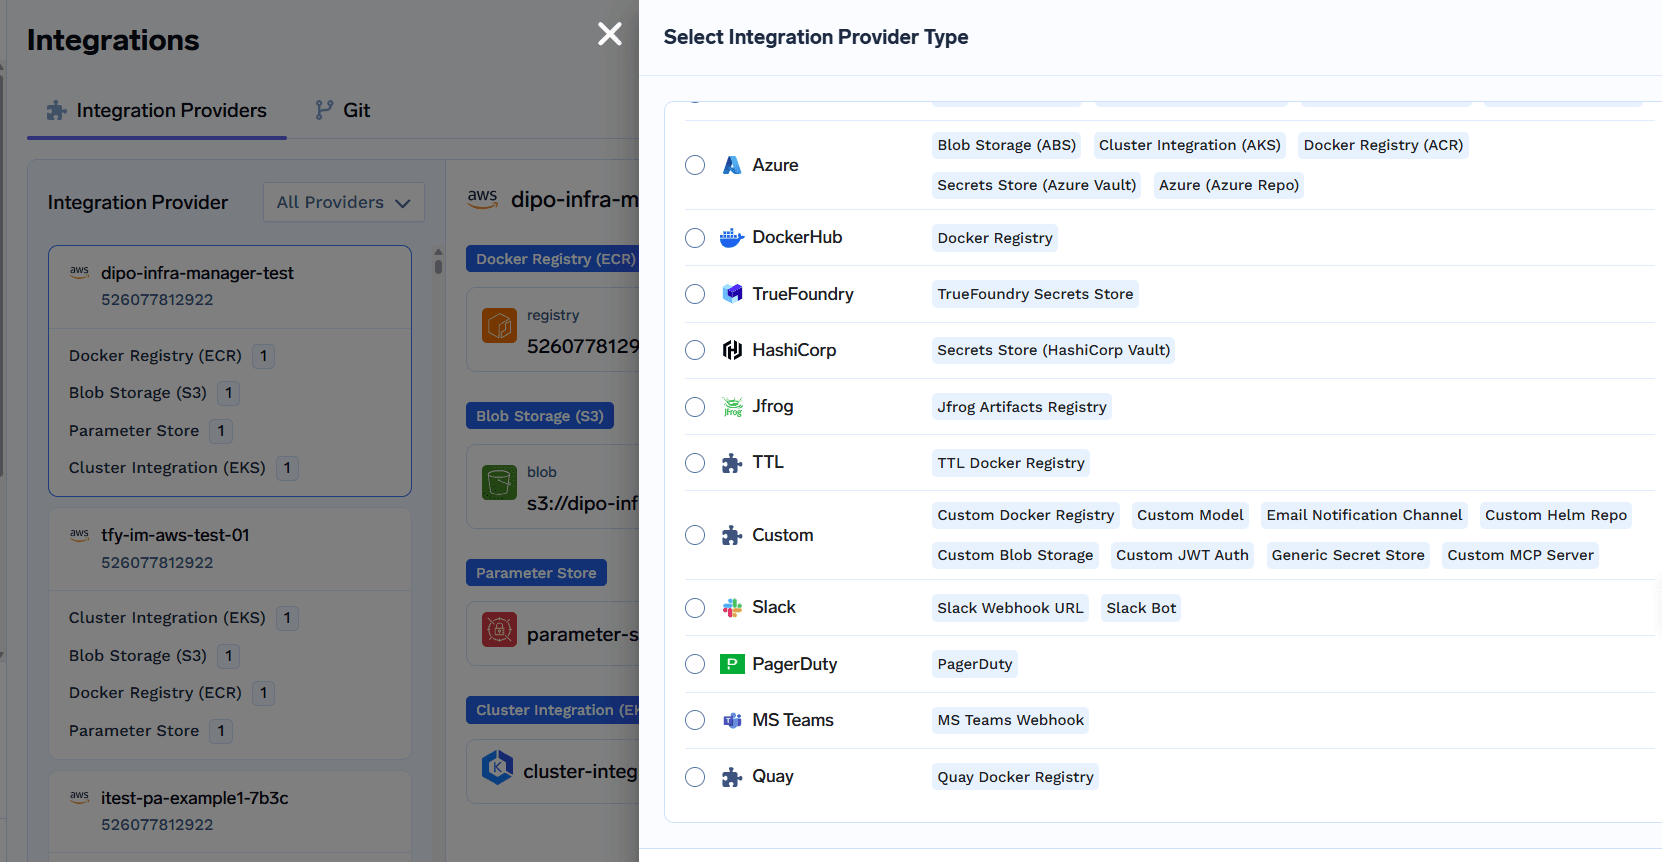
- Choose ‘MS Teams Webhook’ in the integrations section.
- Fill out the form fields as shown below:
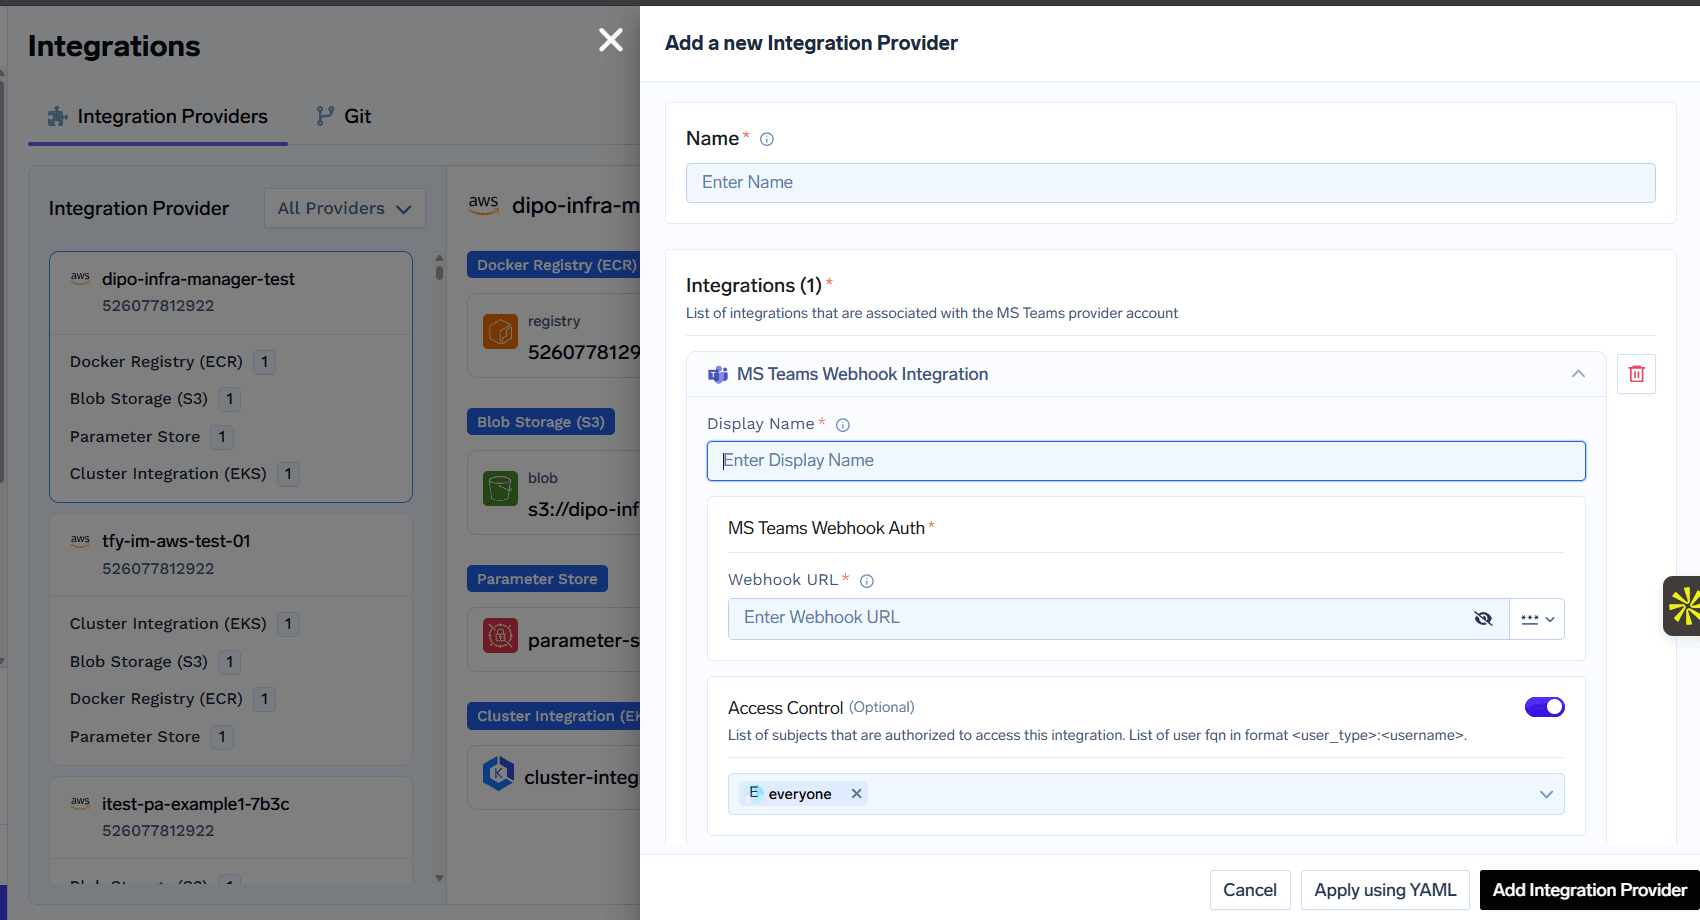
Field Descriptions
- Name: A unique name for this integration provider (e.g.,
ms-teams-test). - Display Name: The display name for this MS Teams webhook integration (e.g.,
test-webhook). - Webhook URL: The Incoming Webhook URL from your Microsoft Teams channel. This is stored securely as a secret reference.
- Access Control (Optional): List of users or groups allowed to use this integration. By default, set to
everyone.
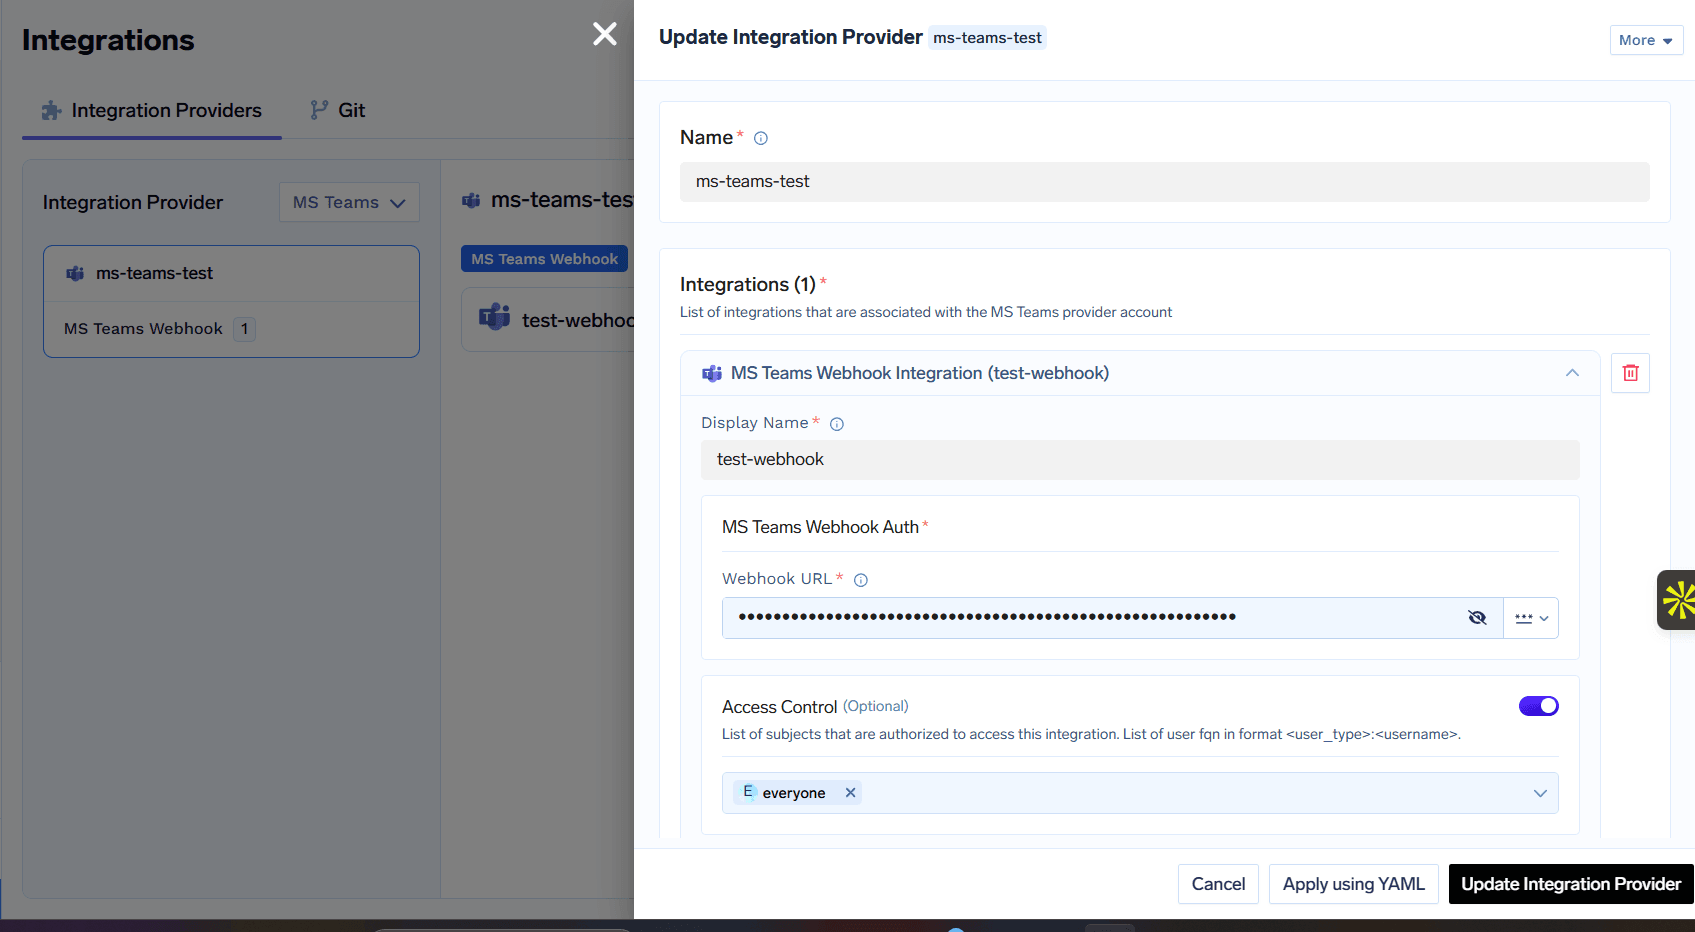
How to get the MS Teams Webhook URL:For more details, see the Microsoft Incoming Webhook documentation.
- Open Microsoft Teams and navigate to the channel where you want to receive alerts.
- Click the ⋯ (more options) menu on the channel and select Manage Channel or Connectors.
- Search for Incoming Webhook and click Configure.
- Give the webhook a name, optionally upload a custom icon, and click Create.
- Copy the generated Webhook URL and paste it into the TrueFoundry form above.
Using MS Teams as a Notification Channel
Once the integration is set up, you can select MS Teams Webhook as a notification target when configuring alerts or budget rules. Select the configured webhook from the Notification Channel dropdown.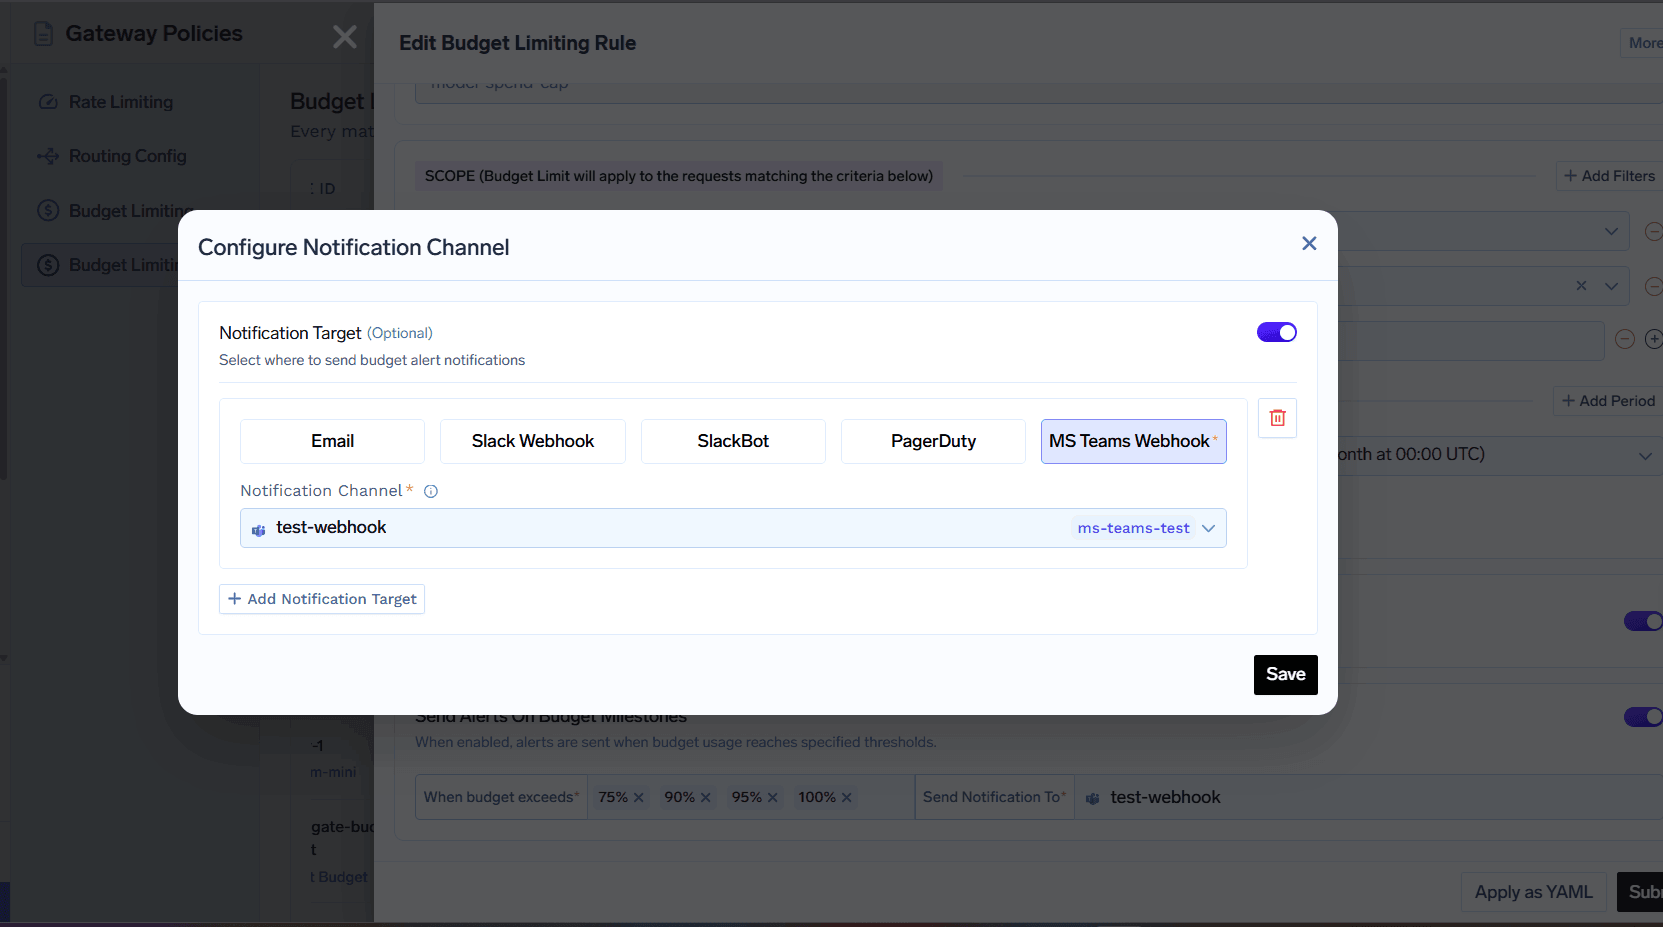
Access Control
For all integrations, you can restrict access to specific users or groups by editing the Access Control field. By default, it is set toeveryone so all users can use the integration.
Final Steps
- After filling all required fields, click Add Integration Provider to save your integration.
- You can now use these integrations as notification channels when setting up alerts for your applications.
With these integrations in place, you can receive real-time alerts via Microsoft Teams for all your TrueFoundry applications!