Launch a JupyterLab notebook with a dedicated Spark Connect cluster for interactive big data workloads.
TrueFoundry Spark Notebooks provide a JupyterLab environment with a dedicated Spark Connect server running alongside it. This gives you an interactive PySpark and Scala environment backed by a fully managed Spark cluster on Kubernetes — with no external infrastructure to set up.Use Spark Notebooks when you need to:
Explore and transform large datasets interactively
Prototype Spark ETL pipelines before productionizing them
Run distributed computations without managing Spark infrastructure
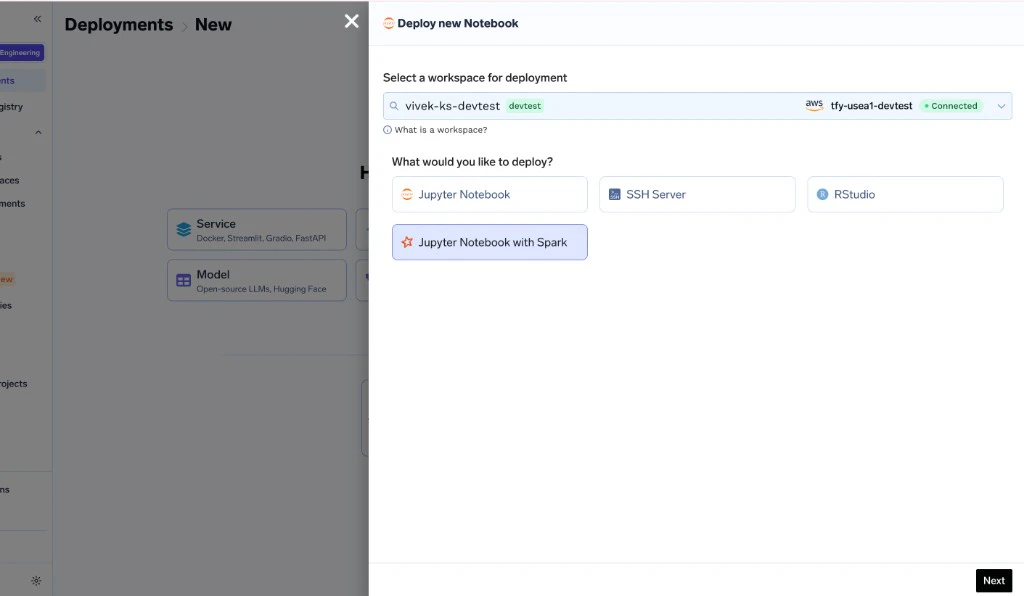
To launch a Spark Notebook, select Jupyter Notebook with Spark as the workbench type in the deployment form and configure the Spark cluster settings.
Select Jupyter Notebook with Spark as the workbench type
1
Create a new Notebook
Navigate to your workspace and click New Notebook. Select the Jupyter Notebook with Spark type.
2
Choose a Spark image
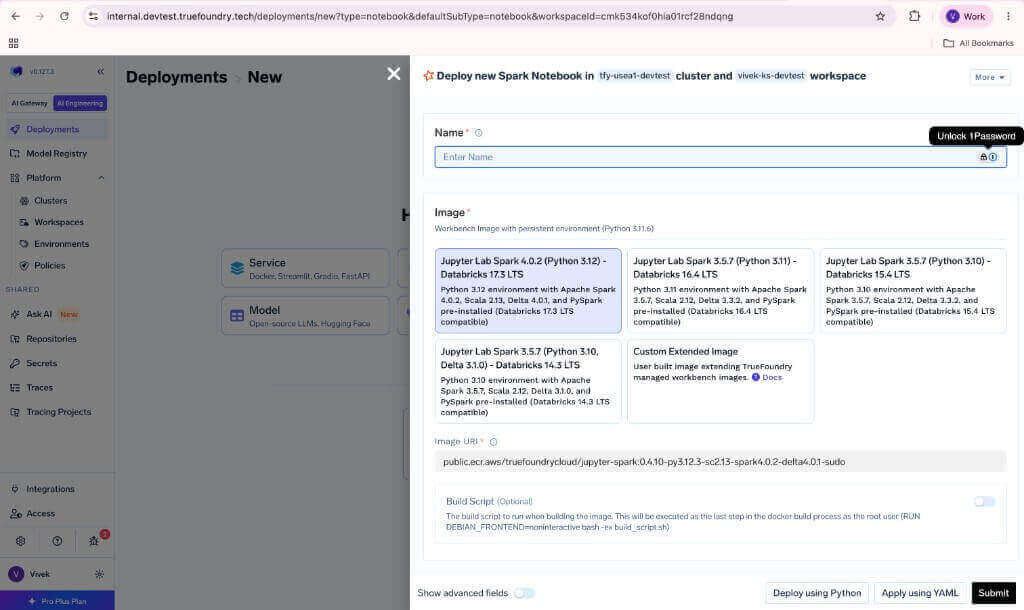
Select the pre-built Spark image or provide a custom extended image.
Image selection and notebook configuration
3
Configure Spark cluster resources
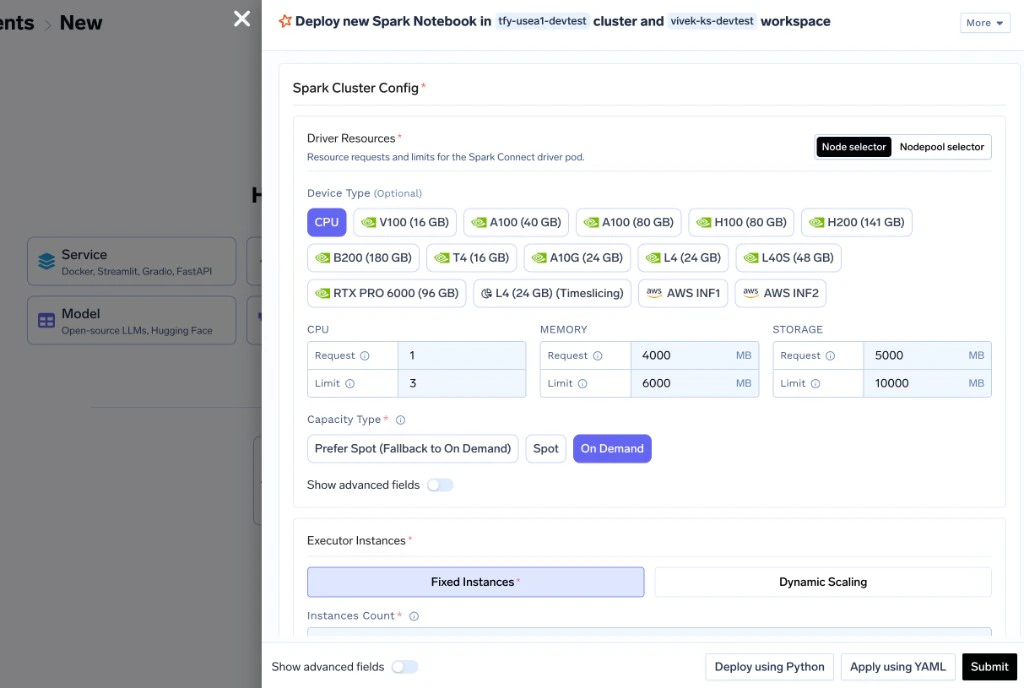
Set the driver resources, executor count (or dynamic scaling), and executor resources.
Spark Cluster Config — driver resources and executor instances
4
Launch
Click deploy. The notebook and Spark Connect server will start together. A SparkSession is automatically available in every Python and Scala notebook cell.
All images are hosted under public.ecr.aws/truefoundrycloud/. For example, the full URI for the Databricks 17.3 LTS image is public.ecr.aws/truefoundrycloud/jupyter-spark:0.4.10-py3.12.3-sc2.13-spark4.0.2-delta4.0.1-sudo.
Spark is preconfigured in the notebook and available via the spark variable.
# `spark` is already available — no setup neededdf = spark.range(1000000).toDF("id")df.filter(df.id % 2 == 0).count()
// SparkSession is pre-initialized in the Scala kernelval df = spark.range(1000000).toDF("id")df.filter($"id" % 2 === 0).count()
The notebook connects to the Spark Connect server via the SPARK_CONNECT_URL environment variable, which is automatically set to point to the co-located Spark Connect server.
The startup script retries the connection up to 5 times (configurable via SPARK_INIT_RETRIES). If the Spark Connect server hasn’t started yet, the session will be created once it becomes available.
The Spark Connect server (driver) runs as a separate pod. Configure its resources based on the complexity of your query plans and the volume of data collected to the driver.
Some internal configuration (e.g., spark.jars.ivy, connection timeouts, spark.connect packages) is managed automatically. User-supplied spark.jars.packages values are merged with the internal ones.
By default, the Spark Connect server and executors use the apache/spark:4.0.2 image.You can override this with a custom Spark image in the Advanced section of the Spark Cluster Config. The image must have Spark pre-installed and be compatible with the Kubernetes executor model.
If your Spark jobs need to access cloud storage (S3, GCS, ADLS) or other cloud services, assign a Kubernetes service account with the appropriate IAM role to the notebook. The Spark Connect server and executors inherit this service account for cloud access.Configure the service account in the Advanced section of the deployment form.
Spark notebook images include AI coding agents (OpenCode and Claude Code) via Jupyter AI v3. These agents can help with Spark code, debug notebook errors, and interact with both Python and Scala kernels.To enable AI agents, set environment variables on your Spark notebook deployment. See the AI Coding Agents in Notebooks section in the Jupyter Notebook guide for setup instructions.
Was this page helpful?
Assistant
Responses are generated using AI and may contain mistakes.