> ## Documentation Index
> Fetch the complete documentation index at: https://www.truefoundry.com/llms.txt
> Use this file to discover all available pages before exploring further.
# Setting up External Auth with SAML Azure
> Configure SAML v2 with Azure AD as an identity provider for external authentication with TrueFoundry.
## Configure SAML v2 for Azure
This documentation will guide you in configuring SAML v2 IdP for Azure. In this case, TrueFoundry will act as Service Provider (SP) to Azure (IdP).
## Create an Application in Azure
1. Log in into your Azure Portal navigate to `Enterprise applications`.
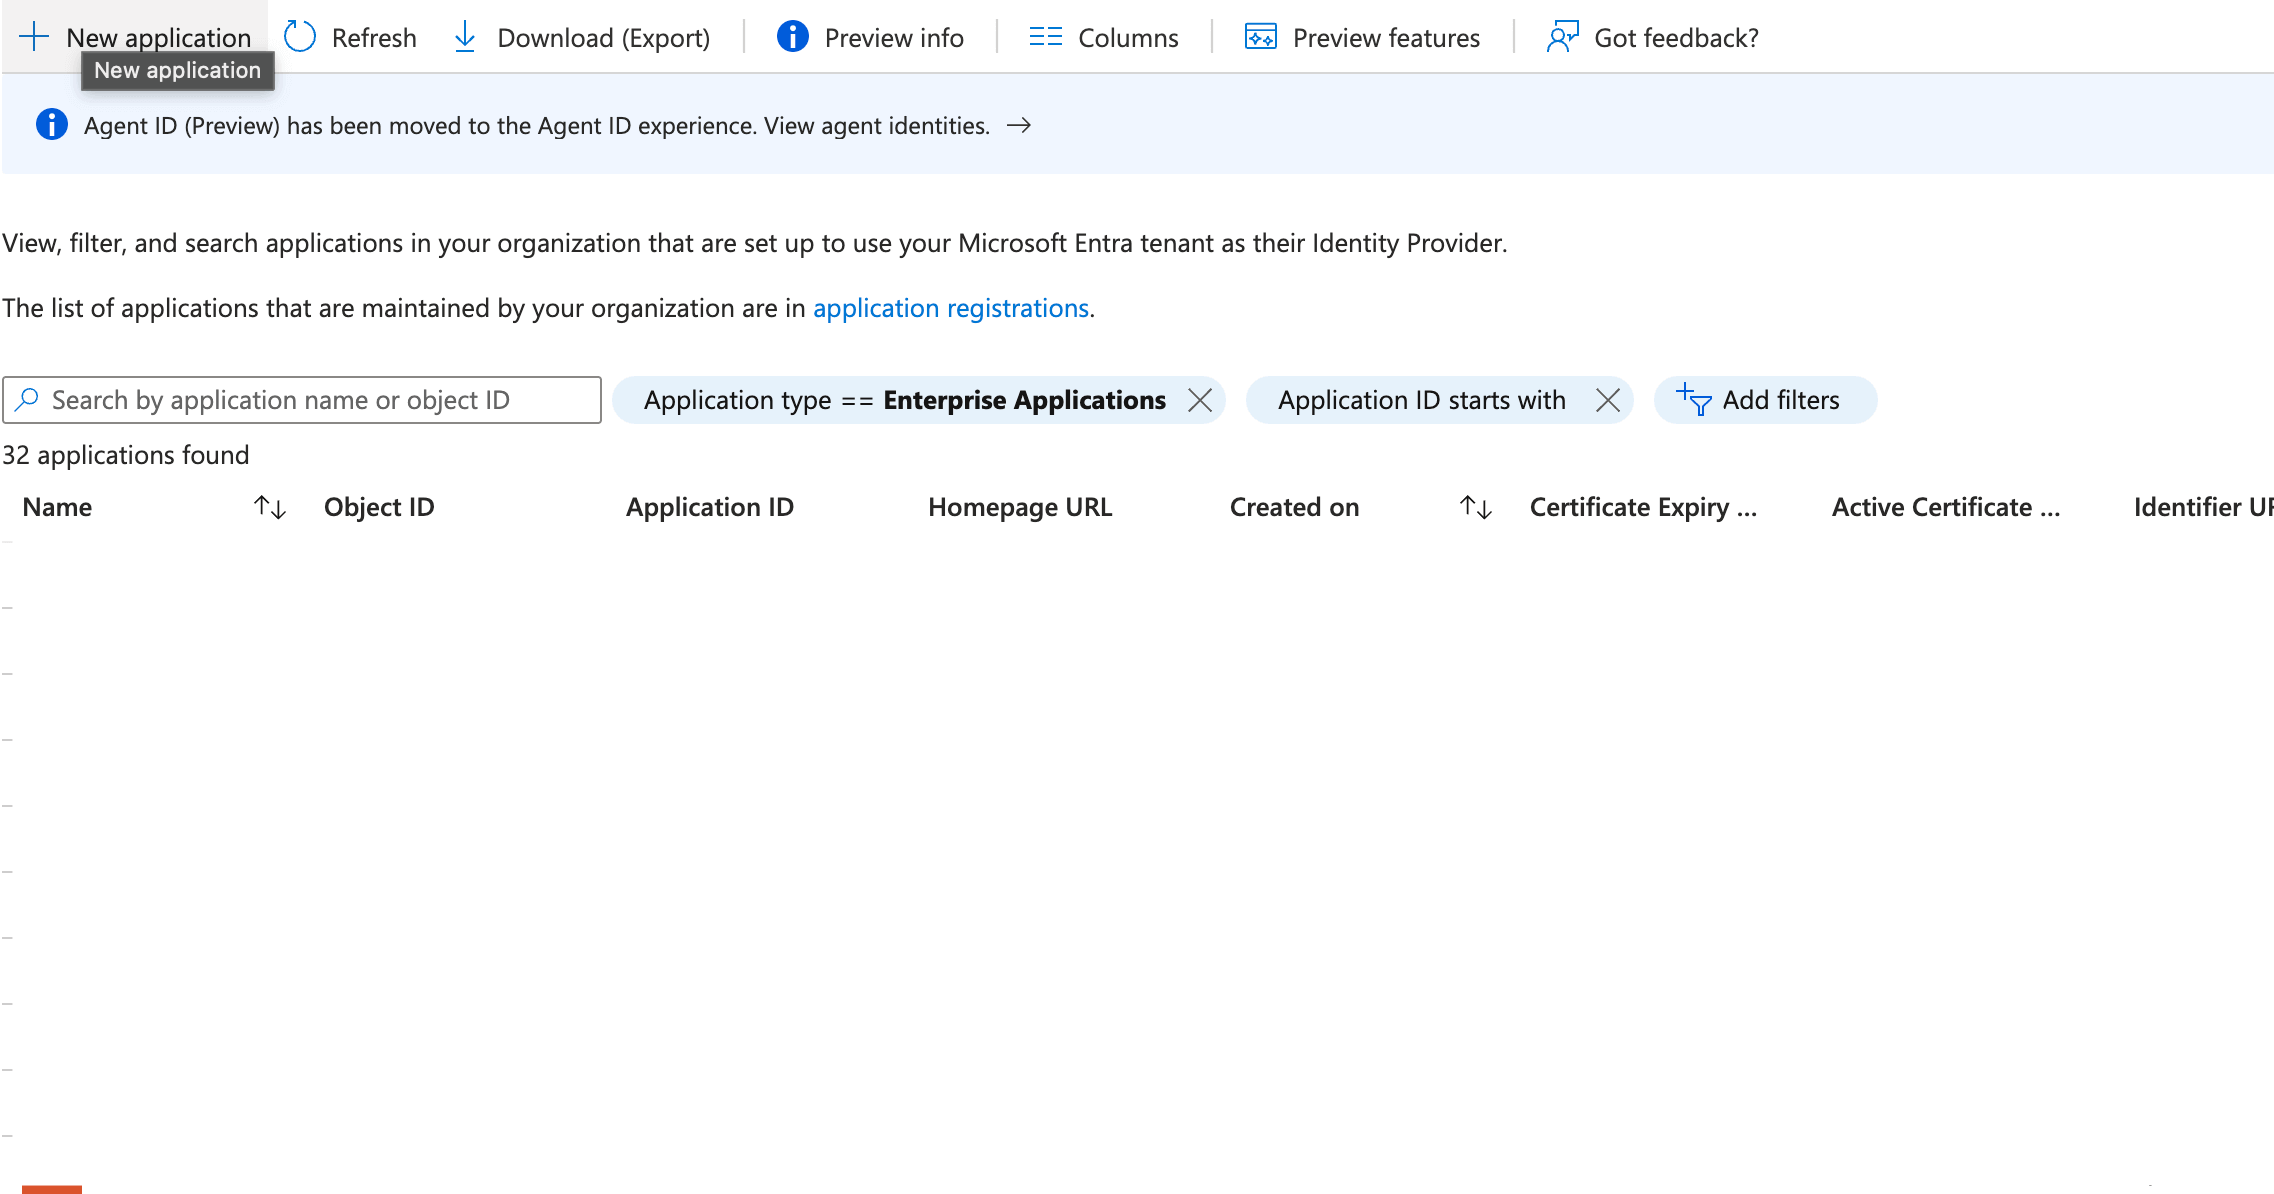
2. At the top of the screen click on `New Application`.
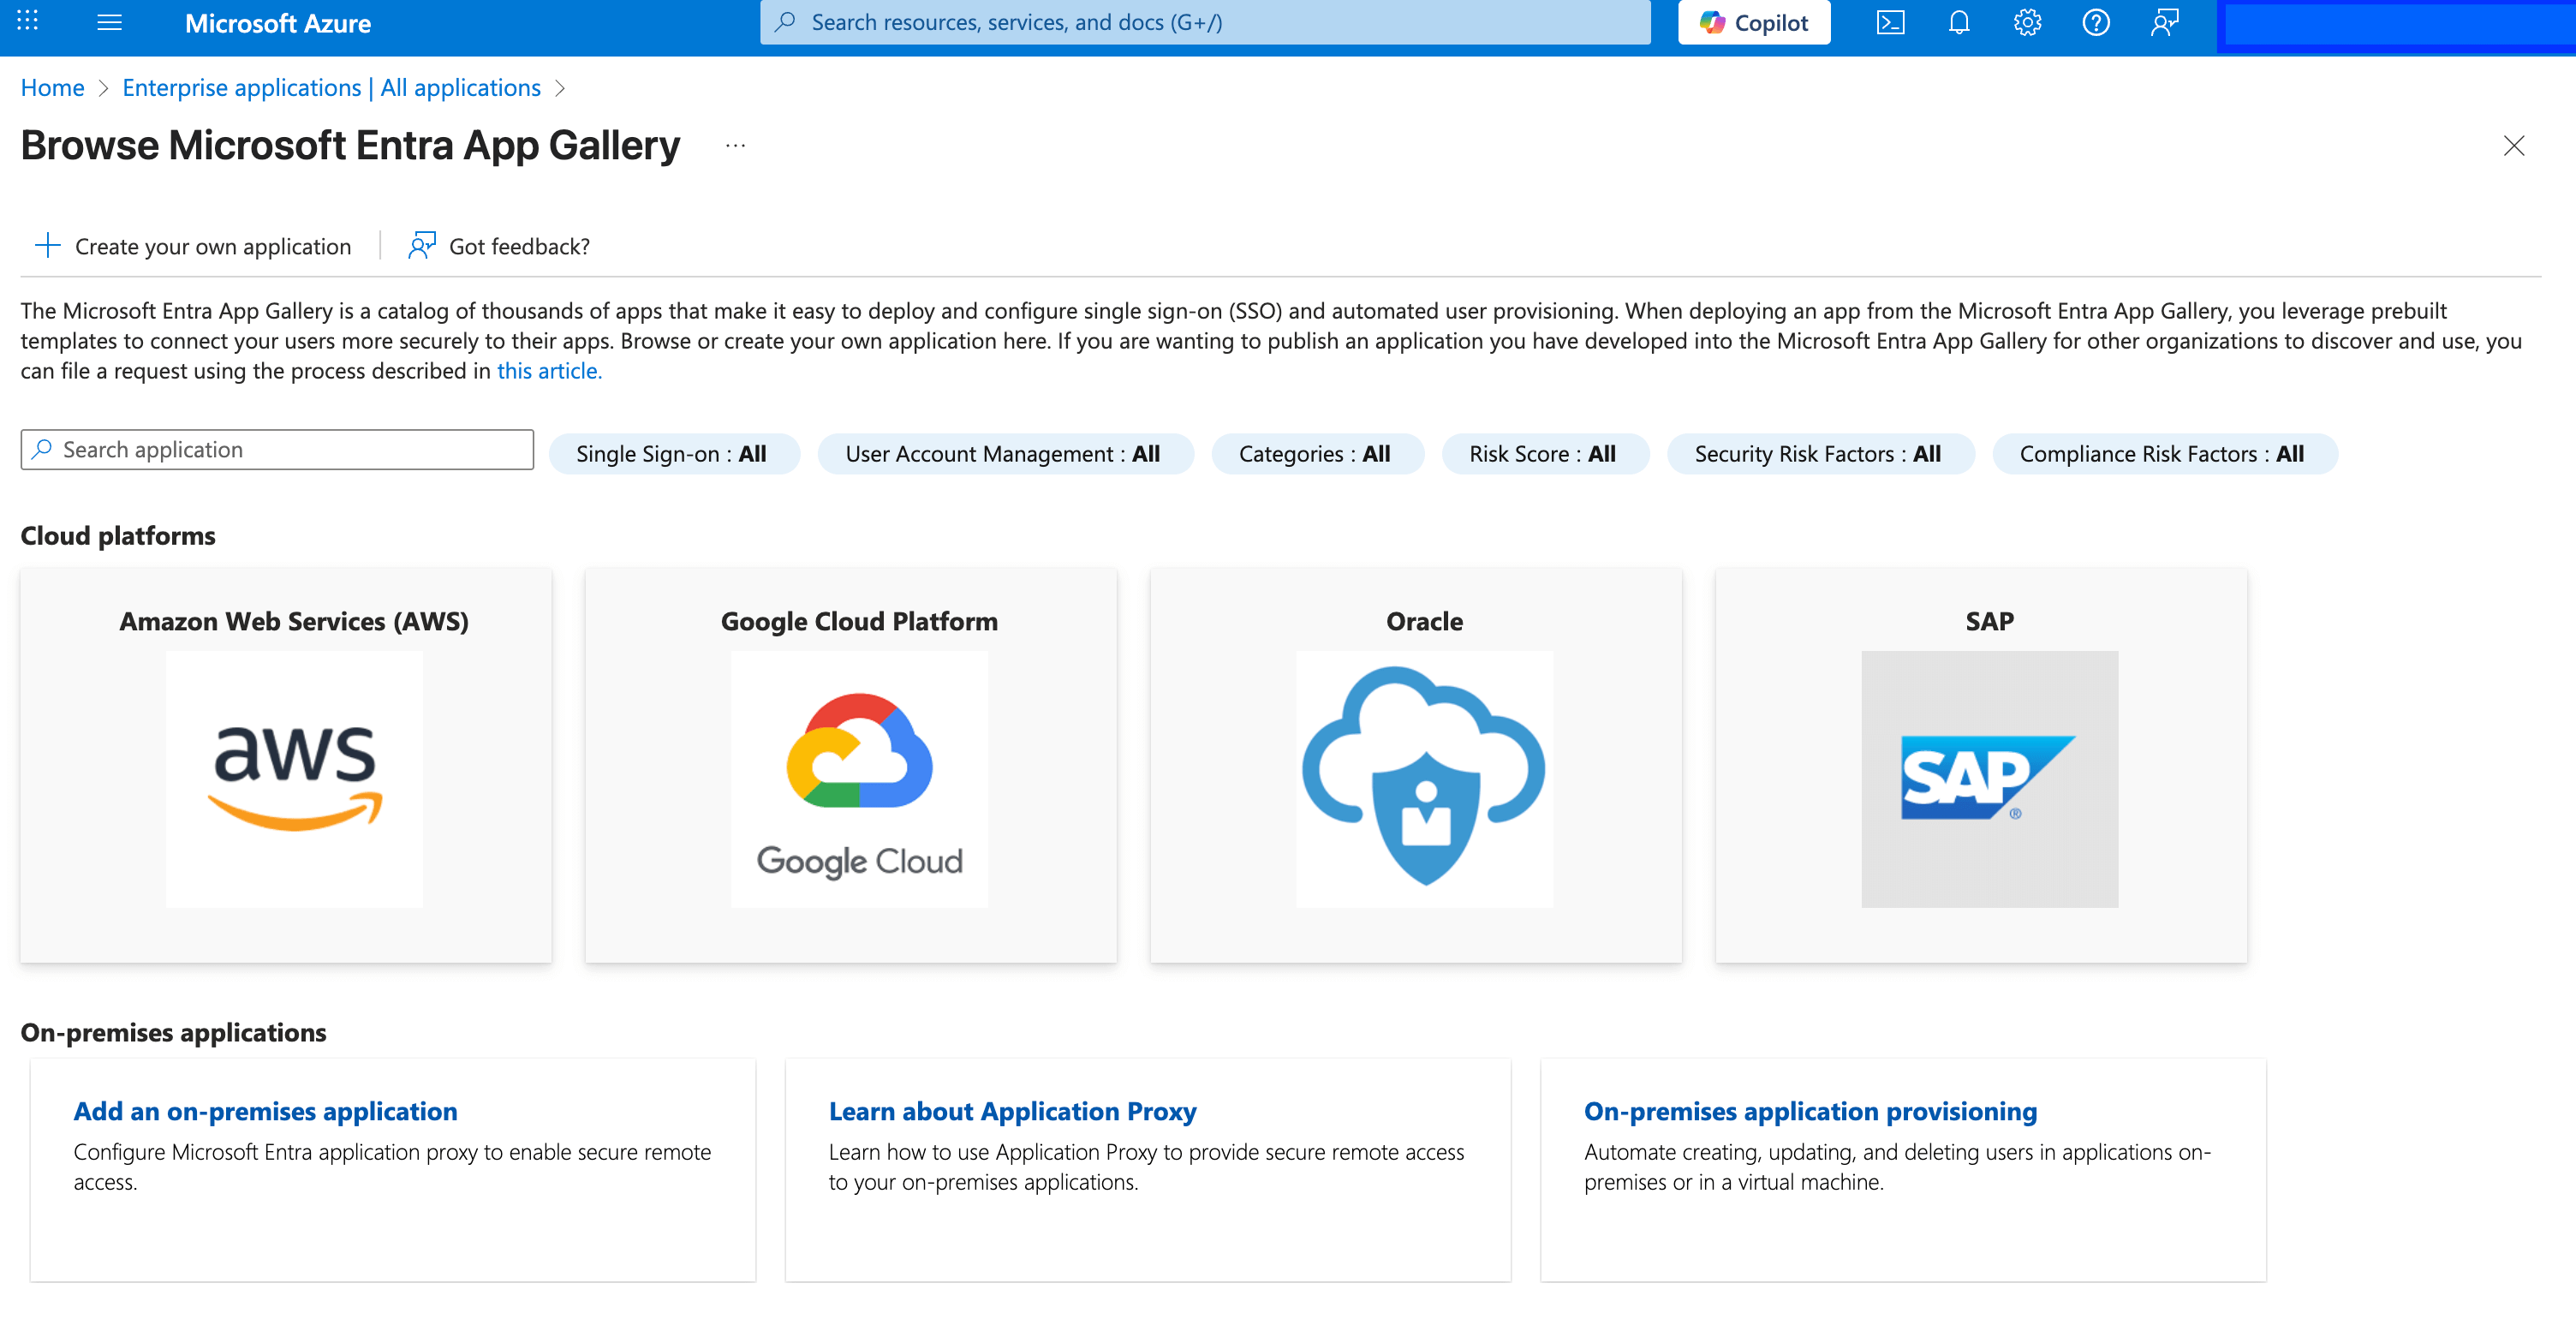
 3. At `Browse Microsoft Entra App Gallery` page click on `Create your own application`
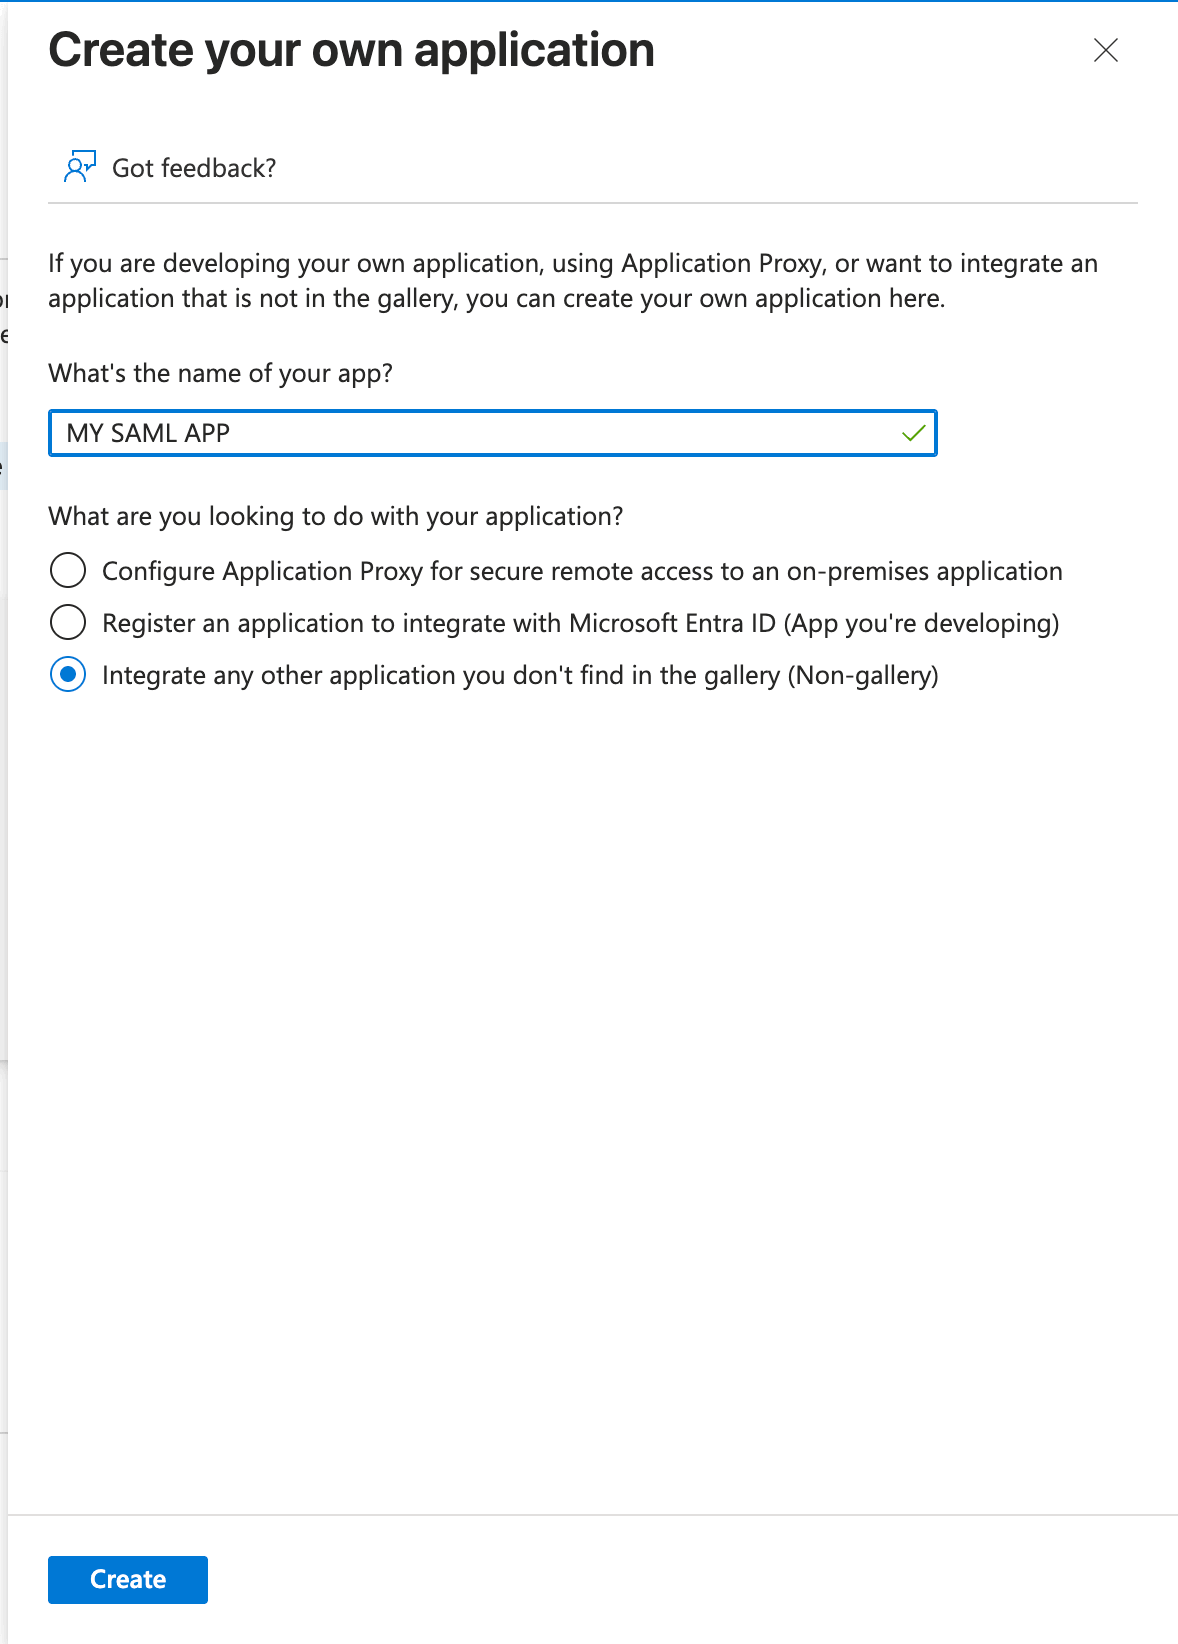
 4. Enter Application name and create application
In `What are you looking to do with your application?` choose `Integrate any other application you don't find in the gallery (Non-gallery)`
4. Enter Application name and create application
In `What are you looking to do with your application?` choose `Integrate any other application you don't find in the gallery (Non-gallery)`
 ## Configure Your Azure Application
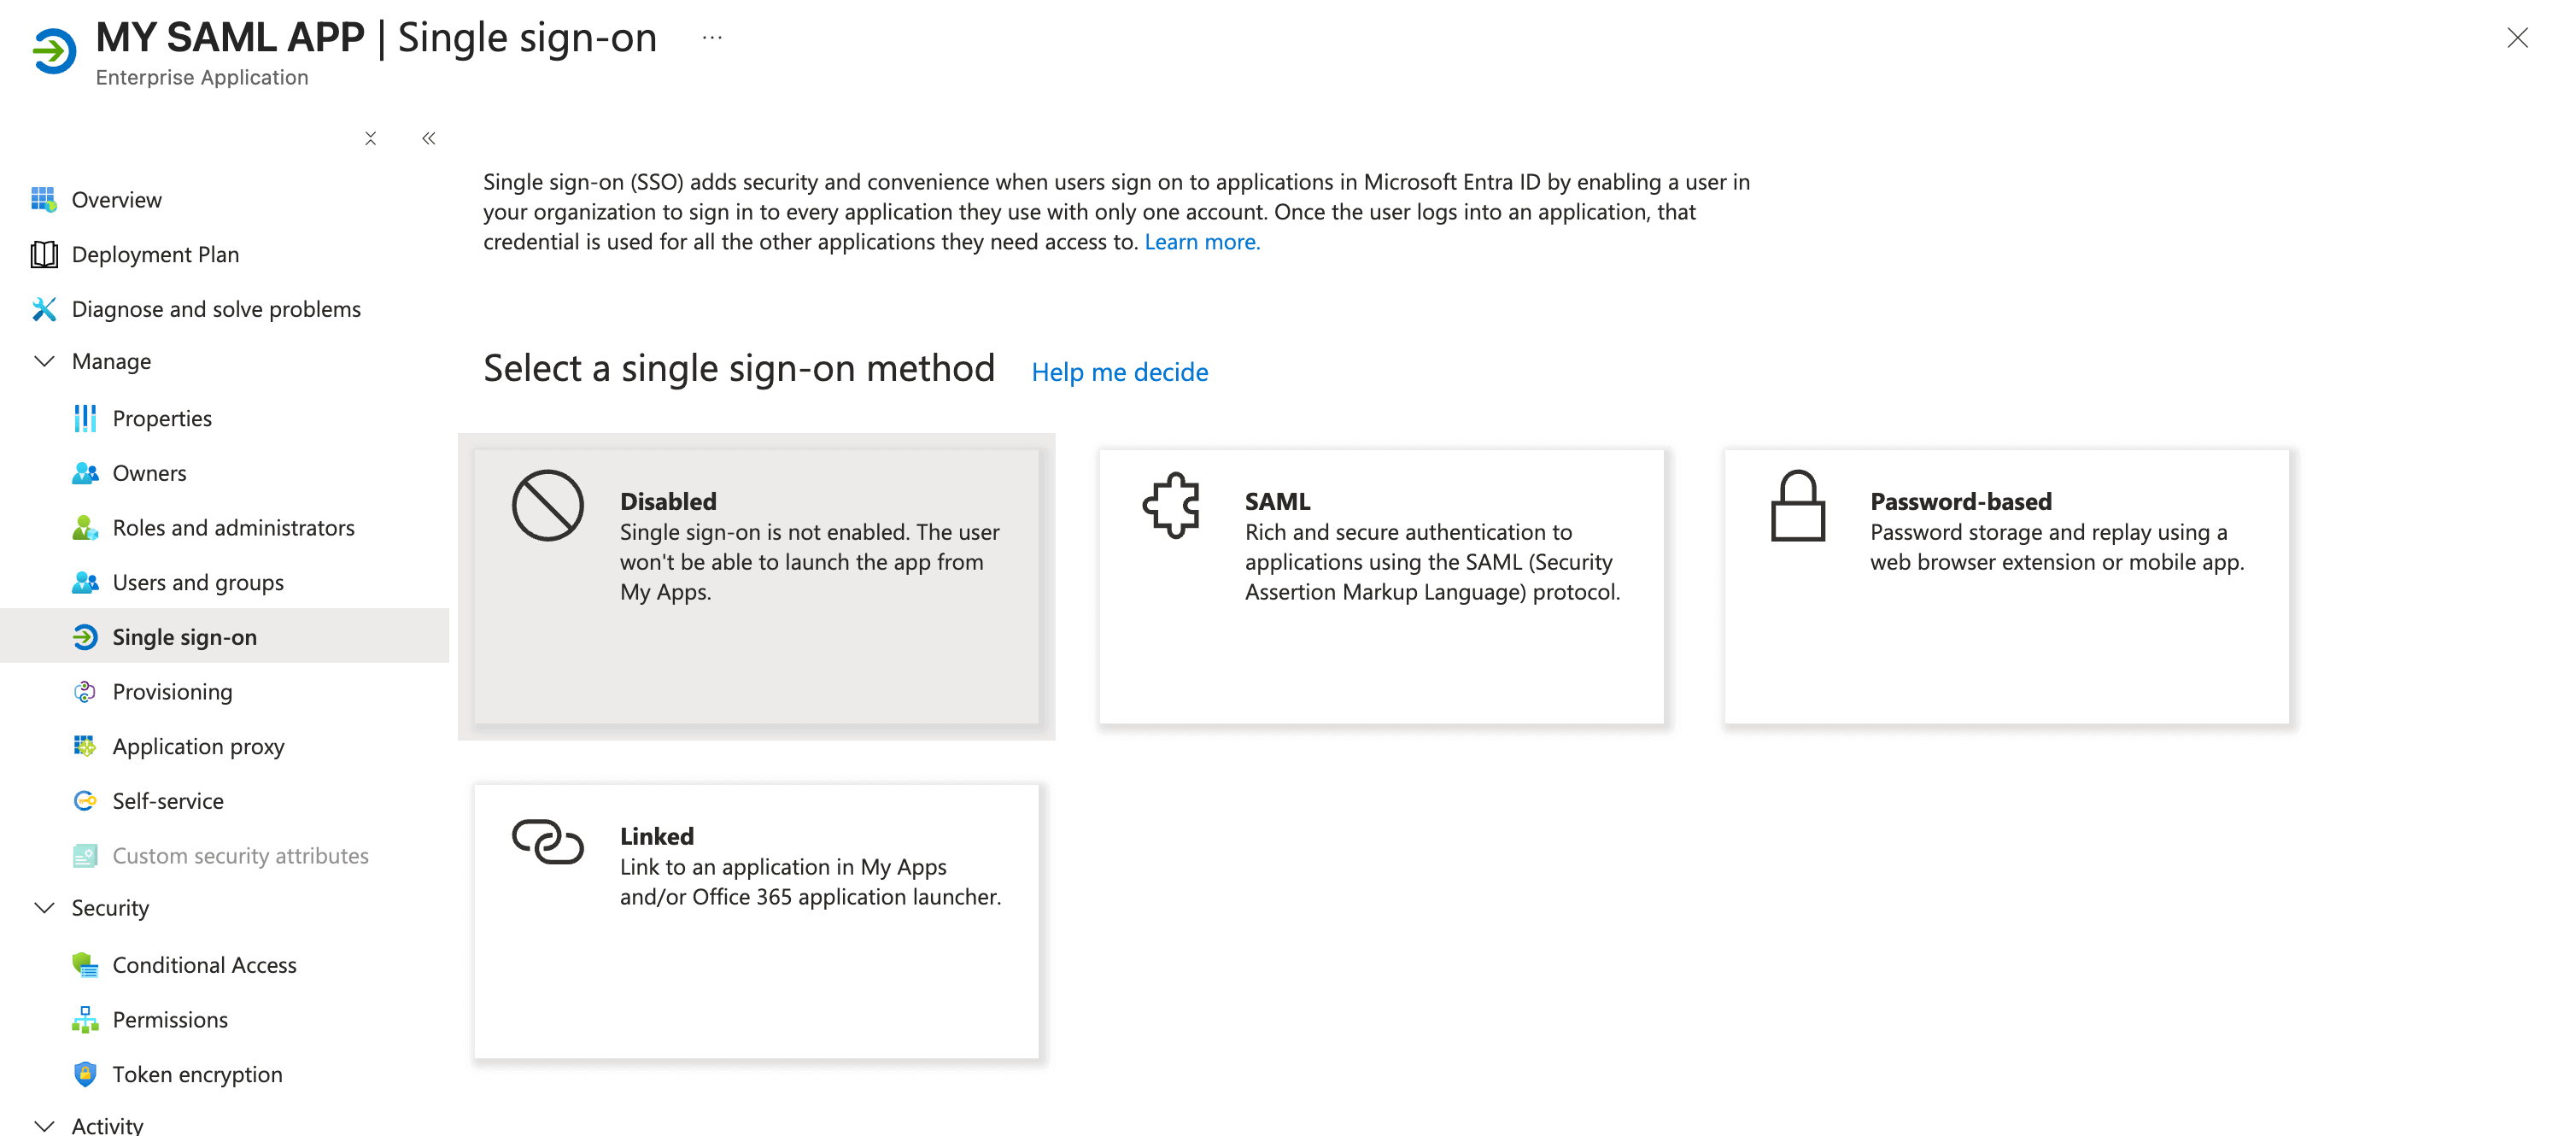
1. In application go to `Single Sign on` and choose SAML
## Configure Your Azure Application
1. In application go to `Single Sign on` and choose SAML
 2. Edit `Basic SAML Configuration`
* **Identifier (Entity ID)**: This is unique ID that identifies your application to Microsoft Entra ID. This is generally control plane URL.
```
/deployments?tab=services
```
* **Reply URL (Assertion Consumer Service URL)**: This is ACS endpoint which can be obtained from truefoundry.
```
/api/svc/v1/saml/acs
```
* **Relay State**: This is endpoint where user will be redirected after being authenticated. This is generally control plane URL.
```
/deployments?tab=services
```
2. Edit `Basic SAML Configuration`
* **Identifier (Entity ID)**: This is unique ID that identifies your application to Microsoft Entra ID. This is generally control plane URL.
```
/deployments?tab=services
```
* **Reply URL (Assertion Consumer Service URL)**: This is ACS endpoint which can be obtained from truefoundry.
```
/api/svc/v1/saml/acs
```
* **Relay State**: This is endpoint where user will be redirected after being authenticated. This is generally control plane URL.
```
/deployments?tab=services
```
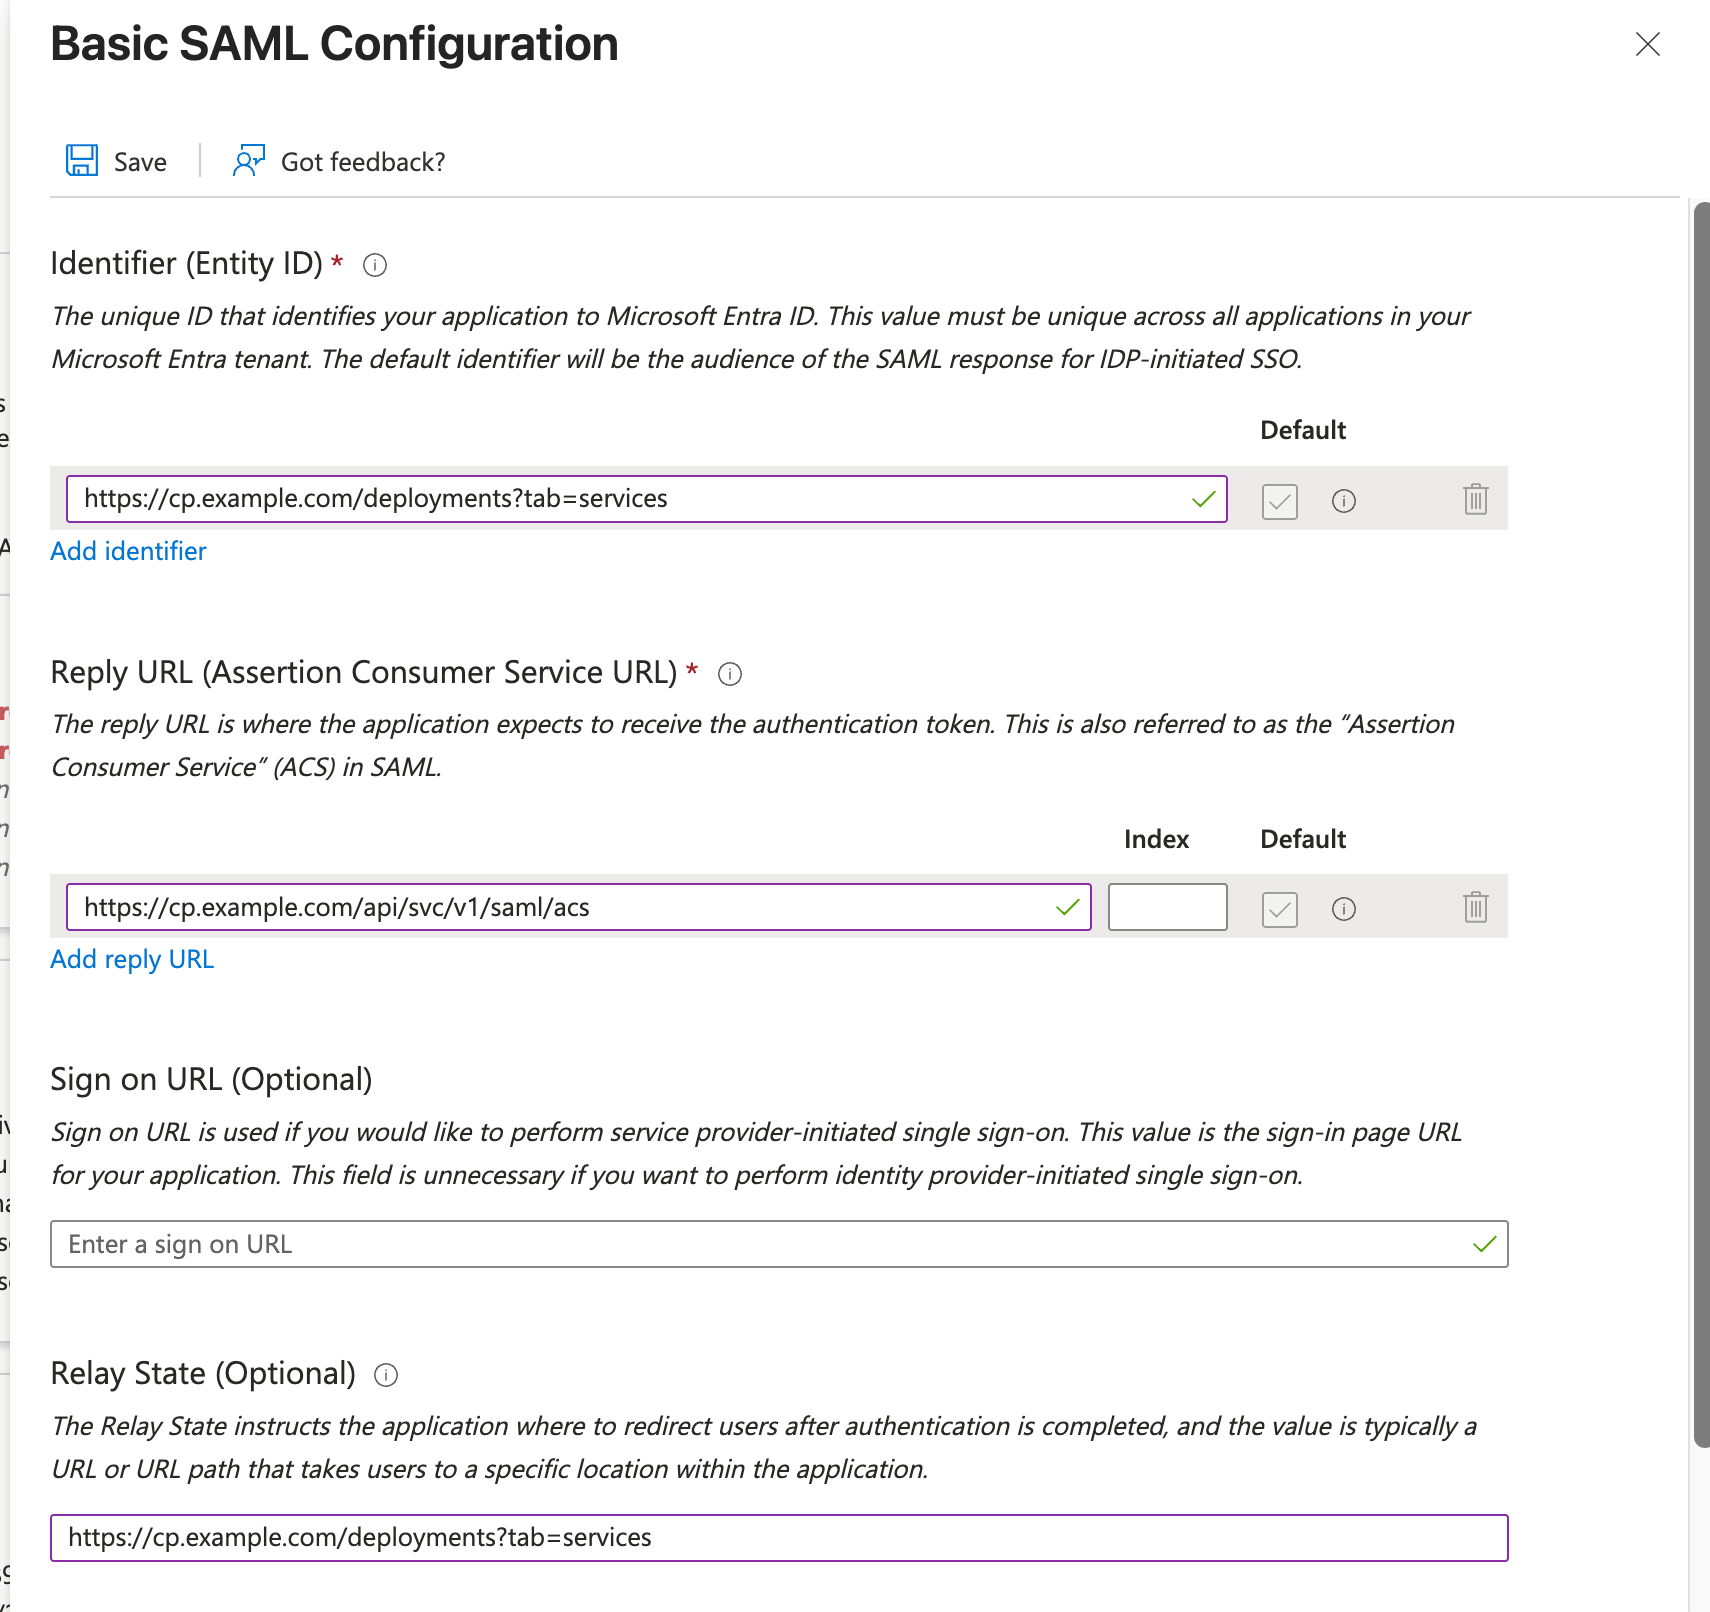 once SSO is Configured download the SAML Certificates(Recommended Base64) it will be required later.
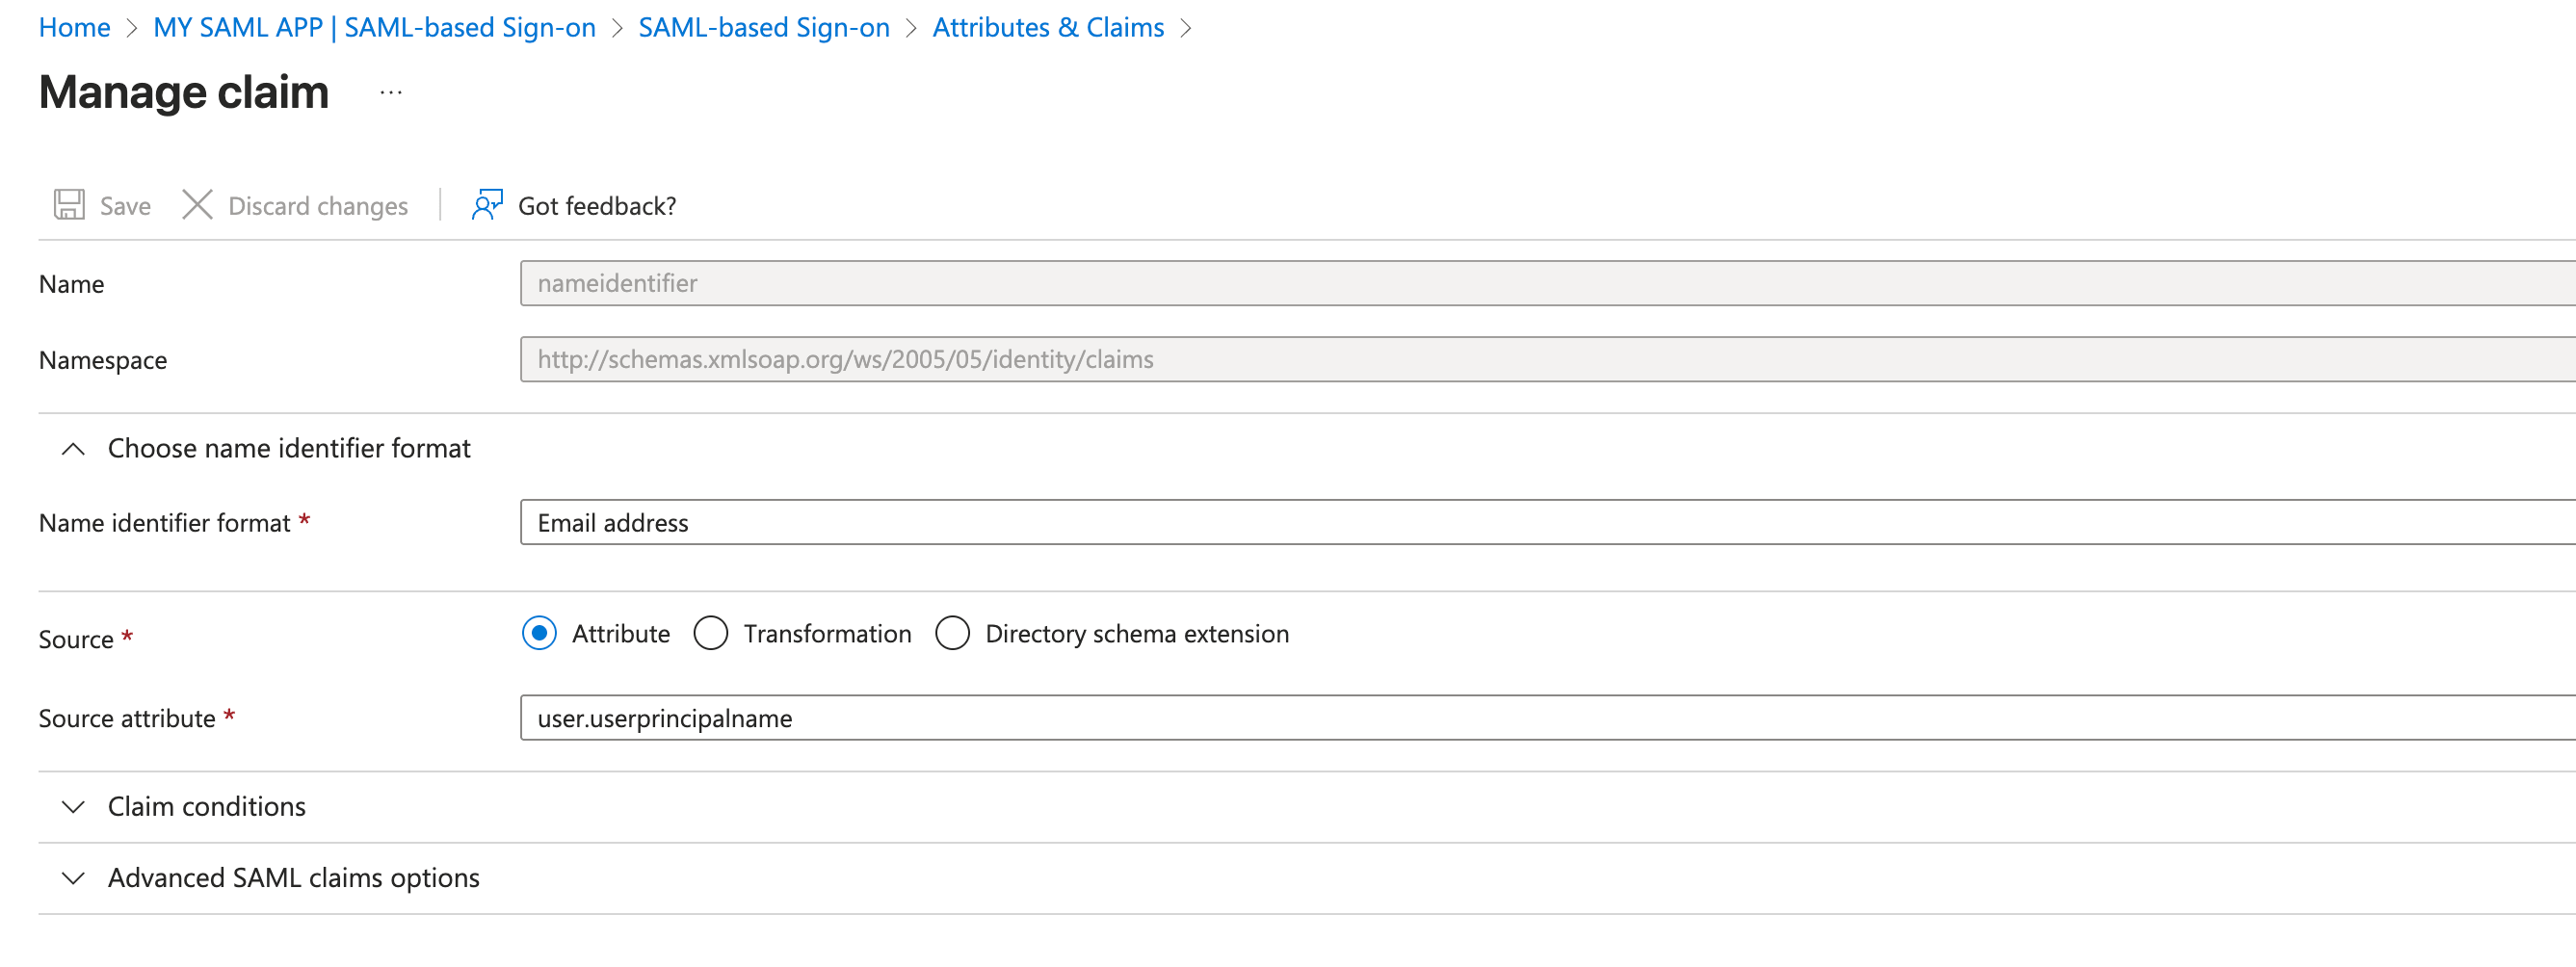
3. Attributes & Claims:
* Add Required Claim
click and on Claim name `Unique User Identifier`
set Name identifier format as `Email address` and Source attribute as `user.userprincipalname`
once SSO is Configured download the SAML Certificates(Recommended Base64) it will be required later.
3. Attributes & Claims:
* Add Required Claim
click and on Claim name `Unique User Identifier`
set Name identifier format as `Email address` and Source attribute as `user.userprincipalname`
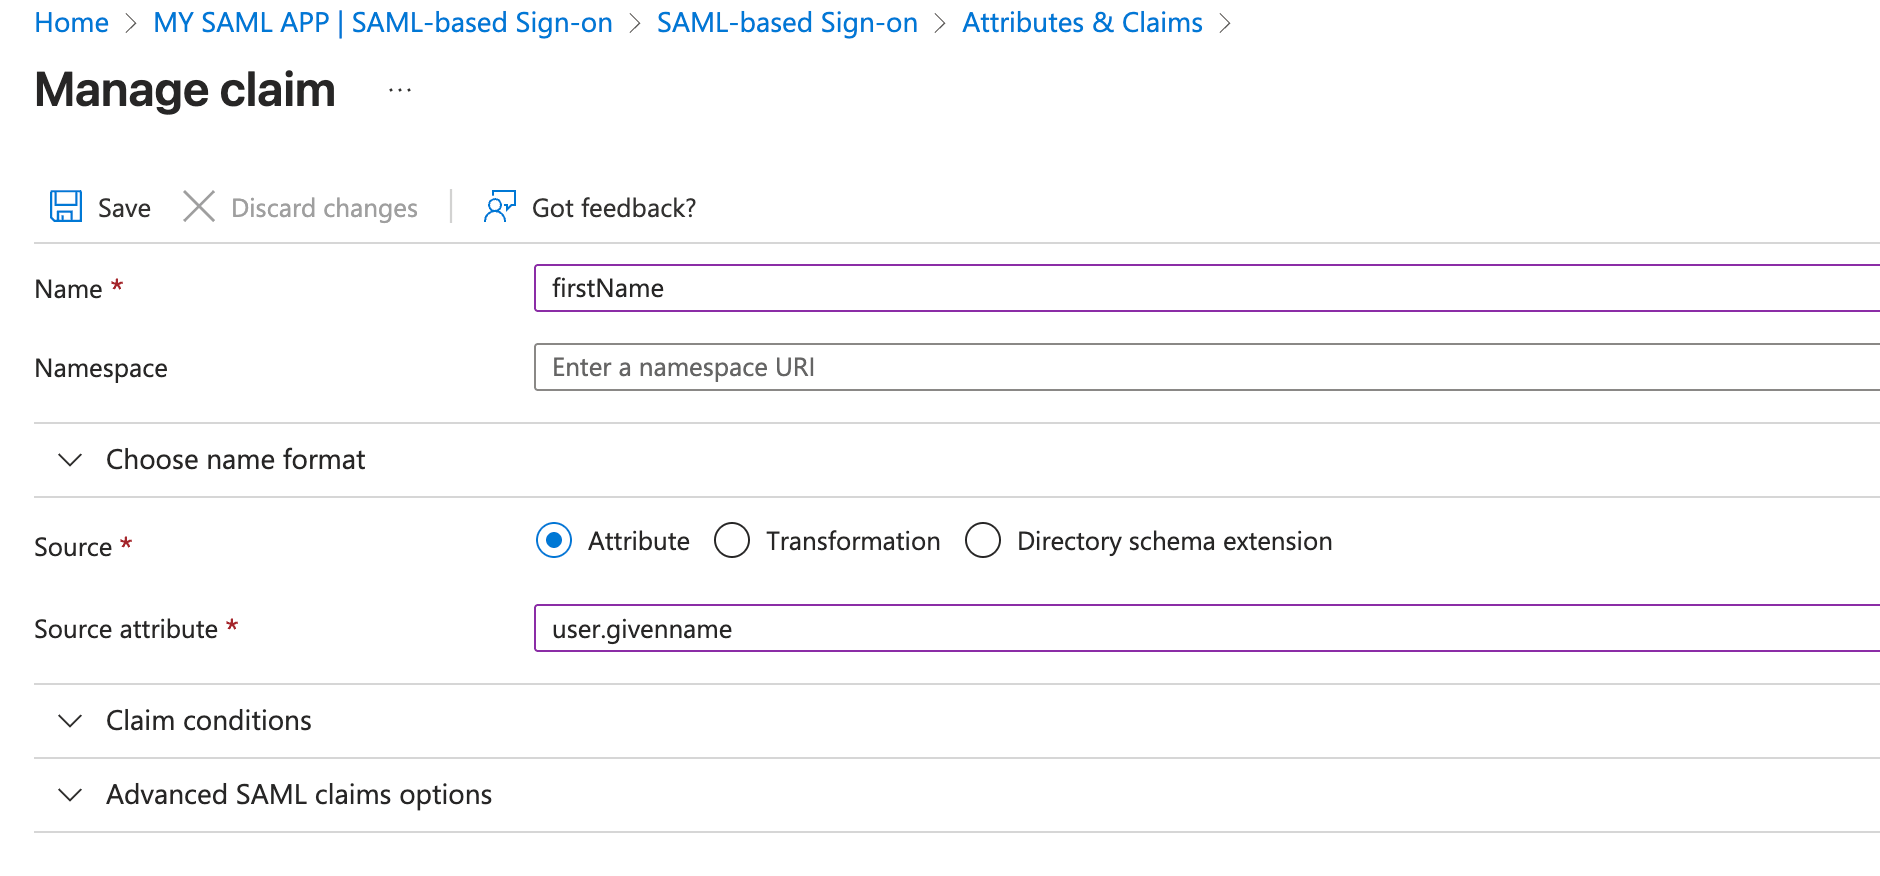
 * Add Additional Claims
Please do not make changes to already predefined Additional Claims.
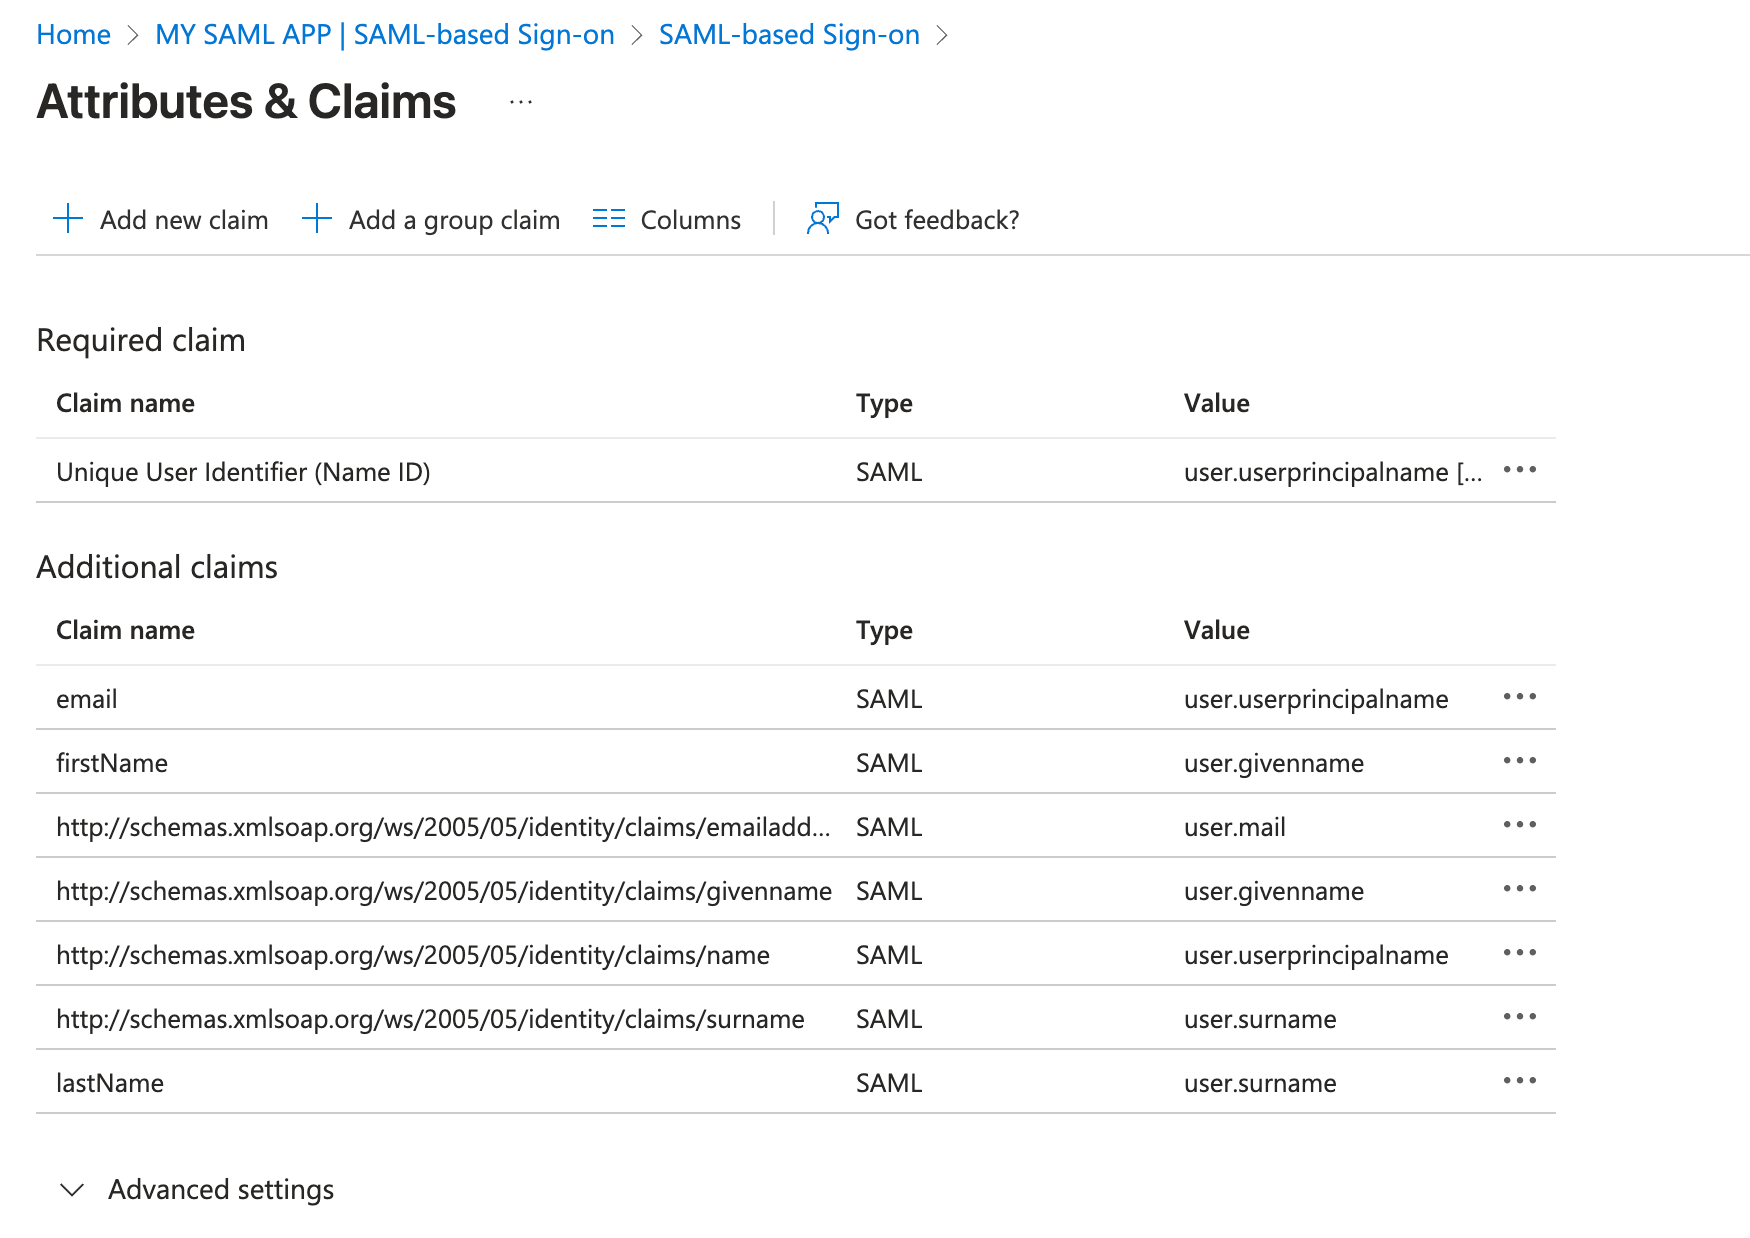
Click on Add new claim at top left and add three new claims `firstName`, `lastName` and `email` one by one.
Addition of firstName is illustrated in the below picture
* Add Additional Claims
Please do not make changes to already predefined Additional Claims.
Click on Add new claim at top left and add three new claims `firstName`, `lastName` and `email` one by one.
Addition of firstName is illustrated in the below picture
 our final list of claims should be like as shown below
 ## Integrate with TrueFoundry
To integrate Azure application with TrueFoundry, Add the following configuration to env Variables
* **OAUTH\_PROVIDER\_TYPE** : `EXTERNAL_SAML`
* **EXTERNAL\_SAML\_IDP\_ENDPOINT**: This is `User access URL` which can be obtained from application by navigating to properties tab.
## Integrate with TrueFoundry
To integrate Azure application with TrueFoundry, Add the following configuration to env Variables
* **OAUTH\_PROVIDER\_TYPE** : `EXTERNAL_SAML`
* **EXTERNAL\_SAML\_IDP\_ENDPOINT**: This is `User access URL` which can be obtained from application by navigating to properties tab.
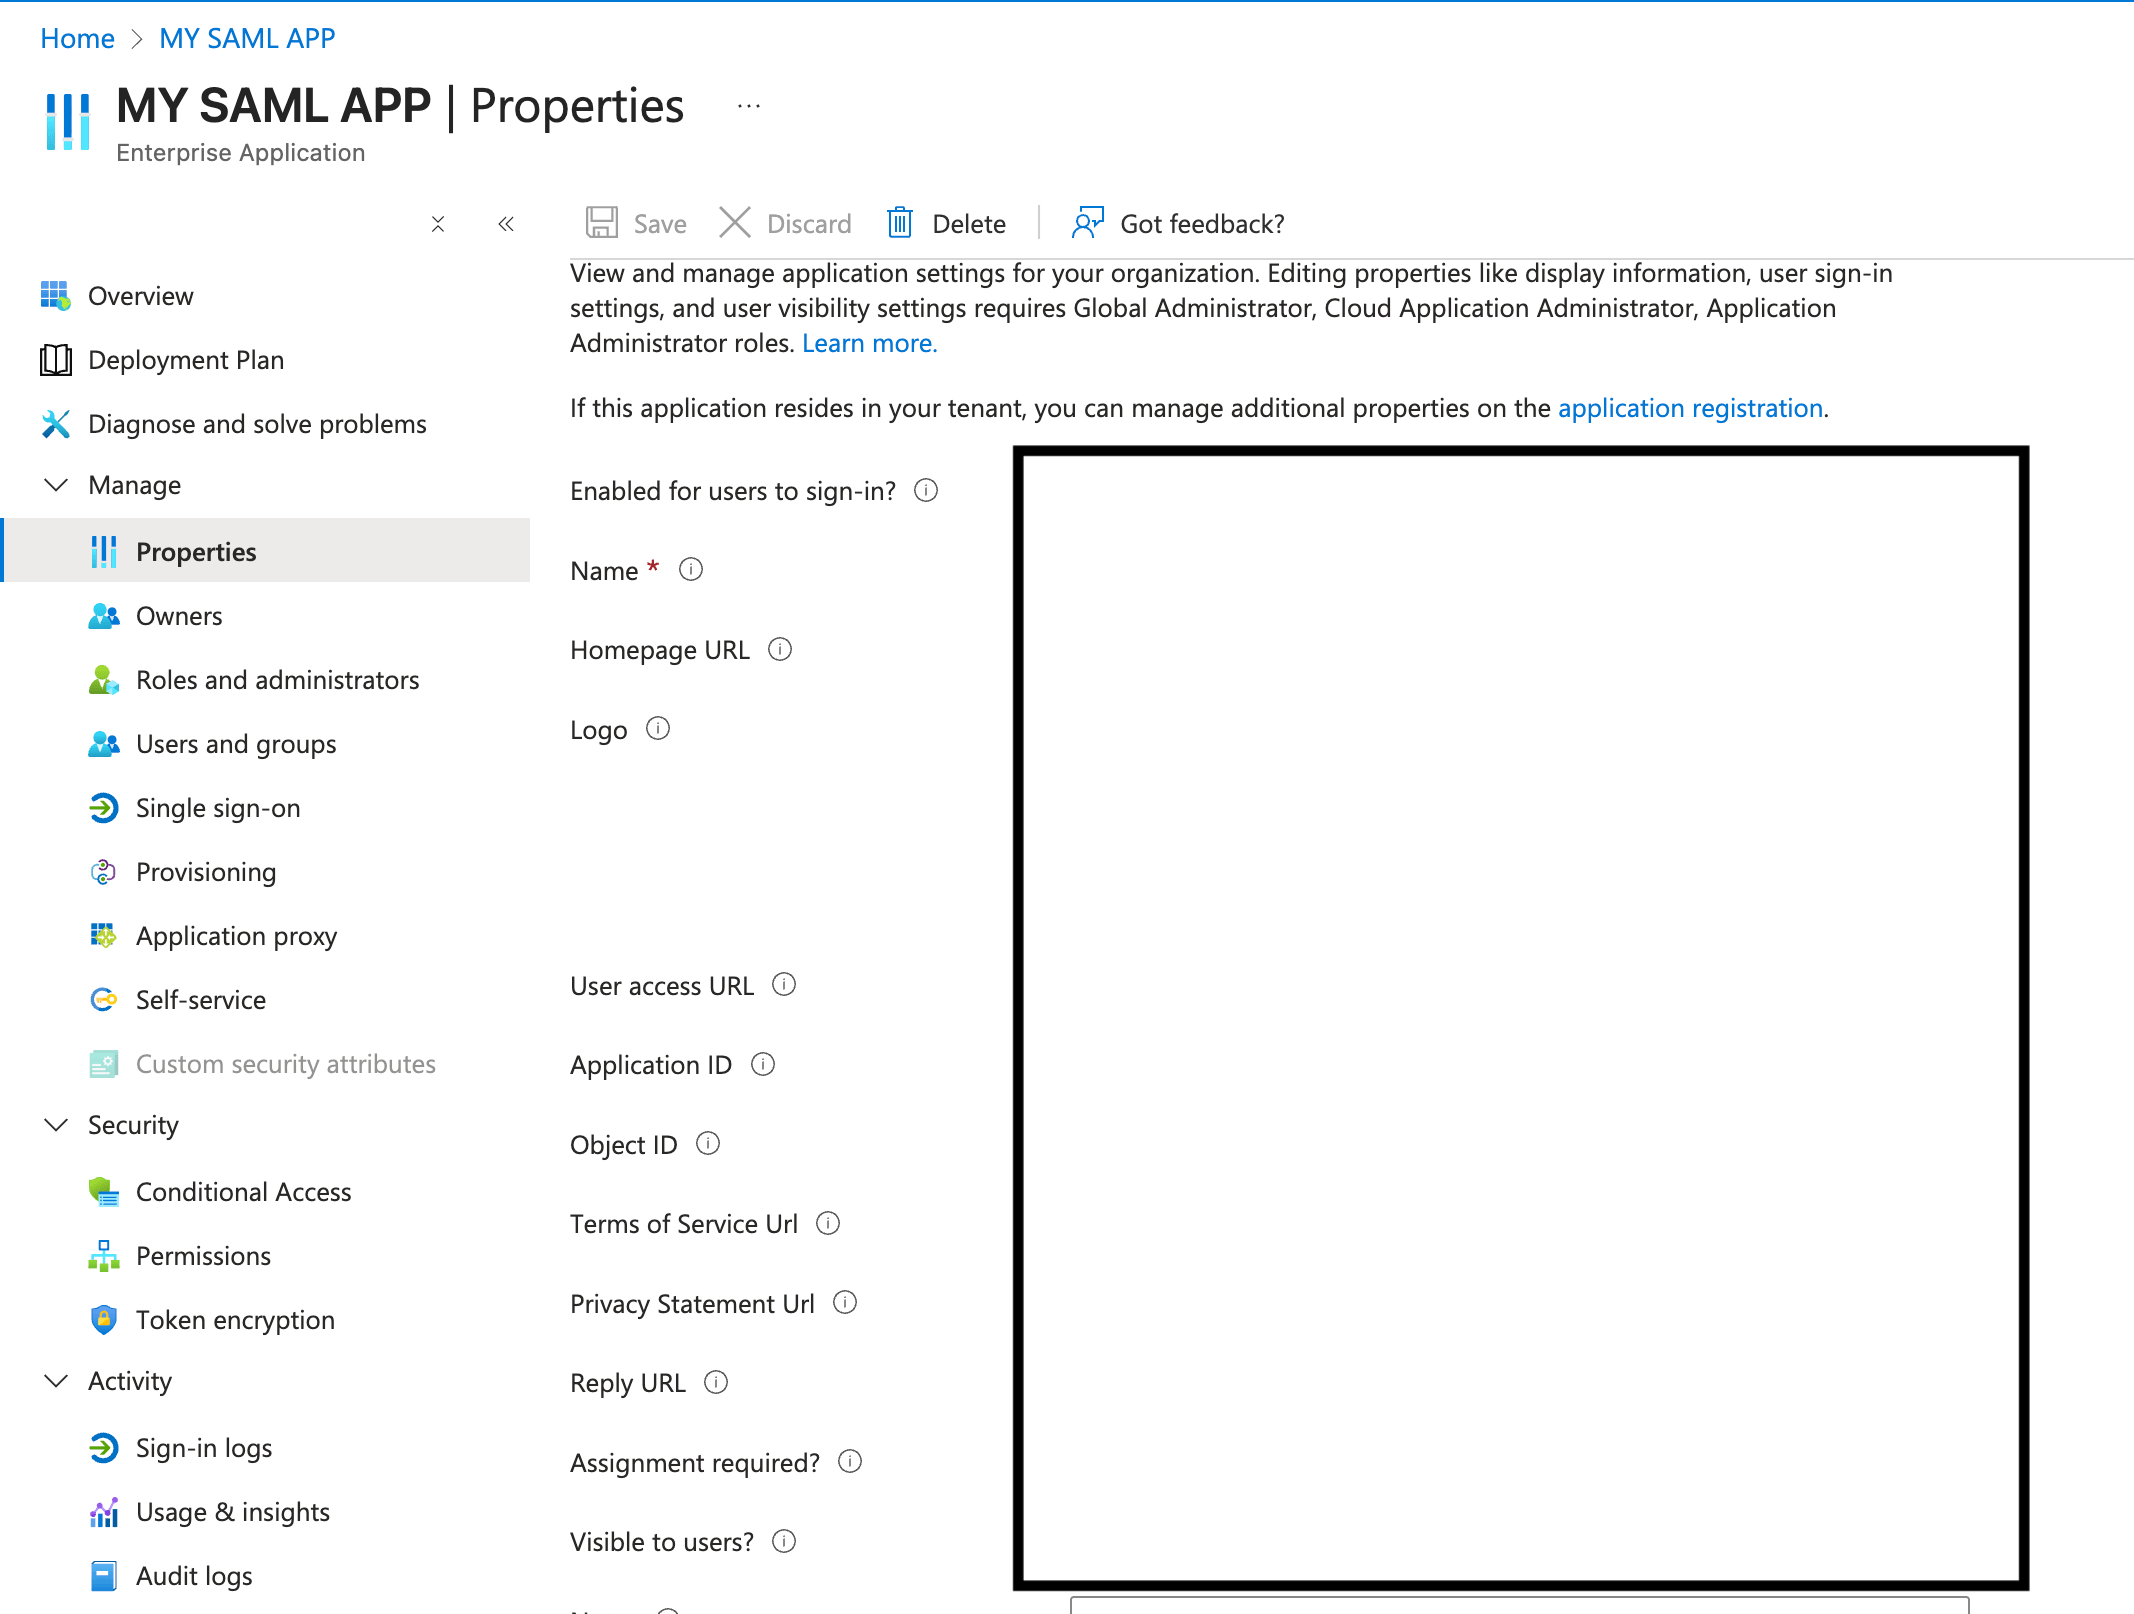 * **EXTERNAL\_SAML\_CERTIFICATE**: Encode the the Certificate that we download earlier by Base64 Encoder and set it here.
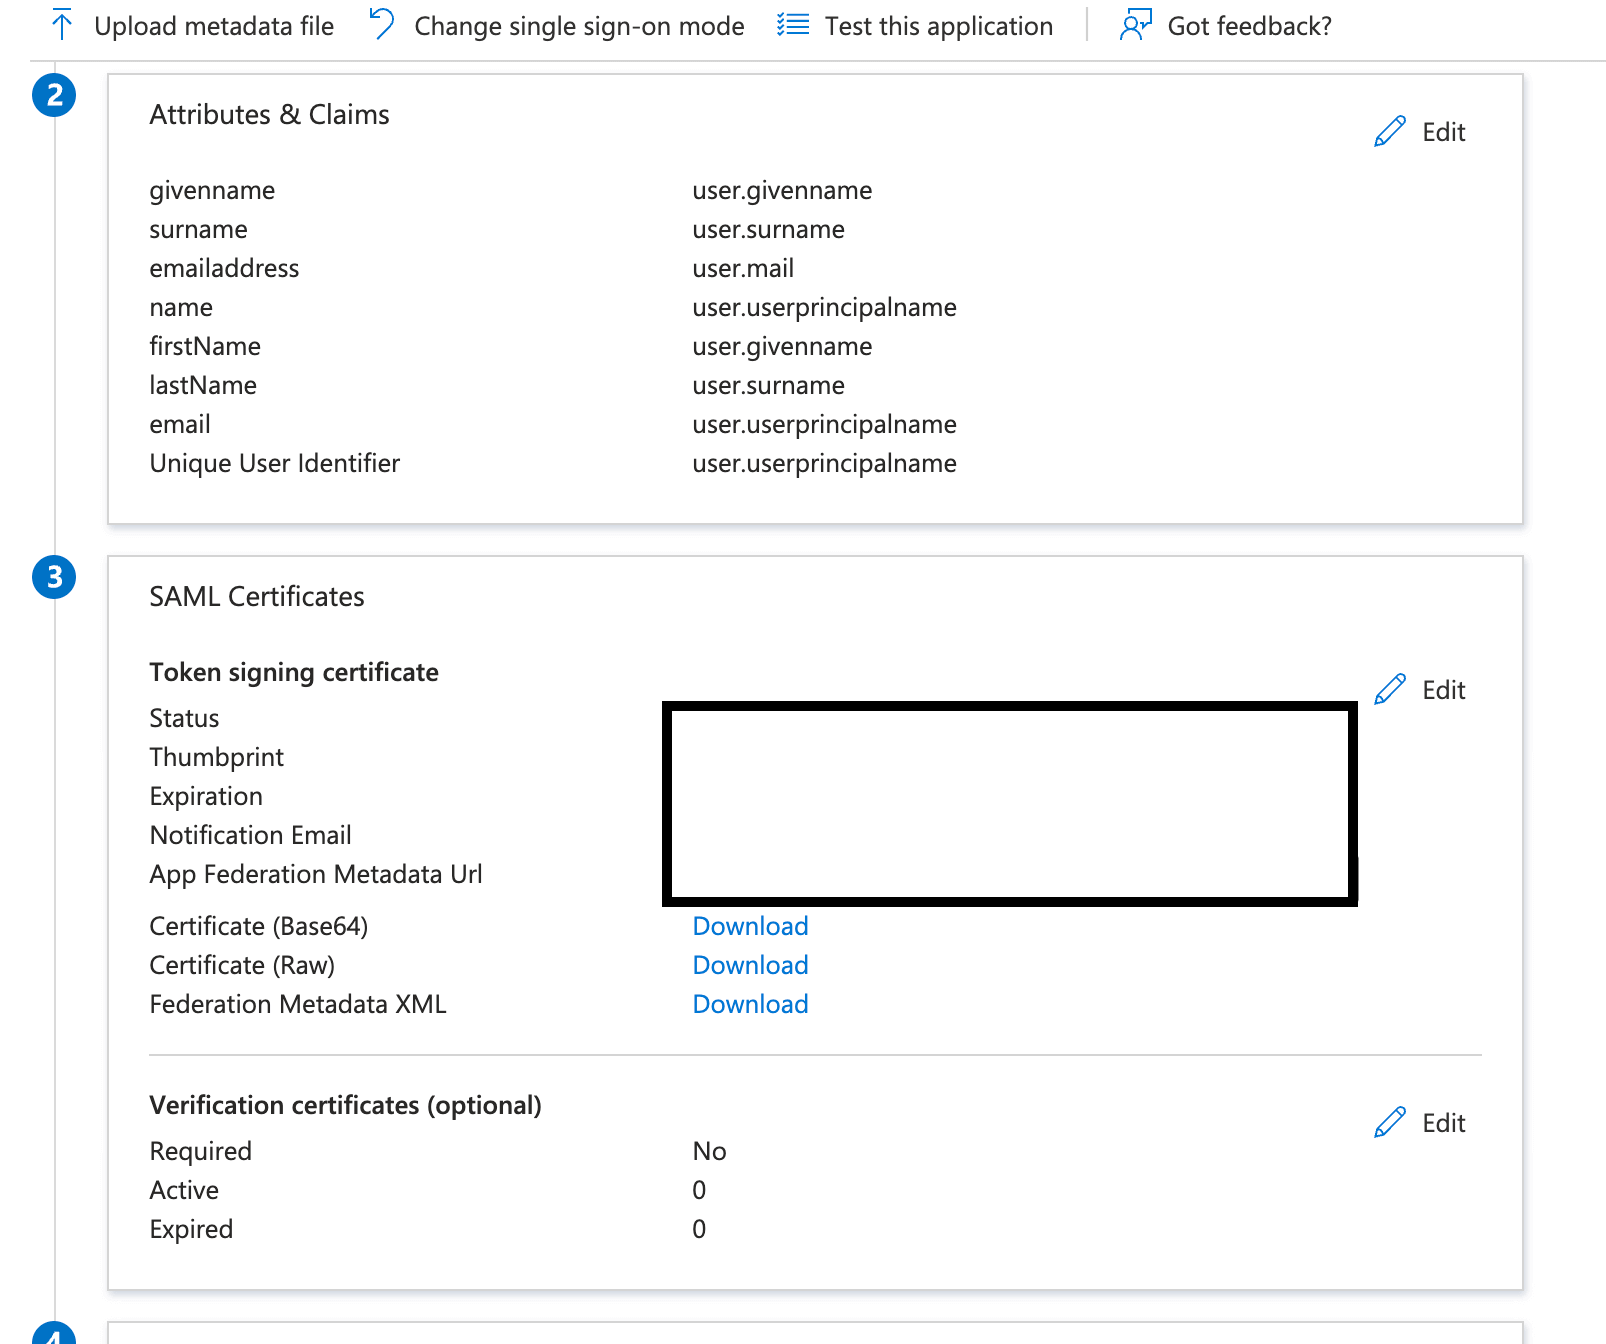 * **EXTERNAL\_SAML\_ACCESS\_TOKEN\_EXPIRY\_SECONDS**: This is duration of access token that will be asigned to user, so keep it as required.
***
* **EXTERNAL\_SAML\_ACCESS\_TOKEN\_EXPIRY\_SECONDS**: This is duration of access token that will be asigned to user, so keep it as required.
***