> ## Documentation Index
> Fetch the complete documentation index at: https://www.truefoundry.com/llms.txt
> Use this file to discover all available pages before exploring further.
# OIDC with Okta
> Configure OpenID Connect with Okta to enable single sign-on for TrueFoundry dashboard access.
## Configure OpenID Connect with Okta
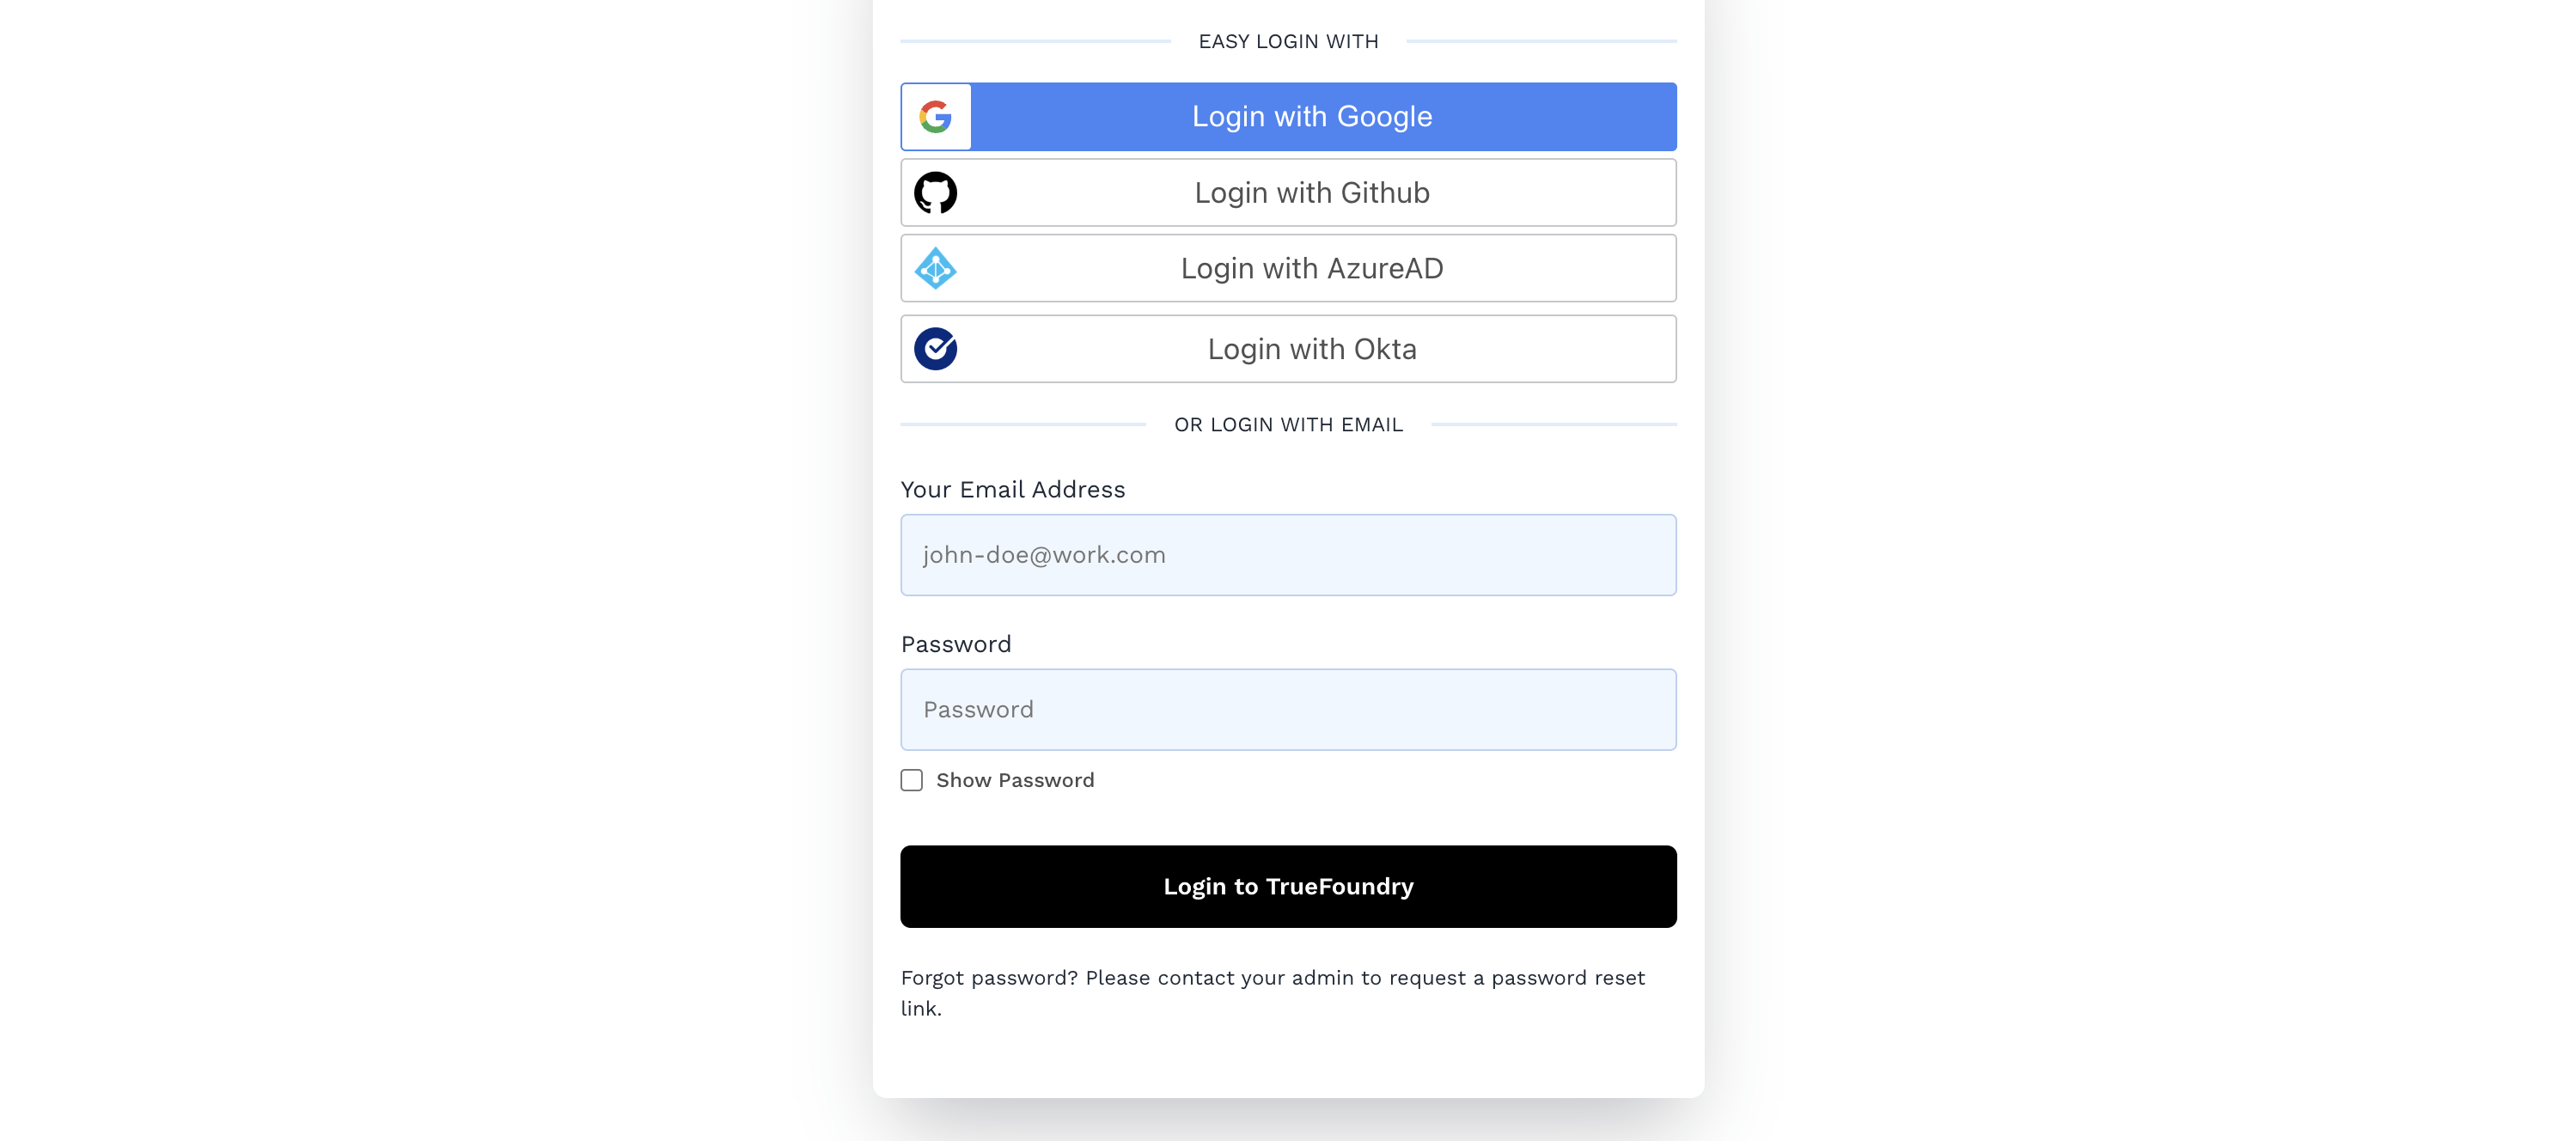
Once you have completed this configuration, you may enable an OpenID Connect "Login with Okta" button for TrueFoundry dashboard.
 ## Prerequisites
* A TrueFoundry instance running on a publicly accessible URL.
* An [Okta Workforce Identity Cloud Account](https://www.okta.com/) connected to a business email address. The [Okta Verify app](https://help.okta.com/en-us/Content/Topics/Mobile/okta-verify-overview.htm) if your Okta account is not configured to send SMS messages for 2FA.
## Okta Configuration
Log in to Okta and navigate to the **Admin** panel.
## Prerequisites
* A TrueFoundry instance running on a publicly accessible URL.
* An [Okta Workforce Identity Cloud Account](https://www.okta.com/) connected to a business email address. The [Okta Verify app](https://help.okta.com/en-us/Content/Topics/Mobile/okta-verify-overview.htm) if your Okta account is not configured to send SMS messages for 2FA.
## Okta Configuration
Log in to Okta and navigate to the **Admin** panel.
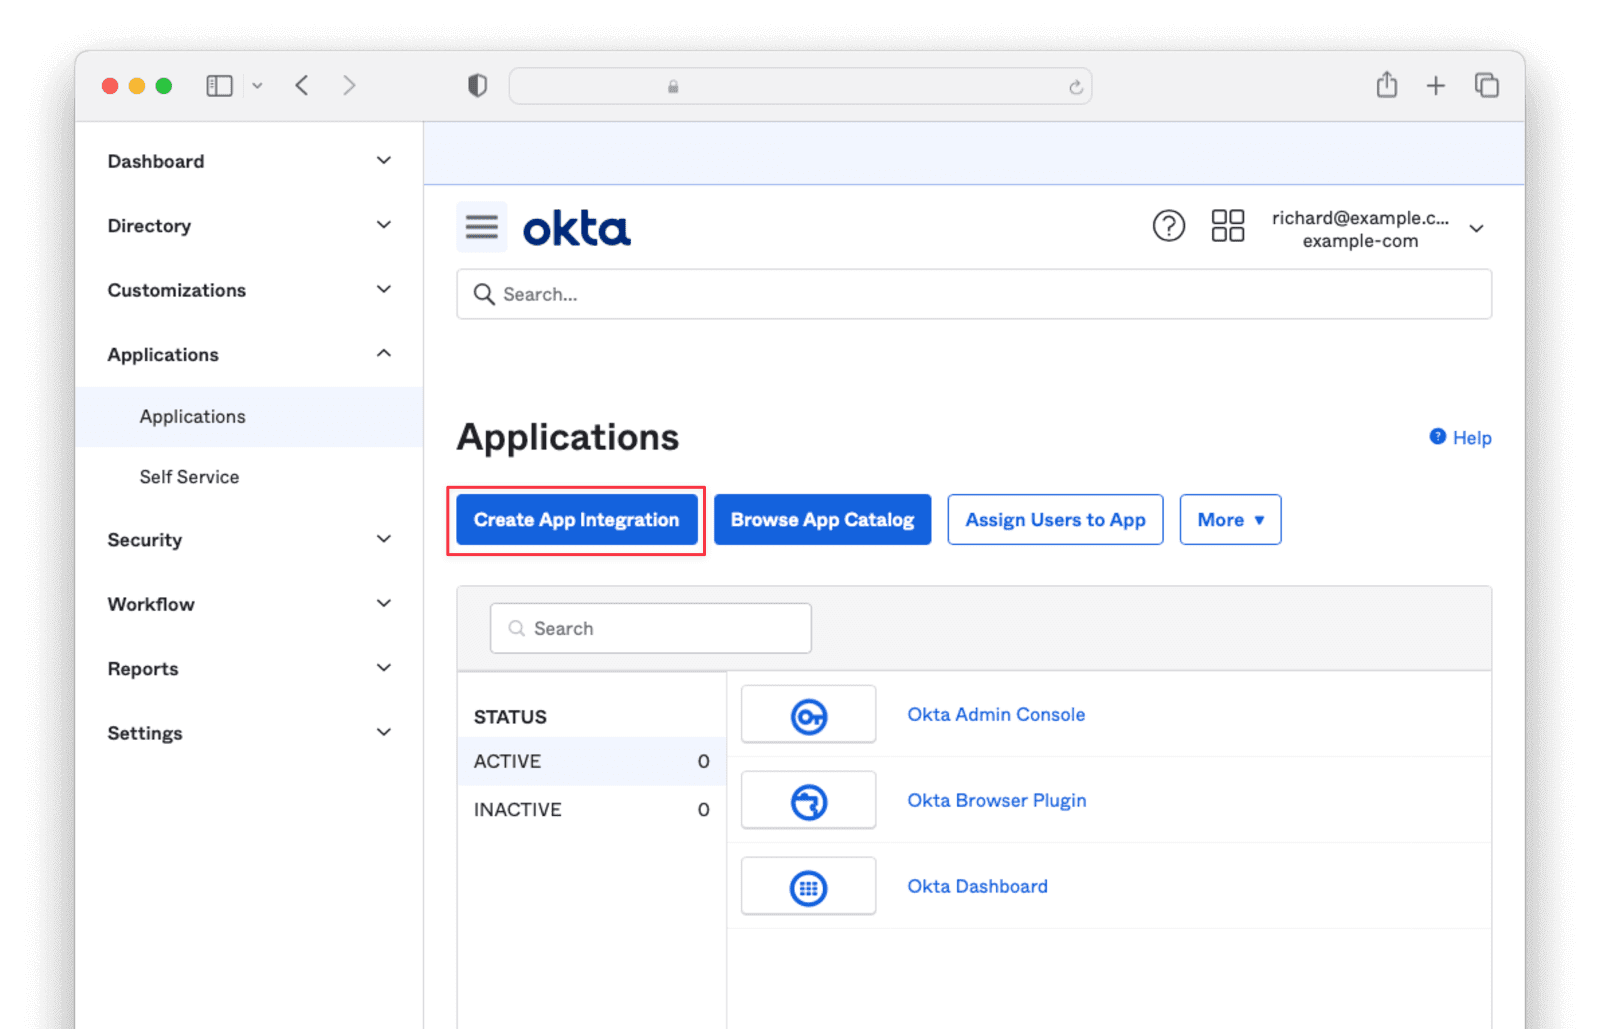
 Navigate to Applications -> Applications and click the `Create App Integration` button.
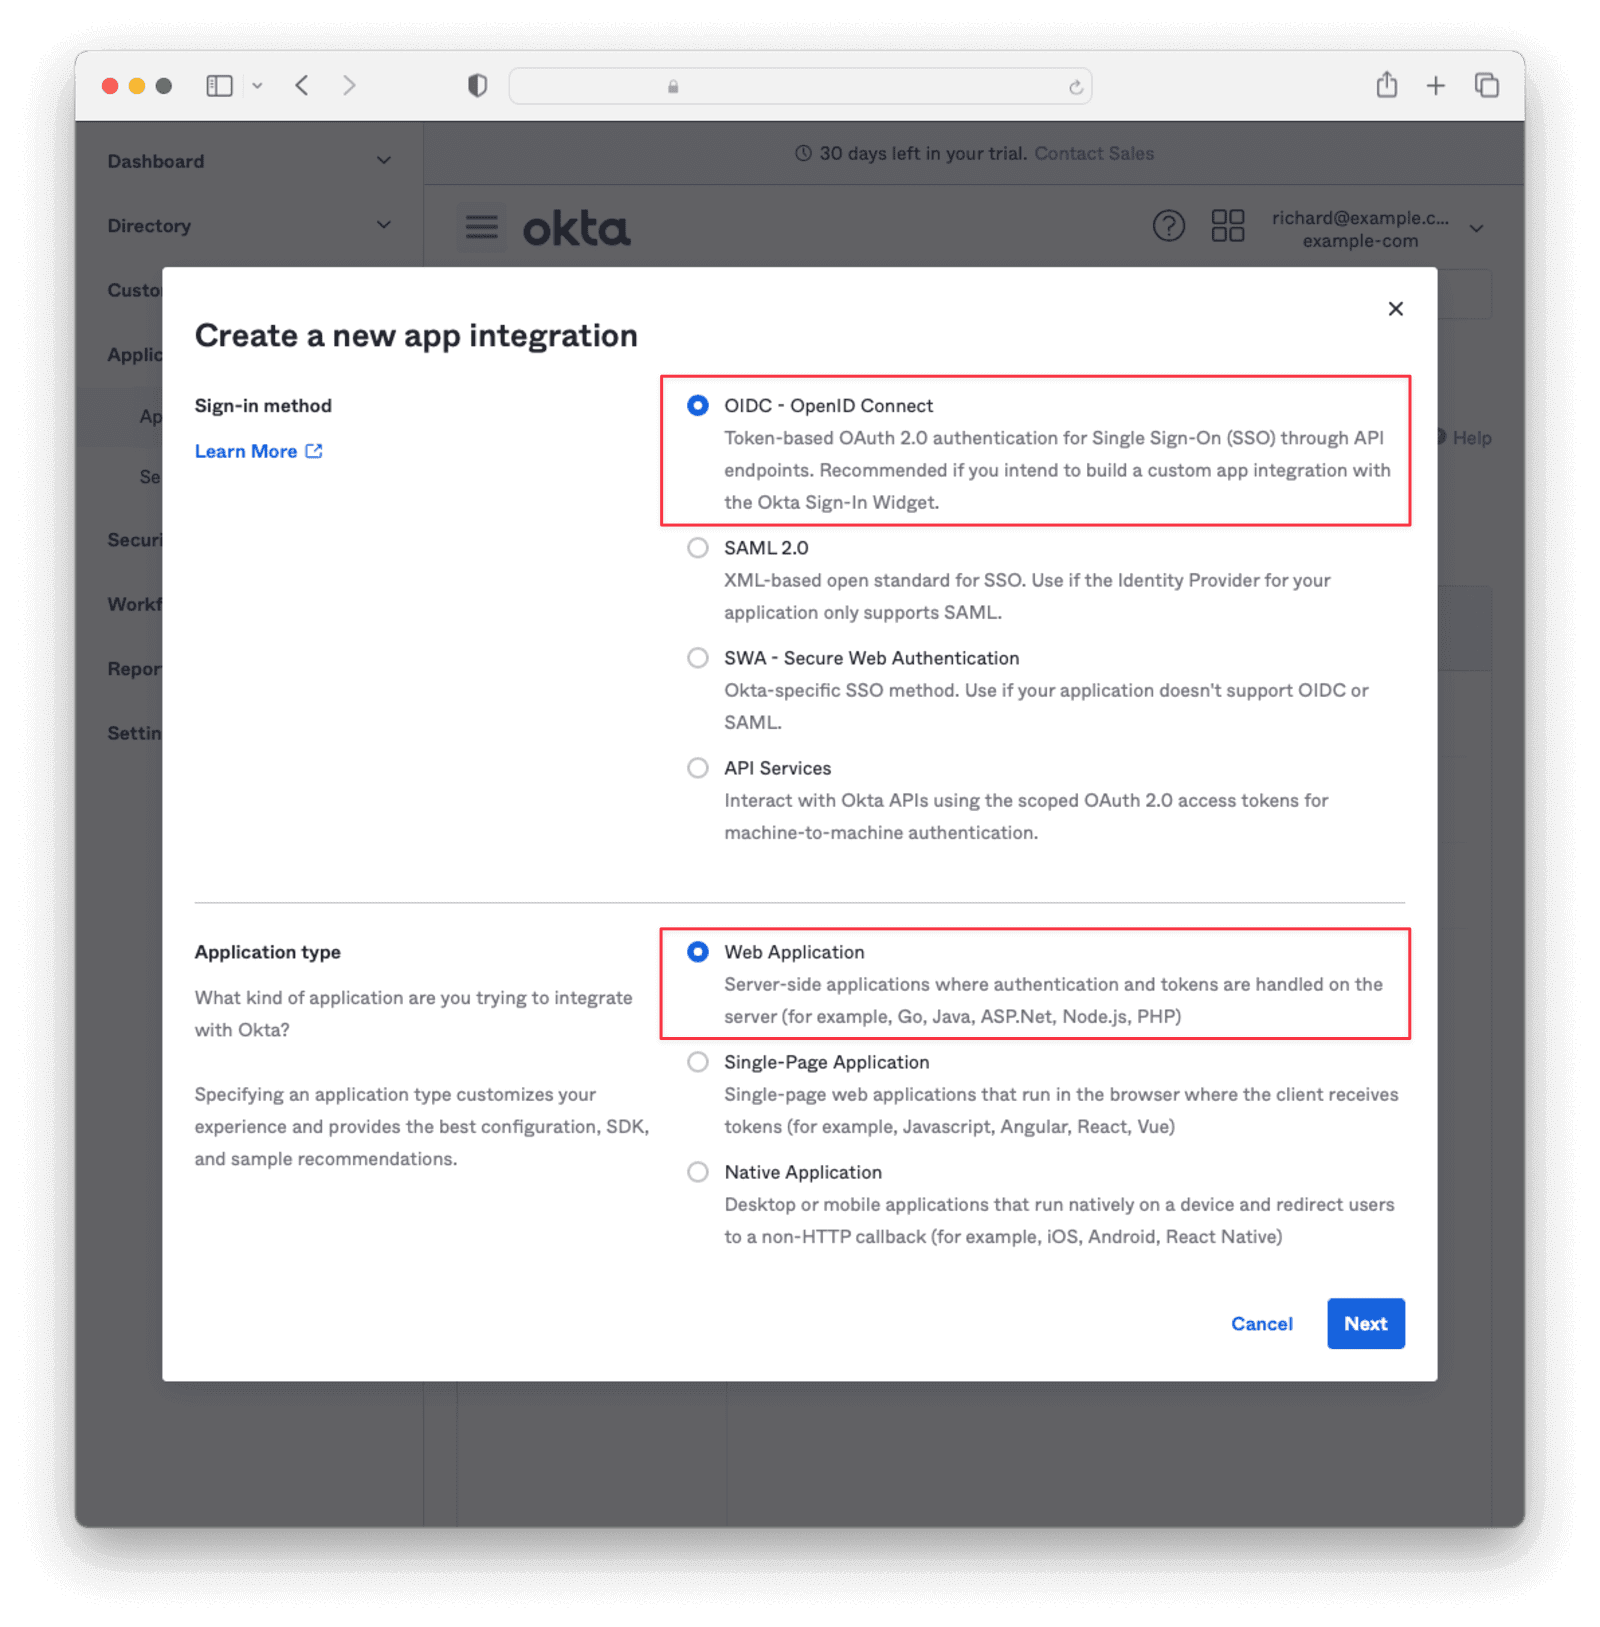
 Select OIDC - OpenID Connect and Web Application then click `Next`.
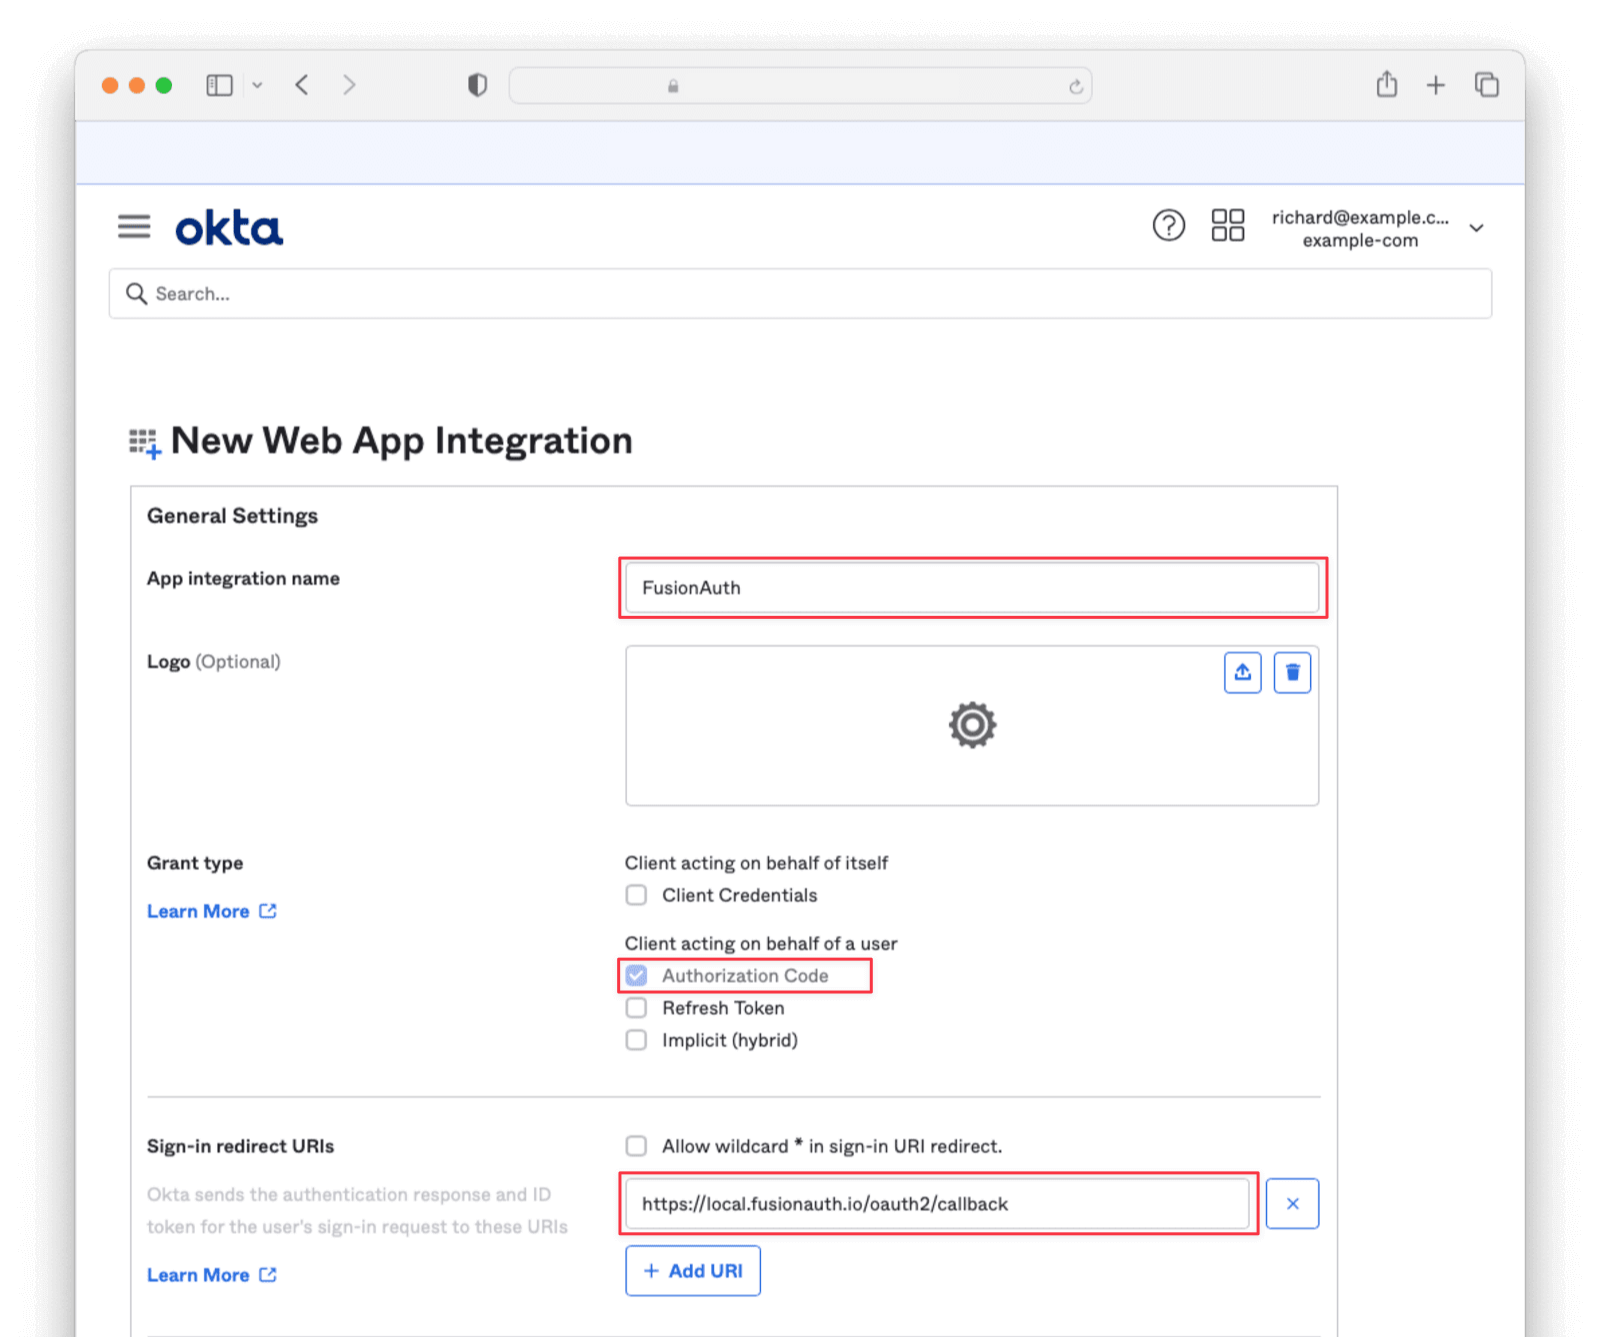
 Enter an App integration name and ensure that Authorization Code is checked. Then, supply a Sign-in redirect URI as `https://login.truefoundry.com/oauth2/callback`.
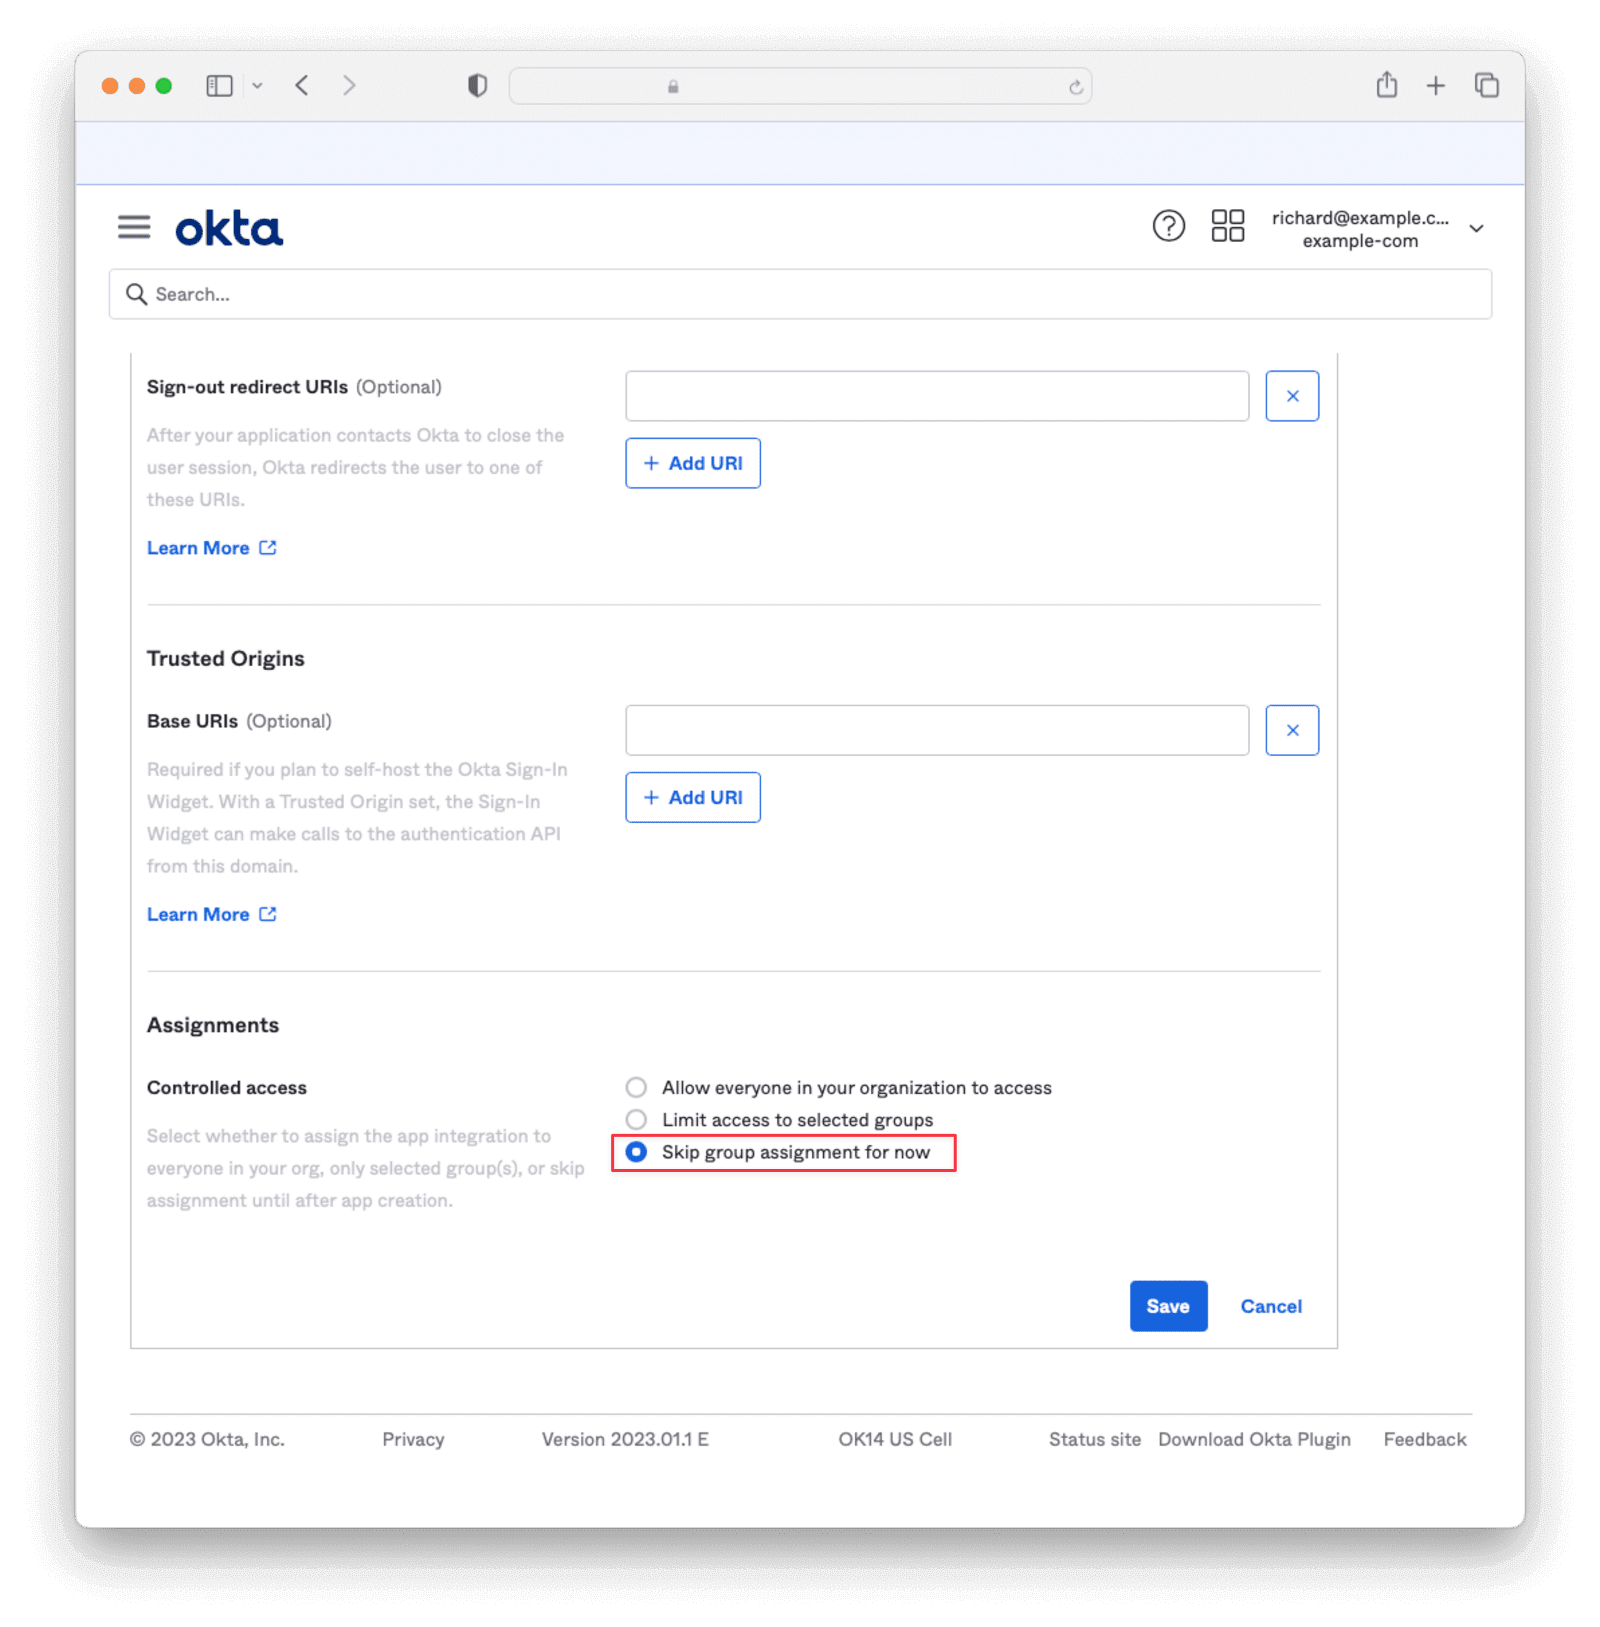
 Under the Assignments section, select Skip group assignment for now . Hit `Save`.
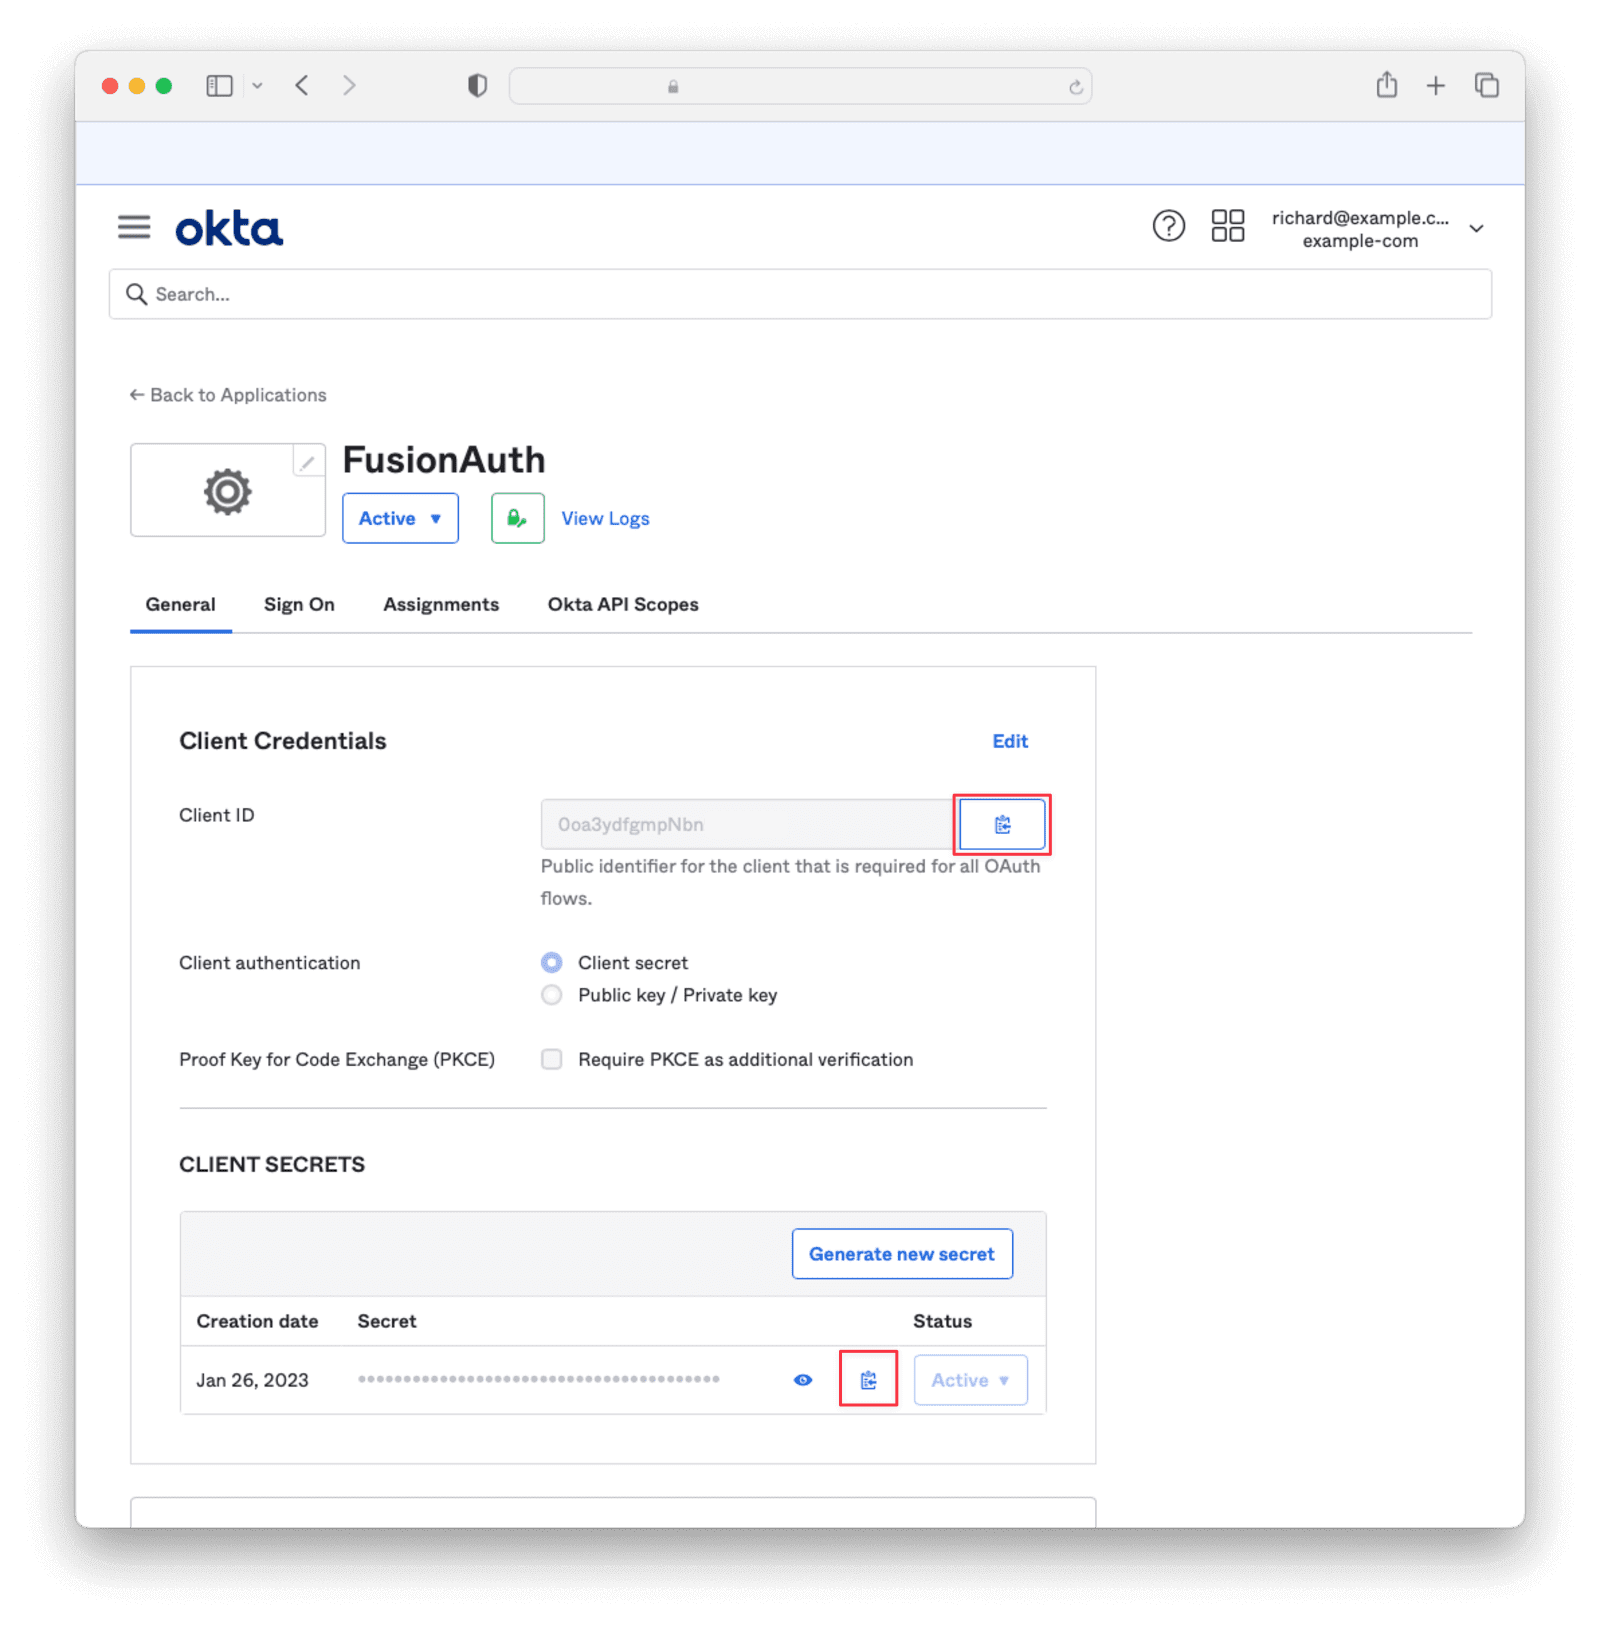
 Copy the **Client ID** and **Secret** into a text file for later use.
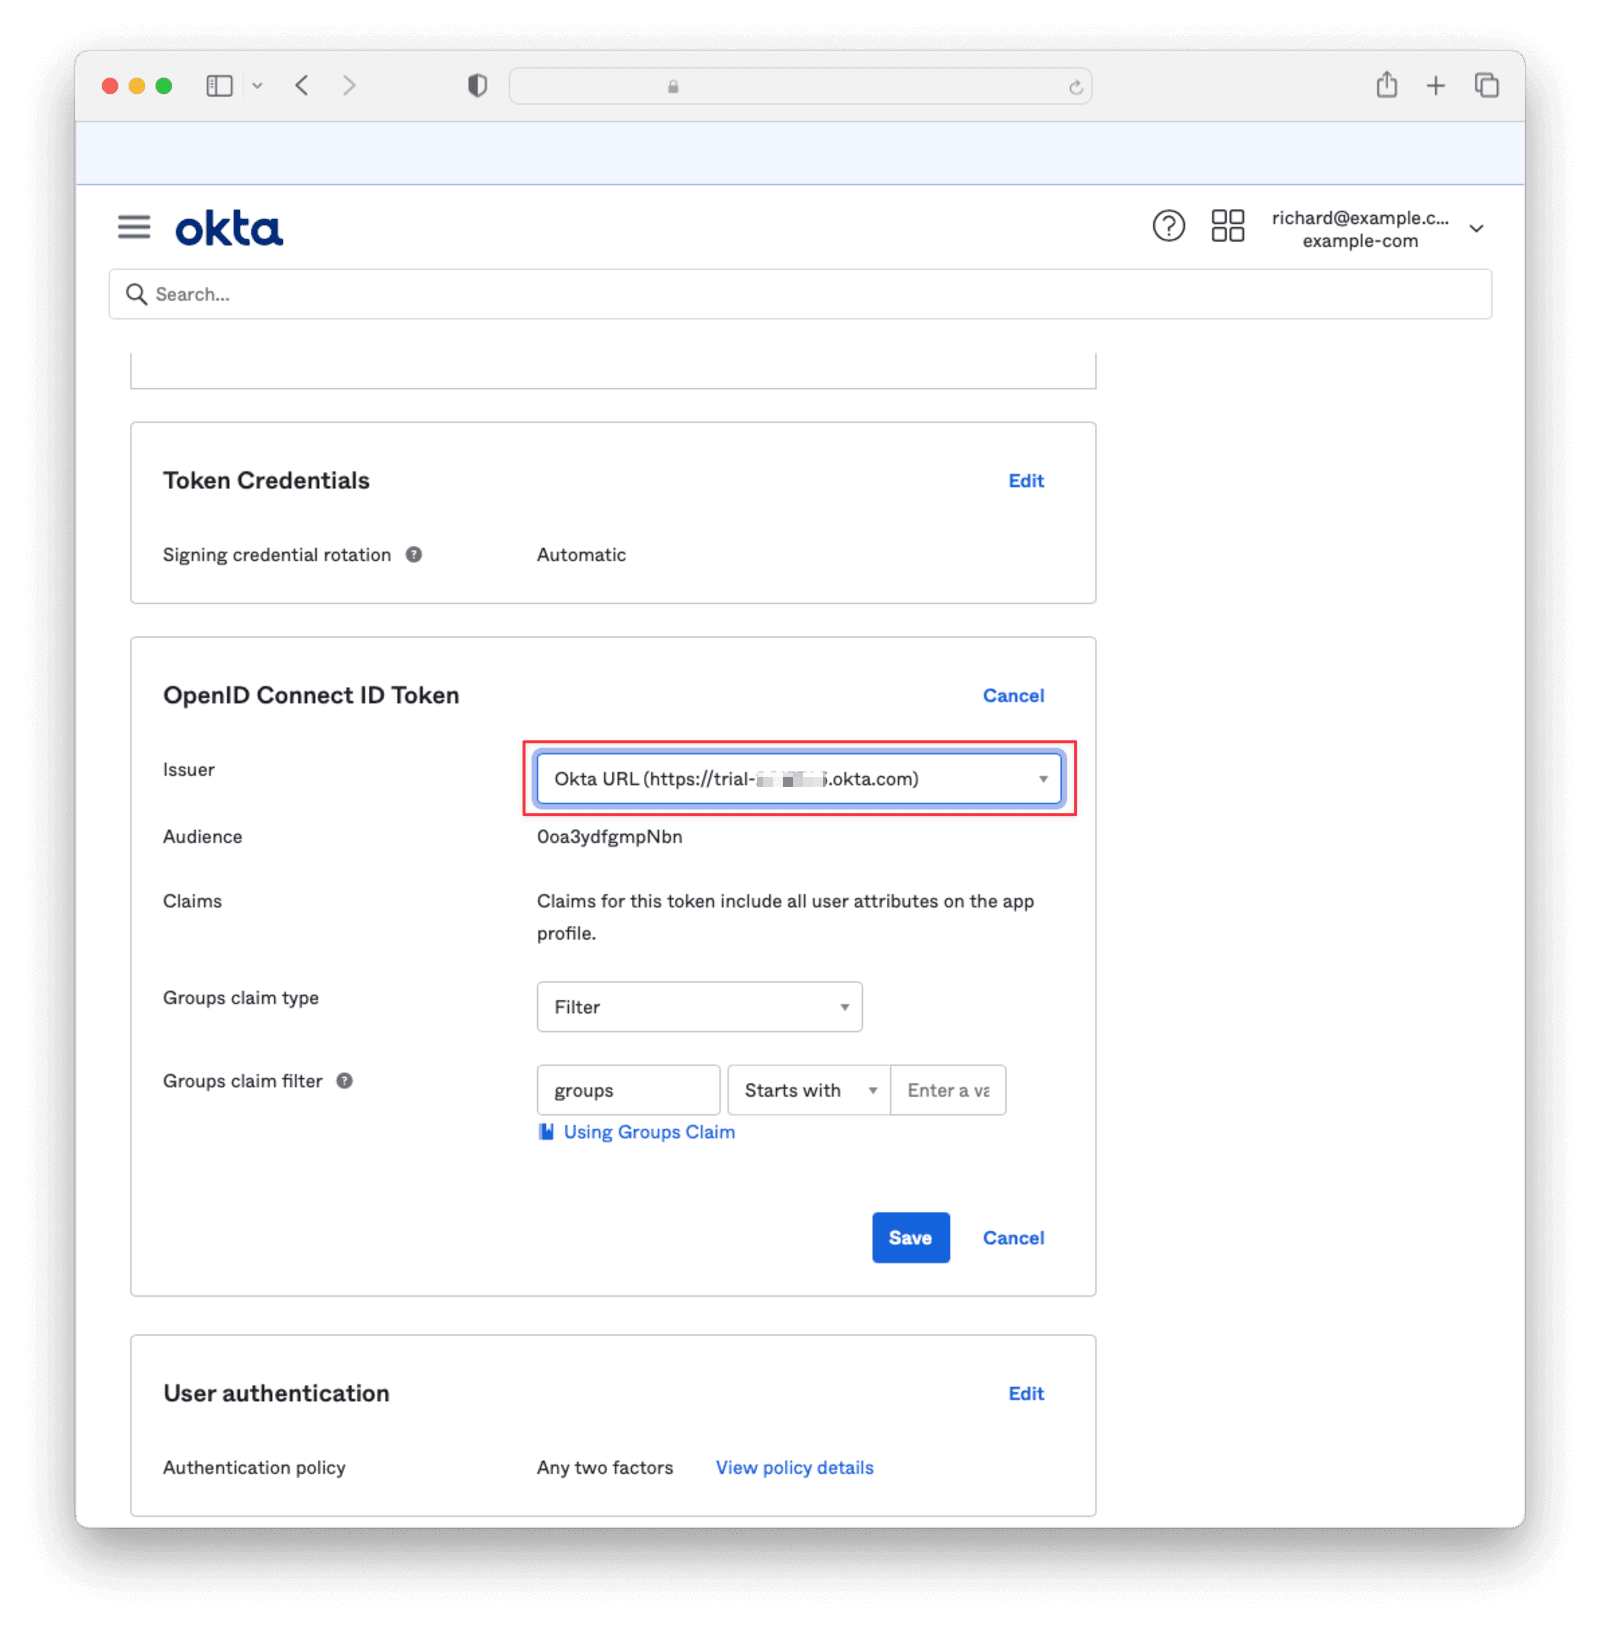
 Under **Sign On**, navigate to the section **OpenID Connect ID Token** and change the Issuer to use the `Okta URL`. Hit `Save` and copy this URL into a text file
 Navigate to **Directory -> People** and click on the username of the user you’d like to authenticate. Then click `Assign Applications` and hit the Assign button next to the one you created. Then click `Save and Go Back` and `Done`.
## Integrate with TrueFoundry
To integrate Okta with TrueFoundry, Add the following configuration to [TrueFoundry SSO settings](/docs/sso#integrate-sso-with-truefoundry)
* **Issuer URL**: Issuer of your Okta application. Example: `https://{your-okta-domain}.okta.com`
* **Client ID**: Application ID of your Okta application
* **Client Secret**: The secret value of the client secret created in the above step
***
Navigate to **Directory -> People** and click on the username of the user you’d like to authenticate. Then click `Assign Applications` and hit the Assign button next to the one you created. Then click `Save and Go Back` and `Done`.
## Integrate with TrueFoundry
To integrate Okta with TrueFoundry, Add the following configuration to [TrueFoundry SSO settings](/docs/sso#integrate-sso-with-truefoundry)
* **Issuer URL**: Issuer of your Okta application. Example: `https://{your-okta-domain}.okta.com`
* **Client ID**: Application ID of your Okta application
* **Client Secret**: The secret value of the client secret created in the above step
***