> ## Documentation Index
> Fetch the complete documentation index at: https://www.truefoundry.com/llms.txt
> Use this file to discover all available pages before exploring further.
# Secret Store
> Use secret stores to manage credentials securely across deployments.
This document covers the guide to integrating your secret store with TrueFoundry to let you store your secrets securely and then use them as environment variables in applications.
We support commonly used secret stores listed below:
1. [AWS SSM](/docs/integrations-secret-store#connect-aws-ssm-as-a-secret-store)
2. [Google GSM](/docs/integrations-secret-store#connect-google-secret-manager)
3. [HashiCorp Vault](/docs/hashicorp)
## Connect your Secret Store
To connect a new secret store, one needs to follow the following steps:
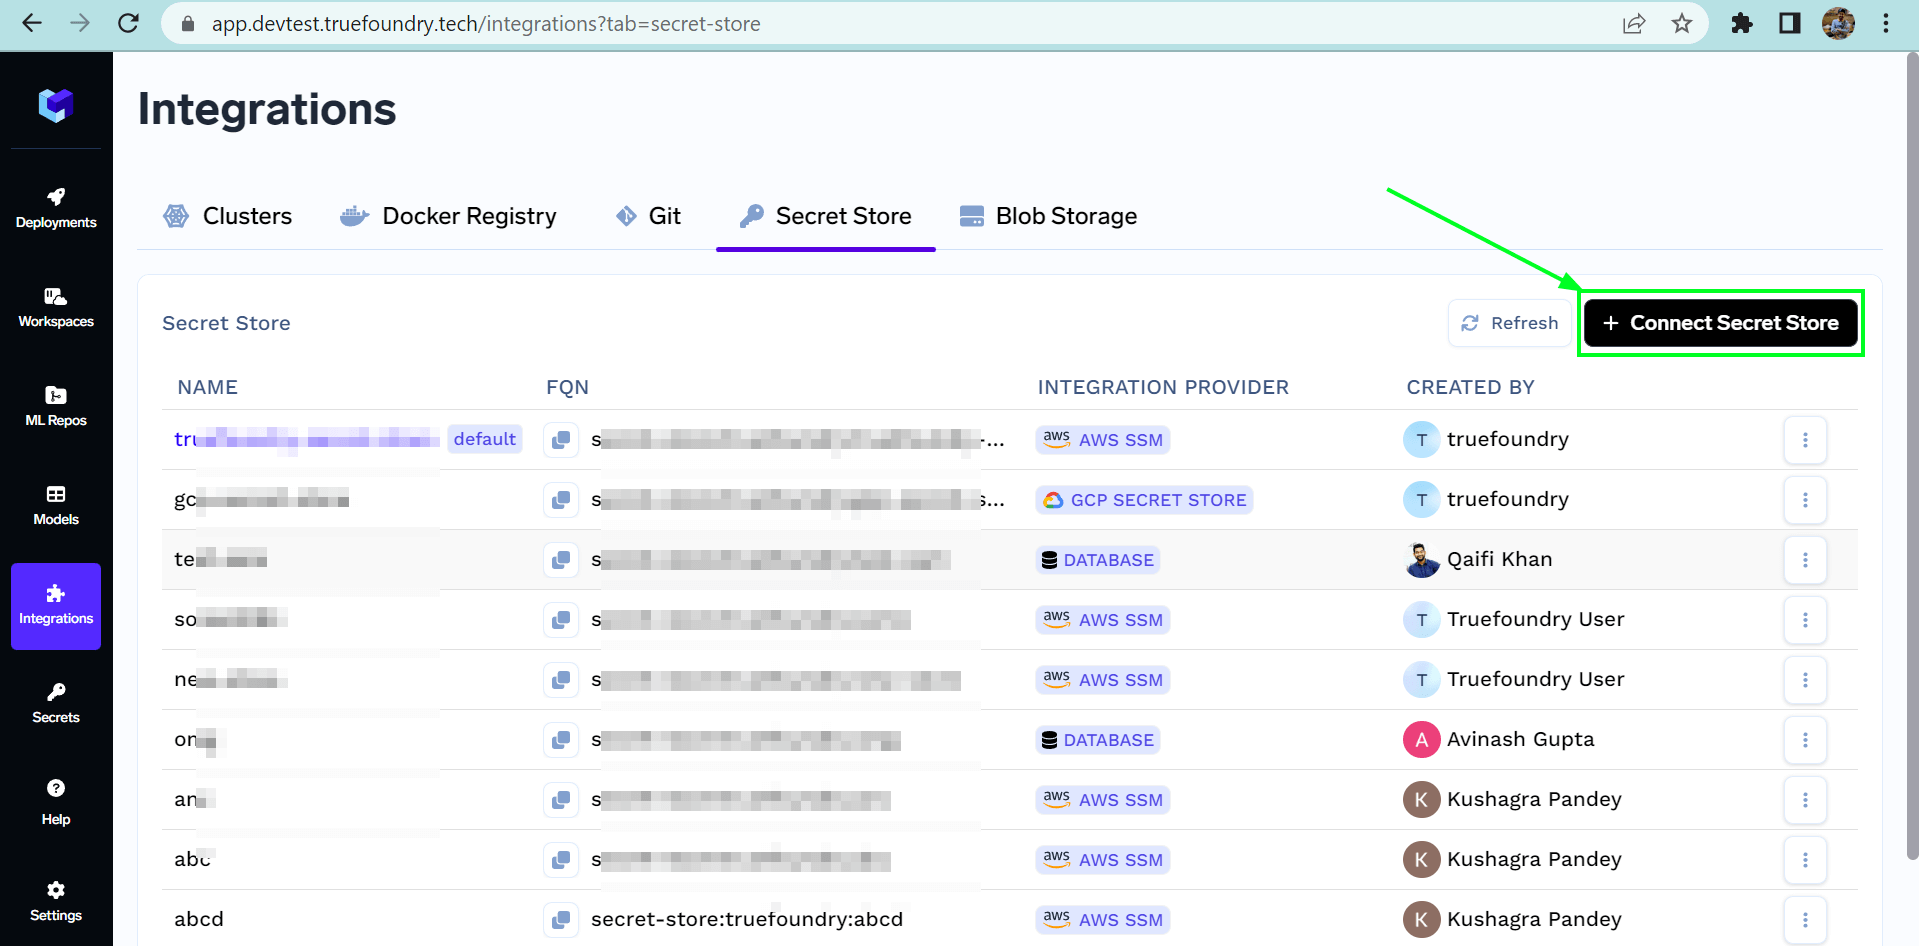
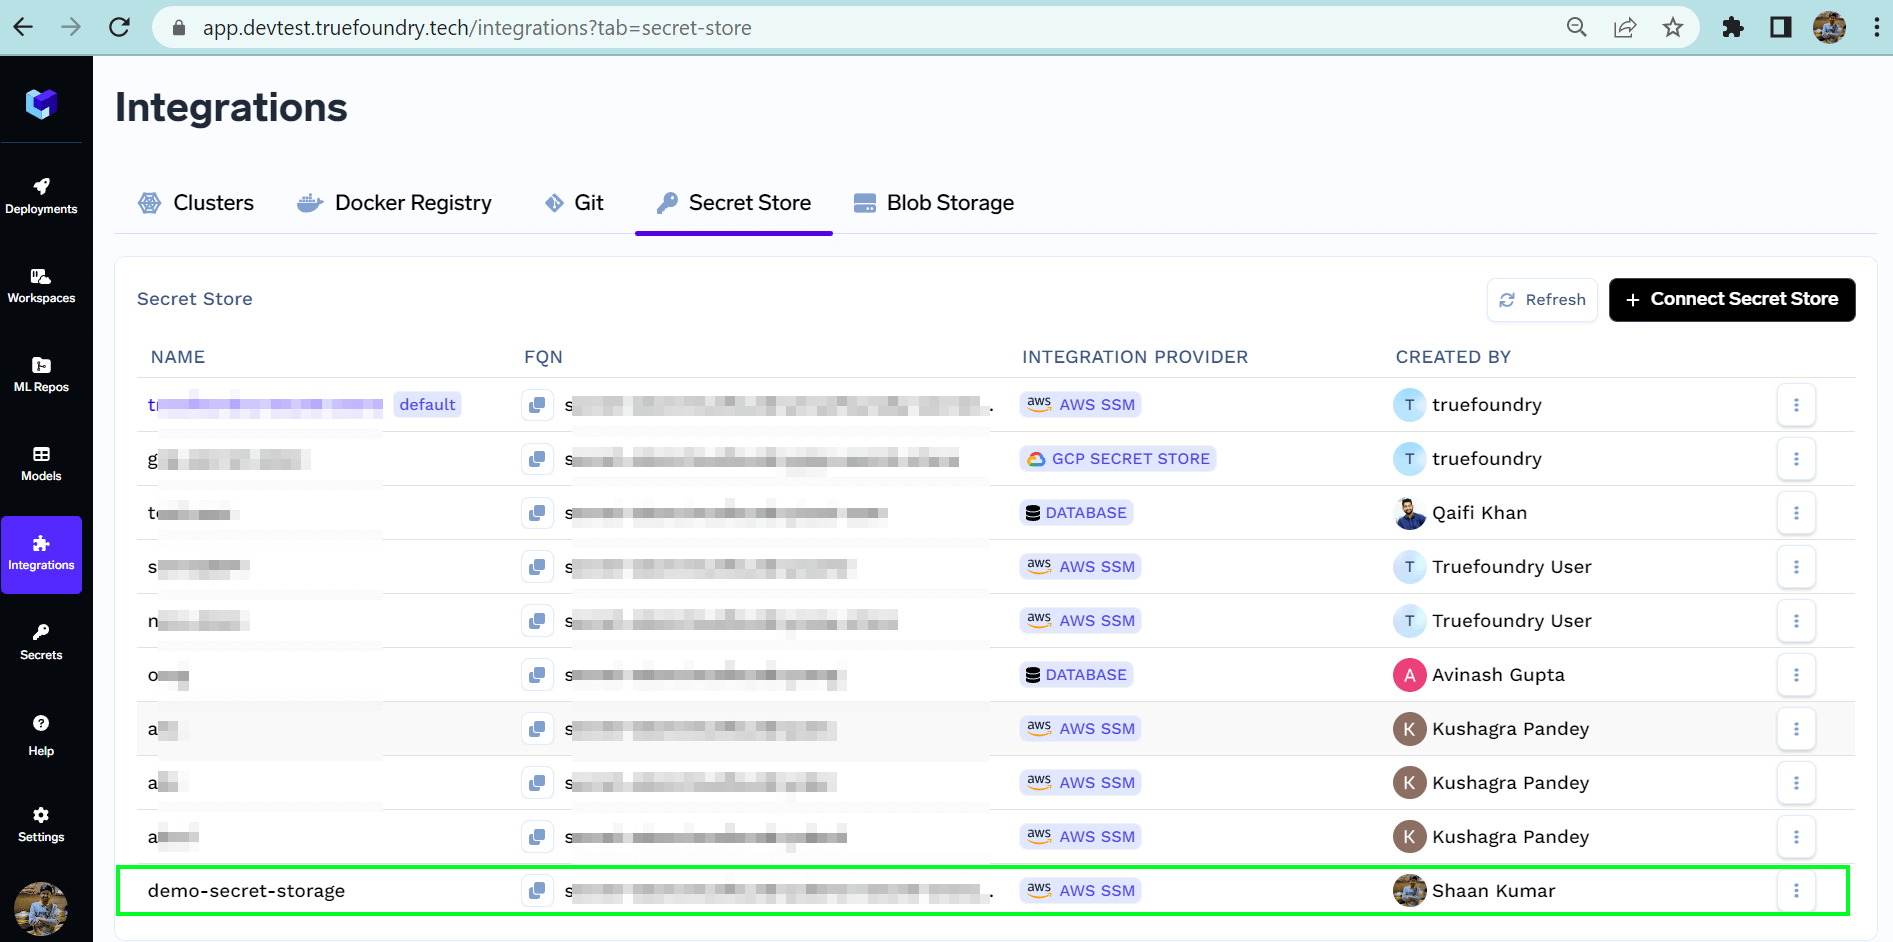
1. Navigate to the `Integrations` section of your truefoundry dashboard, and go to the `Secret Store` section.
2. Click on the `Connect Secret Store` button at the top right corner.
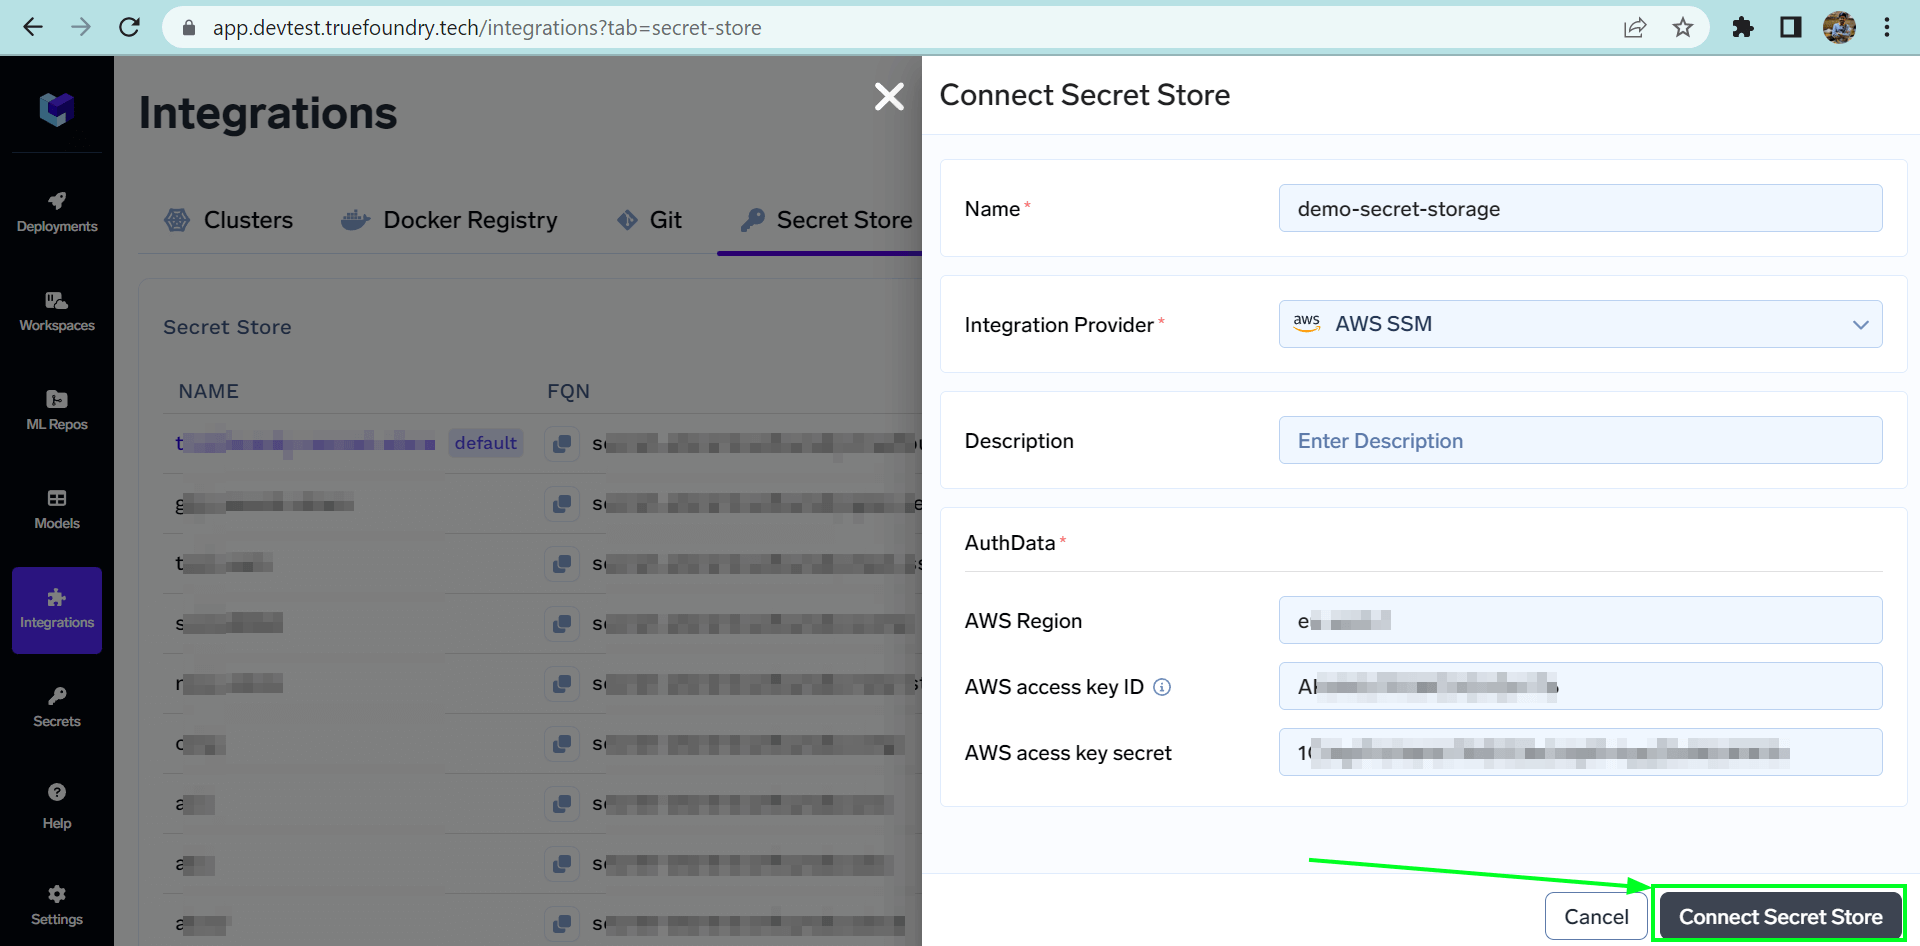
3. Now add the name of the secret store you want to connect. Select the Integration Provider.
4. Fill in the credentials according to the selected integration provider and Submit.
 ## Connect AWS SSM as a secret store
Follow the steps below to connect the secrets manager to TrueFoundry:
1. You might have the IAM role for truefoundry already created with the name - `tfy---platform-role-`, if not [create a new one](/docs/post-cluster-configurations#create-an-iam-role-with-assume-role). You can add the following permission to that role. You can also create a user with the permissions below, generate an access key and secret key and integrate the secret store via the access and secret keys.
```json JSON lines theme={"dark"}
{
"Sid": "SSM",
"Effect": "Allow",
"Action": [
"ssm:GetParameter",
"ssm:GetParameters",
"ssm:PutParameter",
"ssm:DeleteParameter",
"ssm:DeleteParameters",
"ssm:GetParameterHistory"
],
"Resource": ["arn:aws:ssm:AWS_REGION:ACCOUNT_ID:parameter/tfy-secret/*"]
}
```
2. Navigate to **Integrations > Secret Store** tab and click on **Connect Secret Store**
3. Fill in the IAM role with the correct AWS region in the form and Submit.
## Connect Google Secret Manager
Follow the steps below to connect your Google Secrets Manager to TrueFoundry:
1. Create an [IAM serviceaccount](https://cloud.google.com/iam/docs/service-accounts-create) named `tfy---platform-role`, if not created before.
1. Create a custom IAM role with the following permissions:
```javascript json lines theme={"dark"}
[
"secretmanager.secrets.get",
"secretmanager.secrets.list",
"secretmanager.secrets.create",
"secretmanager.secrets.delete",
"secretmanager.secrets.update",
"secretmanager.versions.access",
"resourcemanager.projects.get",
];
```
1. Navigate to IAM & Admin -> Roles.
2. Click + CREATE ROLE.
3. Enter the name a description.
4. Click ADD PERMISSIONS and add the permissions listed above
5. Click CREATE.
2. Attach the custom IAM role to the service account
1. In the IAM section, locate the service account created ealier.
2. Click the Edit icon next to the service account.
3. Click ADD ROLE and select the custom role you created
4. Next to the Role, click on ADD IAM CONDITION
5. Type a title, under CONDITION EDITOR tab, type in this condition\
`resource.name.startsWith('projects//secrets/tfy')`
6. Click on SAVE.
2. Once the *IAM serviceaccount* is created, make sure to [create a key](https://cloud.google.com/iam/docs/keys-create-delete#creating) in JSON format.
3. Navigate to **Integrations > Secret Store** tab and click on **Connect Secret Store**
4. Paste the GCP service account `keyfile.json` and Submit.
## Connect HashiCorp Vault as a Secret Store
Follow the steps in our [HashiCorp Vault integration guide](/docs/hashicorp) to set up HashiCorp Vault as your secret store.
## Connect AWS SSM as a secret store
Follow the steps below to connect the secrets manager to TrueFoundry:
1. You might have the IAM role for truefoundry already created with the name - `tfy---platform-role-`, if not [create a new one](/docs/post-cluster-configurations#create-an-iam-role-with-assume-role). You can add the following permission to that role. You can also create a user with the permissions below, generate an access key and secret key and integrate the secret store via the access and secret keys.
```json JSON lines theme={"dark"}
{
"Sid": "SSM",
"Effect": "Allow",
"Action": [
"ssm:GetParameter",
"ssm:GetParameters",
"ssm:PutParameter",
"ssm:DeleteParameter",
"ssm:DeleteParameters",
"ssm:GetParameterHistory"
],
"Resource": ["arn:aws:ssm:AWS_REGION:ACCOUNT_ID:parameter/tfy-secret/*"]
}
```
2. Navigate to **Integrations > Secret Store** tab and click on **Connect Secret Store**
3. Fill in the IAM role with the correct AWS region in the form and Submit.
## Connect Google Secret Manager
Follow the steps below to connect your Google Secrets Manager to TrueFoundry:
1. Create an [IAM serviceaccount](https://cloud.google.com/iam/docs/service-accounts-create) named `tfy---platform-role`, if not created before.
1. Create a custom IAM role with the following permissions:
```javascript json lines theme={"dark"}
[
"secretmanager.secrets.get",
"secretmanager.secrets.list",
"secretmanager.secrets.create",
"secretmanager.secrets.delete",
"secretmanager.secrets.update",
"secretmanager.versions.access",
"resourcemanager.projects.get",
];
```
1. Navigate to IAM & Admin -> Roles.
2. Click + CREATE ROLE.
3. Enter the name a description.
4. Click ADD PERMISSIONS and add the permissions listed above
5. Click CREATE.
2. Attach the custom IAM role to the service account
1. In the IAM section, locate the service account created ealier.
2. Click the Edit icon next to the service account.
3. Click ADD ROLE and select the custom role you created
4. Next to the Role, click on ADD IAM CONDITION
5. Type a title, under CONDITION EDITOR tab, type in this condition\
`resource.name.startsWith('projects//secrets/tfy')`
6. Click on SAVE.
2. Once the *IAM serviceaccount* is created, make sure to [create a key](https://cloud.google.com/iam/docs/keys-create-delete#creating) in JSON format.
3. Navigate to **Integrations > Secret Store** tab and click on **Connect Secret Store**
4. Paste the GCP service account `keyfile.json` and Submit.
## Connect HashiCorp Vault as a Secret Store
Follow the steps in our [HashiCorp Vault integration guide](/docs/hashicorp) to set up HashiCorp Vault as your secret store.