> ## Documentation Index
> Fetch the complete documentation index at: https://www.truefoundry.com/llms.txt
> Use this file to discover all available pages before exploring further.
# Blob Storage
> Integrate blob storage providers like AWS S3, Google GCS, and Azure Blob with TrueFoundry for artifacts and models.
This document covers the guide to integrating your blob storage with TrueFoundry to let you store your artifacts and models.
We support commonly used blob storage listed below:
1. [AWS S3](/docs/integrations-blob-storage#connect-aws-s3-storage)
2. [Google GCS](/docs/integrations-blob-storage#connect-google-gcs)
3. [Azure Blob Storage](/docs/integrations-blob-storage#connect-azure-blob-storage)
## Connect Blob Storage
To connect a new storage, one needs to follow the following steps:
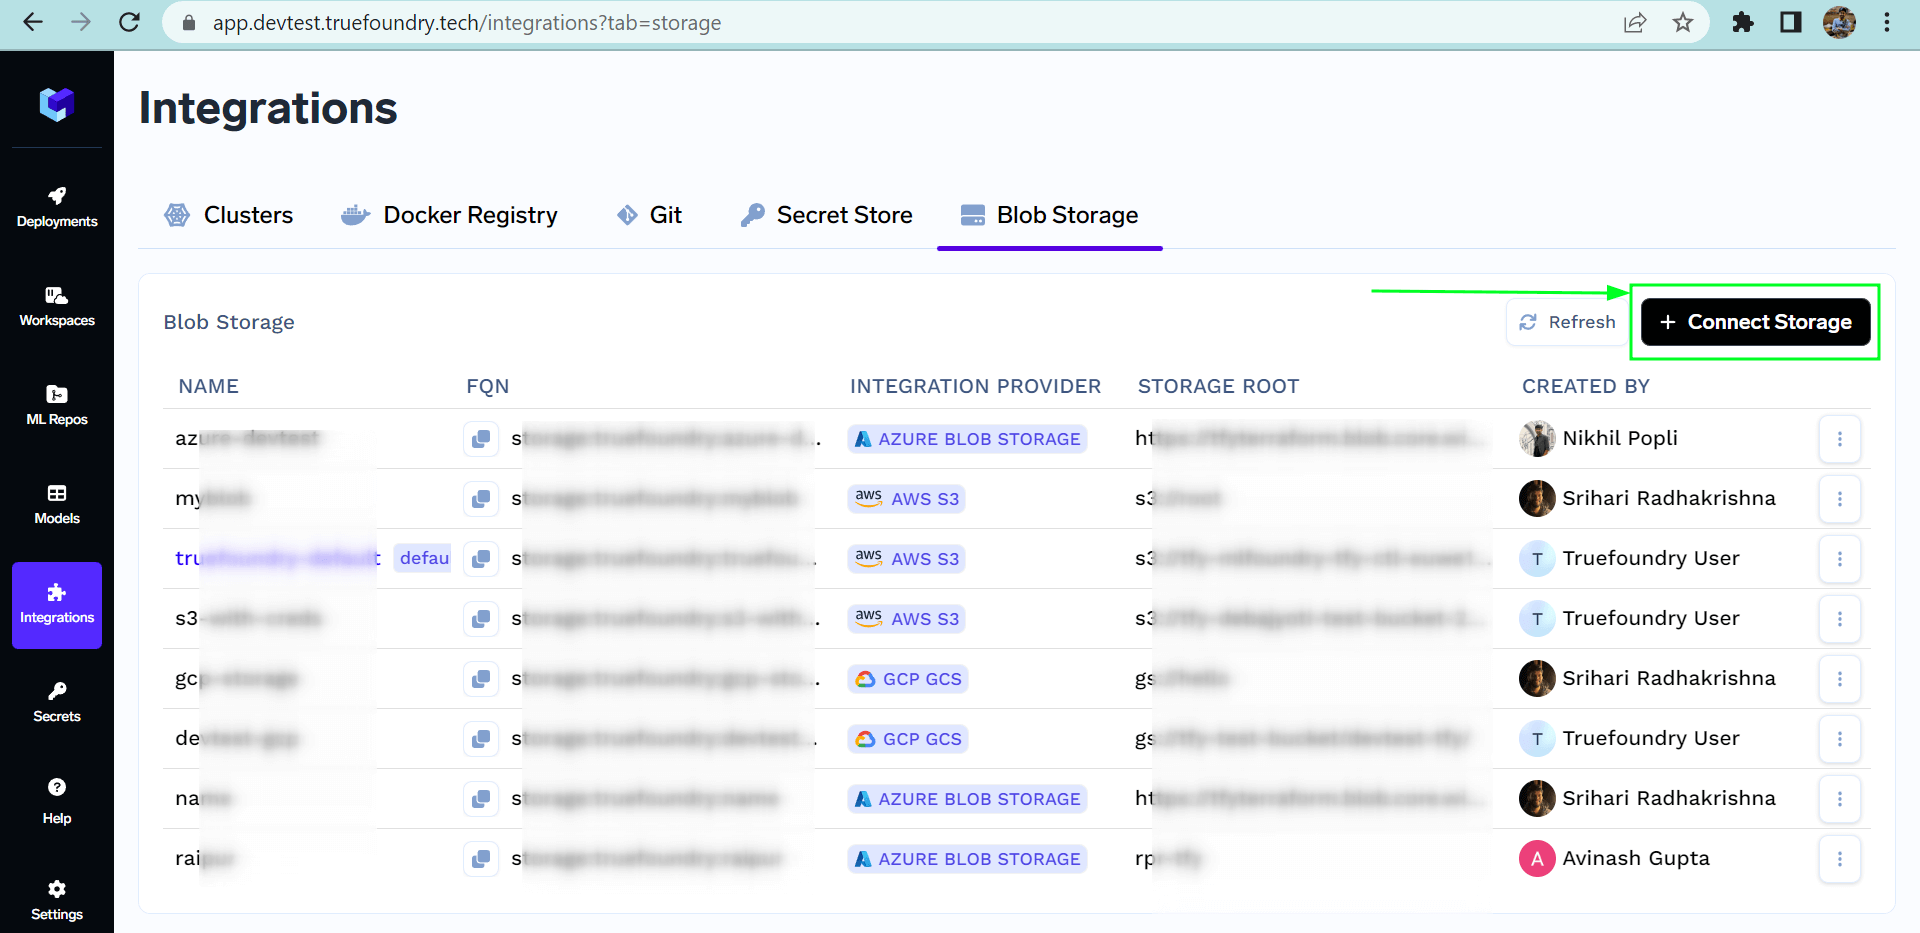
1. Navigate to the `Integrations` page and go to the `Blob Storage` tab.
2. Click on the `Connect Storage` button at the top right corner.
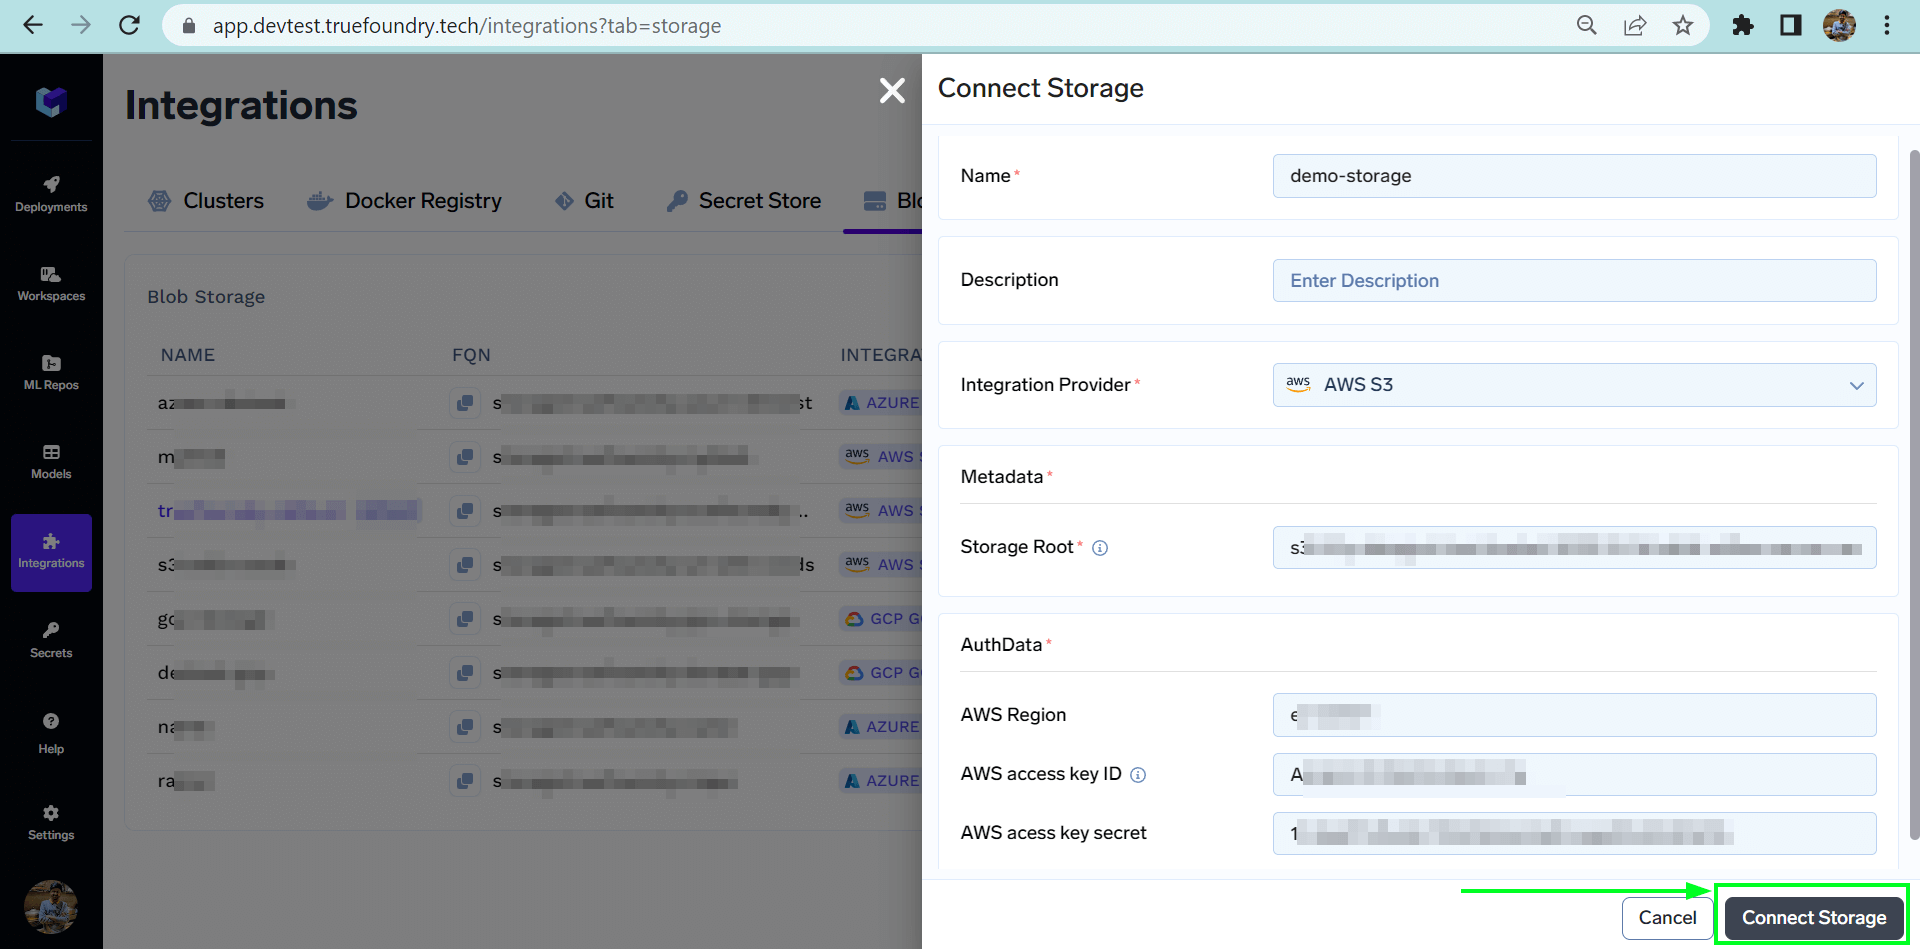
3. Now add the name of the storage you want to connect. Select the Integration Provider.
4. Fill in the credentials and storage root according to the selected integration provider.
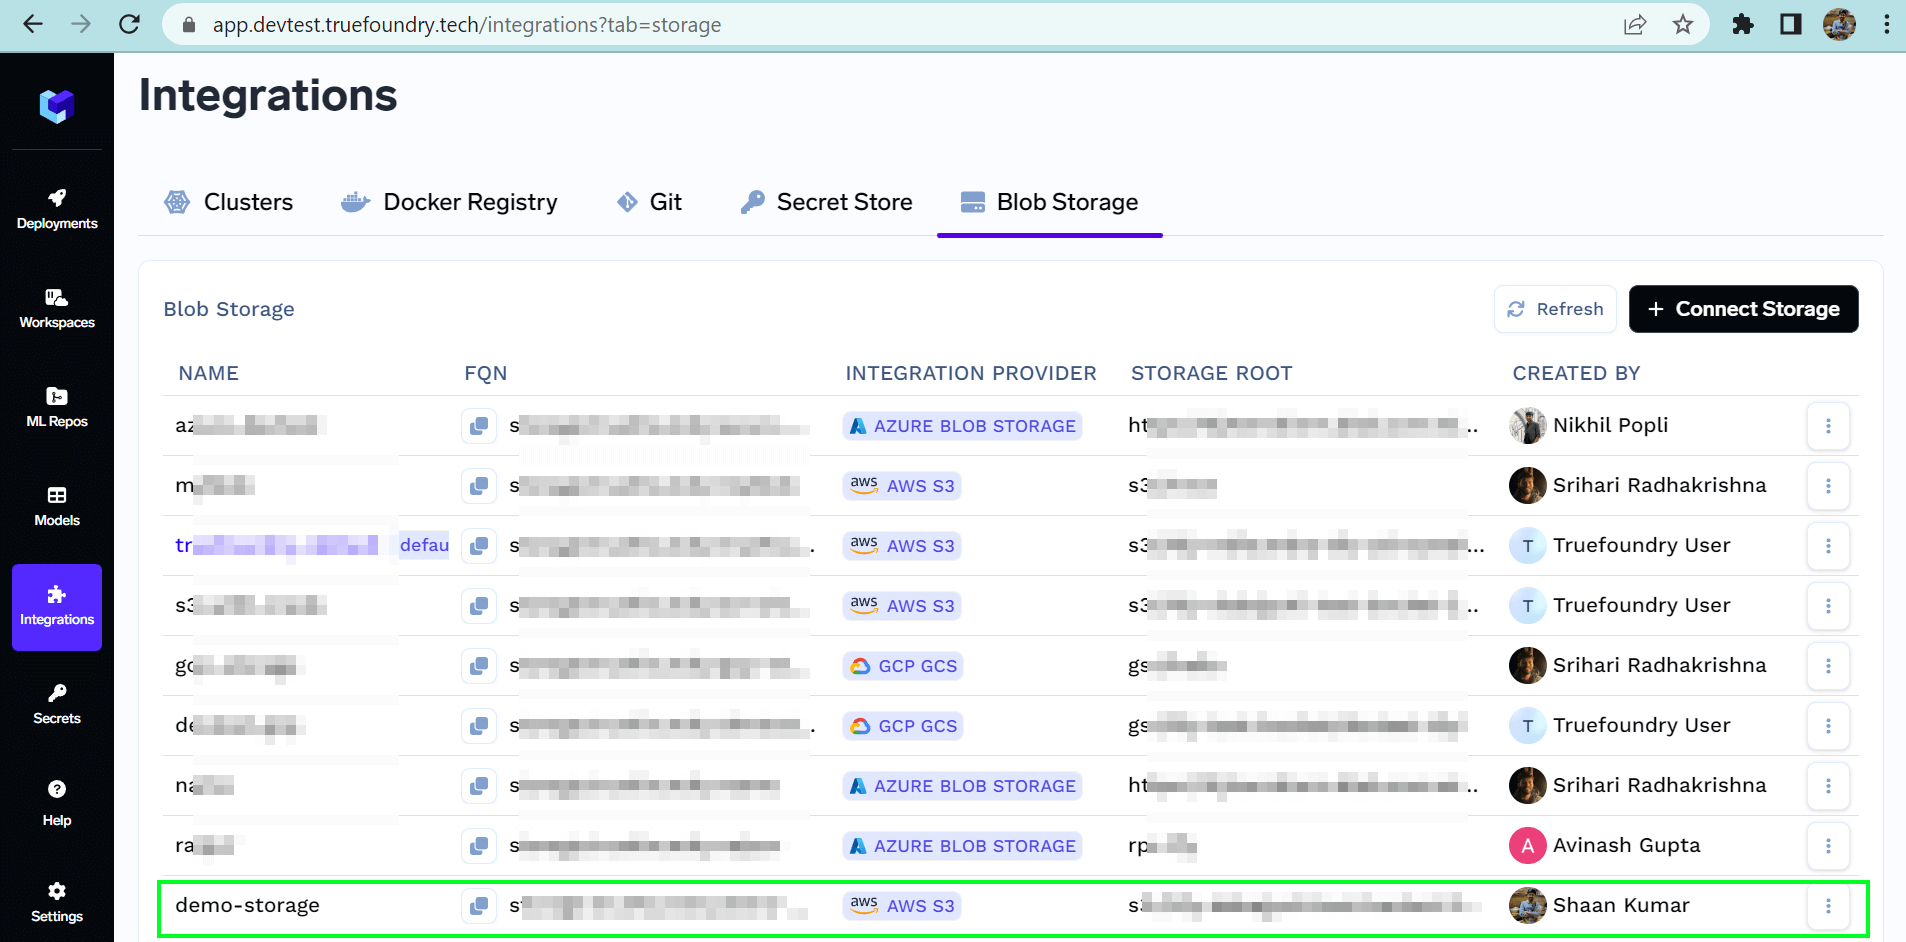
 List of all Storage
 ## Connect AWS S3 storage
Follow the steps below to connect S3 storage to TrueFoundry:
1. Create a [S3 bucket](https://docs.aws.amazon.com/AmazonS3/latest/userguide/creating-bucket.html).
* Make sure the bucket has lifecycle configuration to [abort multipart upload](https://docs.aws.amazon.com/AmazonS3/latest/userguide/mpu-abort-incomplete-mpu-lifecycle-config.html) set for 7 days.
* Make sure [CORS](https://docs.aws.amazon.com/AmazonS3/latest/userguide/enabling-cors-examples.html) is applied on the bucket with the below configuration
```json JSON lines theme={"dark"}
[
{
"AllowedHeaders": ["*"],
"AllowedMethods": ["GET", "POST", "PUT"],
"AllowedOrigins": ["*"],
"ExposeHeaders": ["ETag"],
"MaxAgeSeconds": 3000
}
]
```
2. You might have the IAM role for truefoundry already created with the name - `tfy---platform-role-`, if not [create a new one](/docs/post-cluster-configurations#create-an-iam-role-with-assume-role). You can add the following permission to that role. You can also create a user with the permissions below, generate an access key and secret key and integrate the blob storage via the access and secret keys.
```json JSON lines theme={"dark"}
{
"Sid": "S3",
"Effect": "Allow",
"Action": ["s3:*"],
"Resource": [
"arn:aws:s3:::",
"arn:aws:s3:::/*"
]
}
```
3. In the region, please provide the region of the blob storage e.g. `eu-west-1`
4. Navigate to **Integrations > Blob Storage** tab and then add your S3 by clicking **Connect Storage**.
## Connect Google GCS
Follow the steps below to connect GCS storage to TrueFoundry:
1. Create a [GCP bucket](https://cloud.google.com/storage/docs/creating-buckets).
* Make sure to add the lifecycle configurations on the bucket to delete multipart upload after 7 days.
* For this go to GCP bucket -> Lifecycle -> Add a rule
* Select `Delete multi-part upload` for 7 days
2. We also need to add the CORS policy to the GCP bucket. Right now adding the CORS policy to the GCP bucket is not possible through the console so for this, we will use *gsutil*
1. Create a file called `cors.json` using the below command
```powershell Shell lines theme={"dark"}
cat > cors.json <
2. Attach the above CORS policy to the service account by running the following command using [gsutils](https://cloud.google.com/storage/docs/gsutil_install)
```shell Shell lines theme={"dark"}
gsutil cors set cors.json gs://BUCKET_NAME
```
3. Create an [IAM serviceaccount](https://cloud.google.com/iam/docs/service-accounts-create) named `tfy---platform-role`, if not created before.
4. Create a custom IAM role with the following permissions:
```javascript json lines theme={"dark"}
[
"storage.objects.create",
"storage.objects.delete",
"storage.objects.get",
"storage.objects.list",
"storage.objects.update",
"storage.buckets.create",
"storage.buckets.get",
"storage.buckets.list",
"storage.buckets.create",
"storage.buckets.update",
"storage.multipartUploads.create",
"storage.multipartUploads.list",
"storage.multipartUploads.listParts",
"storage.multipartUploads.abort",
"resourcemanager.projects.get",
];
```
1. Navigate to IAM & Admin -> Roles.
2. Click + CREATE ROLE.
3. Enter the name a description, and set the stage to General Availability.
4. Click ADD PERMISSIONS and add the permissions listed above
5. Click CREATE.
5. Attach the custom IAM role to the service account
1. In the IAM section, locate the service account created ealier.
2. Click the Edit icon next to the service account.
3. Click ADD ROLE and select the custom role you created
4. Next to the Role, click on ADD IAM CONDITION
5. Type a title, under CONDITION EDITOR tab, type in this condition\
`resource.name.startsWith('projects/_/buckets/}')`
6. Click on SAVE.
6. Once the *IAM serviceaccount* is created, make sure to [create a key](https://cloud.google.com/iam/docs/keys-create-delete#creating) in JSON format.
7. Navigate to **Integrations > Blob Storage** tab and then add your GCS by clicking **Connect Storage**.
## Connect Azure Blob Storage
Follow the steps below to connect your Azure blob storage to TrueFoundry:
1. Create a [Azure Storage account](https://learn.microsoft.com/en-us/azure/storage/common/storage-account-create?tabs=azure-portal) in your resource group
1. **Instance details** - You must `Geo-redundant storage` to make sure your data is available through other regions in case of region unavailability.
2. **Security** - Make sure
1. DISABLE `Allow enabling anonymous access on individual containers`
2. ENABLE `Enable storage account key access`
3. **Network access** - ENABLE `Allow public access from all networks`
4. **Recovery** - You can keep it to default for 7 days.
2. Create an [Azure container](https://learn.microsoft.com/en-us/azure/storage/blobs/blob-containers-portal) inside the above storage account.
3. Search for `CORS` from the left panel and for `Blob service` (optional for `File service` `Queue service` and `Table Service`, only apply the change if you are using them) select the below options
1. Allowed Origins - `*` or your control plane URL
2. Allowed Methods - `GET, POST, PUT`
3. Allowed Headers - `*`
4. Exposed Headers - `Etag`
5. MaxAgeSeconds - `3600`
4. Collect the following information
1. [Standard endpoint](https://learn.microsoft.com/en-us/azure/storage/common/storage-account-overview#standard-endpoints) - Endpoint of the blob storage Once the container is created we need to get the standard endpoint of the blob storage along with the container which will look something like this. Replace this with your storage account name and the container name.
```javascript lines theme={"dark"}
https://*mystorageaccount*.blob.core.windows.net/*mycontainer*/
```
2. Connection string - From the Azure portal in your storage account, head over to the `Security + Networking` section under `Access keys` which will contain the `Connection String` .
5. Head over to the platform.
1. In the left section in **Integrations** tab, click on **Blob Storage** and `+Connect Storage`
2. Select the **Integration Provider** as `Azure Blob Storage`
3. Add the standard endpoint as the storage root
4. Add the Connection string in the `Azure Blob Connection String`
## Connect AWS S3 storage
Follow the steps below to connect S3 storage to TrueFoundry:
1. Create a [S3 bucket](https://docs.aws.amazon.com/AmazonS3/latest/userguide/creating-bucket.html).
* Make sure the bucket has lifecycle configuration to [abort multipart upload](https://docs.aws.amazon.com/AmazonS3/latest/userguide/mpu-abort-incomplete-mpu-lifecycle-config.html) set for 7 days.
* Make sure [CORS](https://docs.aws.amazon.com/AmazonS3/latest/userguide/enabling-cors-examples.html) is applied on the bucket with the below configuration
```json JSON lines theme={"dark"}
[
{
"AllowedHeaders": ["*"],
"AllowedMethods": ["GET", "POST", "PUT"],
"AllowedOrigins": ["*"],
"ExposeHeaders": ["ETag"],
"MaxAgeSeconds": 3000
}
]
```
2. You might have the IAM role for truefoundry already created with the name - `tfy---platform-role-`, if not [create a new one](/docs/post-cluster-configurations#create-an-iam-role-with-assume-role). You can add the following permission to that role. You can also create a user with the permissions below, generate an access key and secret key and integrate the blob storage via the access and secret keys.
```json JSON lines theme={"dark"}
{
"Sid": "S3",
"Effect": "Allow",
"Action": ["s3:*"],
"Resource": [
"arn:aws:s3:::",
"arn:aws:s3:::/*"
]
}
```
3. In the region, please provide the region of the blob storage e.g. `eu-west-1`
4. Navigate to **Integrations > Blob Storage** tab and then add your S3 by clicking **Connect Storage**.
## Connect Google GCS
Follow the steps below to connect GCS storage to TrueFoundry:
1. Create a [GCP bucket](https://cloud.google.com/storage/docs/creating-buckets).
* Make sure to add the lifecycle configurations on the bucket to delete multipart upload after 7 days.
* For this go to GCP bucket -> Lifecycle -> Add a rule
* Select `Delete multi-part upload` for 7 days
2. We also need to add the CORS policy to the GCP bucket. Right now adding the CORS policy to the GCP bucket is not possible through the console so for this, we will use *gsutil*
1. Create a file called `cors.json` using the below command
```powershell Shell lines theme={"dark"}
cat > cors.json <
2. Attach the above CORS policy to the service account by running the following command using [gsutils](https://cloud.google.com/storage/docs/gsutil_install)
```shell Shell lines theme={"dark"}
gsutil cors set cors.json gs://BUCKET_NAME
```
3. Create an [IAM serviceaccount](https://cloud.google.com/iam/docs/service-accounts-create) named `tfy---platform-role`, if not created before.
4. Create a custom IAM role with the following permissions:
```javascript json lines theme={"dark"}
[
"storage.objects.create",
"storage.objects.delete",
"storage.objects.get",
"storage.objects.list",
"storage.objects.update",
"storage.buckets.create",
"storage.buckets.get",
"storage.buckets.list",
"storage.buckets.create",
"storage.buckets.update",
"storage.multipartUploads.create",
"storage.multipartUploads.list",
"storage.multipartUploads.listParts",
"storage.multipartUploads.abort",
"resourcemanager.projects.get",
];
```
1. Navigate to IAM & Admin -> Roles.
2. Click + CREATE ROLE.
3. Enter the name a description, and set the stage to General Availability.
4. Click ADD PERMISSIONS and add the permissions listed above
5. Click CREATE.
5. Attach the custom IAM role to the service account
1. In the IAM section, locate the service account created ealier.
2. Click the Edit icon next to the service account.
3. Click ADD ROLE and select the custom role you created
4. Next to the Role, click on ADD IAM CONDITION
5. Type a title, under CONDITION EDITOR tab, type in this condition\
`resource.name.startsWith('projects/_/buckets/}')`
6. Click on SAVE.
6. Once the *IAM serviceaccount* is created, make sure to [create a key](https://cloud.google.com/iam/docs/keys-create-delete#creating) in JSON format.
7. Navigate to **Integrations > Blob Storage** tab and then add your GCS by clicking **Connect Storage**.
## Connect Azure Blob Storage
Follow the steps below to connect your Azure blob storage to TrueFoundry:
1. Create a [Azure Storage account](https://learn.microsoft.com/en-us/azure/storage/common/storage-account-create?tabs=azure-portal) in your resource group
1. **Instance details** - You must `Geo-redundant storage` to make sure your data is available through other regions in case of region unavailability.
2. **Security** - Make sure
1. DISABLE `Allow enabling anonymous access on individual containers`
2. ENABLE `Enable storage account key access`
3. **Network access** - ENABLE `Allow public access from all networks`
4. **Recovery** - You can keep it to default for 7 days.
2. Create an [Azure container](https://learn.microsoft.com/en-us/azure/storage/blobs/blob-containers-portal) inside the above storage account.
3. Search for `CORS` from the left panel and for `Blob service` (optional for `File service` `Queue service` and `Table Service`, only apply the change if you are using them) select the below options
1. Allowed Origins - `*` or your control plane URL
2. Allowed Methods - `GET, POST, PUT`
3. Allowed Headers - `*`
4. Exposed Headers - `Etag`
5. MaxAgeSeconds - `3600`
4. Collect the following information
1. [Standard endpoint](https://learn.microsoft.com/en-us/azure/storage/common/storage-account-overview#standard-endpoints) - Endpoint of the blob storage Once the container is created we need to get the standard endpoint of the blob storage along with the container which will look something like this. Replace this with your storage account name and the container name.
```javascript lines theme={"dark"}
https://*mystorageaccount*.blob.core.windows.net/*mycontainer*/
```
2. Connection string - From the Azure portal in your storage account, head over to the `Security + Networking` section under `Access keys` which will contain the `Connection String` .
5. Head over to the platform.
1. In the left section in **Integrations** tab, click on **Blob Storage** and `+Connect Storage`
2. Select the **Integration Provider** as `Azure Blob Storage`
3. Add the standard endpoint as the storage root
4. Add the Connection string in the `Azure Blob Connection String`