> ## Documentation Index
> Fetch the complete documentation index at: https://www.truefoundry.com/llms.txt
> Use this file to discover all available pages before exploring further.
# Manage External Identity (Deprecated)
> Legacy guide for external identity authentication and access control in TrueFoundry.
External Identity is being deprecated. New setups should use [Identity Providers](/docs/platform/identity-providers), where JWT validation is configured once and mappings are defined directly on teams or virtual accounts.
External Identity allows you to bring your own Auth. It authenticate and authorize external, third-party identity providers (Okta, Azure AD) to securely access a TrueFoundry's APIs (e.g., AI Gateway, MCP Gateway) instead of using TrueFoundry's built-in authentication. Users/Applications authenticate with corporate credentials without TrueFoundry user accounts.
## Overview
External Identity enables you to:
* Authenticate using existing identity provider (Okta, Azure AD)
* Control RBAC access to TrueFoundry resources (e.g., Models, MCP Servers, Agents, etc.)
* No need to create TrueFoundry user accounts
External Identity requires an identity provider to be configured.
## When to Use External Identity
Organizations with existing identity providers (Okta, Azure AD) can use External Identity.
Common scenarios:
* **B2B applications**: Your customers authenticate through their own Identity Provider (IdP)
* **No TrueFoundry accounts**: Users who aren’t in TrueFoundry need Model, MCP, Agent access
## How External Identity Works
1. User/application authenticate and get a JWT token from the identity provider.
2. User/application adds the JWT token as Bearer authorization header in TrueFoundry API's
3. TrueFoundry validates the token against the configured identity provider.
4. TrueFoundry extracts claims from the token and maps it to external identity based on the claims configured.
5. The selected external identity is used for RBAC when accessing TrueFoundry resources
6. TrueFoundry uses the `sub` claim to uniquely identify each user and manage their authentication for MCP Servers for personalization.
TrueFoundry never handles user credentials. Your identity provider remains the
source of truth for identity.
## Prerequisites
Before creating an external identity, you must configure Identity Provider.
### Creating an Identity Provider
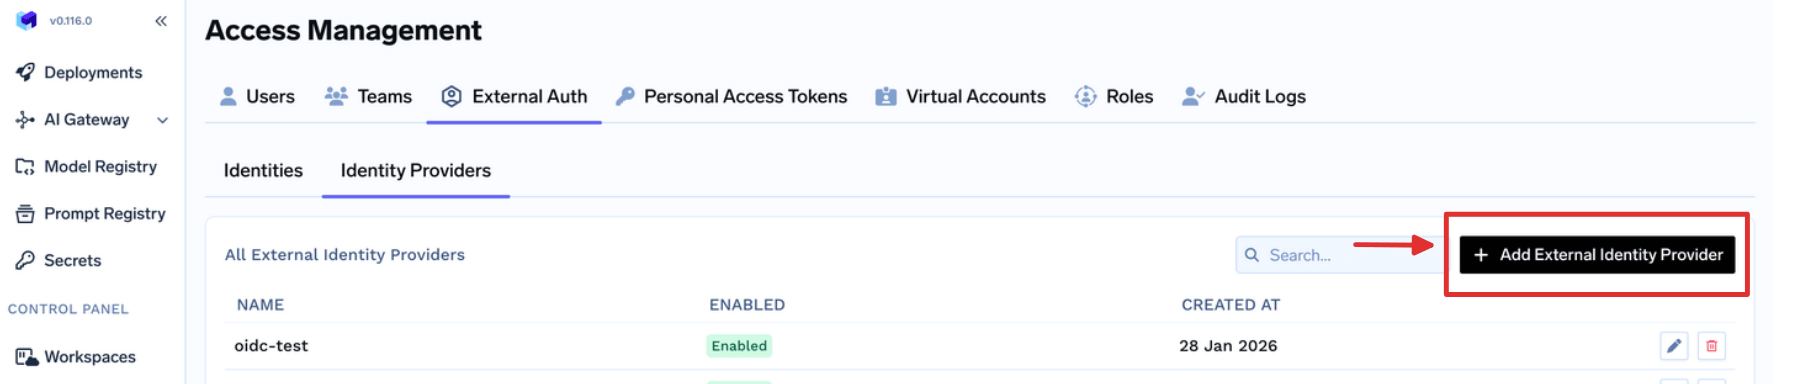
Navigate to **Access > External Auth > Identity Provider**.
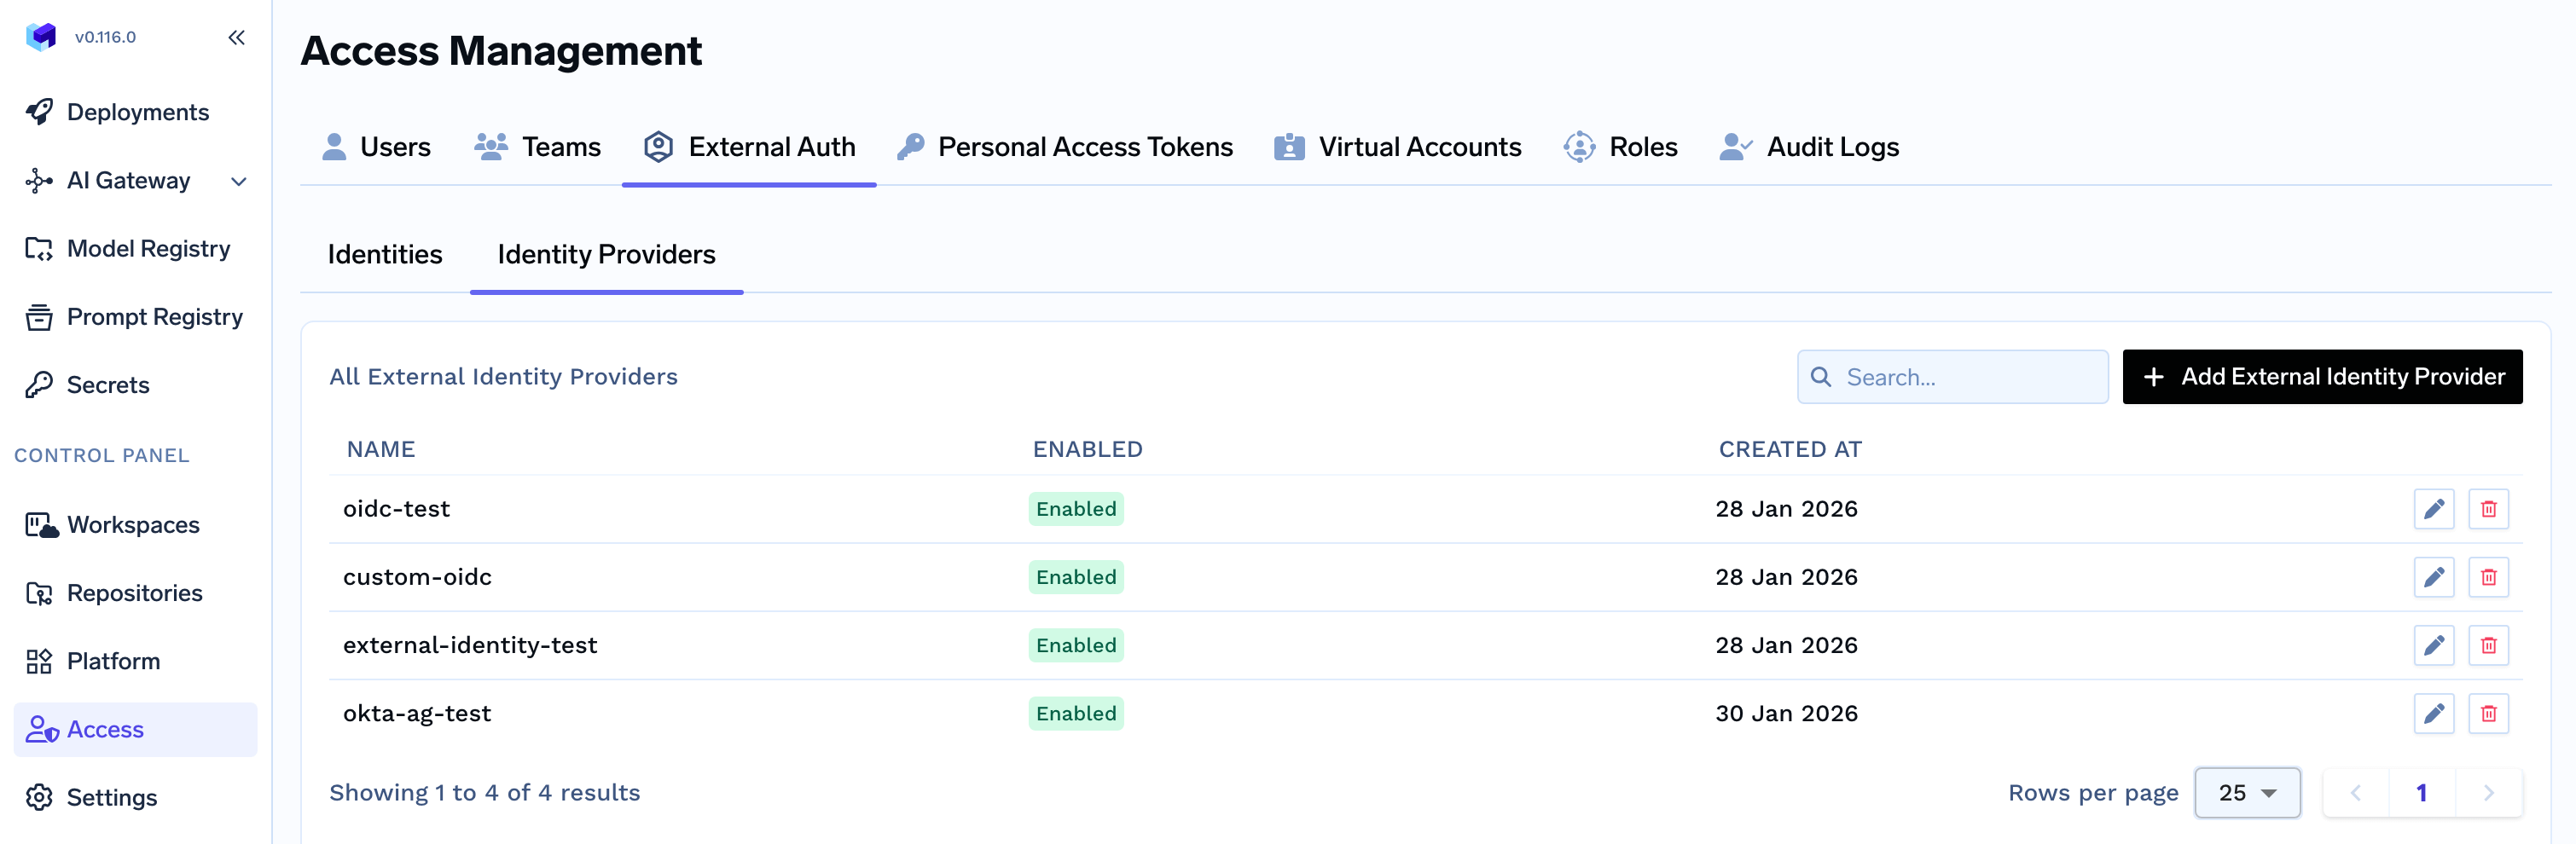 Click on `New Identity Provider` button on the top right.
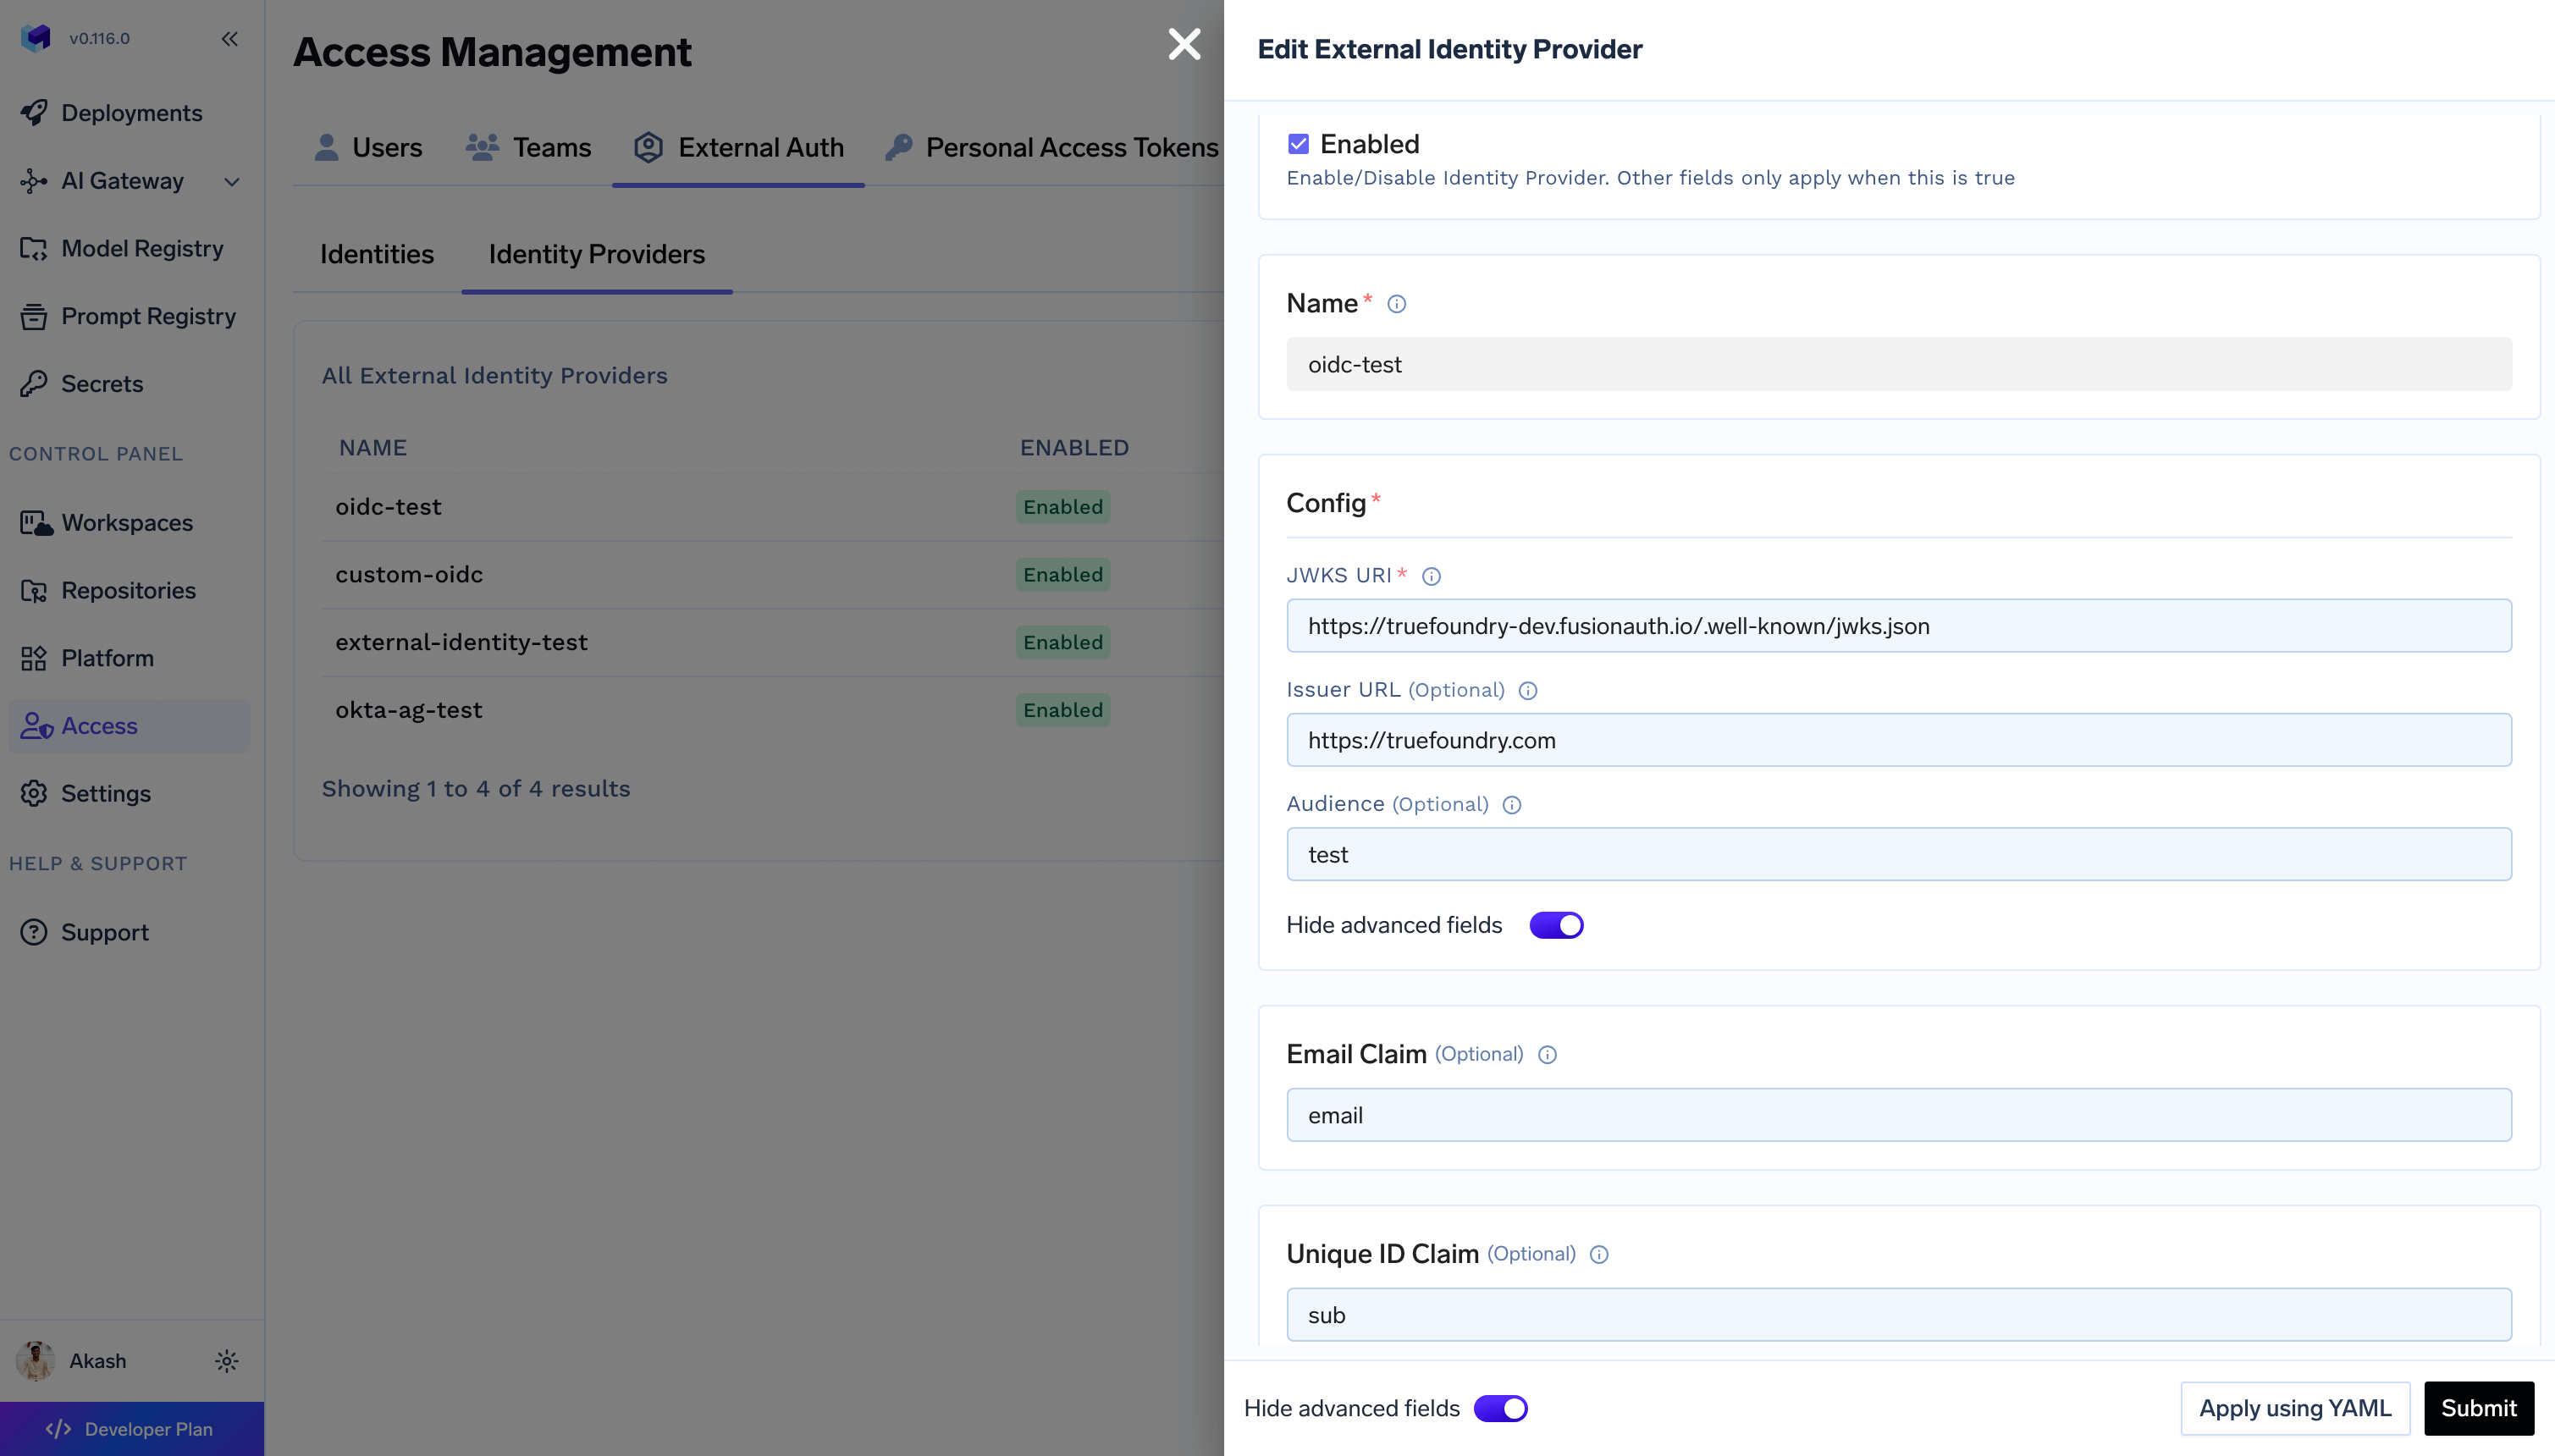
 Configure the identity provider with config for JWT token validation. The form contains following fields:
A unique name to identify this external identity provider. Should follow the
format as Alphanumeric characters and hyphens.
The name should be descriptive and help you identify the purpose of this
external identity.
Contains JWKS URI that exposed the JWKS for fetching the public key to validate the JWT token.
(Optional) You can also validate the token against the issuer and audience.
You can configure claim keys for `unique id` and `email`. Defaults are `sub` and `email` respectively.
`sub` claim is **mandatory** for the token to be validated. You can change the
claim `key` under `Advanced Settings`.
(Optional) You can also configure `email` claim to allow tracking of the
user's requests in traces.
Configure the identity provider with config for JWT token validation. The form contains following fields:
A unique name to identify this external identity provider. Should follow the
format as Alphanumeric characters and hyphens.
The name should be descriptive and help you identify the purpose of this
external identity.
Contains JWKS URI that exposed the JWKS for fetching the public key to validate the JWT token.
(Optional) You can also validate the token against the issuer and audience.
You can configure claim keys for `unique id` and `email`. Defaults are `sub` and `email` respectively.
`sub` claim is **mandatory** for the token to be validated. You can change the
claim `key` under `Advanced Settings`.
(Optional) You can also configure `email` claim to allow tracking of the
user's requests in traces.
 Click **Submit** to create the external identity provider. You’ll see it
listed in the Identities providers tab.
### Examples
#### Okta
Note `` is the organization name of the Okta.
```yaml theme={"dark"}
config:
jwks_uri: https://.okta.com/oauth2/v1/keys
issuer: https://.okta.com
```
#### Azure AD
Note `` and `` are the tenant ID and client ID of the Azure AD application.
```yaml theme={"dark"}
config:
jwks_uri: https://login.microsoftonline.com//discovery/v2.0/keys
issuer: https://login.microsoftonline.com//v2.0
audience:
```
## Creating an External Identity
Go to **Access > External Auth > Idenities**.
Click **Submit** to create the external identity provider. You’ll see it
listed in the Identities providers tab.
### Examples
#### Okta
Note `` is the organization name of the Okta.
```yaml theme={"dark"}
config:
jwks_uri: https://.okta.com/oauth2/v1/keys
issuer: https://.okta.com
```
#### Azure AD
Note `` and `` are the tenant ID and client ID of the Azure AD application.
```yaml theme={"dark"}
config:
jwks_uri: https://login.microsoftonline.com//discovery/v2.0/keys
issuer: https://login.microsoftonline.com//v2.0
audience:
```
## Creating an External Identity
Go to **Access > External Auth > Idenities**.
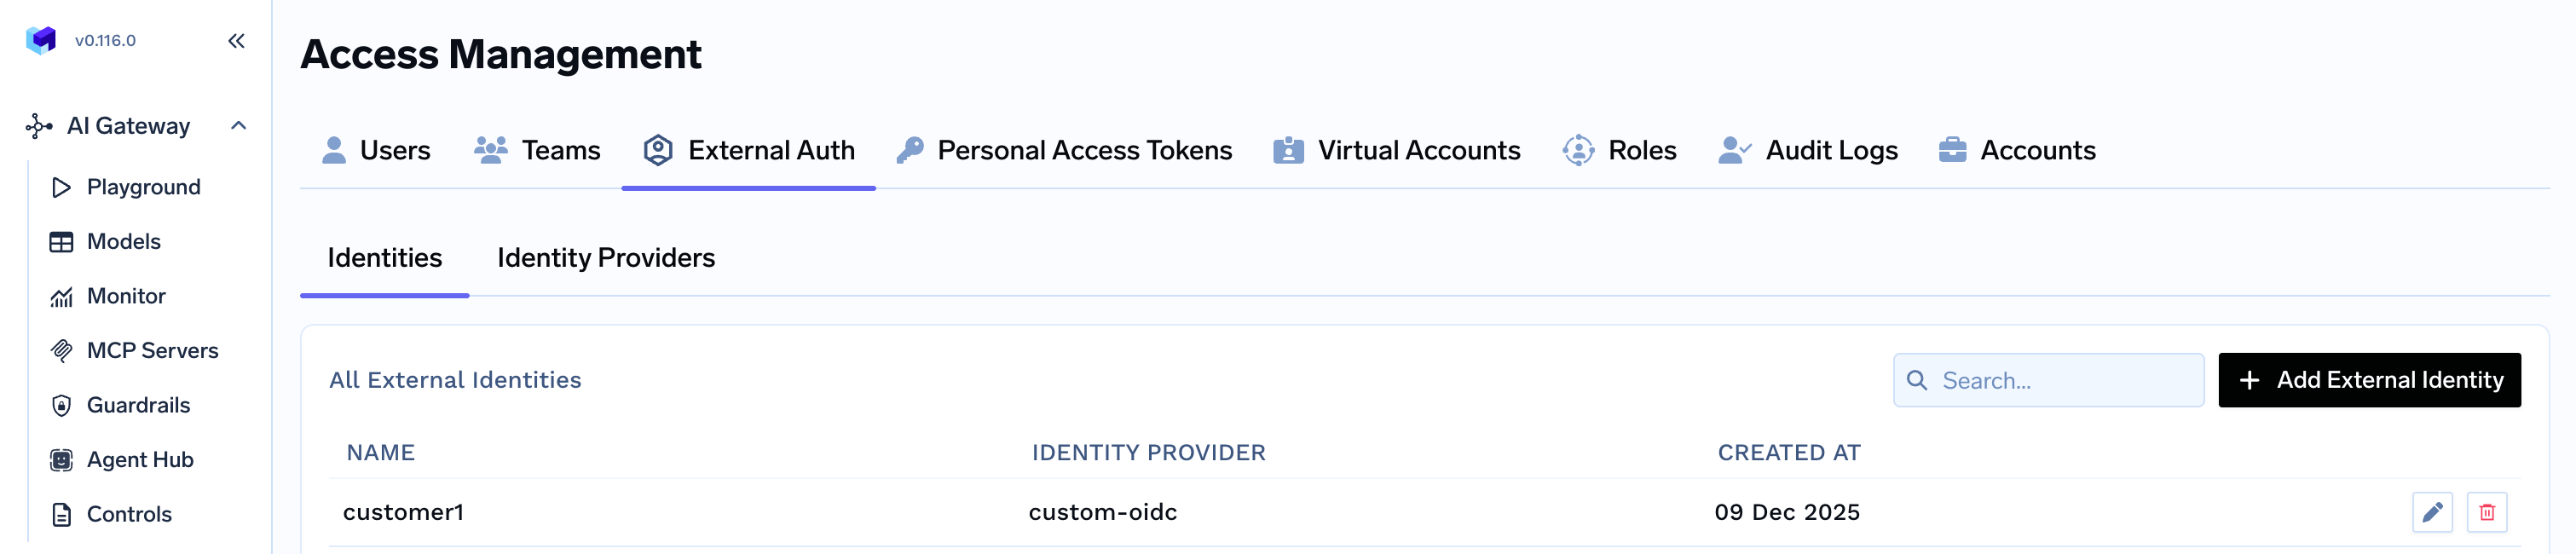 Click the **Add External Identity** button to open the configuration form.
The form contains the following fields:
A unique name to identify this external identity. Should follow the format as alphanumeric characters and hyphens. Examples: `api-service`, `external-app`, `partner-integration`
The name should be descriptive and help you identify the purpose of this
external identity.
Select the identity provider from the list of configured identity providers.
You can create multiple external identities using the same identity provider.
When Truefoundry gets a token from the external identity, it will validate the
token against the identity provider and assign it to all the matching external
identity.
Click the **Add External Identity** button to open the configuration form.
The form contains the following fields:
A unique name to identify this external identity. Should follow the format as alphanumeric characters and hyphens. Examples: `api-service`, `external-app`, `partner-integration`
The name should be descriptive and help you identify the purpose of this
external identity.
Select the identity provider from the list of configured identity providers.
You can create multiple external identities using the same identity provider.
When Truefoundry gets a token from the external identity, it will validate the
token against the identity provider and assign it to all the matching external
identity.
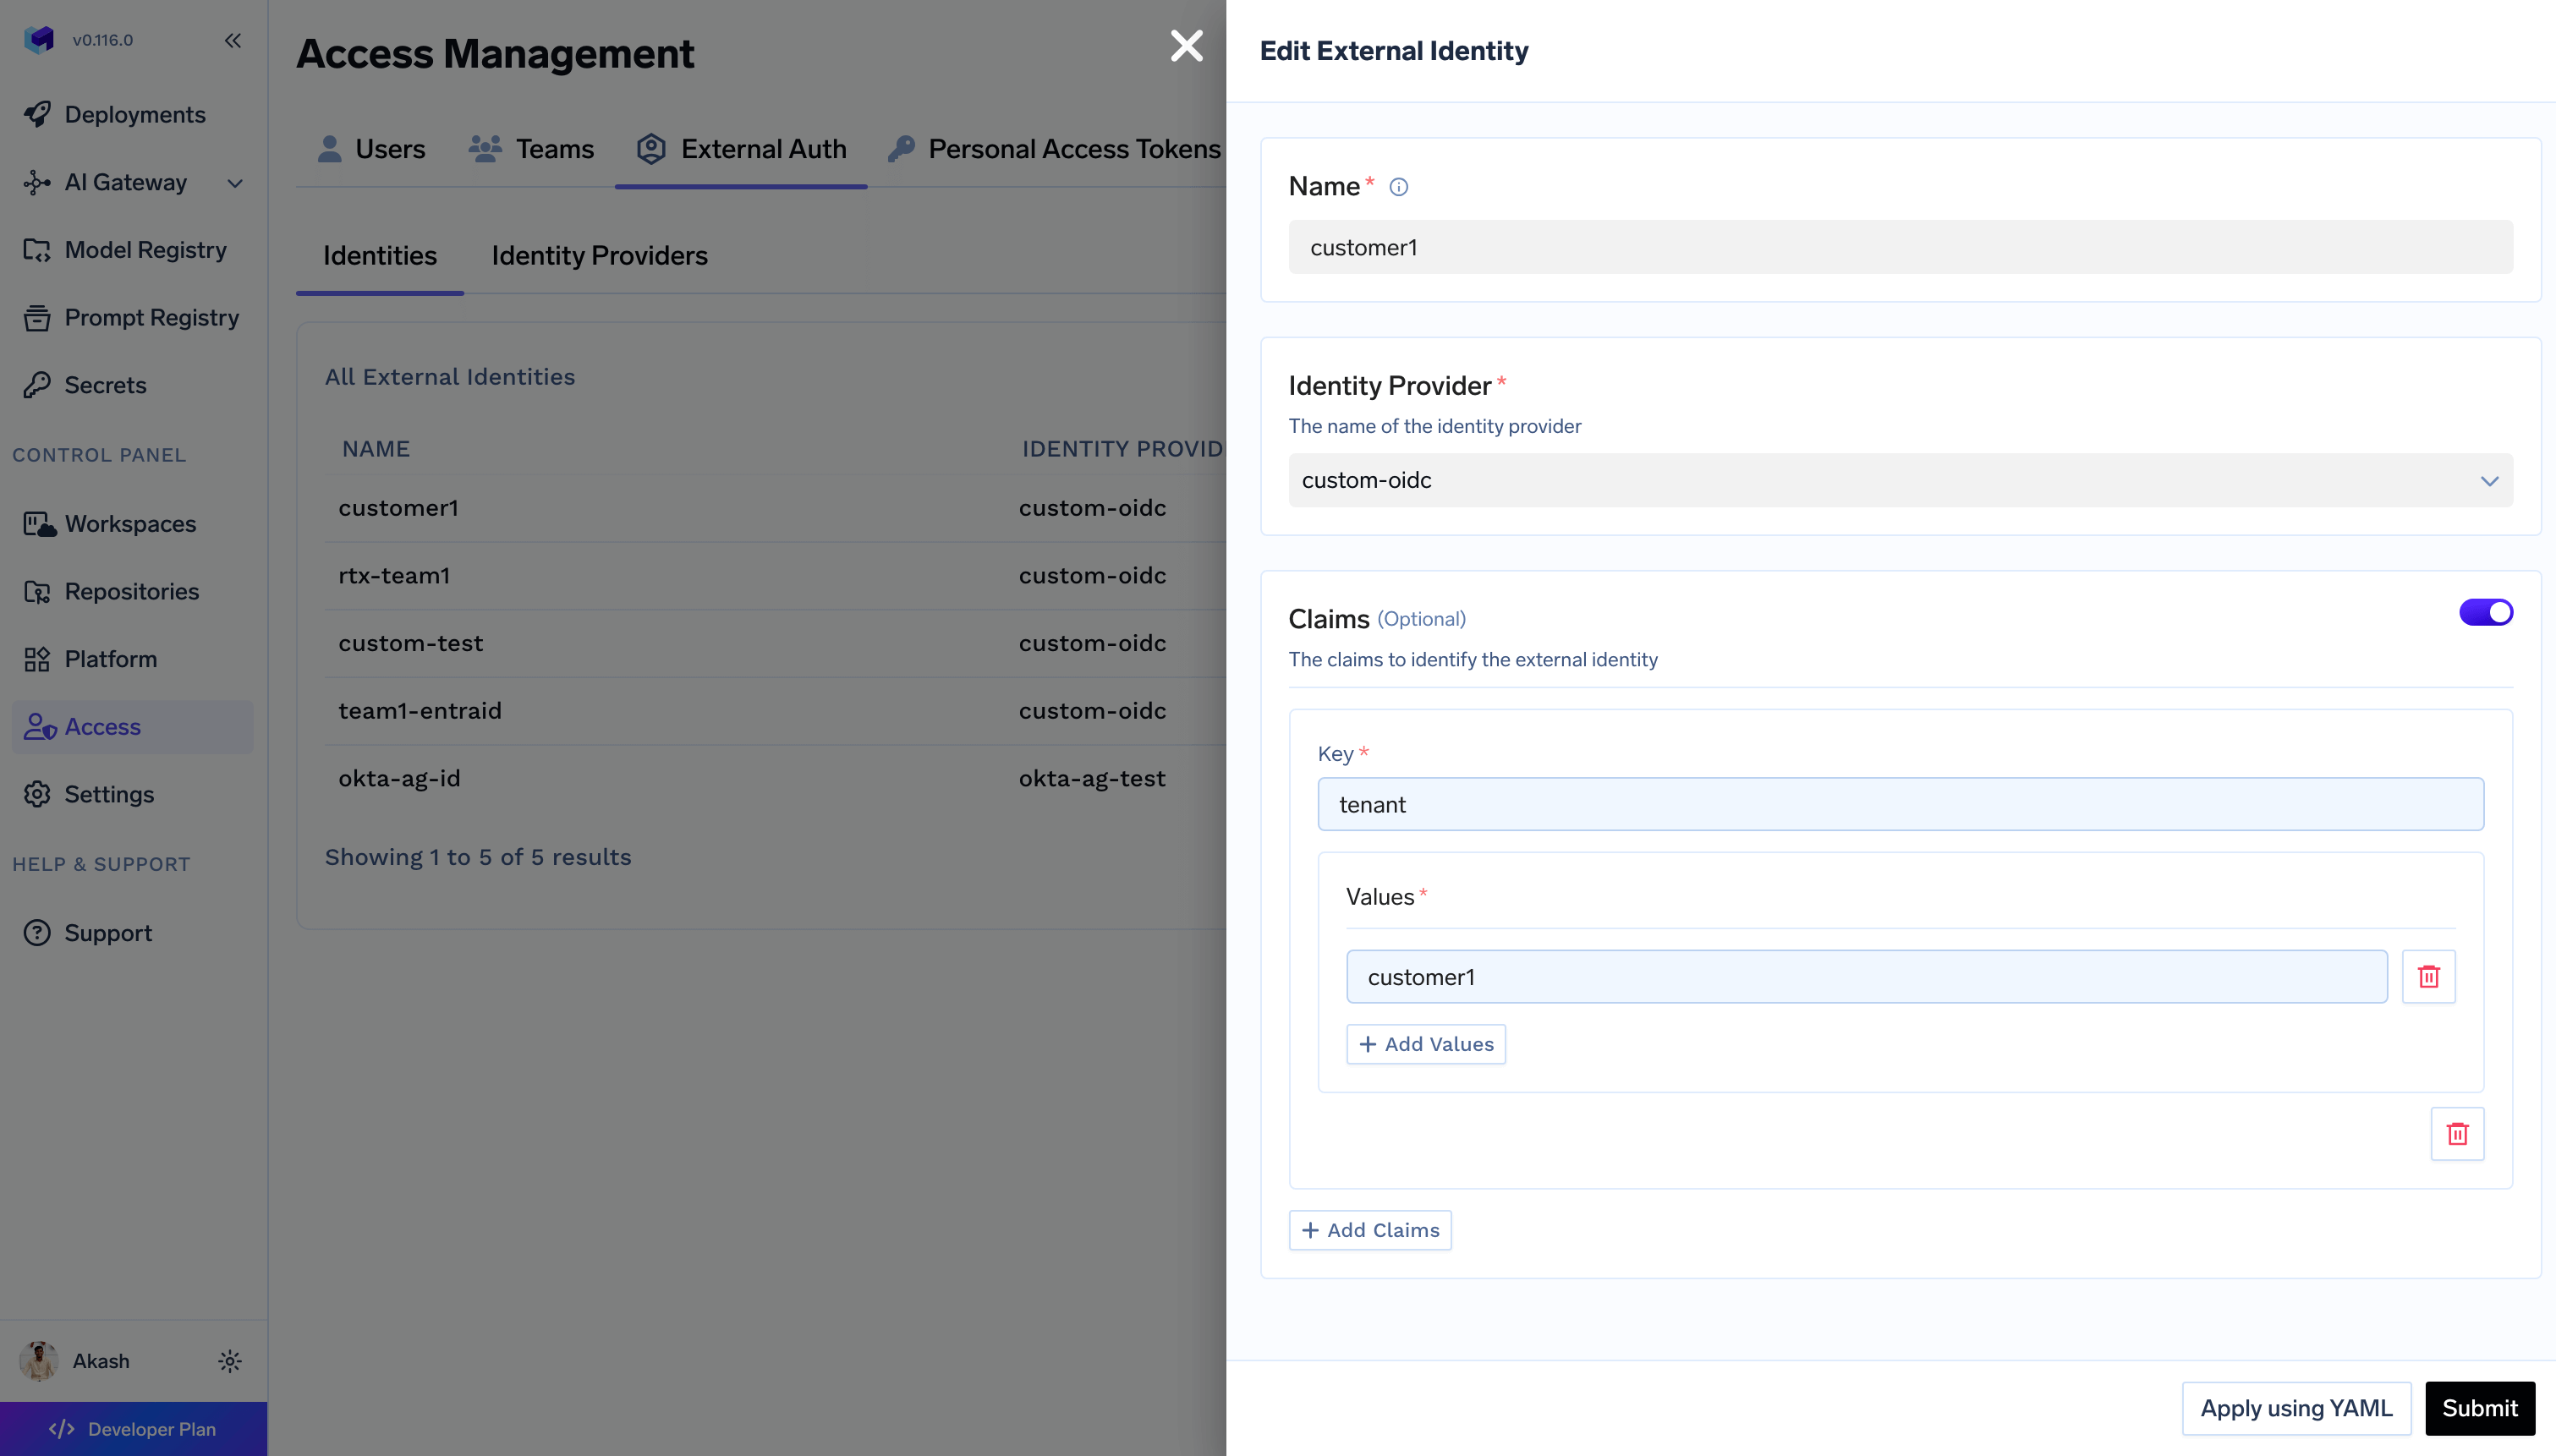 Click **Submit** to create the external identity. You'll see it listed in the External Identities section.
**Best Practice**: Create more specific external identities with detailed
claims for precise access control, and use general external identities (with
fewer or no claims) as fallbacks.
## Using External Identity as Collaborator
Once created, external identities can be added as collaborators to TrueFoundry resources, granting them access based on the assigned role, similar to how you add users and teams as collaborators.
### Adding External Identity as Collaborator
Navigate to the resource you want to grant access to (e.g., Model, MCP Server,
Workspace, Cluster, etc.)
Edit the resource you want to grant access to
Click **Add Collaborator** in the collaborator selection and search for your
\**External Identity*. Choose the appropriate **Role** (e.g., Viewer, Editor,
Manager).
Click **Submit** to create the external identity. You'll see it listed in the External Identities section.
**Best Practice**: Create more specific external identities with detailed
claims for precise access control, and use general external identities (with
fewer or no claims) as fallbacks.
## Using External Identity as Collaborator
Once created, external identities can be added as collaborators to TrueFoundry resources, granting them access based on the assigned role, similar to how you add users and teams as collaborators.
### Adding External Identity as Collaborator
Navigate to the resource you want to grant access to (e.g., Model, MCP Server,
Workspace, Cluster, etc.)
Edit the resource you want to grant access to
Click **Add Collaborator** in the collaborator selection and search for your
\**External Identity*. Choose the appropriate **Role** (e.g., Viewer, Editor,
Manager).
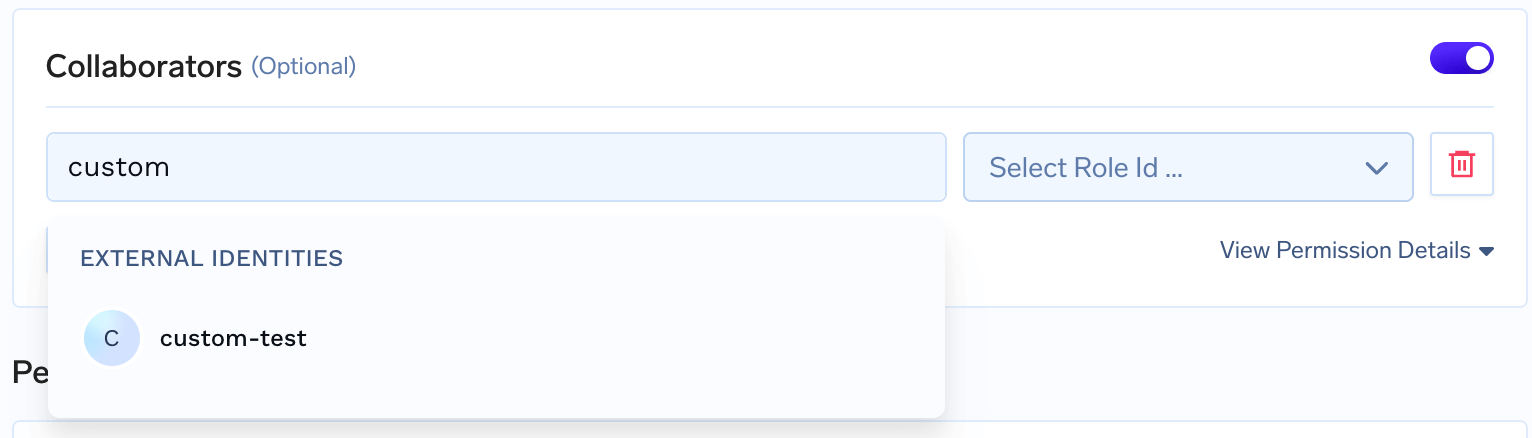 Click **Submit** to save the collaborators in your resource. Your External
Identity can now access the selected resource.
## Troubleshooting
### External Identity Not Matching
**Problem**: Token authentication fails or wrong external identity is selected.
**Solutions**:
* verify the JWKS URI is correct and the JWKS is accessible by TrueFoundry.
* verify the token issuer and audience in the token are correct if configured.
* verify the `sub` claim is present in the token and is correct.
* verify the identity provider is correct and matches your identity provider configuration name
***
Click **Submit** to save the collaborators in your resource. Your External
Identity can now access the selected resource.
## Troubleshooting
### External Identity Not Matching
**Problem**: Token authentication fails or wrong external identity is selected.
**Solutions**:
* verify the JWKS URI is correct and the JWKS is accessible by TrueFoundry.
* verify the token issuer and audience in the token are correct if configured.
* verify the `sub` claim is present in the token and is correct.
* verify the identity provider is correct and matches your identity provider configuration name
***