> ## Documentation Index
> Fetch the complete documentation index at: https://www.truefoundry.com/llms.txt
> Use this file to discover all available pages before exploring further.
# Azure
> Provisioning Control Plane Infrastructure on Azure
### There are steps in this guide where TrueFoundry team will have to be involved. Please reach out to [support@truefoundry.com](mailto:support@truefoundry.com) to get the credentials
Setting up TrueFoundry control plane on your own cloud involves creating the infrastructure to support the platform and then installing the platform itself.
## Setting up Infrastructure
## Requirements
All the compute plane [requirements](/docs/infrastructure/azure-compute-plane-setup#requirements%3A) must be met in order to install the control plane. Below are the additional requirements for the control plane:
| Requirements | Description | Reason for Requirement |
| --------------------------------------------------- | --------------------------------------------------------------------------------------------------------------------------------------------------------------------------- | -------------------------------------------------------------------------------------------------------------------------------------------------------------------------------------------------------------------------------------------------------------------------------------- |
| Azure Flexible Server for PostgreSQL | Postgres >= 13 | The database is used by TrueFoundry control plane to store all its metadata. Ensure that `require_secure_transport` is kept `OFF` if you are using Azure Flexible Server for PostgreSQL. Ensure SSL is disabled, you can change the server parameter `require_secure_transport` to OFF |
| Container in Azure Storage Account | Any container bucket reachable from control-plane | This is used by control-plane to store the intermediate code while building the docker image |
| Egress Access for TrueFoundryAuth | Egress access to [https://auth.truefoundry.com](https://auth.truefoundry.com) and [analytics.truefoundry.com](https://analytics.truefoundry.com) | This is needed to verify the users logging into the TrueFoundry platform for licensing purposes |
| Additional TrueFoundry information | Additional information for control plane deployment which will be provided by TrueFoundry team | This includes tenant name, licence key, and image pull secret |
| DNS | Domain for control plane and service endpoints | One endpoint to point to the control plane service (e.g., platform.example.com) **The control-plane URL must be reachable from the compute-plane**. The developers will need to access the TrueFoundry UI at the provided domain. |
| User/ServiceAccount to provision the infrastructure | Required permissions:
- Azure subscription with billing enabled
- Contributor Role to the subscription
- Role Based Access Administrator to the subscription | Required to set up and manage the infrastructure components |
## Permissions Required
For the control plane, we will be using the following permissions:
* Compute plane [permissions](/docs/infrastructure/azure-compute-plane-setup#permissions-required-to-create-the-infrastructure)
* Azure Flexible Server for PostgreSQL permissions
## Setting up control plane
TrueFoundry control plane infrastructure is provisioned using OpenTofu/Terraform. You can download the OpenTofu/Terraform code for your exact account by filling up your account details and downloading a script that can be executed on your local machine. To perform the below steps, you need to [register](https://www.truefoundry.com/register) an account on TrueFoundry and login to the platform.
To enable the deployment feature which allows you to deploy services through the platform, you need to enable it;
* In the left hand navigation, go to `Settings` then `Platform Feature Visibility` under `Preferences`
* Click on `Edit` button. Then enable the toggle for `Enable Deployment`
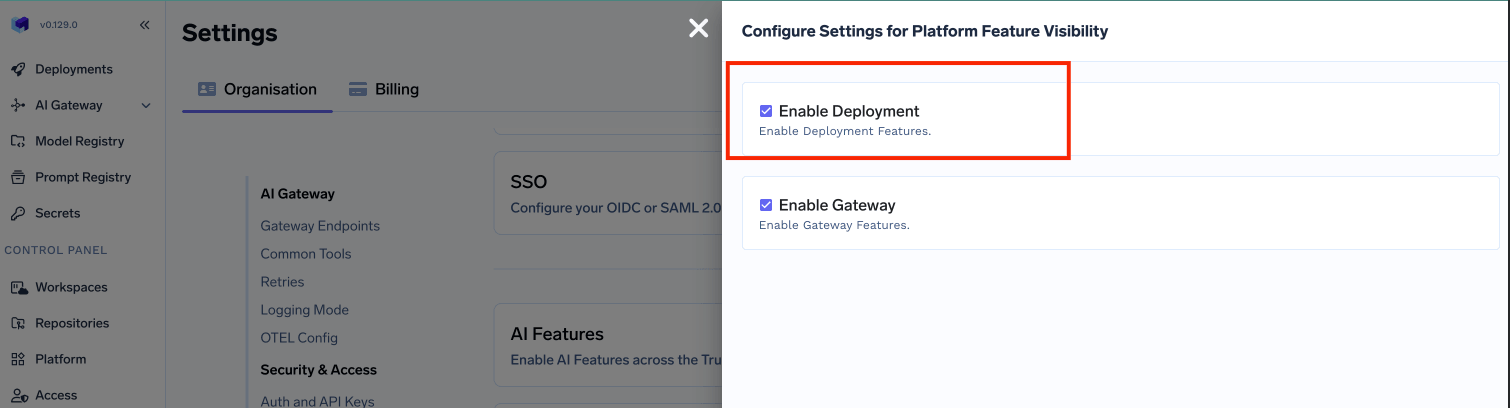 * Click on `Save` button.
This will enable the deployment feature in the platform and allow you to create either a control plane and compute plane.
* Click on `Save` button.
This will enable the deployment feature in the platform and allow you to create either a control plane and compute plane.
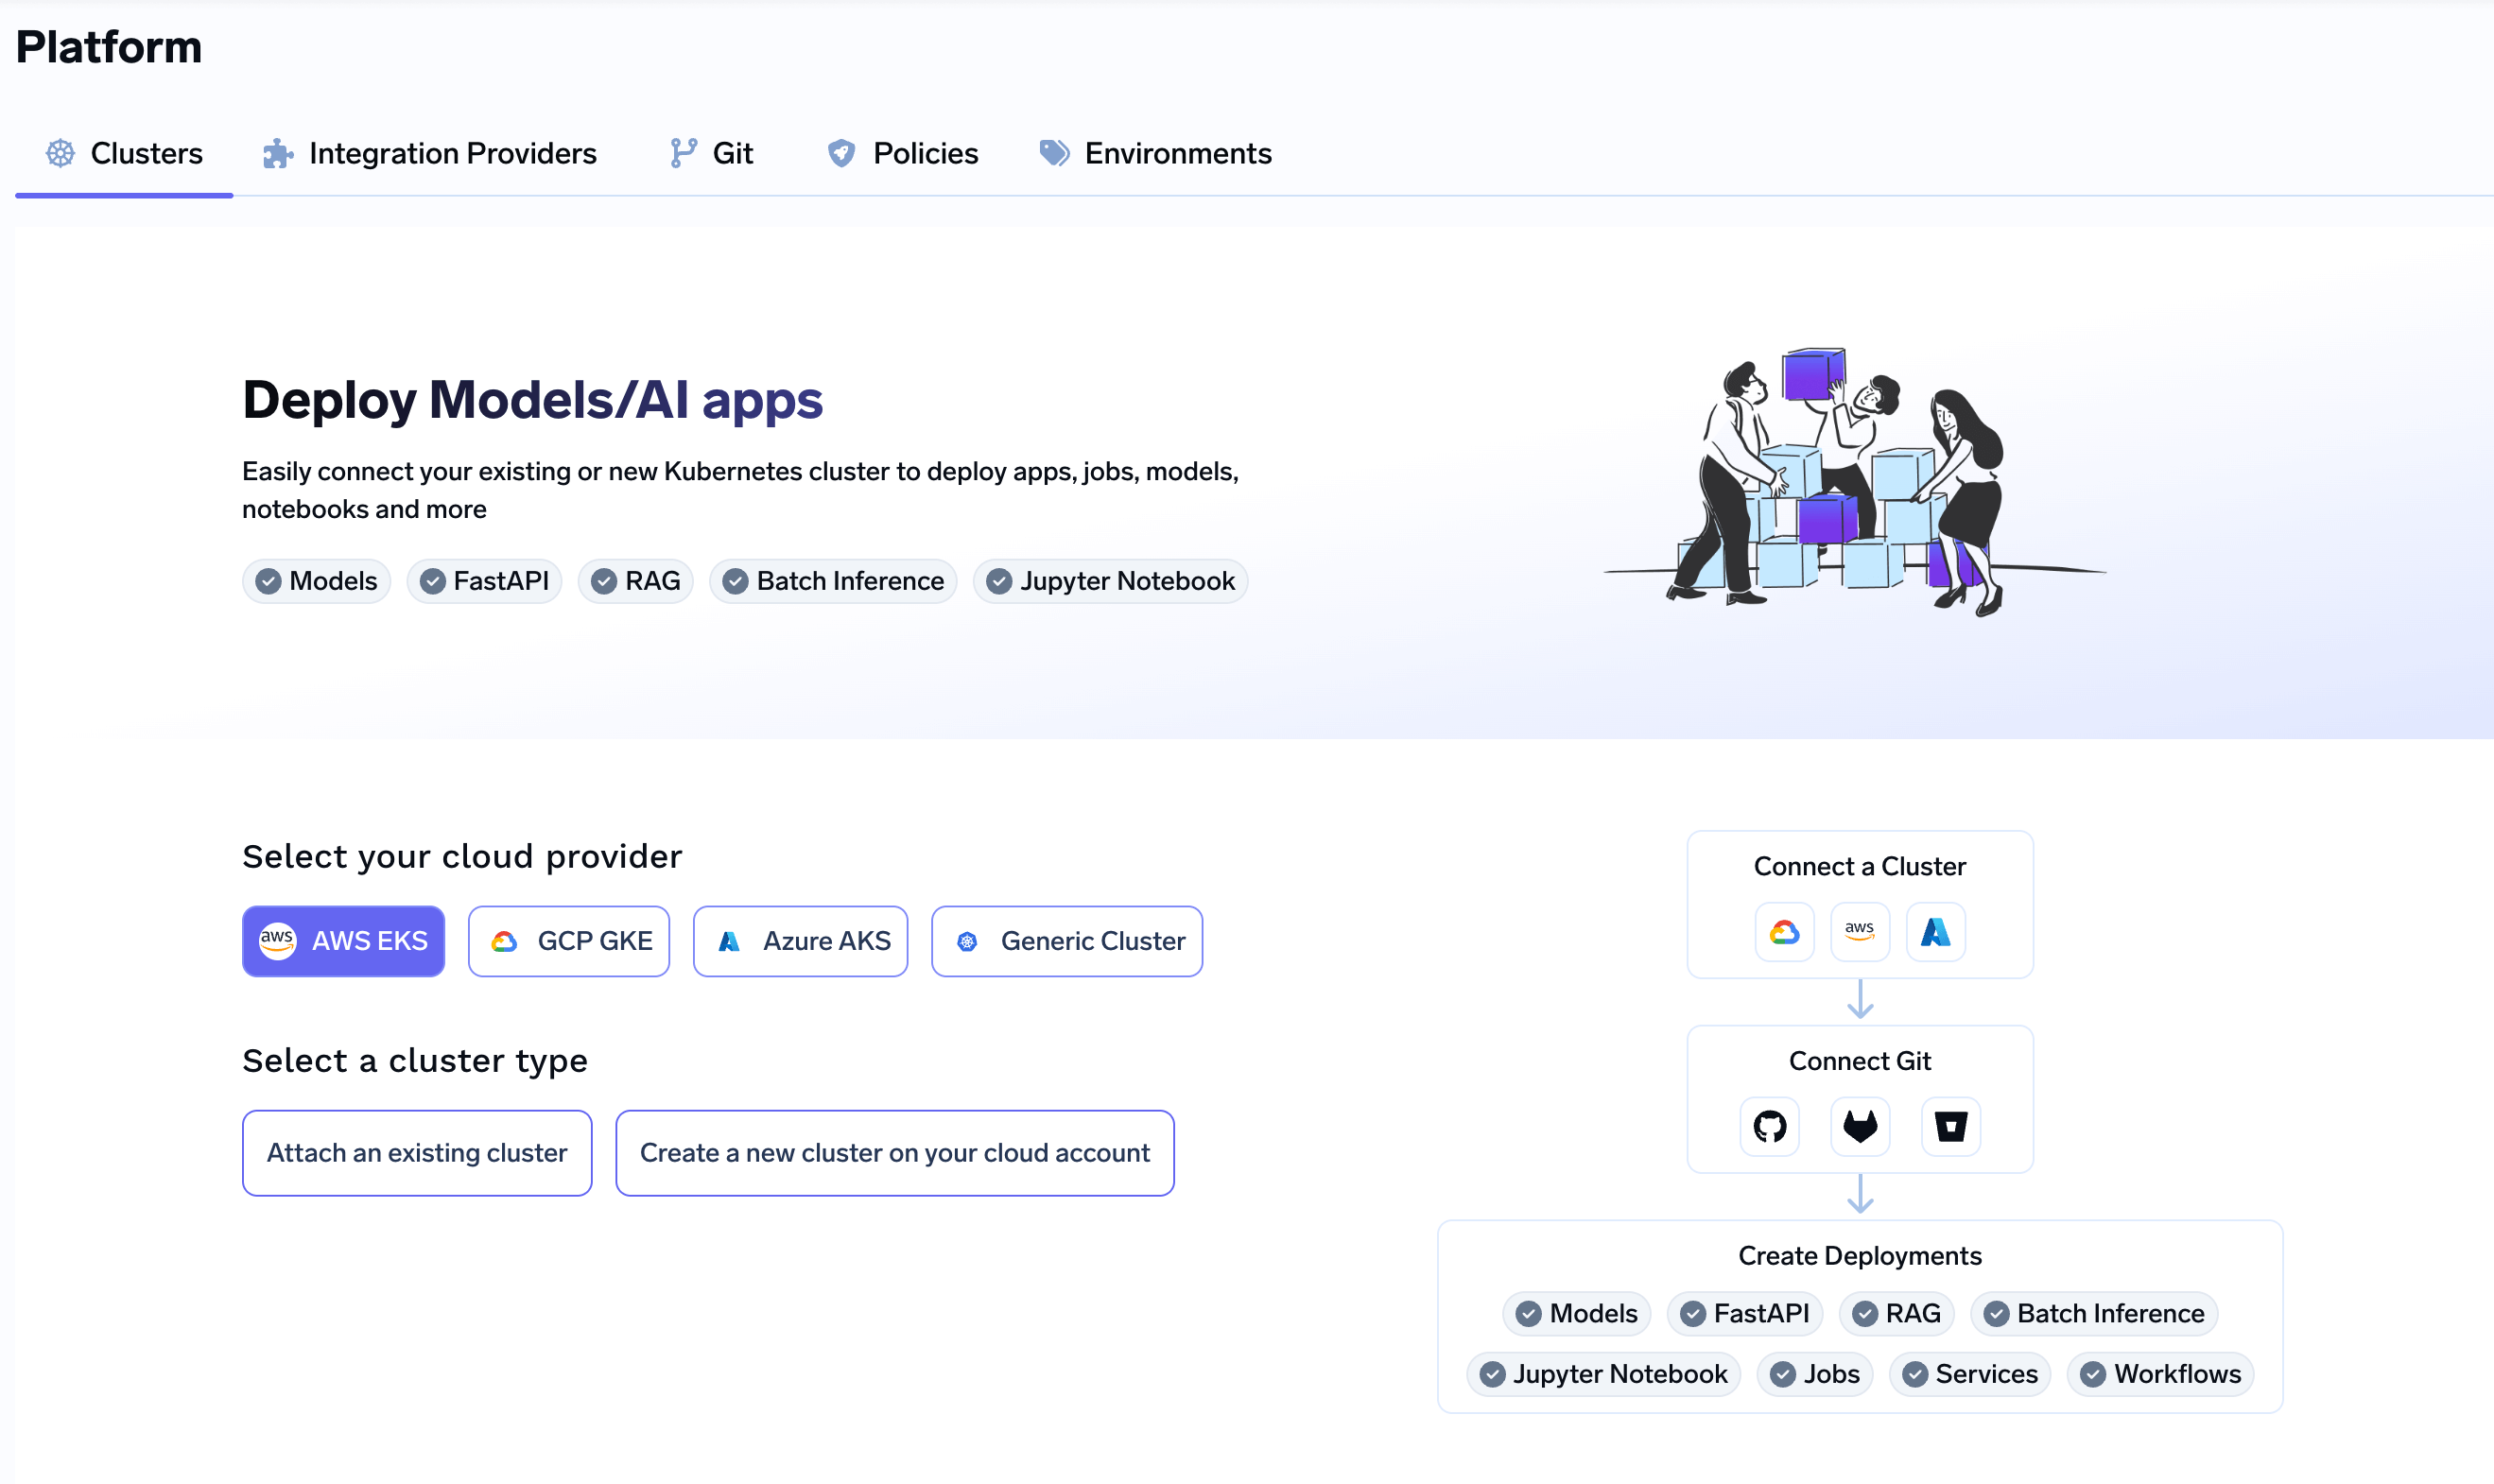
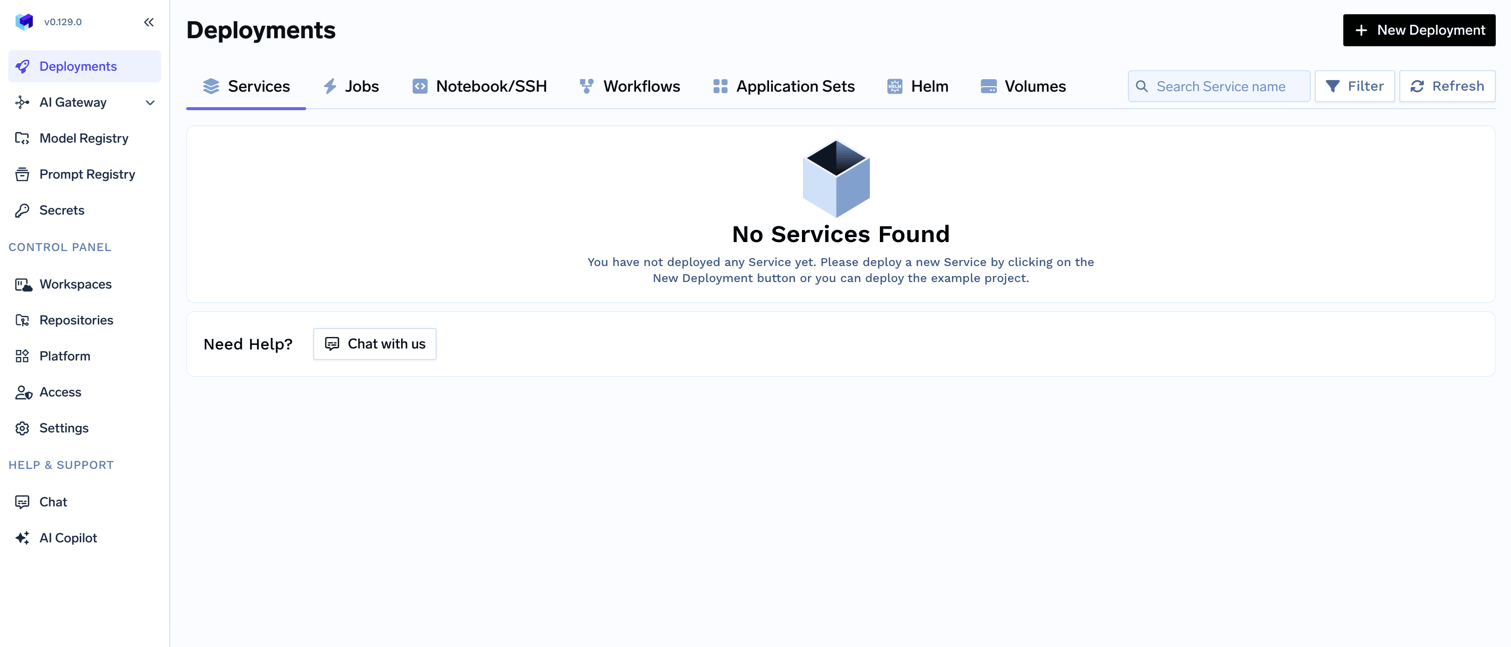 Go to the platform section in the left panel and click on `Clusters`. Add the following value at the end of your URL `&controlPlaneSetupEnabled=true`. This will enable the control plane installation for you. You can click on `Create New Cluster` or `Attach Existing Cluster` depending on your use case. Read the requirements and if everything is satisfied, click on `Continue`.
 A form will be presented with the details for the new cluster to be created. Fill in with your cluster details. Click `Submit` when done
The key fields to fill up here are:
* `Region` - The region and availability zones where you want to create the cluster.
* `Resource Group` - The resource group where you want to create the cluster. Chose between `New Resource Group` or `Existing Resource Group` depending on your use case.
* `Cluster Name` - A name for your cluster.
* `Cluster Version` and `node pools` - The version of the cluster and the node pools to be created.
* `Network Configuration` - Choose between `New Vnet` or `Existing Vnet` depending on your use case.
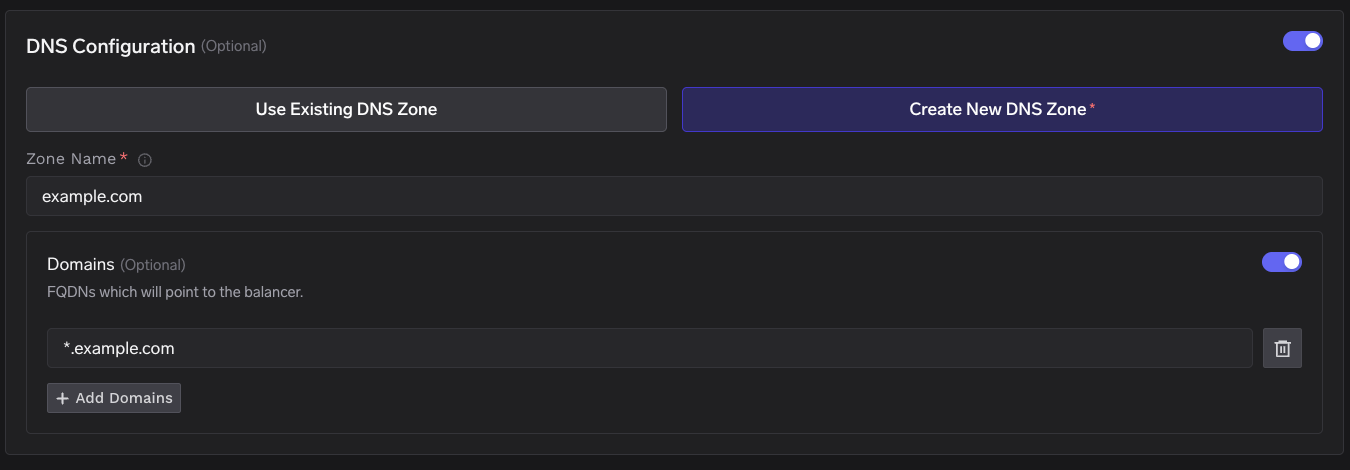
* `DNS Configuration` - Configure the DNS zone and domains that will point to the cluster’s load balancer. This also provisions a TLS certificate for those domains. Select New DNS Zone or Existing DNS Zone if you want TrueFoundry to manage DNS in Azure. If you use an external DNS provider (e.g., Route53, Cloudflare), you can skip this section.
A form will be presented with the details for the new cluster to be created. Fill in with your cluster details. Click `Submit` when done
The key fields to fill up here are:
* `Region` - The region and availability zones where you want to create the cluster.
* `Resource Group` - The resource group where you want to create the cluster. Chose between `New Resource Group` or `Existing Resource Group` depending on your use case.
* `Cluster Name` - A name for your cluster.
* `Cluster Version` and `node pools` - The version of the cluster and the node pools to be created.
* `Network Configuration` - Choose between `New Vnet` or `Existing Vnet` depending on your use case.
* `DNS Configuration` - Configure the DNS zone and domains that will point to the cluster’s load balancer. This also provisions a TLS certificate for those domains. Select New DNS Zone or Existing DNS Zone if you want TrueFoundry to manage DNS in Azure. If you use an external DNS provider (e.g., Route53, Cloudflare), you can skip this section.
 * `Resource Tags` - Tags to be added to the resources created by TrueFoundry on your behalf if any.
* `Storage account (container) for OpenTofu/Terraform State` - OpenTofu/Terraform state will be stored in this container. It can be a preexisting storage account or a new storage account name. The new storage account will automatically be created by our script.
* `Platform Features` - This is to decide which features like BlobStorage, ClusterIntegration using Azure AD and Container Registry will be enabled for your cluster. To read more on how these integrations are used in the platform, please refer to the [platform features](/docs/infrastructure/deploy-compute-plane) page.
* `Control Plane Configuration` - Control plane URL and the database details. You can chose between `PostgreSQL on kubernetes` or `Managed PostgreSQL (RDS)` or `Existing PostgreSQL configuration` depending on your use case.
The key fields to fill up here are:
* `Region` - The region and availability zones where you want to create the cluster.
* `Resource Group` - The resource group where the cluster is already created.
* `Cluster Name` - Your cluster name.
* `Network Configuration` - Existing Vnet and subnet details.
* `DNS Configuration` - Configure the DNS zone and domains that will point to the cluster’s load balancer. This also provisions a TLS certificate for those domains. Select New DNS Zone or Existing DNS Zone if you want TrueFoundry to manage DNS in Azure. If you use an external DNS provider (e.g., Route53, Cloudflare), you can skip this section.
* `Resource Tags` - Tags to be added to the resources created by TrueFoundry on your behalf if any.
* `Cluster Addons` - TrueFoundry needs to install addons like ArgoCD, ArgoWorkflows, Keda, Istio, etc. Please disable the addons that are already installed on your cluster so that truefoundry installation does not overrride the existing configuration and affect your existing workloads.
* `Storage account (container) for OpenTofu/Terraform State` - OpenTofu/Terraform state will be stored in this container. It can be a preexisting storage account or a new storage account name. The new storage account will automatically be created by our script.
* `Control Plane Configuration` - Control plane URL and the database details. You can chose between `PostgreSQL on kubernetes` or `Managed PostgreSQL (RDS)` or `Existing PostgreSQL configuration` depending on your use case.
You will be presented with a `curl` command to download and execute the script. The script will take care of installing the pre-requisites, downloading OpenTofu/Terraform code and running it on your local machine to create the cluster. This will take around 40-50 minutes to complete.
* `Resource Tags` - Tags to be added to the resources created by TrueFoundry on your behalf if any.
* `Storage account (container) for OpenTofu/Terraform State` - OpenTofu/Terraform state will be stored in this container. It can be a preexisting storage account or a new storage account name. The new storage account will automatically be created by our script.
* `Platform Features` - This is to decide which features like BlobStorage, ClusterIntegration using Azure AD and Container Registry will be enabled for your cluster. To read more on how these integrations are used in the platform, please refer to the [platform features](/docs/infrastructure/deploy-compute-plane) page.
* `Control Plane Configuration` - Control plane URL and the database details. You can chose between `PostgreSQL on kubernetes` or `Managed PostgreSQL (RDS)` or `Existing PostgreSQL configuration` depending on your use case.
The key fields to fill up here are:
* `Region` - The region and availability zones where you want to create the cluster.
* `Resource Group` - The resource group where the cluster is already created.
* `Cluster Name` - Your cluster name.
* `Network Configuration` - Existing Vnet and subnet details.
* `DNS Configuration` - Configure the DNS zone and domains that will point to the cluster’s load balancer. This also provisions a TLS certificate for those domains. Select New DNS Zone or Existing DNS Zone if you want TrueFoundry to manage DNS in Azure. If you use an external DNS provider (e.g., Route53, Cloudflare), you can skip this section.
* `Resource Tags` - Tags to be added to the resources created by TrueFoundry on your behalf if any.
* `Cluster Addons` - TrueFoundry needs to install addons like ArgoCD, ArgoWorkflows, Keda, Istio, etc. Please disable the addons that are already installed on your cluster so that truefoundry installation does not overrride the existing configuration and affect your existing workloads.
* `Storage account (container) for OpenTofu/Terraform State` - OpenTofu/Terraform state will be stored in this container. It can be a preexisting storage account or a new storage account name. The new storage account will automatically be created by our script.
* `Control Plane Configuration` - Control plane URL and the database details. You can chose between `PostgreSQL on kubernetes` or `Managed PostgreSQL (RDS)` or `Existing PostgreSQL configuration` depending on your use case.
You will be presented with a `curl` command to download and execute the script. The script will take care of installing the pre-requisites, downloading OpenTofu/Terraform code and running it on your local machine to create the cluster. This will take around 40-50 minutes to complete.
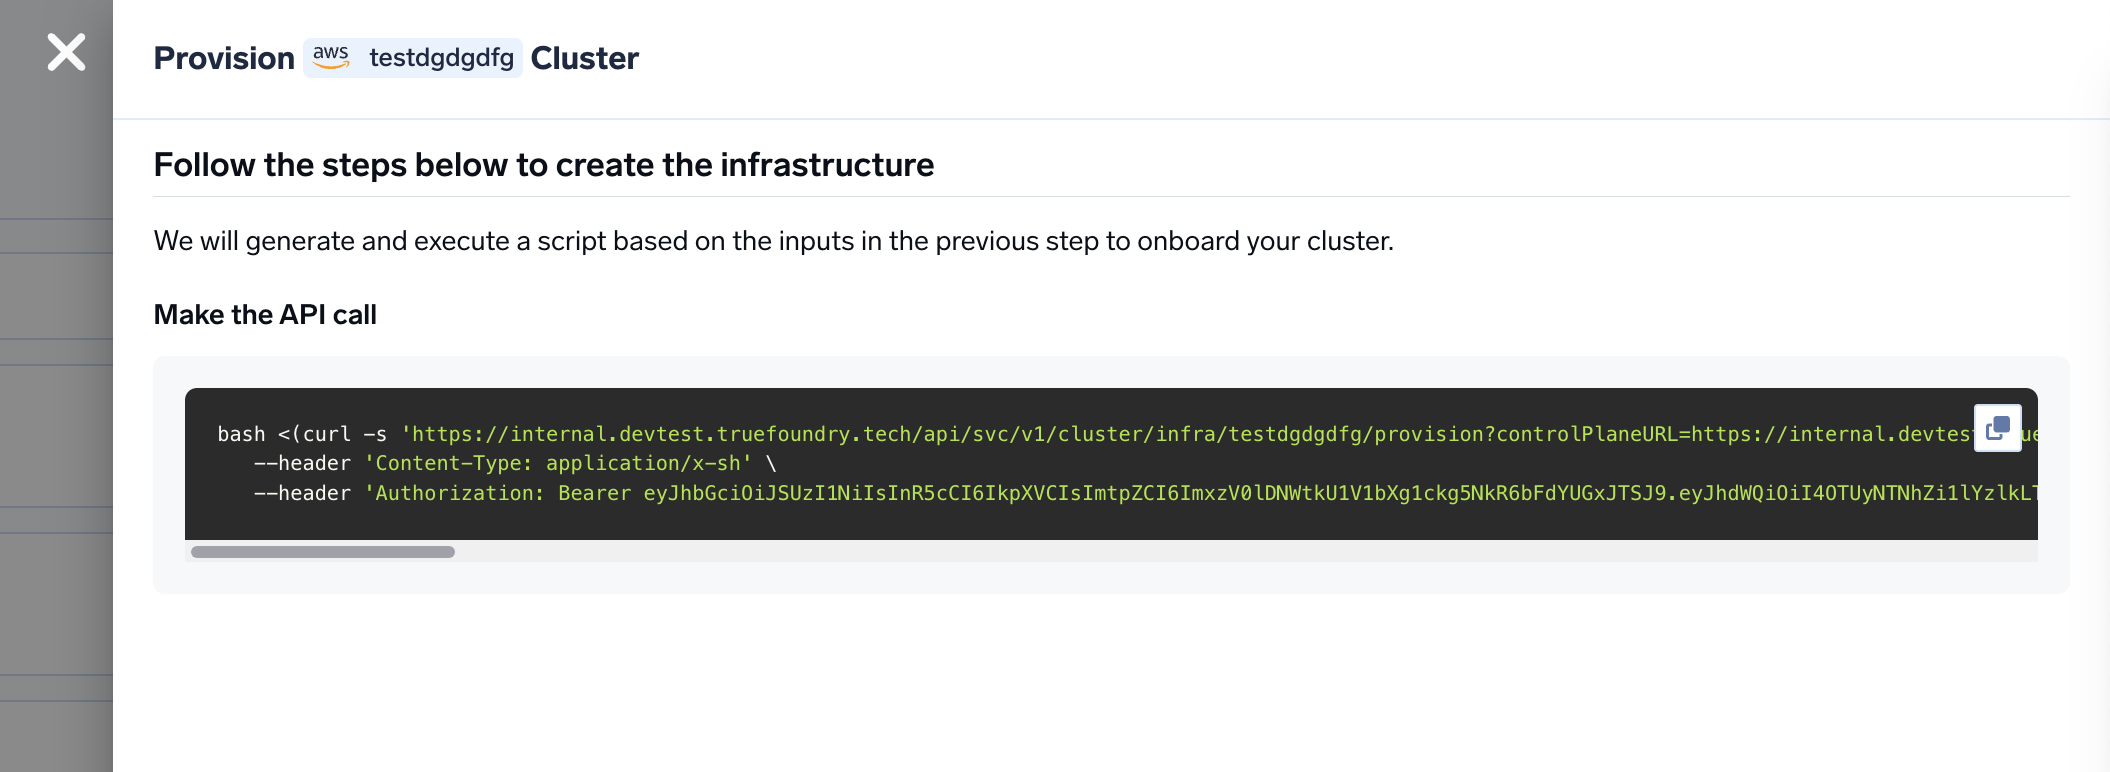 Once the script is executed, create the DNS record for the control plane url. To get the load balancer IP address, you can check the kubernetes service of type `LoadBalancer` in the `istio-system` namespace. You can run the following command to get the IP address.
```bash lines theme={"dark"}
kubectl get svc -n istio-system tfy-istio-ingress -ojsonpath='{.status.loadBalancer.ingress[0].hostname}'
```
This will give you the login screen to the control plane through which you can login via the same credentials used to register the tenant.
Create a DNS record in your route 53 or your DNS provider with the following details
| Record Type | Record Name | Record Value |
| ----------- | ---------------------- | ------------------------- |
| A | CONTROL\_PLANE\_DOMAIN | LOADBALANCER\_IP\_ADDRESS |
We will need to attach the same cluster as compute plane so that we can manage it from the platform. For this, you need to go to the platform section in the left panel and click on `Clusters`. Click on `Attach Existing Cluster` and fill in the details of the control plane cluster. The key fields to fill up here are:
* `Location` - The location of the control plane cluster.
* `Resource Group` - The resource group where the control plane cluster is created.
* `Cluster Name` - The name of the control plane cluster.
* `Cluster Addons` - Unselect all the addons as we have installed them while bringing up the control plane.
* `Network Configuration` - Networking configuration of the control plane cluster.
* `GStorage account (container) for OpenTofu/Terraform State` - OpenTofu/Terraform state will be stored in this container. It can be a preexisting container or a new container name. You can use the same container that we used for the control plane and change the state key to be used for OpenTofu/Terraform state file.
* `Platform Features` - This is to decide which features like BlobStorage, ClusterIntegration, ParameterStore, DockerRegistry and SecretsManager will be enabled for your cluster. To read more on how these integrations are used in the platform, please refer to the [platform features](/docs/infrastructure/deploy-compute-plane) page.
Once the script is executed, create the DNS record for the control plane url. To get the load balancer IP address, you can check the kubernetes service of type `LoadBalancer` in the `istio-system` namespace. You can run the following command to get the IP address.
```bash lines theme={"dark"}
kubectl get svc -n istio-system tfy-istio-ingress -ojsonpath='{.status.loadBalancer.ingress[0].hostname}'
```
This will give you the login screen to the control plane through which you can login via the same credentials used to register the tenant.
Create a DNS record in your route 53 or your DNS provider with the following details
| Record Type | Record Name | Record Value |
| ----------- | ---------------------- | ------------------------- |
| A | CONTROL\_PLANE\_DOMAIN | LOADBALANCER\_IP\_ADDRESS |
We will need to attach the same cluster as compute plane so that we can manage it from the platform. For this, you need to go to the platform section in the left panel and click on `Clusters`. Click on `Attach Existing Cluster` and fill in the details of the control plane cluster. The key fields to fill up here are:
* `Location` - The location of the control plane cluster.
* `Resource Group` - The resource group where the control plane cluster is created.
* `Cluster Name` - The name of the control plane cluster.
* `Cluster Addons` - Unselect all the addons as we have installed them while bringing up the control plane.
* `Network Configuration` - Networking configuration of the control plane cluster.
* `GStorage account (container) for OpenTofu/Terraform State` - OpenTofu/Terraform state will be stored in this container. It can be a preexisting container or a new container name. You can use the same container that we used for the control plane and change the state key to be used for OpenTofu/Terraform state file.
* `Platform Features` - This is to decide which features like BlobStorage, ClusterIntegration, ParameterStore, DockerRegistry and SecretsManager will be enabled for your cluster. To read more on how these integrations are used in the platform, please refer to the [platform features](/docs/infrastructure/deploy-compute-plane) page.
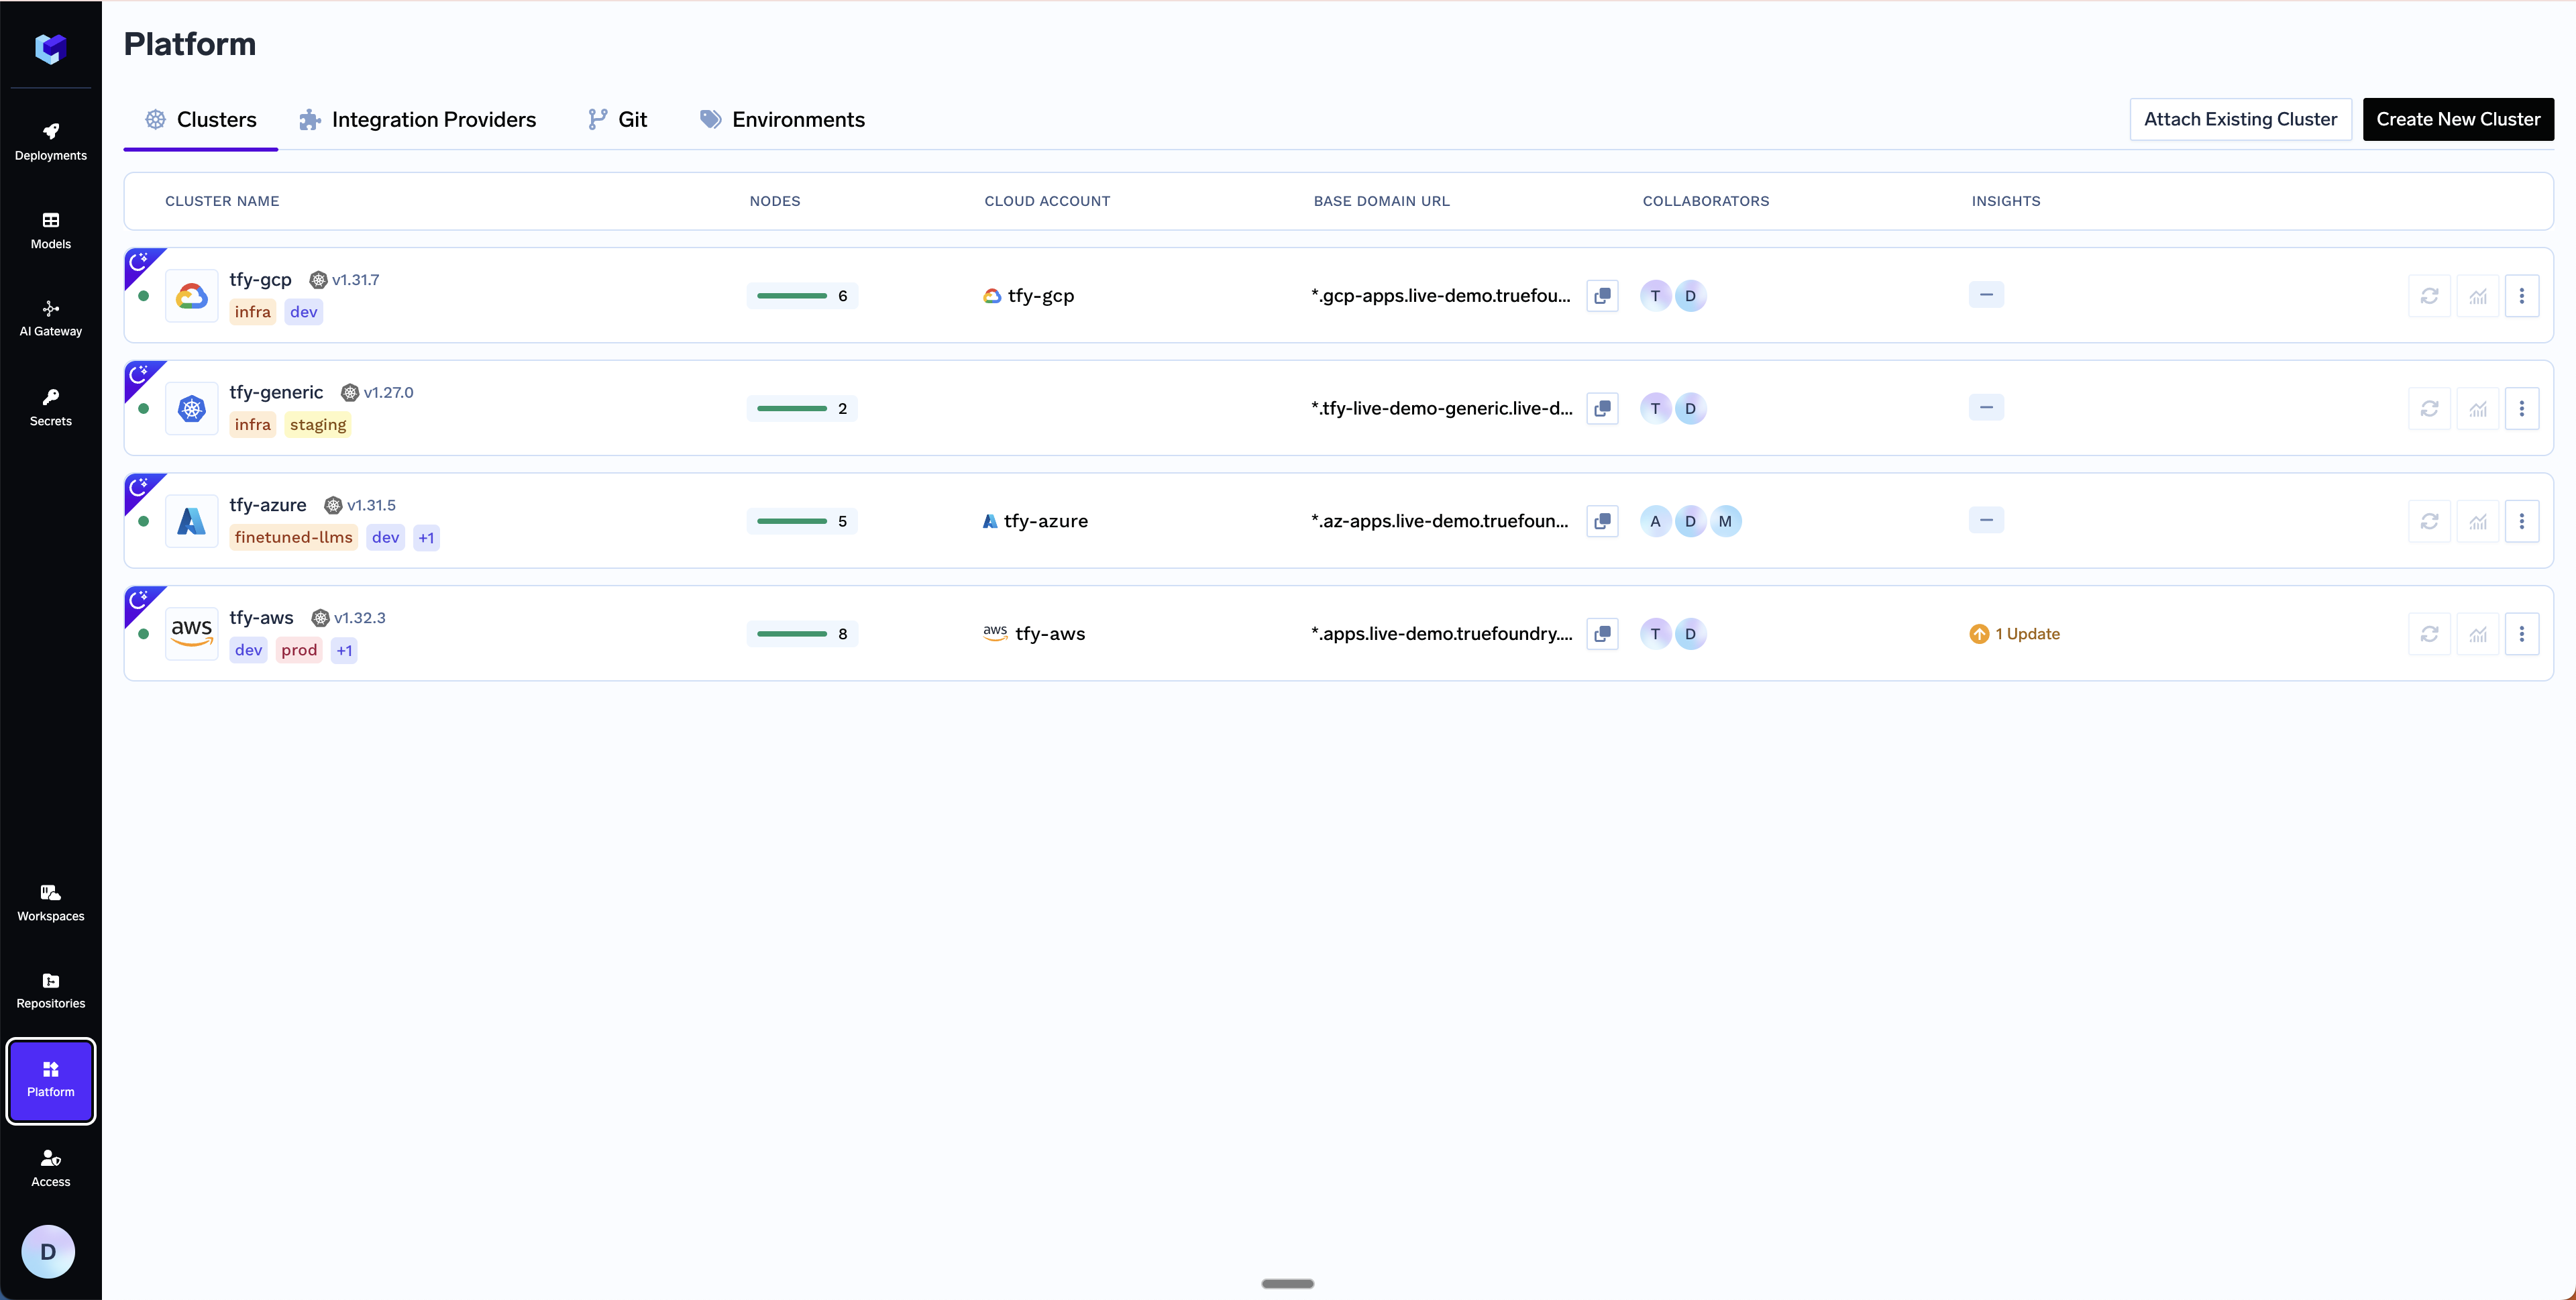 You will be presented with a `curl` command to download and execute the script. The script will take care of installing the pre-requisites, downloading OpenTofu/Terraform code and running it on your local machine to create the cluster. This will take around 40-50 minutes to complete.
Once the script is executed, the cluster will be shown as connected in the platform.
To enable the deployment feature which allows you to deploy services through the platform, you need to enable it;
* In the left hand navigation, go to `Settings` then `Platform Feature Visibility` under `Preferences`
* Click on `Edit` button. Then enable the toggle for `Enable Deployment`
* Click on `Save` button.
You can start by going [here](https://docs.truefoundry.com/docs/deploy-first-service#deploy-from-github)
## FAQ
Yes, please consult this [guide](/docs/add-certificate-for-tls#cert-files) to add your own certificate and key files to the load balancer.
The TrueFoundry control plane supports SSL connections to PostgreSQL. You can configure SSL by setting the `DB_SSL_MODE` environment variable in your `truefoundry-values.yaml`.
Supported `DB_SSL_MODE` values:
| Mode | Encryption | Certificate Validation | Use Case |
| ------------- | ---------- | ---------------------- | --------------------------------------------------------------- |
| `disable` | No | No | Local development or trusted networks |
| `no-verify` | Yes | No | Managed databases with self-signed or unverified certs |
| `require` | Yes | Yes (system CA store) | When you have a valid CA certificate and want full verification |
| `verify-ca` | Yes | Yes (custom CA) | Same as `require` but explicitly checks CA |
| `verify-full` | Yes | Yes (CA + hostname) | Strictest mode, validates CA and hostname |
SSL certificate environment variables:
| Variable | Purpose | Required |
| ------------------ | ---------------------------------------------- | ----------------------------------------------------------------------------- |
| `DB_SSL_CA_PATH` | Path to the server CA certificate file | For `require`, `verify-ca`, or `verify-full` modes |
| `DB_SSL_CERT_PATH` | Path to the client certificate file (for mTLS) | When Azure Database for PostgreSQL requires client certificate authentication |
| `DB_SSL_KEY_PATH` | Path to the client private key file (for mTLS) | When Azure Database for PostgreSQL requires client certificate authentication |
Azure Database for PostgreSQL supports both server-only SSL and mutual TLS (mTLS) with client certificates. You can download the CA certificate from the [Microsoft documentation](https://learn.microsoft.com/en-us/azure/postgresql/flexible-server/concepts-networking-ssl-tls). If your server requires client certificate authentication, you will also need to provide the client certificate and key.
**Scenario 1: Encrypted connection without certificate validation (`no-verify`)**
This is the simplest option for Azure Database for PostgreSQL. It encrypts the connection but skips server certificate validation.
```yaml truefoundry-values.yaml wrap lines theme={"dark"}
servicefoundryServer:
env:
DB_SSL_MODE: "no-verify"
mlfoundryServer:
env:
DB_SSL_MODE: "no-verify"
```
**Scenario 2: Encrypted connection with certificate validation (`require`)**
This mode encrypts the connection and validates the server certificate. Azure Database for PostgreSQL supports client certificate authentication (mTLS), so you may need to provide the server CA certificate along with the client certificate and client key.
Download the certificates, then create a Kubernetes Secret:
```bash wrap lines theme={"dark"}
kubectl create secret generic db-ssl-certs \
--from-file=ca-certificate.crt=/path/to/DigiCertGlobalRootCA.crt.pem \
--from-file=client-cert.pem=/path/to/client-cert.pem \
--from-file=client-key.pem=/path/to/client-key.pem \
-n truefoundry
```
Then configure `truefoundry-values.yaml` to mount the certificates and set the SSL paths:
```yaml truefoundry-values.yaml wrap lines theme={"dark"}
servicefoundryServer:
env:
DB_SSL_MODE: "require"
DB_SSL_CA_PATH: "/etc/ssl/custom/ca-certificate.crt"
DB_SSL_CERT_PATH: "/etc/ssl/custom/client-cert.pem"
DB_SSL_KEY_PATH: "/etc/ssl/custom/client-key.pem"
extraVolumes:
- name: db-ssl-certs
secret:
secretName: db-ssl-certs
extraVolumeMounts:
- name: db-ssl-certs
mountPath: /etc/ssl/custom
readOnly: true
mlfoundryServer:
env:
DB_SSL_MODE: "require"
DB_SSL_CA_PATH: "/etc/ssl/custom/ca-certificate.crt"
DB_SSL_CERT_PATH: "/etc/ssl/custom/client-cert.pem"
DB_SSL_KEY_PATH: "/etc/ssl/custom/client-key.pem"
extraVolumes:
- name: db-ssl-certs
secret:
secretName: db-ssl-certs
extraVolumeMounts:
- name: db-ssl-certs
mountPath: /etc/ssl/custom
readOnly: true
```
Upgrade the Helm release to apply the changes:
```bash wrap lines theme={"dark"}
helm upgrade --install truefoundry oci://tfy.jfrog.io/tfy-helm/truefoundry -n truefoundry --create-namespace -f truefoundry-values.yaml
```
TrueFoundry ships with a built-in monitoring stack that includes Grafana dashboards for the control plane. To enable it, add the following to your `truefoundry-values.yaml`:
```yaml truefoundry-values.yaml theme={"dark"}
truefoundryMonitoring:
enabled: true
grafana:
grafana.ini:
auth.jwt:
jwk_set_url: >-
https:///api/svc/v1/keys//jwks
```
Then upgrade the Helm release to apply the changes:
```bash theme={"dark"}
helm upgrade --install truefoundry oci://tfy.jfrog.io/tfy-helm/truefoundry \
-n truefoundry --create-namespace \
-f truefoundry-values.yaml
```
Once enabled, platform **admins** can access the Grafana dashboard at:
```
https:///admin/grafana/
```
* Replace `` with your actual control plane domain (e.g., `app.example.com`) and `` with your TrueFoundry tenant name provided during onboarding.
* Only users with the **admin** role can access this endpoint.
* Make sure to include the trailing `/` at the end of the URL.
* If you already have Prometheus or VictoriaLogs in your cluster, you can point the monitoring stack to them using `externalServices` instead of installing new instances.
For the full configuration reference, see the [Control Plane Monitoring](/docs/platform/controlplane-monitoring) guide.
You will be presented with a `curl` command to download and execute the script. The script will take care of installing the pre-requisites, downloading OpenTofu/Terraform code and running it on your local machine to create the cluster. This will take around 40-50 minutes to complete.
Once the script is executed, the cluster will be shown as connected in the platform.
To enable the deployment feature which allows you to deploy services through the platform, you need to enable it;
* In the left hand navigation, go to `Settings` then `Platform Feature Visibility` under `Preferences`
* Click on `Edit` button. Then enable the toggle for `Enable Deployment`
* Click on `Save` button.
You can start by going [here](https://docs.truefoundry.com/docs/deploy-first-service#deploy-from-github)
## FAQ
Yes, please consult this [guide](/docs/add-certificate-for-tls#cert-files) to add your own certificate and key files to the load balancer.
The TrueFoundry control plane supports SSL connections to PostgreSQL. You can configure SSL by setting the `DB_SSL_MODE` environment variable in your `truefoundry-values.yaml`.
Supported `DB_SSL_MODE` values:
| Mode | Encryption | Certificate Validation | Use Case |
| ------------- | ---------- | ---------------------- | --------------------------------------------------------------- |
| `disable` | No | No | Local development or trusted networks |
| `no-verify` | Yes | No | Managed databases with self-signed or unverified certs |
| `require` | Yes | Yes (system CA store) | When you have a valid CA certificate and want full verification |
| `verify-ca` | Yes | Yes (custom CA) | Same as `require` but explicitly checks CA |
| `verify-full` | Yes | Yes (CA + hostname) | Strictest mode, validates CA and hostname |
SSL certificate environment variables:
| Variable | Purpose | Required |
| ------------------ | ---------------------------------------------- | ----------------------------------------------------------------------------- |
| `DB_SSL_CA_PATH` | Path to the server CA certificate file | For `require`, `verify-ca`, or `verify-full` modes |
| `DB_SSL_CERT_PATH` | Path to the client certificate file (for mTLS) | When Azure Database for PostgreSQL requires client certificate authentication |
| `DB_SSL_KEY_PATH` | Path to the client private key file (for mTLS) | When Azure Database for PostgreSQL requires client certificate authentication |
Azure Database for PostgreSQL supports both server-only SSL and mutual TLS (mTLS) with client certificates. You can download the CA certificate from the [Microsoft documentation](https://learn.microsoft.com/en-us/azure/postgresql/flexible-server/concepts-networking-ssl-tls). If your server requires client certificate authentication, you will also need to provide the client certificate and key.
**Scenario 1: Encrypted connection without certificate validation (`no-verify`)**
This is the simplest option for Azure Database for PostgreSQL. It encrypts the connection but skips server certificate validation.
```yaml truefoundry-values.yaml wrap lines theme={"dark"}
servicefoundryServer:
env:
DB_SSL_MODE: "no-verify"
mlfoundryServer:
env:
DB_SSL_MODE: "no-verify"
```
**Scenario 2: Encrypted connection with certificate validation (`require`)**
This mode encrypts the connection and validates the server certificate. Azure Database for PostgreSQL supports client certificate authentication (mTLS), so you may need to provide the server CA certificate along with the client certificate and client key.
Download the certificates, then create a Kubernetes Secret:
```bash wrap lines theme={"dark"}
kubectl create secret generic db-ssl-certs \
--from-file=ca-certificate.crt=/path/to/DigiCertGlobalRootCA.crt.pem \
--from-file=client-cert.pem=/path/to/client-cert.pem \
--from-file=client-key.pem=/path/to/client-key.pem \
-n truefoundry
```
Then configure `truefoundry-values.yaml` to mount the certificates and set the SSL paths:
```yaml truefoundry-values.yaml wrap lines theme={"dark"}
servicefoundryServer:
env:
DB_SSL_MODE: "require"
DB_SSL_CA_PATH: "/etc/ssl/custom/ca-certificate.crt"
DB_SSL_CERT_PATH: "/etc/ssl/custom/client-cert.pem"
DB_SSL_KEY_PATH: "/etc/ssl/custom/client-key.pem"
extraVolumes:
- name: db-ssl-certs
secret:
secretName: db-ssl-certs
extraVolumeMounts:
- name: db-ssl-certs
mountPath: /etc/ssl/custom
readOnly: true
mlfoundryServer:
env:
DB_SSL_MODE: "require"
DB_SSL_CA_PATH: "/etc/ssl/custom/ca-certificate.crt"
DB_SSL_CERT_PATH: "/etc/ssl/custom/client-cert.pem"
DB_SSL_KEY_PATH: "/etc/ssl/custom/client-key.pem"
extraVolumes:
- name: db-ssl-certs
secret:
secretName: db-ssl-certs
extraVolumeMounts:
- name: db-ssl-certs
mountPath: /etc/ssl/custom
readOnly: true
```
Upgrade the Helm release to apply the changes:
```bash wrap lines theme={"dark"}
helm upgrade --install truefoundry oci://tfy.jfrog.io/tfy-helm/truefoundry -n truefoundry --create-namespace -f truefoundry-values.yaml
```
TrueFoundry ships with a built-in monitoring stack that includes Grafana dashboards for the control plane. To enable it, add the following to your `truefoundry-values.yaml`:
```yaml truefoundry-values.yaml theme={"dark"}
truefoundryMonitoring:
enabled: true
grafana:
grafana.ini:
auth.jwt:
jwk_set_url: >-
https:///api/svc/v1/keys//jwks
```
Then upgrade the Helm release to apply the changes:
```bash theme={"dark"}
helm upgrade --install truefoundry oci://tfy.jfrog.io/tfy-helm/truefoundry \
-n truefoundry --create-namespace \
-f truefoundry-values.yaml
```
Once enabled, platform **admins** can access the Grafana dashboard at:
```
https:///admin/grafana/
```
* Replace `` with your actual control plane domain (e.g., `app.example.com`) and `` with your TrueFoundry tenant name provided during onboarding.
* Only users with the **admin** role can access this endpoint.
* Make sure to include the trailing `/` at the end of the URL.
* If you already have Prometheus or VictoriaLogs in your cluster, you can point the monitoring stack to them using `externalServices` instead of installing new instances.
For the full configuration reference, see the [Control Plane Monitoring](/docs/platform/controlplane-monitoring) guide.